With such a scale, it will be tough to represent caulking correctly. Maybe bevel each side of the plank, then the gap between adjacent planks will give the shade for the caulking. I would try an 'H' grade pencil as well.
-

Win a Free Custom Engraved Brass Coin!!!
As a way to introduce our brass coins to the community, we will raffle off a free coin during the month of August. Follow link ABOVE for instructions for entering.
-

PRE-ORDER SHIPS IN SCALE TODAY!
The beloved Ships in Scale Magazine is back and charting a new course for 2026!
Discover new skills, new techniques, and new inspirations in every issue.
NOTE THAT OUR FIRST ISSUE WILL BE JAN/FEB 2026
You are using an out of date browser. It may not display this or other websites correctly.
You should upgrade or use an alternative browser.
You should upgrade or use an alternative browser.
USCG Bear.
- Thread starter Jim J
- Start date
- Watchers 14
-
- Tags
- revenue cutter uscg bear
- Joined
- Dec 1, 2016
- Messages
- 6,383
- Points
- 728

i do not know if it will work at the scale but lead caulking is a light gray. Any paint or marker might seep into the wood and create a fuzzy look. Try the wax crayon idea i posted somewhere on the forum. i once warmed up the crayon to create a very thin coating once.
you can see in post #14 the caulking is white. you don't see that to often in model building you always see black. The Niagara from the war of 1812 i think was caulked in lead. Many models i see the builder used black for caulking.
you can see in post #14 the caulking is white. you don't see that to often in model building you always see black. The Niagara from the war of 1812 i think was caulked in lead. Many models i see the builder used black for caulking.
This is reaching out there but you could have one laser cut to scale. Have them deep etch where the caulking goes. Give it a quick coat of shellac so the paint doesn't seep into the wood. Give it a coat of whatever colour paint you want your calking to be making sure it seeps down into the cracks, then run it through a thickness sander a few times till you get your wooden decking again. Would that work? Who knows. just doing a little thinking out of the box. 
This will be a tough decision
Here we can see the planking very good



but I guess the best is to try really with scale correct 2mm strips - In my opinion the light caulking is very dominant in the photos, so I think with some light thin paper (origami) it can be done in a good way
BTW: Do you know this page? - there are a lot of photos
Here we can see the planking very good


but I guess the best is to try really with scale correct 2mm strips - In my opinion the light caulking is very dominant in the photos, so I think with some light thin paper (origami) it can be done in a good way
BTW: Do you know this page? - there are a lot of photos
Canoe21
Lawrence
Hello Jim, For your white caulking I suggest that you use white paper of the thickness of your caulking. An example of this is Zoly's Ontario build on his post #769. Just a thought, have a look.Ok guys. I'm going to throw out a question for all of you just to see if anybody has any better ideas than I have to solve a problem. The problem is with the decking, and as I mentioed earlier I think I have a solution but I'm not going to divulge it at this time to see what you might come up with. The decking on this ship is teak with lead caulking and is 3 1/2 " wide. Now at 1/64th scale that would mean that the planks themselves would be less than 2mm wide. Then there is the matter of the caulking. Remember, this is being built as a SCALE model, not an opproximation. I want to keep the decking at scale. Any suggestions?
Regards Lawrence
Thanks for all your replies. There are certainly many ways I could go. I'll ponder over this while I continue my work on the hull as I still have a little time before I get to this stage. As I said earlier, this is going to be a long journey so I'm just trying to get a few ideas going to help it along.
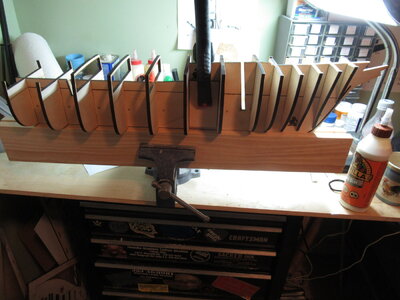
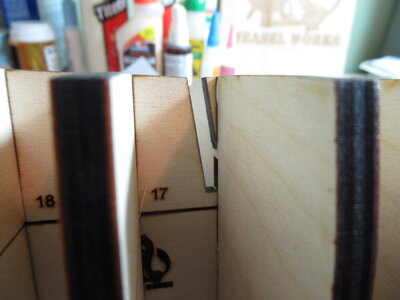
Been a few days since my last post so let's get started. After gluing the bow and mid sections together I installed what I call mast supports. These will allow for the masts to retain their correct placement side to side as well as front to back.
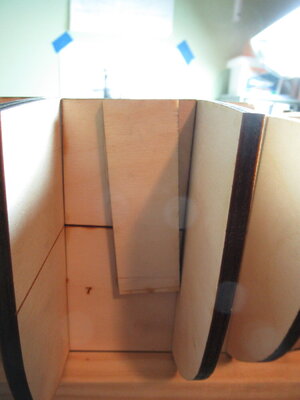
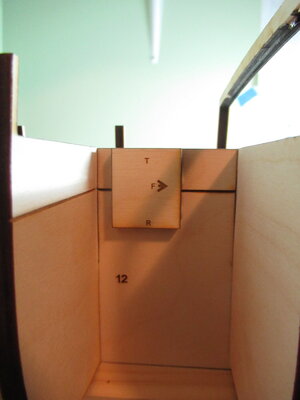
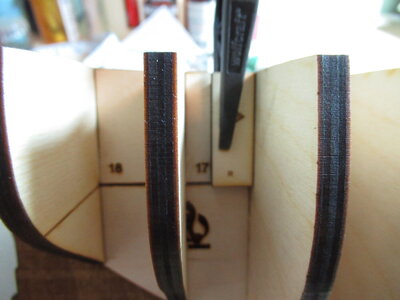
I then assembled the stern section. You will notice in the second picture that there is a small wedge shaped piece added to the bulkhead to help maintain the angle of the mizzen mast.
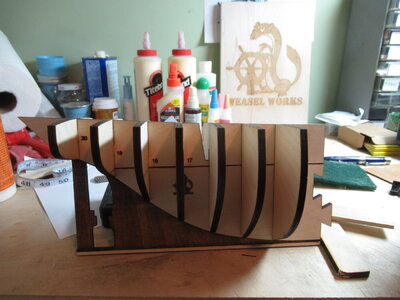
I then glued on the mast support.
Finally, once everything had dried I attached the stern section to the rest of the ship.
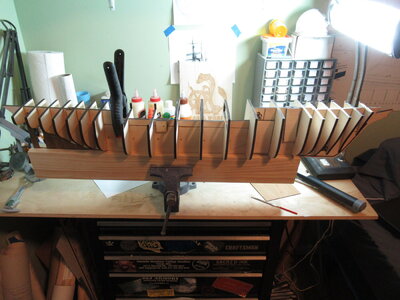
At this point the hull construction is 39" long. Even at 1:64 scale this is a huge model.


I then assembled the stern section. You will notice in the second picture that there is a small wedge shaped piece added to the bulkhead to help maintain the angle of the mizzen mast.


I then glued on the mast support.

Finally, once everything had dried I attached the stern section to the rest of the ship.

At this point the hull construction is 39" long. Even at 1:64 scale this is a huge model.
Looking good Jim. At that big scale you can really go to town adding all the fine details with this model.
.
.
Well, Brian, it certainly will lend itself to the kind of attention to detail that it deserves. It's not going to be a quick build, by any stretch of the imagination, but it will be a very rewarding one.
Kurt Konrath
Kurt Konrath
Your build pace will allow you to think ahead and work out possible problems and upgrades to the kit.
She will be a fine ship when done as it looks so far.
She will be a fine ship when done as it looks so far.
Thanks Kkronrath. Yes it does allow for the time to plan everything out. That's one of the advantages of building from scratch. Between Mike and I we can make modifications on the fly in order to produce the best model possible. It may take awhile but I think it wikk be a gorgeous ship when finished.
Hey Jim, things are looking good. Concerning your planking and caulking, I calculate the planks should be 1.4 mm and it looks like in the pictures the caulking is quite prominent. It seems it is almost 1/3 of the width of a plank so approx .4 mm. Standard construction paper is .44 mm, which is pretty close, you may want to experiment using it. As a final note be sure Mike has a good sharp slitting blade to cut all these strips, you may also want to plan a sleepover that day!! 

Well it's been awhile since I've been able to post anything on this build. We had to redesign the decks to better fit the hull and add some reinforcement points and attachment areas to make sure everything would go into place properly.
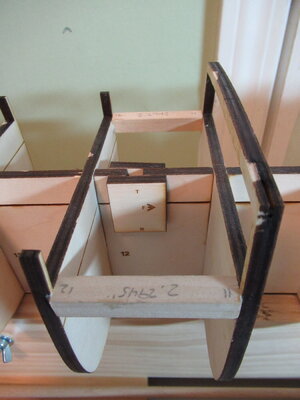
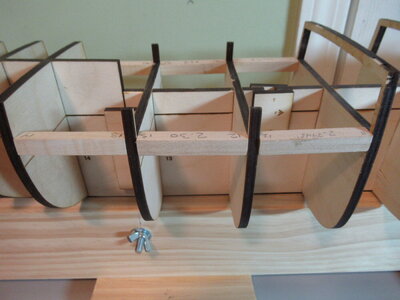
Added the bow filler blocks and additional supports to ensure a straight bow area.

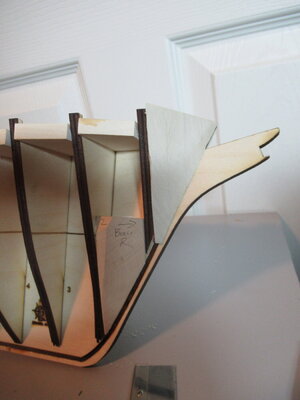
Added the stern filler blocks.
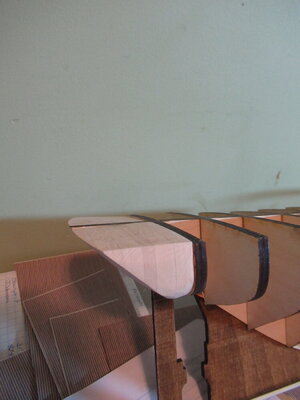


Added the bow filler blocks and additional supports to ensure a straight bow area.


Added the stern filler blocks.

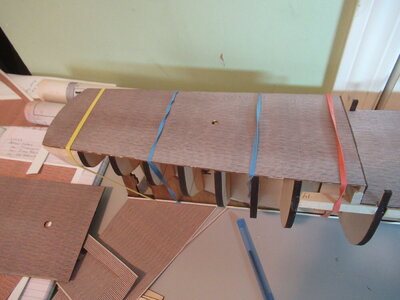
The next step was to start p[lacing the decks. To adequately represent the decking I borrowed an idea from our plastic WWII ship modeling bretheren. When they super detail a model, and want to use accurate decking they use a self adhesive printed decking. As I mentioned before, the decking on the bear was 3 1/2" wide and caulked with white lead. Using Corel Draw we printed out a teak looking decking with the white caulk. It looke real nice and is in keeping with the proper scale.
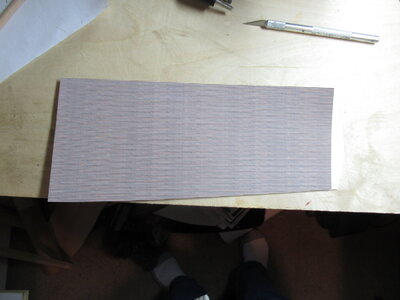
Once the decking is applied it is sprayed with clear flat paint to seal it.
The first deck to be installed is the "under-deck". This is below the Hurricane deck so it needs to go in first as there is a deck house that will be installed later.
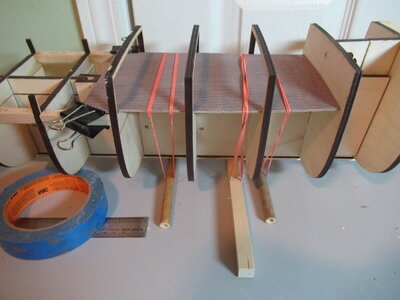
It is held in place with clamps and rubber bands while the glue is drying. Next the "seal deck" is installed.
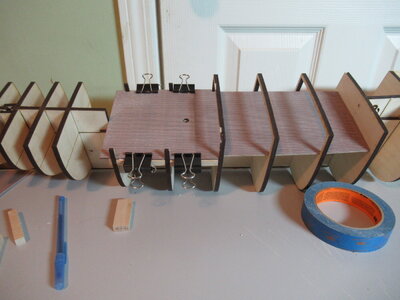
After this is done there are some further support pieces glued in place to support a bulkhead that goes between the "seal deck" and the "gun deck".
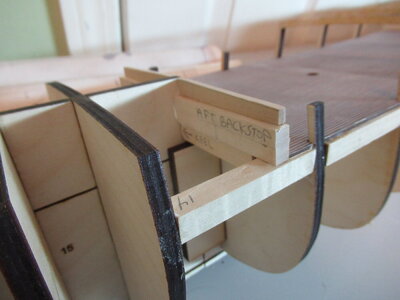
Next the bulkhead is installed and then the "gun deck is glued in place.
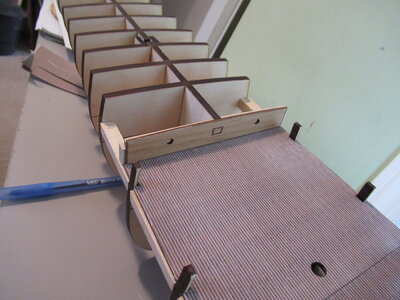
Now comes the fun - if tedious process - of fairing the hull. I am going to do this before installing the bow deck. Due to the size of this ship it's going to take awhile, and I will post more after I have completed the process. That's all for now...stay tuned!

Once the decking is applied it is sprayed with clear flat paint to seal it.
The first deck to be installed is the "under-deck". This is below the Hurricane deck so it needs to go in first as there is a deck house that will be installed later.

It is held in place with clamps and rubber bands while the glue is drying. Next the "seal deck" is installed.

After this is done there are some further support pieces glued in place to support a bulkhead that goes between the "seal deck" and the "gun deck".

Next the bulkhead is installed and then the "gun deck is glued in place.


Now comes the fun - if tedious process - of fairing the hull. I am going to do this before installing the bow deck. Due to the size of this ship it's going to take awhile, and I will post more after I have completed the process. That's all for now...stay tuned!
Thats looking great Jim.
WHOA GUYS, IMPRESSED ESPECIALL THE DECK THAT WAS 3-D PRINTED, BY MIKE S WAS IT NOT, BOY HOW DID YOU GUYS COME UP WITH THE SCRIBING AND THE COLOR, WISH I COULD UNDERSTAND THIS PROCESS EVERYTIME I THINK I GOT IT SOMETHING ELSE POPS UP. GOD BLESS STAY SAFE YOU AND YOURS DON
Thanks Brian. Donfarr, that decking is not 3D printed. It's printed on a standard ink-jet printer, at high resolution, on self-stick label paper. It's pretty much permanent when stuck to the false deck, and when painted with a matt clear is pretty much impervious. Plus it looks pretty good! lol
Sorry I haven't been able to post much here lately. Been working on getting the hull faired so I can begin planking but as usual- life has a way of throwing you a curve ball. The Admiral has been struggling with a pair of bad hips and has finally decided that she has had enough with the pain. It was a decision she had to come to on her own after suffering for the past several years with it. Well, she has had her Covid shots now and so she finally went to see her surgeon.She gets her pre-surgery dental visit this Fri and then she will be scheduled for surgery. In the meantime, I've been trying to get everything in order around the house to make her recovery as easy as possible - which means not as much time for ship work. Oh well, what's life without a bit of drama, eh? All that being said...keep watching this space as there is a lot going to be happening in the not too distant future.


