
-

SUBSCRIBE TO SHIPS IN SCALE TODAY!
The beloved Ships in Scale Magazine is back and charting a new course for 2026!
Discover new skills, new techniques, and new inspirations in every issue.
NOTE THAT OUR NEXT ISSUE WILL BE July/August 2026 -

Win a Free Custom Engraved Brass Coin!!!
As a way to introduce our brass coins to the community, we will raffle off a free coin during the month of August. Follow link ABOVE for instructions for entering.


You are using an out of date browser. It may not display this or other websites correctly.
You should upgrade or use an alternative browser.
You should upgrade or use an alternative browser.
- Joined
- Sep 25, 2025
- Messages
- 67
- Points
- 68

Dear Tom.Thanks for the kind words. The planking has taken far longer than I thought. I know the preformed planks are designed to make it easier, but after my 4th model with them, I think they just make it harder. Your idea of veneer is intriguing, but since I'm planning to copper plate the lower hull I'm hoping a good filling and sanding will make the rest look OK.
I think the info in Canney's book is incomplete (I have the book). Remember, the Harriet Lane was launched in 1857, not 1861. 1861 is when she became a US Navy vessel. The USCG History webpage on the Harriet Lane states she was launched on 19 November 1857 and comissioned on 28 February 1858. They list her armamanent as:
Armament:
1858: 1 x 32-pdr pivot gun; 4 x 24-pdrs; 1 x 12-pdr
1861 (1 June): 3 x 32-pdrs; 4 x 24pdrs
1862 (Feb): 3 x 9”; 1 x 30-pdr
However, the Harriet Lane is notorious for being poorly documented. I agree the published plans make it hard to see how a pivot gun fit on the deck.
Do you have a plan by Webb that shows the paddle wheels? The only plan of the Harriet Lane actually drawn by William Webb that I know of is this:
View attachment 626451
which obviously has no info about the paddle wheels. It would be great if you've found more detailed plans.
Hope you post a build log when you're ready to start.
Tom
I've seen a side view of HL which shows the paddles (in a NRG article and have been posted on internet images} and they number 20. This drawing is supposedly by Webb but it seems so refined. The formula for the number of blades is one for every foot in the wheel's diameter +2. The plan I looked at was about 22 ' in D which makes 24 but I think 20 is close. Looking at your plan you can get the diameter from the deck perspective and check out what number you get.....let me know. I agree his book is remiss about important details......Cheers....Robert

I'll see what I can put together, I am not the most proficient user of technology, but I do have a STEM daughter to can assist me. Thanks you for your interest.


Robert,Dear Tom.
I've seen a side view of HL which shows the paddles (in a NRG article and have been posted on internet images} and they number 20. This drawing is supposedly by Webb but it seems so refined. The formula for the number of blades is one for every foot in the wheel's diameter +2. The plan I looked at was about 22 ' in D which makes 24 but I think 20 is close. Looking at your plan you can get the diameter from the deck perspective and check out what number you get.....let me know. I agree his book is remiss about important details......Cheers....Robert
Was it this one?
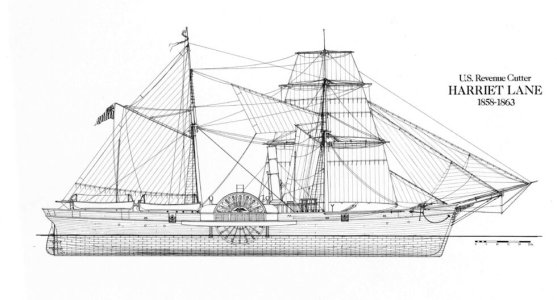
That was drawn by John Tilley on commission from the US Coast Guard Historian. He based it on the plans Merritt Edson created for the Smithsonian in the early 60s (the same ones the Model Shipways kit is based on). John Tilley was part of an interesting discussion of Harriet Lane models on Fine Scale Model Forum.
Here is a list of most of the known illustrations of the Harriet Lane Harriet Lane Illustrations
I obtained Edson's plans from the Smithsonian. What they sent was basically a rigging plan
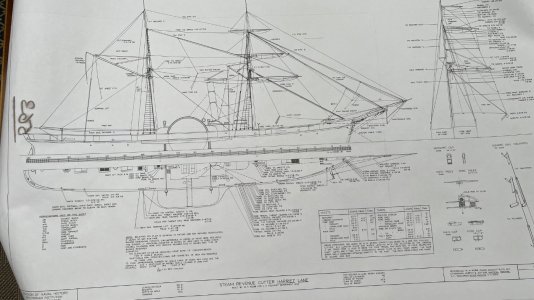
The inner aspect of the paddlewheel covers appears to be 22'. I'll have to ad the proper number of blades to my list of questions. My most pressing are how many ship's boats she had when launched in 1857 (2 or 4), and the pivot gun issue. Fortunately, I won't have to make any decisions about most of these for a while!
The Nautical Research Journal apparently published plans of the Harriet Lane in Vol. 7. You can only get them if you buy the whole set of the Journal on a USB. I guess I should just spend the $90 to see what they've got

Last edited:
- Joined
- Jun 29, 2024
- Messages
- 2,170
- Points
- 488

For anyone where ship model building is more than a passing fancy OLD Nautical Research Journals are a treasure trove of information. OLD for me is approximately prior to about the year 2000 or prior to the time that the Journal began to be published in color. These old issues are true scholarly journals with focus on scratch building projects and techniques. This means lots of useful technical drawings.
Roger
Roger
Roger,
You convinced me. I bought the set. An early birthday present to myself!
You convinced me. I bought the set. An early birthday present to myself!
- Joined
- Sep 25, 2025
- Messages
- 67
- Points
- 68
Dear Tom,
I have a set of the NRG on disc....I'll look things up and let you know tomorrow about how good the research is....Robert
I have a set of the NRG on disc....I'll look things up and let you know tomorrow about how good the research is....Robert
- Joined
- Sep 25, 2025
- Messages
- 67
- Points
- 68
Dear Tom,Dear Tom,
I have a set of the NRG on disc....I'll look things up and let you know tomorrow about how good the research is....Robert
Looked at the plans.....fairly detailed but I think you might have seen something similar. No revealing text to go with drawings. Does show 4 lifeboats forward ones seem to be placed above the aft end of the paddlewheel. I could try to burn a disc and send it to you.......Robert
- Joined
- Jun 29, 2024
- Messages
- 2,170
- Points
- 488
Warships’ boats, like the ships’ armament were “outfit;” something that could be changed over the vessel’s lifetime. They were not primarily lifeboats but workboats that allowed the mother ship to function efficiently. There were several distinctly different designs from burdensome launches intended to haul bulky cargo like barreled water to fine lined elegant craft for transporting senior officers. Boat outfit would, therefore, depend on the vessel’s mission and practices of the agency to which it was assigned. Navies have always modified their vessels over time and particularly prior to WWII ( when involved in vicious night fighting they realized that burning wooden boats were a problem) boat outfit seemed to grow.
I read John Tilly’s comments about Harriett Lane on the Fine Scale Modeler forum. He had researched the Coast Guard’s records and says that they are a mess. He also says that he knows of no contemporary paintings or photos that show her in enough detail to be useful. I also suggest that the Webb Portfolio is actually a type of catalog. The Revenue Cutter drawings show room for four boats; not the actual outfit for any actual vessel.
You want to build her “as commissioned” in 1857. I suggest the minimum boat outfit; two boats, a cutter and a whaler. These are both designed for use in open water, essential for boarding other vessels at sea.
And finally, there is actually a boat that exists from one of these early steam powered revenue cutters. USCG Saginaw was wrecked on a reef in the Pacific. Members of her crew sailed her gig to get help. The boat still exists.
OOPS! Saginaw had a gig. If she had two boats then a cutter or whaler and a gig. If three, a cutter, a whaler, and a gig. If four, a cutter, a whaler, a launch, and a gig. But why then did they use the gig to get help. Why not a more seaworthy boat like a cutter. Mysteries!
Roger
I read John Tilly’s comments about Harriett Lane on the Fine Scale Modeler forum. He had researched the Coast Guard’s records and says that they are a mess. He also says that he knows of no contemporary paintings or photos that show her in enough detail to be useful. I also suggest that the Webb Portfolio is actually a type of catalog. The Revenue Cutter drawings show room for four boats; not the actual outfit for any actual vessel.
You want to build her “as commissioned” in 1857. I suggest the minimum boat outfit; two boats, a cutter and a whaler. These are both designed for use in open water, essential for boarding other vessels at sea.
And finally, there is actually a boat that exists from one of these early steam powered revenue cutters. USCG Saginaw was wrecked on a reef in the Pacific. Members of her crew sailed her gig to get help. The boat still exists.
OOPS! Saginaw had a gig. If she had two boats then a cutter or whaler and a gig. If three, a cutter, a whaler, and a gig. If four, a cutter, a whaler, a launch, and a gig. But why then did they use the gig to get help. Why not a more seaworthy boat like a cutter. Mysteries!
Roger
Robert,Dear Tom,
Looked at the plans.....fairly detailed but I think you might have seen something similar. No revealing text to go with drawings. Does show 4 lifeboats forward ones seem to be placed above the aft end of the paddlewheel. I could try to burn a disc and send it to you.......Robert
Thanks for the offer.
I broke down and ordered the NRG set last night. An early birthday present to myself.
Roger,Warships’ boats, like the ships’ armament were “outfit;” something that could be changed over the vessel’s lifetime. They were not primarily lifeboats but workboats that allowed the mother ship to function efficiently. There were several distinctly different designs from burdensome launches intended to haul bulky cargo like barreled water to fine lined elegant craft for transporting senior officers. Boat outfit would, therefore, depend on the vessel’s mission and practices of the agency to which it was assigned. Navies have always modified their vessels over time and particularly prior to WWII ( when involved in vicious night fighting they realized that burning wooden boats were a problem) boat outfit seemed to grow.
I read John Tilly’s comments about Harriett Lane on the Fine Scale Modeler forum. He had researched the Coast Guard’s records and says that they are a mess. He also says that he knows of no contemporary paintings or photos that show her in enough detail to be useful. I also suggest that the Webb Portfolio is actually a type of catalog. The Revenue Cutter drawings show room for four boats; not the actual outfit for any actual vessel.
You want to build her “as commissioned” in 1857. I suggest the minimum boat outfit; two boats, a cutter and a whaler. These are both designed for use in open water, essential for boarding other vessels at sea.
Thanks for the thoughtful response. I read somewhere (maybe John Tilly in the FSM forum) that they probably increased the number of ship's boats when she became a Navy vessel. Ultimately I guess there is no way to know for certain what the Harriet Lane actually looked like, so we can all interpret our models as we wish, assuming our choices are informed by whatever info exists. My plan is to go with 2 boats, because it's simpler; there is a least one illustration from the early 1860s that shows her with 2 boats; and that's what David Antscherl chose to do on the model, whatever his reasons. I may ask him if he based that decision on any research.
I think the two volume Webb Folio of ~1895 is more than a catalog. Although it contains a few plans of generic ships (like the Plan for US Steam Revenue Cutter of 600 tons, April 1857) most of the plans are of actual ships that Webb built. Webb had the portfolio published privately and donated copies to libraries and other institutions after the end of his ship- building career, I think as a way of ensuring his legacy.
I'll have to look into 1:96 scale cutters, whalers and gigs. The boats supplied with the kit seem very generic.
Tom
- Joined
- Jun 29, 2024
- Messages
- 2,170
- Points
- 488
I agree that many of the vessels in Webb’s portfolio are vessels that he actually built but what I meant was that it might have been a promotional tool to attract new business.
I have Webb Institute’s biography of him in my library. I’ll see what they have to say.
Roger
I have Webb Institute’s biography of him in my library. I’ll see what they have to say.
Roger
Post 23 - The Dusty Part
I applied way too much Durham's water putty to the hull yesterday. I followed the suggestion on the can and added a little vinegar to slow the drying time.
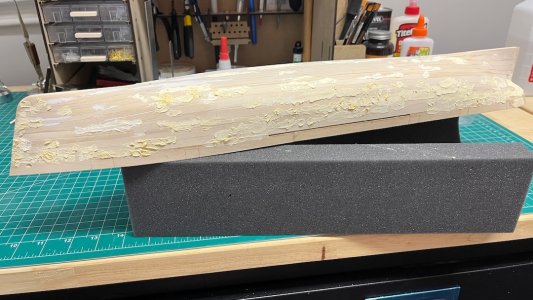
I took her outside on a beautiful summer's day today to sand her down. I found these square flexible sanding sponges on Amazon which I find very useful
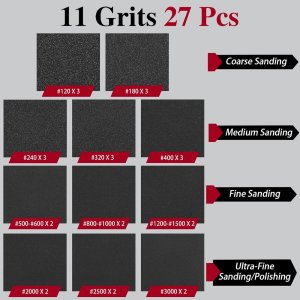
Not sure what I will use most of them for, but I started with 120 grit, followed by 240 grit, and then a quick going over with 400 grit. At the end, she felt pretty smooth. I removed almost all of the Durham's, except for spaces between the planks, and at the stern where the counter meets the stern post. I need to do a little more filling there. Here's how she now looks on a glorious Berkshire afternnon:
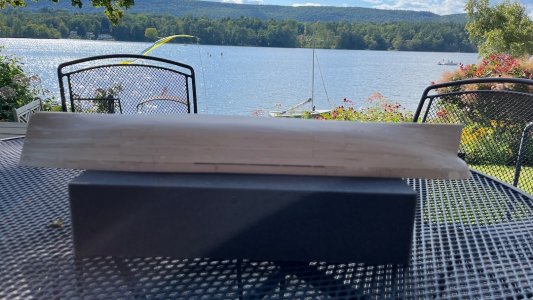
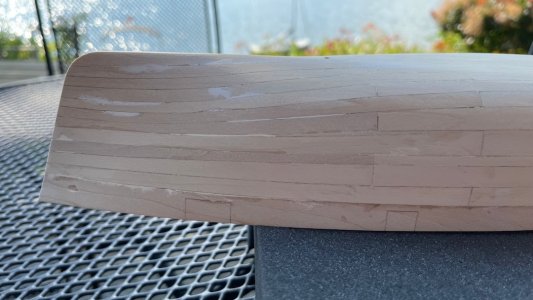
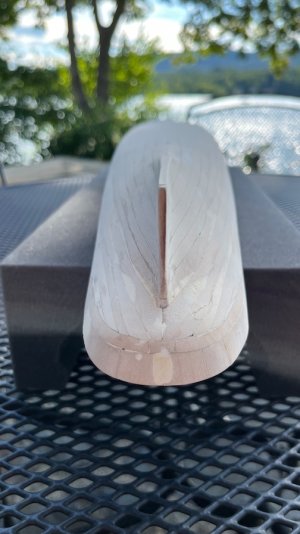
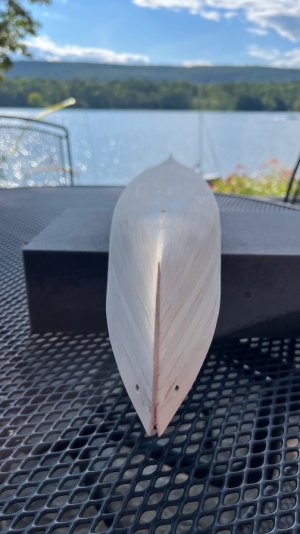
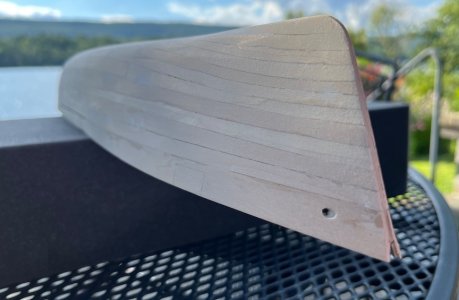
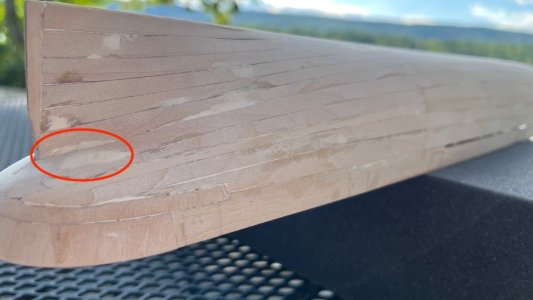
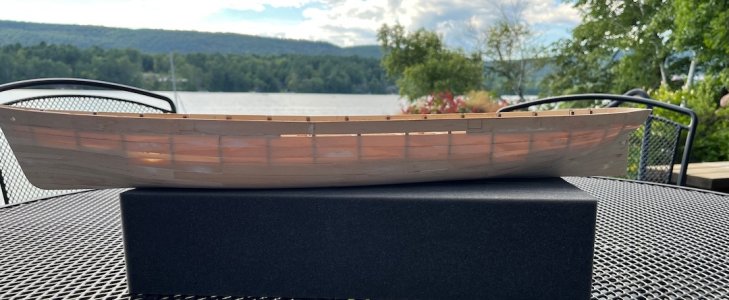
We'll see how I did when I apply the primer. Next up is adding the stem and keel, making sure they merge properly into the hull, and then shaving down the bulkhead extensions.
I applied way too much Durham's water putty to the hull yesterday. I followed the suggestion on the can and added a little vinegar to slow the drying time.
I took her outside on a beautiful summer's day today to sand her down. I found these square flexible sanding sponges on Amazon which I find very useful
Not sure what I will use most of them for, but I started with 120 grit, followed by 240 grit, and then a quick going over with 400 grit. At the end, she felt pretty smooth. I removed almost all of the Durham's, except for spaces between the planks, and at the stern where the counter meets the stern post. I need to do a little more filling there. Here's how she now looks on a glorious Berkshire afternnon:
We'll see how I did when I apply the primer. Next up is adding the stem and keel, making sure they merge properly into the hull, and then shaving down the bulkhead extensions.
- Joined
- Jun 29, 2024
- Messages
- 2,170
- Points
- 488
Very nice! What kind of small boat is that moored offshore?
Although he published it around 1895, long after he had given up ship building. He was a philanthropist at that point.I agree that many of the vessels in Webb’s portfolio are vessels that he actually built but what I meant was that it might have been a promotional tool to attract new business.
I have Webb Institute’s biography of him in my library. I’ll see what they have to say.
Roger
Tom
It belongs to my neighbor. The manufacturer is Topaz. We only have what my in-laws would call a stinkpot - a pontoon boat (aka floating patio)Very nice! What kind of small boat is that moored offshore?

- Joined
- Jun 29, 2024
- Messages
- 2,170
- Points
- 488
Yes, I just finishing reading about it in the book, William H. Webb, Shipbuilder, published by Webb Institute. You are correct that he published the portfolio of plans long after he closed down his shipbuilding business. The book says that he published the portfolio in “about 1895.” This would be a year after he founded Webb Institute. Webb Institute still exists, educating naval architects and I believe that attendance is still free.
Another interesting thing that I read. To build its first steam powered revenue cutter the US Government requested designs from leading US shipbuilders. Eighteen designs were received. Some builders submitting more than one. The review board selected Webb’s design which became Harriett Lane. Webb’s design for Harriett Lane was not exactly new, however. The patrol vessel America built for the Russian Government was built several years earlier. As we have already discussed, she is a smaller sister to Harriet Lane. I, therefore, wonder if some of the unidentified drawings posted earlier are preliminary designs for one of these vessels.
Roger
Another interesting thing that I read. To build its first steam powered revenue cutter the US Government requested designs from leading US shipbuilders. Eighteen designs were received. Some builders submitting more than one. The review board selected Webb’s design which became Harriett Lane. Webb’s design for Harriett Lane was not exactly new, however. The patrol vessel America built for the Russian Government was built several years earlier. As we have already discussed, she is a smaller sister to Harriet Lane. I, therefore, wonder if some of the unidentified drawings posted earlier are preliminary designs for one of these vessels.
Roger


Good morning Tom. Congrats- your planking came out fabulously. I love the views. Cheers GrantPost 23 - The Dusty Part
I applied way too much Durham's water putty to the hull yesterday. I followed the suggestion on the can and added a little vinegar to slow the drying time.
View attachment 627142
I took her outside on a beautiful summer's day today to sand her down. I found these square flexible sanding sponges on Amazon which I find very useful
View attachment 627150
Not sure what I will use most of them for, but I started with 120 grit, followed by 240 grit, and then a quick going over with 400 grit. At the end, she felt pretty smooth. I removed almost all of the Durham's, except for spaces between the planks, and at the stern where the counter meets the stern post. I need to do a little more filling there. Here's how she now looks on a glorious Berkshire afternnon:
View attachment 627143
View attachment 627144View attachment 627145 View attachment 627146
View attachment 627147
View attachment 627154
View attachment 627149
We'll see how I did when I apply the primer. Next up is adding the stem and keel, making sure they merge properly into the hull, and then shaving down the bulkhead extensions.

You work look wonderful!Post 23 - The Dusty Part
I applied way too much Durham's water putty to the hull yesterday. I followed the suggestion on the can and added a little vinegar to slow the drying time.
View attachment 627142
I took her outside on a beautiful summer's day today to sand her down. I found these square flexible sanding sponges on Amazon which I find very useful
View attachment 627150
Not sure what I will use most of them for, but I started with 120 grit, followed by 240 grit, and then a quick going over with 400 grit. At the end, she felt pretty smooth. I removed almost all of the Durham's, except for spaces between the planks, and at the stern where the counter meets the stern post. I need to do a little more filling there. Here's how she now looks on a glorious Berkshire afternnon:
View attachment 627143
View attachment 627144View attachment 627145 View attachment 627146
View attachment 627147
View attachment 627154
View attachment 627149
We'll see how I did when I apply the primer. Next up is adding the stem and keel, making sure they merge properly into the hull, and then shaving down the bulkhead extensions.
Rob