USRC Harriet Lane Model Shipways 1:96 scale circa 1863

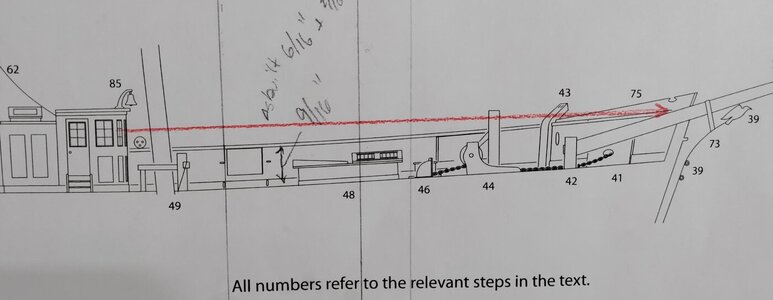
I am in the process of building the deck house structure which seems to be the engineering rooms and the pilot house forward. As to the pilot house, for some reason I have it in my head that a ship's pilot is in charge of guiding the ship and needs to be able to see where the ship is going. As you can see from the plans, from about the center of the pilot house windows (about 5.5 scale feet above the floor of the pilot house) the pilot cannot see forward at all. And since I've made the pilot's job even more difficult by raising the forward bulwarks by almost 2 scale feet, I'm raising the pilot house by 1.5 scale feet.
PH Plans.jpg
 
Looks awesome! Ther's a lot of satisfaction in knowing detail is there, even if it's where no one will ever see it. Admiralty models are full of the like, from 200-300 years ago.
 
I forgot to ask, but what would one expect to see in the pilot house? I can imagine that a compass, a chronometer, a chart rack and chart table would come in handy as well as a speaking tube. Thoughts?
 
I am in the process of building the deck house structure which seems to be the engineering rooms and the pilot house forward. As to the pilot house, for some reason I have it in my head that a ship's pilot is in charge of guiding the ship and needs to be able to see where the ship is going. As you can see from the plans, from about the center of the pilot house windows (about 5.5 scale feet above the floor of the pilot house) the pilot cannot see forward at all. And since I've made the pilot's job even more difficult by raising the forward bulwarks by almost 2 scale feet, I'm raising the pilot house by 1.5 scale feet.

View attachment 434322
Don't forget the foremast sting dead center obscuring any view foreword.
 
Don't forget the foremast sting dead center obscuring any view foreword.
I did forget that, Pete! I guess the pilot isn't supposed to be able to see anything forwardROTF I'm still going to elevate the pilot house because the deckhouse complex looks a little squatty to me. I'll post a picture soon.
 
I think the pilot house would contain its own steering wheel, binnacle, ship's telegraph, speaking tube, handles for bell and whistle ropes and perhaps a pot bellied stove and a bench. I bet Jerry Todd Knows. He knows ALL this arcana.;)
 
I agree with you Pete! What you write makes sense. But, looking at my reference books including Canney's "The Old Steam Navy Frigates Sloops and Gunboats 1815 - 1885" it looks like the steering remained well aft as it had been before the advent of steam propulsion. So, I think I'll populate my pilot house with some of these things. Sadly, as you'll see from the pics, it's too small for a stove.
 
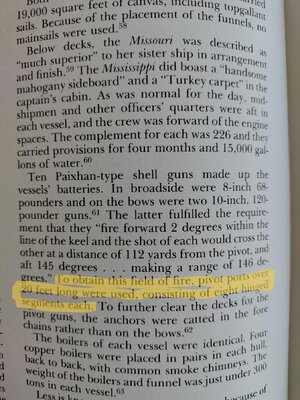
You know, I really should actually read these books rather than just looking at the pictures. Pete, here's the perfect source for the wide gunport conundrum. Canney's discussion of the 1847 Mississippi and Missouri. 20 foot wide gunports! Note the discussion of anchor stowage.
20 foot Gunport.jpg
 
I was thinking about a double cathead arrangement (see Posts 8, 10, 13). That's still a long way from the hawse hole. Still it allows for anchor stowage in a convenient location - over the water and ready to let-go at a moment's notice. I'll keep thinking about it.
 
Good morning, shipmates!

I've made a little progress. Today it's the completion of the windlass - just a couple of details and the completion of the main deck houses.

These two pictures show the iron straps on the Carrick bits and the bolt heads. The bolt heads look blacker in person I used my usual drop of Titebond to simulate tiny bolt heads on the straps. This work will be almost invisible when the raised fore deck is in place.

WL strap.jpgWL bolts.jpg
 
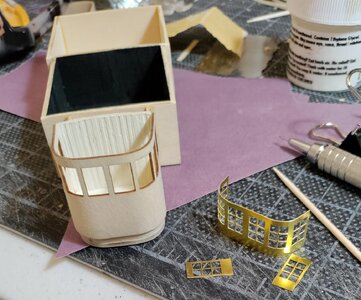
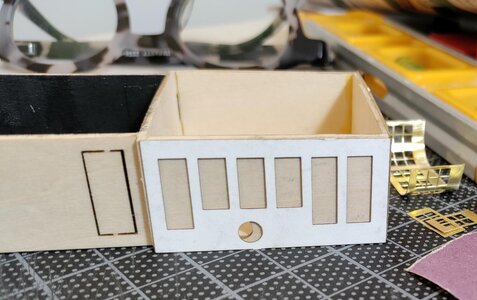
Now for the deck houses staring the pilot house. I posted earlier that I thought the pilot house was a bit squatty and that I would raise it. Just a reminder for anyone planning to build this model - every modeler has noted that the photo etched card for the pilot house front detail doesn't fit properly unless you trim the ends and make a few minor additions. I had the same problem. You have to be really careful to make sure that the card sits properly over the window openings. This leaves the ends needing to be trimmed. The trimming leaves about 1/32" aft of the pilot house doors.

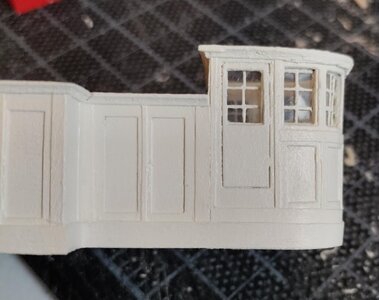
I also had a major problem with the photo etched brass window frames. Part of the problem I caused by adding paneling to the pilothouse bulkhead. The other part is because the window frames are spaced too far apart on the photo etch. In the end I cut the frames out of their sheet and glued them in individually.

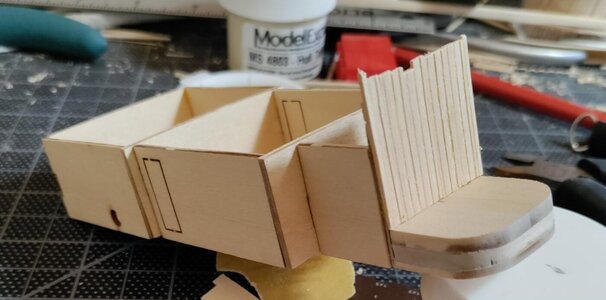
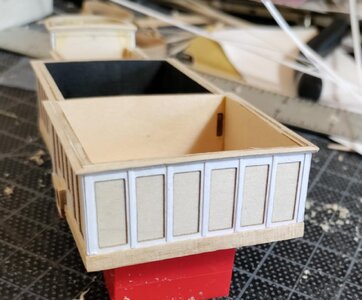
The deckhouse construction was not difficult. Some modelers, however, have had problems with maintaining the camber of the deckhouse complex so that once finished there are minimum unsightly gaps to be hidden by additional trim. The instructions talk about maintaining the camber which I did by judicious clamping.

The second photo shows the paper strips called for in the instructions so that the pilothouse floor can be securely glued in while maintaining the camber of the floor. The instructions don't say how wide or thick the paper should be. I don't know why, but obsessed over this question for a couple of seconds before I just took a sheet of notepad paper and eyeballed the width by putting the pilothouse floor on top of the strips and moving the strips away from the centerline until it looked right. It worked out fine.

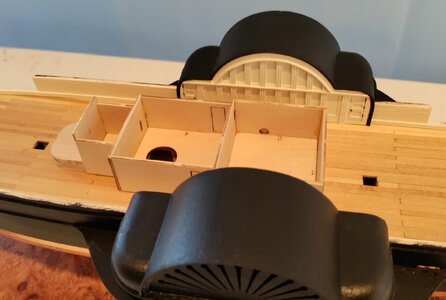
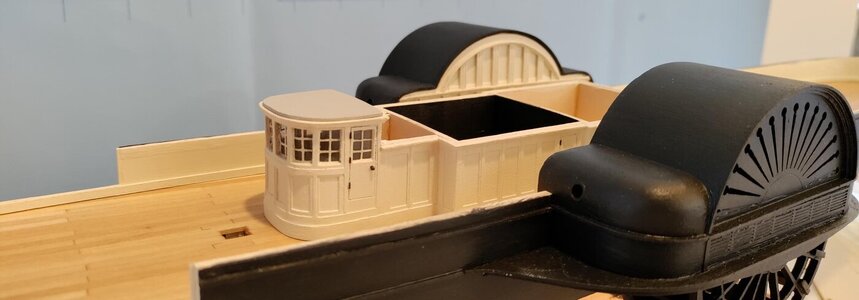
The last two pictures show what the deckhouse complex looks like in place. There's not a lot of room between the deckhouse complex and the upper paddlewheel assemblies. This would impact how I would go about detaining the deckhouse complex to match the detaining of the upper paddlewheel assemblies.
PH1.jpgPH2.jpgPH3.jpgPH4.jpg
 
I began detailing the pilot house by paneling the aft bulkhead with 1/32 x 1/8 strips that I scraped with an Artesana Latina scraping tool. As I mentioned this addition made it certain that the photo etched window frames would need to be trimmed. Given how dark the pilot house is once roofed, I'm not sure the detailing was worth the time.

I then attached the pilot house front. This was done according to the instructions which call for wetting one side and clamping into place to dry. Note - if I had to do this again I would temporarily attach a piece of scrap in the same shape as the pilot house floor to the top of the pilot house to maintain the shape of the pilot house at the top. I found that once dried and in place the 1/32" thick pilot house front material had dried in its own shape at the top which was not an exact mirror of the shape at the floor.

I then attached the photo etch card pieces. You can see that the hole for the paddlewheel shaft is off a bit :eek:.

PH5.jpgPH6.jpgPH7.jpgPH8.jpg
 
Once I got all of the photo etched card aboard I began by adding cove around the tops of the various houses. However, as I thought about the small spaces between the deckhouse complex and the upper paddlewheel assemblies, I decided that I would use paper strips to add detail to the paneling rather than wood. If I had to do it again, I would have used this method on the upper paddlewheel assemblies. It's a touch more subtle, but still effective. Also with my stone-age tools and techniques, I could "mill" and shape the paper much more easily than the wood.:p As a final detail, I added "glass" to the windows. I hope you can catch the reflection. I used clear plastic of suitable thickness (it retained its shape and could conform to curves - my initial thought was super thin mylar - NOPE).

PH9.jpgPH10.jpgPH11.jpg
 
Here's the finished (almost) product painted with hinges and door knobs in place aboard Harriet Lane. You can see now how dark it is inside the pilot house. For that reason I left it empty. Moreover, once she under glass you won't be able to get close enough to see much more than the reflections off the "glass" in the pilot house windows.

I went ahead with the deckhouse complex construction to make sure of the placement of the upper paddlewheel assemblies, specifically the drive shafts for the wheels, vis-a-vis the deckhouse complex. I think I can now safely permanently attach the lower paddlewheel assemblies to the hull so, that's probably the next step for me. On the other hand, I now have Jerry Todd's lovely guns - perhaps it's time to get them fitted?PH13.jpgPH14.jpg


PH12.jpg
 
Last edited:
Back
Top