USS Constitution Build log by VIC [COMPLETED BUILD]

Visions of clove hitches dancing in my head. My first attempt at rat lines. Lanyards aren’t much better. But I’m learning. Maybe by the time I get to the mizzenmast...View attachment 165009
we can see, that the result is getting better and better with going upwards.
Think about this: When you finished with all the ratlines, maybe you could remove the first four or five and make them once more ....


and try to install the lanyards with slightly more tension - this will help to keep them straight during the ratline installation
 
Thanks for the tip,Uwe. That was the first try. Das zweite Mal war ei
we can see, that the result is getting better and better with going upwards.
Think about this: When you finished with all the ratlines, maybe you could remove the first four or five and make them once more ....


and try to install the lanyards with slightly more tension - this will help to keep them straight during the ratline installation
Das werde ich probieren.
 
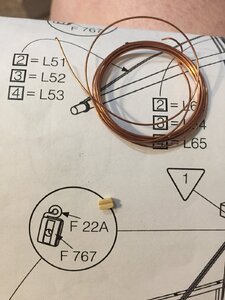
A couple of medical forceps would help tremendously with that. Start at the top of your block and wrap around tightly, then the tip of the forcep to
make your hook. Im a bit of a nut so I solder mine where the wire meets the other end for strength. If you dont have any, perhaps you have some thin
tweezers to make your hook.
 
Hi Victator,
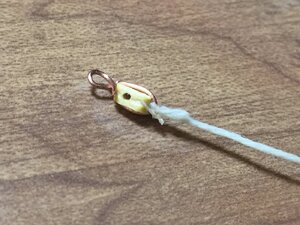
Nice job with the wire stropping on your block. Just eyeballing, it looks like the gauge of the wire might be a little large. That can make a tough job even more difficult. With thinner wire, it will be easier to get a snug fit to the block and clean loop. And then, if you like, touch up that loop joint with a bit of solder and blacken with some sort of brass black solution for a nice iron finish.
Don't be afraid to practice a few before committing them to the ship, as they will improve rapidly on the first couple of gos.
Thanks. So far I’ve been trying to use the material in the box. Doesn’t work for lanyard rigging. Used embroidery floss for shrouds because that was the only black I could find that fit. I’ll see what I can do in finding a smaller gauge wire and something to darken it with. Again, steep learning curve.
 
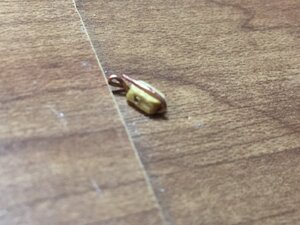
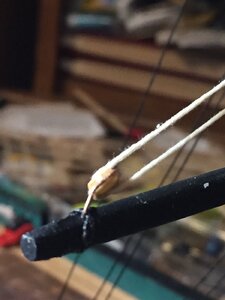
Had to drill holes out in blocks. Twisted wire around blocks. Also had to wrap wire around line for one block. View attachment 165225View attachment 165226

Good start, but when you bend wire, it wants to make large radius curved bends. Buy some very tiny short needle nosed pliers, buy TWO of them. Then buy a third set that has round jaws, as in long and tubular, the ones used in making beadwork with wire. You find these tools in a craft store where the beads and wire are sold. You can use them the round nosed pliers to make the eye by wrapping the wire around them. Get some beadwork wire cutters too. Wear a magnifying lens headset with integral lamp. They are cheap at $16 at Modeling Expo on the internet. Using the right tools sets you up for success in precision wire work. Snip the excess off of the eye with a set of beadwork wire cutters, which make a very sharp cut, and don't leave wedge ends on the very end of the wire. Grab the eye with one set of the short needle nosed pliers mentioned previously, and with the other pliers, bend two 90 degree bends, forming a square U-bend just wide enough to slip the block into. You'll calibrate your hands to do this with practice. I GUARANTEE you will screw up some wire and scrap a few of these strops before you get them looking truly good. That's normal. The final bend which takes the end of the the wire back toward the eye is tricky, and you'll cut the end of the wire pretty close to the bend. Use the pliers to twist the strop iron to the side, not open it wide like a clam. Then insert the block and with the strop grabbed by the side edges of both pliers, twist the loop of the strop closed. The end of the strop should hide nicely under the eye, so you don't see a wide open joint there if you trimmed the wire properly. Before you insert the block though, blacken the copper wire with blackening solution, a type of acid you use to turn the copper black. Also stain the block with a quick dip in some wood stain, so it doesn't appear so pale and white. Any color you choose is better than white wood. I like red-brown, but walnut stain makes blocks look more used and realistic. The difference between a good model and a great one is going the extra mile in these details, and not rushing the ship to completion.
 
Attached large spar with lines. Haven’t tried the bead pliers or fine wire yet. Will be looking for them along with magnifying glasses. Didn’t know the work would be this tiny. Thought I would just throw a few strings on and that would be good. But nooooo...0166EC98-069C-46A3-B5F4-FEE256ACA6DB.jpegB11FCC6D-3E43-4A19-BED3-A0E9338B8550.jpeg10F2BE4A-3828-4949-B574-D6584D35F2A2.jpeg
 
Last edited:
Before showing how I started, any tips on keeping lanyards from twisting?
Twisting lanyards are actually caused by the type line/thread being used for the stays. Some types of line will twist...or unravel...when pulled taught...if I remember nylon line is one such culprit. To avoid twisted lanyards you need to prevent the stay lines from unraveling when pulled taught. Two solutions: The first is to use a different rigging line for the stays. This may seem frustrating now that you have several in place but it is a solution. The second is to coat the twisting stay line with diluted transparent white glue to seal the line to prevent the twist. Dilute the glue so it can easily be applied with a paint brush. You can also run CA glue into the line fibers of the stay...when dry the line will be sealed. Both of these glue solutions will result in a stiff stay line so make sure the line is stretched in place first with a temporary clamp or single lanyard until dry. Then you should be able the rig up the dead eyes and lanyards without a twist. Hope this helps...
 
Last edited:
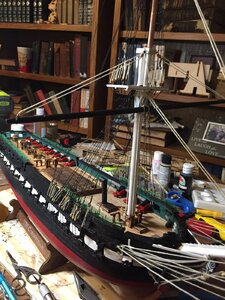
Now, for this month's photos. I can see now I've made a lot of mistakes. Keeping lines tight is sometimes a challenge. Also, my foremast leans forward a bit. I'm also wondering if I shouldn't have done the main mast first.
You are doing fine. I usually work my rigging either front to back or back to front. So you are OK starting with the foremast...then the Main...then the Mizzenmast. I would not stress over the mast lean. It happens and once all the rigging is done it will blend in and not be noticeable. Yes...taught rigging lines are a challenge. But continue to do your best in keeping lines taught but not so tight that you bend yards and masts. You are doing super! By the way, I built the Constitution by Model Shipways and my Mizzenmast ended up with a forward lean. Anyone looking at the model now would not notice. But I know it is there! Oh well!
 
You are doing fine. I usually work my rigging either front to back or back to front. So you are OK starting with the foremast...then the Main...then the Mizzenmast. I would not stress over the mast lean. It happens and once all the rigging is done it will blend in and not be noticeable. Yes...taught rigging lines are a challenge. But continue to do your best in keeping lines taught but not so tight that you bend yards and masts. You are doing super! By the way, I built the Constitution by Model Shipways and my Mizzenmast ended up with a forward lean. Anyone looking at the model now would not notice. But I know it is there! Oh well!
Thanks for the encouraging and helpful remarks.
 
Attached large spar with lines. Haven’t tried the bead pliers or fine wire yet. Will be looking for them along with magnifying glasses. Didn’t know the work would be this tiny. Thought I would just throw a few strings on and that would be good. But nooooo...
I found several very good tools (as well as line and wire) in the jewelry craft section of craft stores such as HobbyLobby and Joanns. The crafting of jewelry has many of the same skills as ship rigging. So the tools work as well...needle nose pliers, round end pliers, etc. I also get all my wire from the jewelry section.
 
Back
Top