• LUCZORAMA SHIPWRECK SCAVENGER HUNT GIVEAWAY. 4 Weeks of Fun • 1 Legendary Prize ((OcCre’s Fram Ship)) • Global Crew Welcome!
    **VIEW THREAD HERE**

USS Constitution by Model Shipways. - First Build Log

The most current update right now is that I'm about to begin making the cheek knees and rails. It is taking a little longer because the information from the Hunt Practicum and plans appear very limited and I've been studying what other builders have done to make these as best and close as possible. I will use the practicum as a baseline but follow and study what 3 of the builders that have survived this ordeal have done which does look pretty impressive. There is also some 3D thinking going into this instead of having to manipulate one piece of wood into three different directions, it looks like the best solution thus far is to build separate pieces, the ones that have to make their curve around the stem and headboard and then the base piece that starts at the hull and cathead. The last piece I'm debating is either using the polystyrene for the white striping, of another method, but first I want to make it past the head rails correctly so I can build out the rest of the frame from the bow, main rail, and stem. These rails seem to set the pace for the rest of it. Also, Model Expo finally sent me new grates for the deck coamings that I decided to rebuild and making them a good contrasting color to the deck. Originally, the ones I made originally seemed to dark and with a dark deck, wanted to lighten then up a bit which meant having to redo and re-stain them which I don't mind because these are not difficult to build. So, I'll be doing this also at the same time, so my next update could take a couple weeks based on the time I have available in my evenings after work.
 
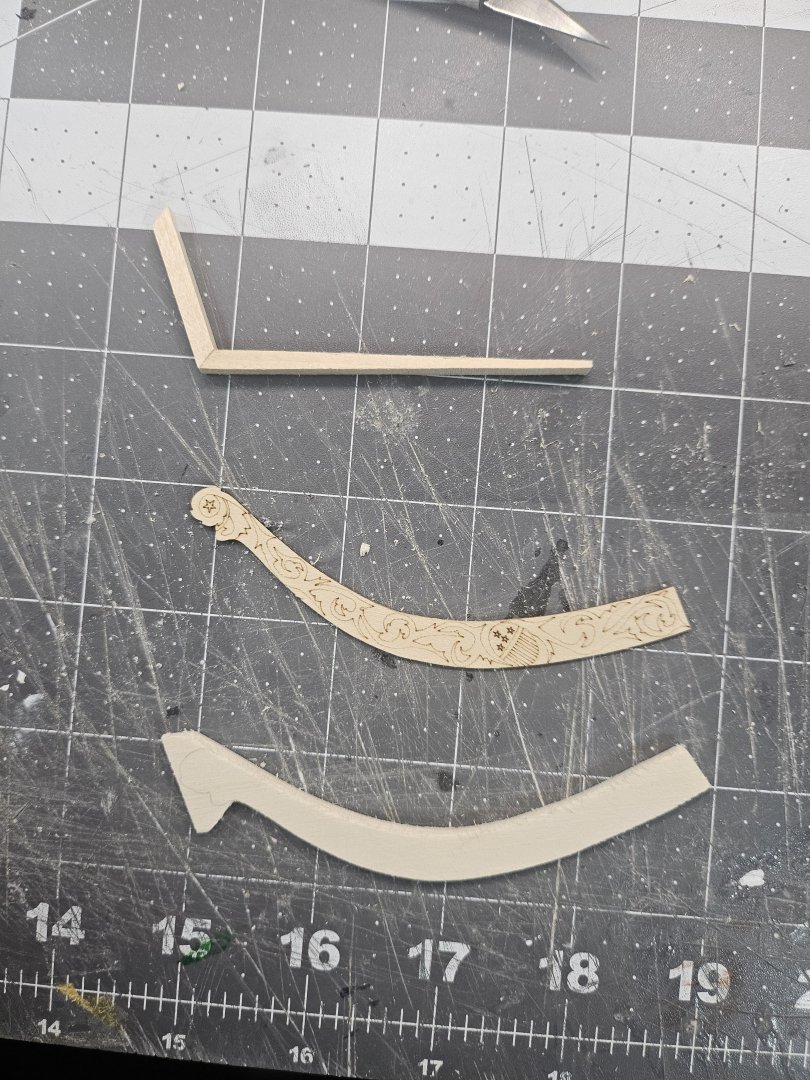
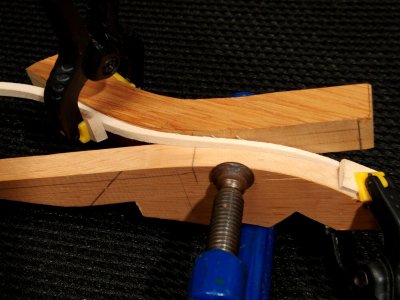
Well then, I'm beginning to realize that the practicum is incomplete and inconsistent when it comes to the cheek knees and rails. The pattern to follow is certainly not the top right corner, but halfway down the page. The top right is only to see what it should look like. I followed those dimensions and realized it is not the correct size, so I've been experimenting with the 1/8 sheets, the 5/32 and the 1/4 inch. The 5/32 and 1/8 are nearly the same exact size, so it would be easier to used your 1/8 sheet to cut the curve and length with its knee separately. I dont think I agree with using the 1/4 sheet or doubling up on the 1/8 because the 1/4 will be trimmed down anyway and when your done it's back down or narrowed down to 1/8 or 5/32 anyway, so I'm not sure why Bob Hunt would do this because you can do this all on the 1/8 sheet for the rails. The 5/32×5/32 strips do well for the knees though. So. I cut out a 1/8 template of the trackboard and soaking four, 5 1/4 in 5/32 strips overnight so i can used my templatethe clamp to strips on it and clamp them down to conform to the right curves with the trailboard and the correct length because my original cuts were too short because I followed the practicum on this. Hunt even started the lesson with a pattern he drew and cut thats not even on the plans, so you're left guessing on the actual size. Ill continue pressing on, but i wish an update would be made with more detailed instructions at each step because the rails are considered the most difficult or most challenging at this stage of the build...so, I'll continue studying the 3-4 folks that have completed the Conny.20250720_193224.thumb.jpg.72575b7d06ea616c6df2ae2c21b2a80e.jpg
 
My disappointment with the cheek knees and rails grows each day as I realize how flawed the plans and practicum are. Anything remotely close to being a template you can use for cutting the rails from woods are utterly useless and do not match in size and dimensions. It might be close, but not close enough...for sure... So, my strategy is using sheets of wood and drawing the design using a flexible measurement tape to measure the angles on the hull of my Conny and check them against the plans. I am following the builders that finished their builds and what their pieces look and then if they did it in multiple pieces then I will follow that because they all look good and a matter of preference for the technique used. If I have any disappointments on my journey so far, it will have to be the unclear and ambiguous instructions in the practicum related to the rails and the measurement inaccuracies when bounced against the plans. The rails on the plans are so narrowly cut that it is impossible to get the white striping with the .40 half round polystyrene strips or even using wire to do it because there is no room on the rail. A part of me is compelled to possibly build a thread for just this part of the Conny build from Model Shipways MS2040 kit. Getting the builders that survived this piece and having them add their advice and pictures, which most would be cut, and paste would be very helpful and beneficial with a one-stop-shop for tackling this nightmare for future builders on the forum.
 
Making the rails other than the third one was very easy because they only needed to be bent in one direction. Only the third rail was a bit challenging since it had to be bent in three different directions. I had shaped it by heating with an iron, but you can also use the method Tony shared above.
 
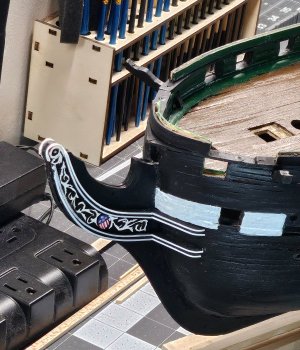
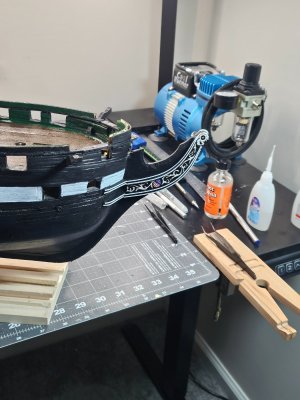
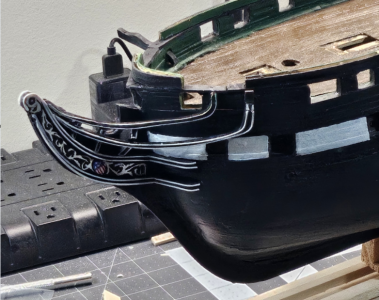
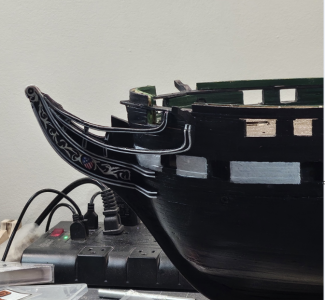
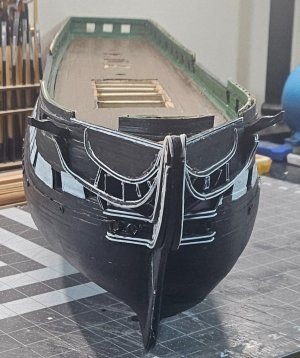
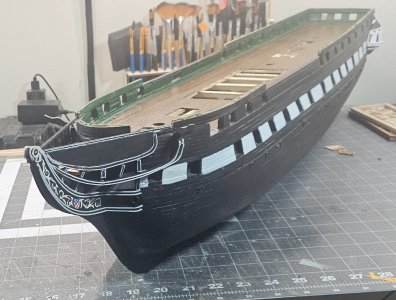
Alright, so I survived the first part of the bow and stem framework for the cheek knees and rails. I was worried about the trailboard because some assemblers would carve this out, paint it, or create a dry decal to transfer on to the stem between the cheek knees. I took the advice from one of the assemeblers on the forum about using fine tip paint markers/pens. I took my time and it actually came out better than expected. What helped was the laser cut carving of the design that helped keep the paint between the lines. The printout of the flag to cut and paste onto the trailboard didn't work as advertised as stated in the 20250724_225531.jpg20250724_225540.jpg20250724_225555.jpgpracticum. I took my time and managed to paint the flags on the trailboard...I can't remember the last time I has a steady hand to pull something like this off, lol. Anyway, the cheek knees worked out and along with the white striping using 0.80 half round polystyrene. It wasn't as painful as I initially thought, but nevertheless worked out feel it actually looks pretty good. Now it's off to the next set of rails.
 
I guess I now understand fully why the cheeks knees and rails are painful for everyone. In Hunt's practicum, Bob states that although the plans show how the rails should or could be constructed with the timbers, they were found not be accurate and likely because everyone's bow may not be the same exact size or dimensions when compared to other Conny modeler/assembler. Personally, I found that I've had to make my timbers larger than what are in the plans and went through lots of pieces of wood to try to make the right fit in all dimensions for the 2nd and 3rd rails and the timbers. I'm finishing up timbers 4 and 5 on the port side and one I so that, then I'll complete the starboard side. I had made near duplicates of the timbers from the port side to closely match for the starboard side. I also made them larger that way I can trim it to that side because everyone will have variances in curvature of the rails. This has also been very time consuming because of trying to make a nice fit with the timbers because the "head" area with the grates and box like setup have to properly fit down the centerline on both sides on top of the timers on the inside of the rails. I did something different regarding the molding you find on the timbers. The practicum only offer that polystyrene is cut to border the shape like the rails themselves. I found an easier way instead of making a mess with the glue when building the 3rd and 2nd rail, by actually painting lines bordering the timbers. I recently found fine and ultra fine tip white paint pens. If you run the tip nice and easy, if you have a steady hand, it looks like you had used molding instead. You might see timbers 1,2, and 3 with the white lines painted on them. I found it much easier to do this without the mess and having black fine tip paint markers work well if you have to touchup a spot because you got out of the lines you were creating. I just about swear by these fine tip paint markers. That's how I was able to do all the fancy scroll work on the stem...

1753706753996.png


1753706809477.png
 
I guess I now understand fully why the cheeks knees and rails are painful for everyone. In Hunt's practicum, Bob states that although the plans show how the rails should or could be constructed with the timbers, they were found not be accurate and likely because everyone's bow may not be the same exact size or dimensions when compared to other Conny modeler/assembler. Personally, I found that I've had to make my timbers larger than what are in the plans and went through lots of pieces of wood to try to make the right fit in all dimensions for the 2nd and 3rd rails and the timbers. I'm finishing up timbers 4 and 5 on the port side and one I so that, then I'll complete the starboard side. I had made near duplicates of the timbers from the port side to closely match for the starboard side. I also made them larger that way I can trim it to that side because everyone will have variances in curvature of the rails. This has also been very time consuming because of trying to make a nice fit with the timbers because the "head" area with the grates and box like setup have to properly fit down the centerline on both sides on top of the timers on the inside of the rails. I did something different regarding the molding you find on the timbers. The practicum only offer that polystyrene is cut to border the shape like the rails themselves. I found an easier way instead of making a mess with the glue when building the 3rd and 2nd rail, by actually painting lines bordering the timbers. I recently found fine and ultra fine tip white paint pens. If you run the tip nice and easy, if you have a steady hand, it looks like you had used molding instead. You might see timbers 1,2, and 3 with the white lines painted on them. I found it much easier to do this without the mess and having black fine tip paint markers work well if you have to touchup a spot because you got out of the lines you were creating. I just about swear by these fine tip paint markers. That's how I was able to do all the fancy scroll work on the stem...

View attachment 534455


View attachment 534456
Good morning. Good work with those head rails, cheeks etc. way to go. Cheers Grant
 
Good morning. Good work with those head rails, cheeks etc. way to go. Cheers Grant
Thanks for the compliment. I was working on the head and had to sand those down slightly to get them into the space where the 2nd rail and timbers meet. I was actually a tighter fit than I expected, but imagine most folks had to make adjustments or modifications to fit those in. This is also driven by the cheek knees and rails because I am almost positive that everyone measurements are similar, yet different because we all had to make it work and tailor them to our ship and that would certainly affect the crew head area. Robert Hunt ended up doing this as well. He stated that design in the plans are different from what he saw on the ship himself, so he ended up making adjustments as well.
 
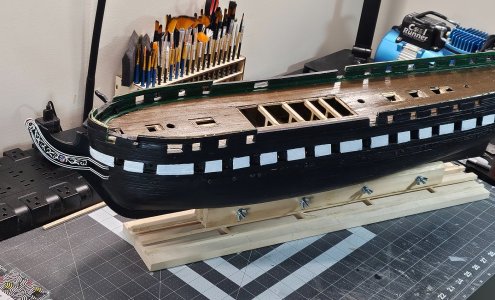
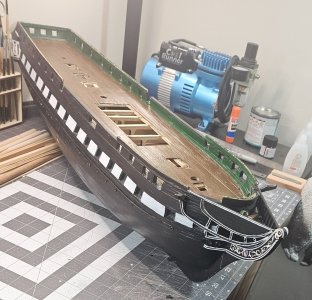
Finally finished the cheek knees, rails, head rails, crew head, and planking the main head rail to the 2nd rail. Once again, the fine pen paint marks were extremely useful. I painted the head rail on the side all white and then after it dried, I used a small metal ruler and put it on the edge using the planks for support and uaes the fine pen black marker and ran the line straight down, and it not only looked straight, but actually looked good. Again, I think using fine tip marker paint pens are the way to go instead of the sticky glue and finger mess trying to get extremely small half round white polystyrene strips. Now I'm cleaning everything with a damp cloth and preparing to copper the hull
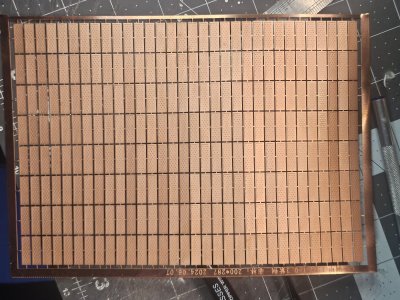
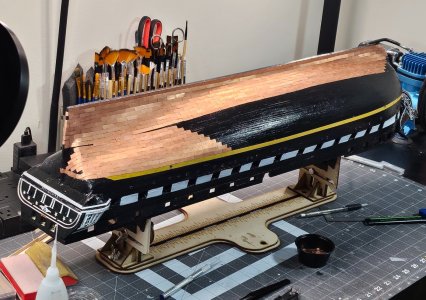
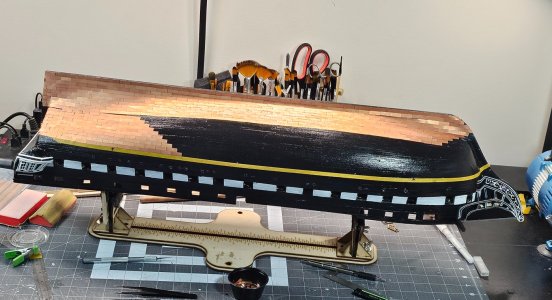
...finally, lol. I bought copper plates20250802_073221.jpg20250802_073227.jpg20250802_073227.jpg20250802_073232.jpgand choose not to use t tape. In my opinion, there are only a few assemblers and builders that can make the ,, mm I tape look great but hands down the plates look much better and they come with a rivet scheme that is consistent for port and starboard side. I am adding polycrylic to the hull which will help with the adhesion of the copper plates. This past of the build may take me a couple weeks because there are a lot of copper plates. And last, but not least, the hawse pipes. I did notice that some folks cut little boards and glued them inside of the cheek knees and then drilled holes to insert the hawse pipes.
 
You've successfully completed the most challenging part of this model. Congratulations.
Thanks! I surprised myself, lol. Now I have to figure out the best adhesive to use for gluing copper plates to the hull...I would imagine the CA superglue will work, but I'll have to research tha. Have a great day!
 
Back
Top