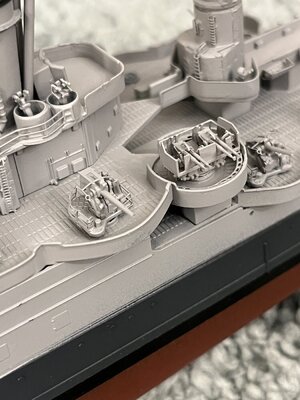
Hi Will. I would paint the deck first and then whatever superstructure could be painted with the deck masked. Masking the superstructure with its fine details in pe could be a disaster. I would also add whatever i could after painting is complete. ie deck guns, whip antennas etc. My opinion only. Be well and have a great day.
-

Win a Free Custom Engraved Brass Coin!!!
As a way to introduce our brass coins to the community, we will raffle off a free coin during the month of August. Follow link ABOVE for instructions for entering.
-

PRE-ORDER SHIPS IN SCALE TODAY!
The beloved Ships in Scale Magazine is back and charting a new course for 2026!
Discover new skills, new techniques, and new inspirations in every issue.
NOTE THAT OUR FIRST ISSUE WILL BE JAN/FEB 2026
You are using an out of date browser. It may not display this or other websites correctly.
You should upgrade or use an alternative browser.
You should upgrade or use an alternative browser.
USS Indianapolis CA-35 1/350 scale by Academy (Will @ Trilogy)
- Thread starter Will @ Trilogy
- Start date
- Watchers 17
I want to thank everyone for the likes and comments, its great to have such support. Haven't had much time to work on Indianapolis as we are moving back to Colorado on November 12th. Sold our house and bought another in Colorado so I've been packing my workshop. Im hoping to prime all the parts made before I packing.
Thanks Soars123 for the painting suggestions. This seems to be a good method and many thanks.
Hope to post the primed parts before packing so I'd better get to work.
Thanks Soars123 for the painting suggestions. This seems to be a good method and many thanks.
Hope to post the primed parts before packing so I'd better get to work.
Hi Will...great hearing from you. Here's to a quick and easy move! I'm looking forward to watching as your build continues. I'm working on her hull right now, so far going well. Bob
Thanks Bob. While packing I'll try to sneak time to paint parts with primer. Let nothing stop me not snow, rain, heat or moving.
Well I'm back after moving. That doesn't mean I've found all my modeling supplies but I've found enough to start with the small parts. I have 4 5" guns left to make and then I believe all the small parts have been made. I left off making parts for the mast and range finder so it took me awhile to remember what I was doing. I finished the fore and aft masts, put all the pe on the superstructures. Today I worked on the guns and have 4 5" to go. I need to paint the hull and decks before I can go forward but the problem is I can't find my work light for painting. The basement is too dark for any work so the light is necessary to paint.
But here are some photos of work to date.
Hull taped of ready to spray the "see grey"
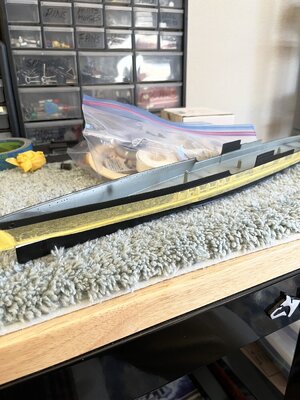
Not being able to paint I moved ahead to the superstructures with all the pe doors and ladders.
After mast
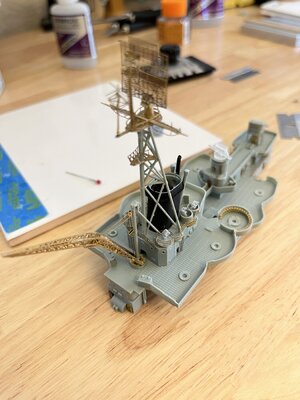
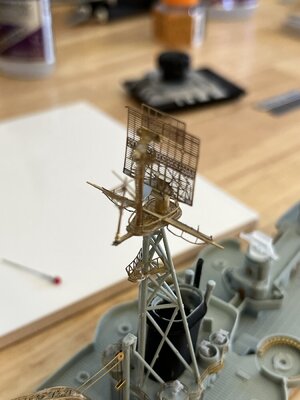
3d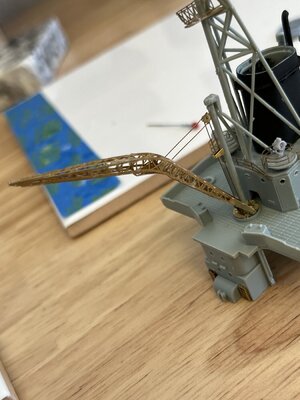
Notice the search light in the photo. I found 3d printed parts from "Black Cat Models" and you will items on the ship in future pictures
Hard to see detail on the forward superstructure as I primed it black.
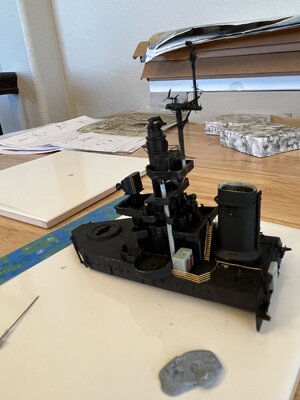
Notice some pe and grey plastic where I knocked off pieces and overlooked putting on in the proper sequence.
Completed catapult and airplane.
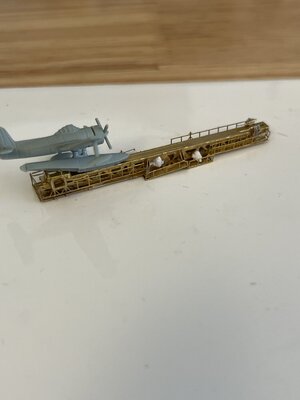
completed deck parts
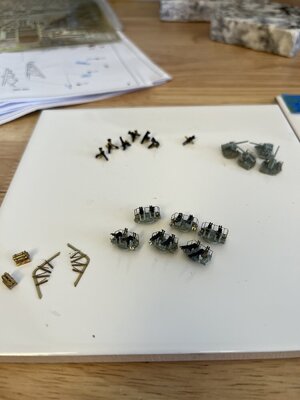
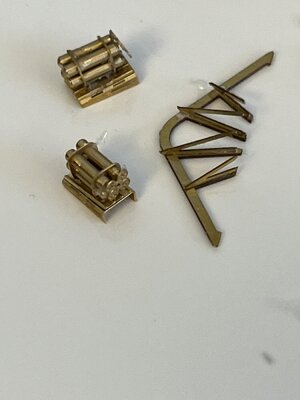
Smoke generators and prop guards.
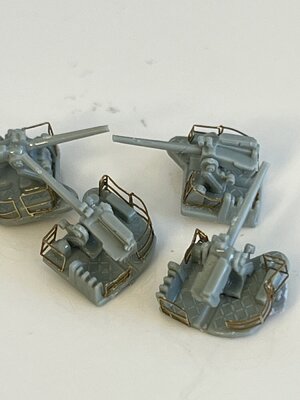
5" guns
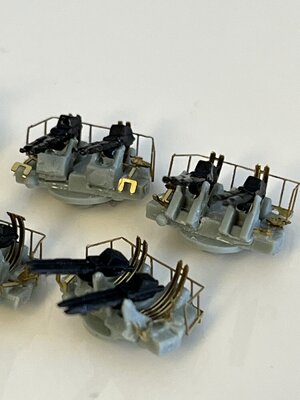
40mm bofoa
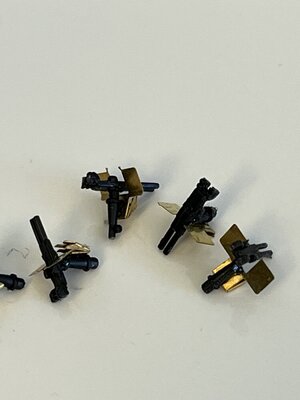
20mm oerlikon cannons
That's as much as I've completed. Its lunch time and after lunch It's basement time to open more boxes in the search for the lamp.
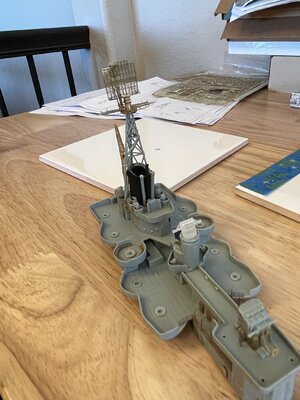
But here are some photos of work to date.
Hull taped of ready to spray the "see grey"

Not being able to paint I moved ahead to the superstructures with all the pe doors and ladders.
After mast


3d

Notice the search light in the photo. I found 3d printed parts from "Black Cat Models" and you will items on the ship in future pictures
Hard to see detail on the forward superstructure as I primed it black.

Notice some pe and grey plastic where I knocked off pieces and overlooked putting on in the proper sequence.
Completed catapult and airplane.

completed deck parts

Smoke generators and prop guards.

5" guns

40mm bofoa

20mm oerlikon cannons

That's as much as I've completed. Its lunch time and after lunch It's basement time to open more boxes in the search for the lamp.

Found my work light and started painting. Decks medium blue and top of hull sea grey.
Side view

You can see the sea grey clearly in this view.
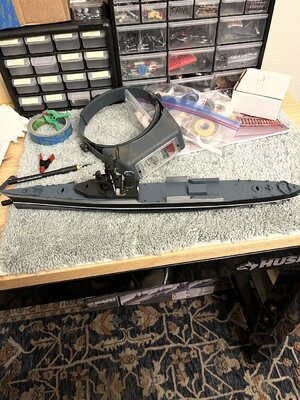
Top view the blue of #22 camouflage would hide the ship from airborne scout planes.
45 degree off bow
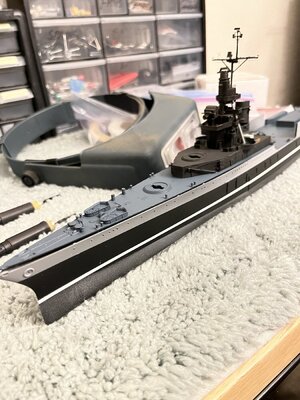
I'll have hour of taping the blue to paint the grey but oh well that's what its about.
Shot from stern
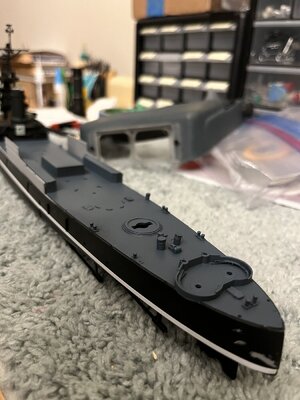
More painting tomorrow. I have to put a .02 needle to paint the decks on the superstructures so that's it until more done.
Side view

You can see the sea grey clearly in this view.

Top view the blue of #22 camouflage would hide the ship from airborne scout planes.
45 degree off bow

I'll have hour of taping the blue to paint the grey but oh well that's what its about.
Shot from stern

More painting tomorrow. I have to put a .02 needle to paint the decks on the superstructures so that's it until more done.
Will@trilogy I’m encouraged by your story. I recently moved also in the middle of building the Elco PT boat. We’ve been here for just over a month and the last room to be sorted out…you guessed it…my office/model room. I do know where most of my tools and parts are but that doesn’t help when every surface is covered with “stuff”. I’d started a build log but about the second or third post … we moved. I’m making slow but sure progress with the room and I figure that I’ll be back in building mode…oh…by next century Well I'm back after moving. That doesn't mean I've found all my modeling supplies but I've found enough to start with the small parts. I have 4 5" guns left to make and then I believe all the small parts have been made. I left off making parts for the mast and range finder so it took me awhile to remember what I was doing. I finished the fore and aft masts, put all the pe on the superstructures. Today I worked on the guns and have 4 5" to go. I need to paint the hull and decks before I can go forward but the problem is I can't find my work light for painting. The basement is too dark for any work so the light is necessary to paint.
But here are some photos of work to date.
Hull taped of ready to spray the "see grey"
View attachment 349752
Not being able to paint I moved ahead to the superstructures with all the pe doors and ladders.
After mast
View attachment 349753
View attachment 349754
3d View attachment 349755
Notice the search light in the photo. I found 3d printed parts from "Black Cat Models" and you will items on the ship in future pictures
Hard to see detail on the forward superstructure as I primed it black.
View attachment 349757
Notice some pe and grey plastic where I knocked off pieces and overlooked putting on in the proper sequence.
Completed catapult and airplane.
View attachment 349759
completed deck parts
View attachment 349765
Smoke generators and prop guards.
View attachment 349766
5" guns
View attachment 349767
40mm bofoa
View attachment 349768
20mm oerlikon cannons
View attachment 349769
That's as much as I've completed. Its lunch time and after lunch It's basement time to open more boxes in the search for the lamp.
View attachment 349756
That is some excellent PE work your doing.Well I'm back after moving. That doesn't mean I've found all my modeling supplies but I've found enough to start with the small parts. I have 4 5" guns left to make and then I believe all the small parts have been made. I left off making parts for the mast and range finder so it took me awhile to remember what I was doing. I finished the fore and aft masts, put all the pe on the superstructures. Today I worked on the guns and have 4 5" to go. I need to paint the hull and decks before I can go forward but the problem is I can't find my work light for painting. The basement is too dark for any work so the light is necessary to paint.
But here are some photos of work to date.
Hull taped of ready to spray the "see grey"
View attachment 349752
Not being able to paint I moved ahead to the superstructures with all the pe doors and ladders.
After mast
View attachment 349753
View attachment 349754
3d View attachment 349755
Notice the search light in the photo. I found 3d printed parts from "Black Cat Models" and you will items on the ship in future pictures
Hard to see detail on the forward superstructure as I primed it black.
View attachment 349757
Notice some pe and grey plastic where I knocked off pieces and overlooked putting on in the proper sequence.
Completed catapult and airplane.
View attachment 349759
completed deck parts
View attachment 349765
Smoke generators and prop guards.
View attachment 349766
5" guns
View attachment 349767
40mm bofoa
View attachment 349768
20mm oerlikon cannons
View attachment 349769
That's as much as I've completed. Its lunch time and after lunch It's basement time to open more boxes in the search for the lamp.
View attachment 349756

Thanks for the wonderful comments and of course all the likes
Thanks NathanLooking forward to the finish! I m a bit curious about that rug on bench, has it swallow any small parts?
No, the rug is still hungry. ha ha ha
I only use the rug to rest completed subassemblies from damage.
Also looking forward to completion as one of my daughters gave me a 1/600 USS Missouri to build along with 4 books of Indianapolis history so I better get going.
Kurt Konrath
Kurt Konrath
I know the saga of moving and not finding stuff as I moved two years ago, only 25 miles, but still searching boxes for stuff that just got packed and moved without proper labeling of what a box has in it. Then they all just got stacked in store room at new house till I get them all unpacked and sorted.
Two years later I have most stuff out and in place, but some is still hiding somewhere.
Two years later I have most stuff out and in place, but some is still hiding somewhere.
- Joined
- Dec 24, 2021
- Messages
- 131
- Points
- 88

40mm bofors
Fired these bad boys for real back in the early 80's, loads of fun!
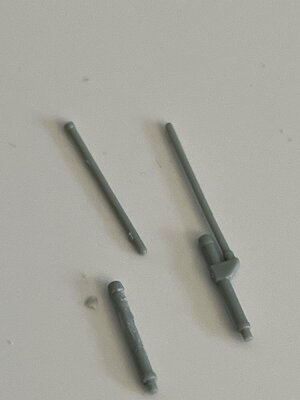
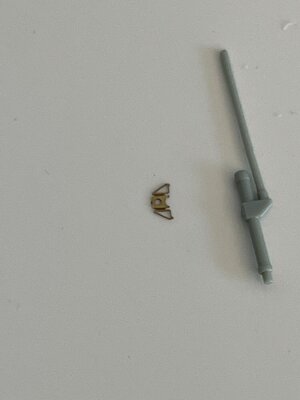
Now that I've found the work light I can start to paint the hull and then move on to assembly. Taking time to go through the Eduard pe instructions making sure all the pe has been mounted while paint dries. First things were the antennas aft of the forward stack. Here you have to cut apart the antenna in the middle where the mounting post joins the antenna.
One antenna separated and another as removed from sprue
The pe bracket to be bent alongside the unmodified antenna
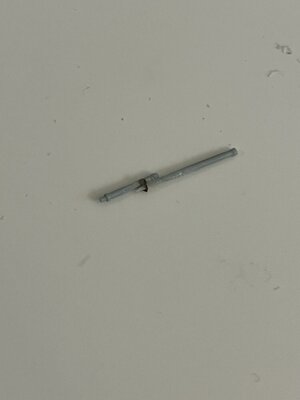
finished antenna
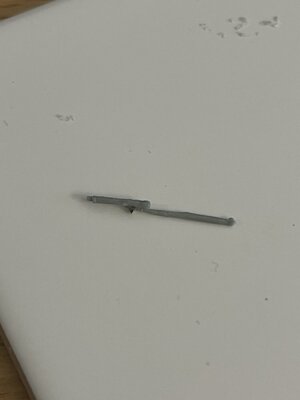

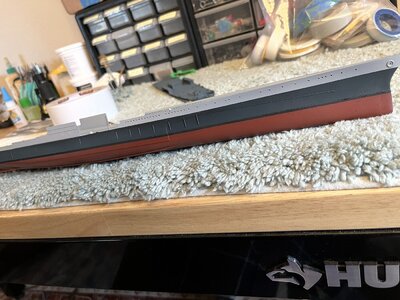
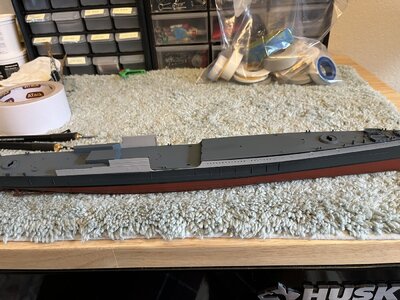
Major step. Hull painted all four colors. The black waterline requires a repaint as the tape lifted a couple areas. Oh well but fixable. I wait a couple of days making sure the paint hardens completely.
How I did this was to place 2mm tape at the waterline covering the black primer paint the top grey, tape it off paint the dark blue, tape off everything and paint the red.
Just had to dry fit the forward and aft decks with their blue paint.
Before gluing the decks in place I have to tape off all the deck leaving everything to be painted grey. Glue the decks and start the assembly.
One antenna separated and another as removed from sprue

The pe bracket to be bent alongside the unmodified antenna

finished antenna


Major step. Hull painted all four colors. The black waterline requires a repaint as the tape lifted a couple areas. Oh well but fixable. I wait a couple of days making sure the paint hardens completely.
How I did this was to place 2mm tape at the waterline covering the black primer paint the top grey, tape it off paint the dark blue, tape off everything and paint the red.

Just had to dry fit the forward and aft decks with their blue paint.

Before gluing the decks in place I have to tape off all the deck leaving everything to be painted grey. Glue the decks and start the assembly.
- Joined
- Aug 11, 2022
- Messages
- 51
- Points
- 88

Looks great!
Beautiful detail on the Bofors 40mm.Thanks Steve for your comments. I have not had much time to work on Indianapolis but I found some nice 3d parts I thought people would enjoy.
View attachment 355013
the 40mm bofors and the gun directors and if interested pm me.
I'm going to have more so there be more posts

Finished the Indianapolis today and as I said at the beginning this is the first plastic model since my youth. Looking at it I realize how much I learned and how much I could have done better. I really enjoyed this site and all the help, comments and likes along the way. I'm not sure what my next project will be as I keep studying kits available and the subjects history.
Below are photos of the completed model without any explanation as I became very lazy about keeping up to date postings.
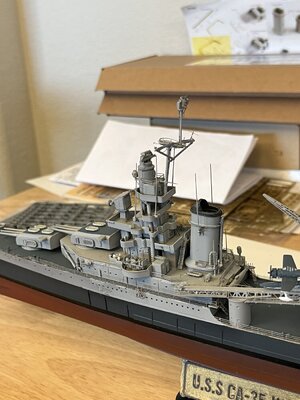
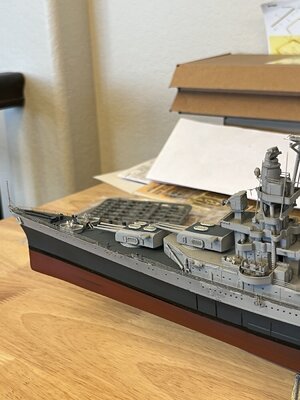
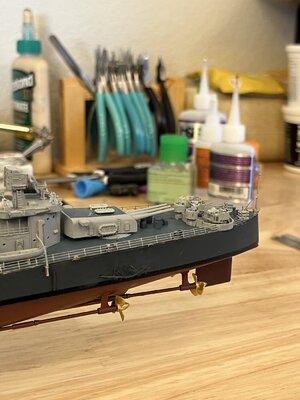
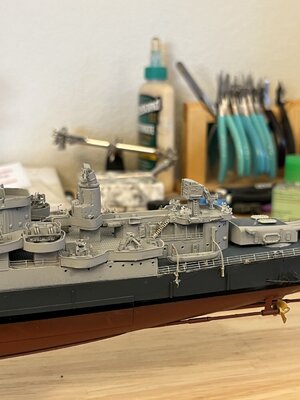
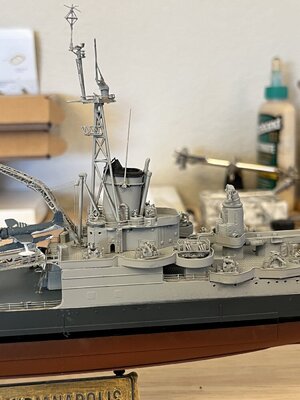
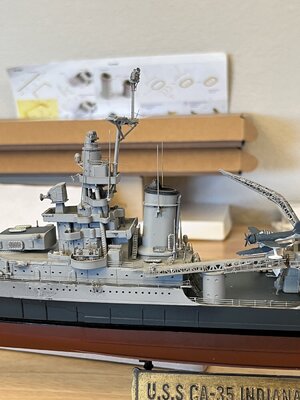
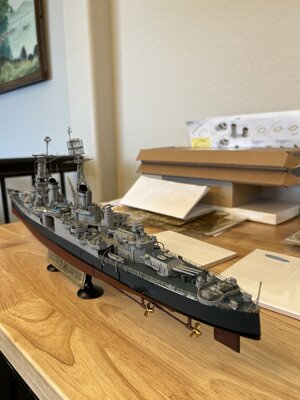
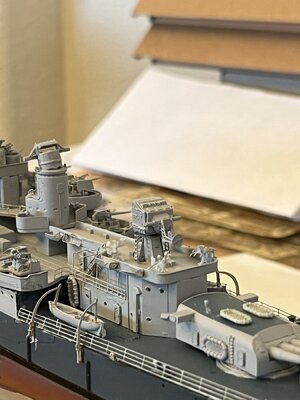
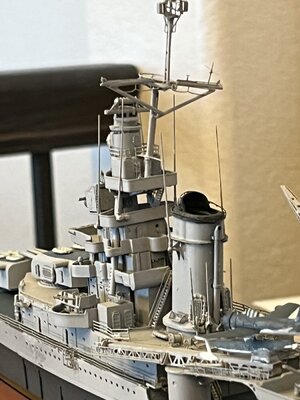
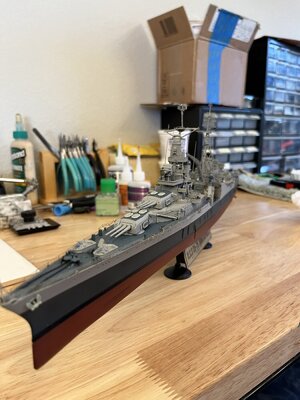
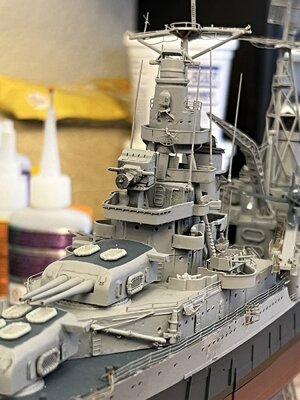
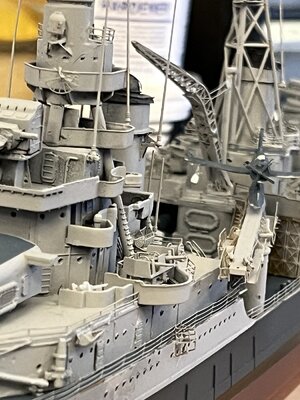
Looking at the pictures I see that I am not finished as the water transfers are not in place so there will be one more posting.
Below are photos of the completed model without any explanation as I became very lazy about keeping up to date postings.


Looking at the pictures I see that I am not finished as the water transfers are not in place so there will be one more posting.
Congratulations on completing (nearly completing) this nice ship model. Looking forward to seeing what you choose next.
Great Job, I hope I can do as good a job on my USS Portland


