Vasa - 1:65 DeAgostini [COMPLETED BUILD]

Joined
Aug 23, 2020
Messages
6,866
Points
838

Location
Wadsworth, Illinois, USA
Editorial note added following the completion of this build:
This build report is crazy long - unhelpfully so. If you're not interested in all the details and just want to see how it all turned out use this link to see the final result: Final Images. If that sparks your interest and you want to see the rest, you are most welcome to join me on a journey...


Hello everyone! My name is Paul and I have been thinking about building the Vasa for a really, really long time. It would seem the time has finally come!

There are plenty of logs out there for the Swedish warship Vasa. So why another one?

Two reasons: 1) I need help! I basically have no experience with this sort of thing. But, I have read lots of build logs on various forums and, as a general rule, the participants are genuine and helpful. I have found this oddly encouraging – maybe with help I could actually get this thing done?

Which brings me to my related second reason: 2) the vast majority of build logs are posted by skilled and accomplished builders (rightly so – putting your stuff out there for others to see should be inspirational rather than tragic). But those same experienced artists know what they know and often do things without even thinking about it. Which also means they don’t struggle (at least anymore) with things that a novice will struggle with. Perhaps a log posted by someone less experienced will help others who are likewise less experienced (or, at least, give everyone something to laugh about).

I’m not sure this build log will gain any traction, but I’ll give it a shot and see if anyone shows up. I should mention that I still work for a living so progress might be slow. But I’m willing to put in the time to do this thing right so I would welcome anyone with an interest to pull up a chair and see me through this build.
 
Last edited:
Why the Vasa? I love the story.

Designed to be a showpiece she turned out to be an epic failure. How many of us have started out with great aspirations only to end up tinkling on our own foot in one area of life or another? But history has been kind to the Vasa. She has been redeemed and has now eclipsed what she was designed to accomplish nearly 400 years ago. The Vasa has become a showpiece (a star!). She even has her own museum! As a man of faith, I can find myself in the redemptive story of the Vasa.

But which version to build? As far as I know there are four kit versions of the Vasa generally available to the ship building community: Corel, Billings, Sergal and DeAgostini. The first three predate the work of Fred Hocker at the Vasa museum so they each have their unique issues. Since the DeAg edition was based on some more up-to-date information she seemed like a logical first choice.

Two problems: the price is breathtaking ($1300 US) – and the kit was unavailable. Several emails to the company (Model-Space) went unanswered. I reached out on several forums looking for advice. It seemed that most everyone agreed that the DeAg version was the best kit to start with. As it was unavailable the sentiment drifted slightly in the direction of the Corel (with all sorts of “buts” associated with that). Since there were also several excellent (magnificent?) Corel 1:75 build logs available I set my sights on the Corel.

But just to be sure, I called Model Space on a Monday morning. Turns out the monthly installment version wasn’t available, but the nice lady said her computer showed the full build kit was available to the US market. I placed an order and five days later there were four boxes on my front porch.
 
Last edited:
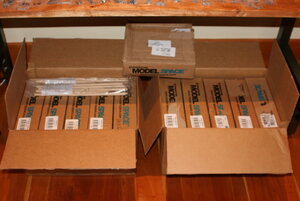
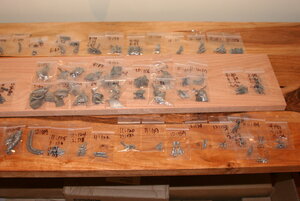
The kit comes in 12 (monthly) boxes and each box contains the individually packaged stages that correspond to the build steps (detailed in the Assembly Guide on the Model-Space website).

IMG_5384.JPG

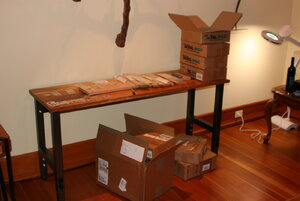
The first thing I did was open the boxes and take a complete inventory. Did I have all the packages? It appeared that I did (oddly, one was labeled for the German market but that surely shouldn’t matter).

IMG_5378.JPG

IMG_5381.JPG

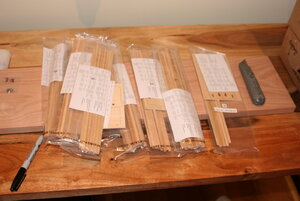
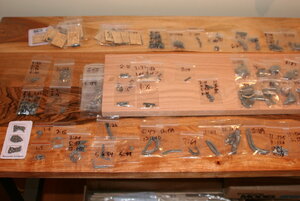
I then identified all of the cast metal/decorative pieces and removed them from the packages. To the extent that I could I tried to combine ‘like’ pieces into zip lock bags labeling each bag with the box it came from along with the build-stage. Inexplicably, for example, the lions’ heads for the gun port covers were found in more than ten different stages of the build...

IMG_5385.JPG

IMG_5386.JPG

While the Assembly Guide calls for simultaneous construction and painting this seems wonky to me (though it would spread out the meticulous painting obligation). I could not imagine building the false keel and frame elements over the course of months while also painting decorations along the way. It seemed better to gather all the pieces and build the ship in the same general flow as all the other builds I have seen on the forums.

As a novice I might regret this decision since it means I will not be following the DeAg build instructions precisely. Since my Roter Lowe instructions were in Italian 35 years ago and I only speak English I felt (foolishly?) emboldened to use the instructions as a guide rather than as dogma. ;)

About half-way through the sorting I began to better appreciate the scope of what I was going to be attempting – there are lots and lots of parts – and there are lots and lots of metal bits – and lots of the metal bits are really tiny. How was I going to detail/paint something I could barely see? I held one of the little metal guys under a 1.5 magnifying lamp. Brighter! But still tiny. Maybe I need to start dialing back my expectations!

So, that's the story of my prep work... Next post will happen when I have something to show. Thanks for checking out this new forum!
 
Last edited:
Hi Doc. Welcome to SOS and to the world of model shipbuilding. I think that your choice of both the Vasa and the De Agostini kit are excellent ones which will provide you with many and many hours of unbridled enjoyment and - inevitably - frustrations and problems too. For me, the biggest revelation was how much model shipbuilding taught me about myself !:) Enjoy your time and do not be afraid to ask.
 
Grabbed my chair - good choice.
When I was working I had occasion to spend lot's of time in Stockholm. Visited the Vasa Museum - an entry door into the 1600s that is unparalleled in any museum IMO. Some of my working peers had no interest, but pushed some of them to go - they, to the last one, were so glad that I "forced" the issue haha.
And what is also so perfect about Vasa is that there are 1000's of images and source files available as well.

This builder is considered one of the best: here is a link to his project. http://www.wasadream.com/modeles/Clayton/wasaclaytonenglish.html
as well as to some of his research for that project http://www.wasadream.com/Index/indexenglish.html

Looking forward to your log - great intro indeed.
 
I am nearing the completion of my first sailing ship, La Couronne, so I understand the mindset of a beginner in tackling construction of your first 17th century ship model. Luckily for you, the amount of information on the Wasa is enormous since the ship was recovered, and the DeAgostini kit instructions are very complete and easy to follow. I had to eek out La Couronne with just a set of drawings and 1-1/2 pages of text instructions and the help of many people here and on other forums with advice and their own build logs. Your model is larger in size, and easier to work on as a result. So, I may be able to help with some answers to questions from time to time, seeing as your model and mine were both Dutch in design and built within 10 years of each other. You have lots going for you, but understand from the start that building these things is going to be very tedious and slow, even with help. But, if you take the time to do precise measuring, cutting, assembling, and painting, and add EXTRA time to correct things that you find inaccurate in the kit or lacking in detail with some scratch building and modification based on your own research, your model will be the pride of the family fleet, even if you own a prestigious, extravagant 16' fiberglass canoe like I do. ;) Give yourself at least 3 years to complete the model, and look at the build as a journey where every single step is a micro-project in itself, and the amount of extra detail you can give this kit will be staggering.

After a few more months on La Couronne, the ship will be finished and I will start a Deagostini kit similar yours, HMS Sovereign of the Seas. Then we'll be building similar projects.
 
Congrats on your endeavor Doc! DeAgostini, by all reviews on SoS seems to be the kit that is the most comprehensive and historically accurate. I have no personal experience or input on that, but Vasa and her story has hypnotized me. I find on certain days, when I have 30 minutes or so, I'll go Google Vasa and find a information source site I have yet to read and learn more.
I expect, if I live long enough, I may find her in my dockyard one day. So I'm pulling up a chair of my own and will cheer you on. Remember that saying, "It takes a village to raise a child." Well, "It takes a dockyard full shipwrights to build a ship." :) SoS is that dockyard and you're not alone. Help is all around you if you need it. Thumbsup;)

Have fun on your journey mate!
Cheers,
Ken
 
The kit comes in 12 (monthly) boxes and each box contains the individually packaged stages that correspond to the build steps (detailed in the Assembly Guide on the Model-Space website).

View attachment 177760

The first thing I did was open the boxes and take a complete inventory. Did I have all the packages? It appeared that I did (oddly, one was labeled for the German market but that surely shouldn’t matter).

View attachment 177761

View attachment 177762

I then identified all of the cast metal/decorative pieces and removed them from the packages. To the extent that I could I tried to combine ‘like’ pieces into zip lock bags labeling each bag with the box it came from along with the build-stage. Inexplicably, for example, the lions’ heads for the gun port covers were found in more than ten different stages of the build...

View attachment 177764

View attachment 177765

While the Assembly Guide calls for simultaneous construction and painting this seems wonky to me (though it would spread out the meticulous painting obligation). I could not imagine building the false keel and frame elements over the course of months while also painting decorations along the way. It seemed better to gather all the pieces and build the ship in the same general flow as all the other builds I have seen on the forums.

As a novice I might regret this decision since it means I will not be following the DeAg build instructions precisely. Since my Roter Lowe instructions were in Italian 35 years ago and I only speak English I felt (foolishly?) emboldened to use the instructions as a guide rather than as dogma. ;)

About half-way through the sorting I began to better appreciate the scope of what I was going to be attempting – there are lots and lots of parts – and there are lots and lots of metal bits – and lots of the metal bits are really tiny. How was I going to detail/paint something I could barely see? I held one of the little metal guys under a 1.5 magnifying lamp. Brighter! But still tiny. Maybe I need to start dialing back my expectations!

So, that's the story of my prep work... Next post will happen when I have something to show. Thanks for checking out this new forum!
Holy cow. All that in one shipment. I wish we could have seen the grin on your face--like a little kid at Christmas, I imagine.
 
Thanks, everyone, for your kind words of welcome.

There sure are a lot of high-ranking folks peering over my shoulder! I am simultaneously encouraged and terrified. I know what it means to be an expert in a field of study – but this isn’t mine. Be gentle friends!

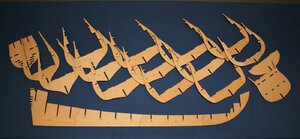
Well, construction has begun. I spent some time setting up a workspace and then identified the parts of the false keel (the keel came in four parts?!) along with the frames for the hull (these each came in three parts) and glued them up.

IMG_5392 (2).JPG

For the life of me I can’t conceive of how these couldn’t have been cut as single pieces. There’s really not much job satisfaction in putting together a puzzle. Or is there? You know the feeling you get when you are done cutting the grass and all the lines are just perfect and you stand there gazing admiringly at your work as if you’ve just completed Michelangelo’s David? I felt that same way after gluing up the keel and frames. I stacked a couple of books on several piles of frames and allowed them to dry overnight. The image above was taken the next morning - and just moments before I picked up the keel and it promptly broke into two pieces. Hmm. Better add some bracing to those joins (or tune up my gluing game...).

By the way, the DeAg laser cutting on the plywood is impressive and the pieces fit together with great precision.

I have more to show (I have been off work for a few days) and will post my progress when I get a moment.
 
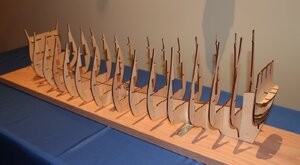
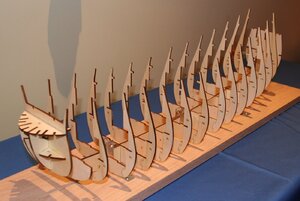
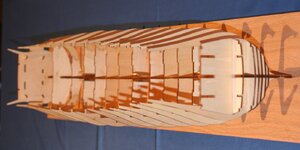
With the addition of the frames to the keel I now have the outline of a ship and I'm feeling super excited about that. I also added a few structural pieces at the fore and aft.

IMG_5399 (2).JPG

IMG_5400 (2).JPG

I did the best I could keeping everything square – though it was challenging working in three planes of space simultaneously. I found that using aliphatic resin cement (Titebond) was helpful. CA would have bonded the pieces together too quickly – getting everything aligned requires way more working time than CA would have allowed. For the record, I started with Gorilla brand wood glue, but it was too slow to take an initial set – for some reason the Titebond seemed tackier (?). What adhesives should I use going forward for the different segments of the build (yes, I know that is a really elementary question…)? Waiting for glue to dry is no fun…but does CA actually bond wood well enough for the long haul?

IMG_5411 (2).JPG

First issue: notwithstanding the book stacking exercise the vertical members of frame 15 are twisted and bent (the plywood is warped – my puzzle making skills are not to blame in this case). Not sure what to do about that yet. Should I straighten it now or use the future support/structural pieces to take out the twist/bend? The ply is much thinner than I might have expected so it should be easy to force it back into shape. Then again, it seems just as likely to break... I guess I'll wait and straighten the frame with the structural pieces that are forthcoming.

As an aside, I traced out a few of the frames before gluing them to the false keel (why is it called false?). By calculating the thickness of the future hull planking I am hoping to fabricate a dry dock/carriage to use later in the construction. Or at least that seems like a good idea...

I keep imagining what my bride will say when she sees the credit card statement. “That model ship thing cost $1300? What would a finished one have cost? Me: “Probably around $800.” Bride: “What am I missing?” Me: “Wait until you see what I spent on tools and supplies…”

Thanks for watching!
 
Last edited:
What adhesives should I use going forward for the different segments of the build (yes, I know that is a really elementary question…)? Waiting for glue to dry is no fun…but does CA actually bond wood well enough for the long haul?
If you ask this question ten modelers, you will get 12 opinion. and the answers are very subjective, based on everybody experience.
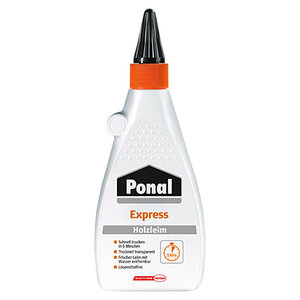
I am personally using on 99% of the cases water based wood glue. Here in Germany / Austria the standard is Ponal Express, which is drying in 5 minutes (really strong after 15 minutes - my experience)
90277306_21212975.jpg
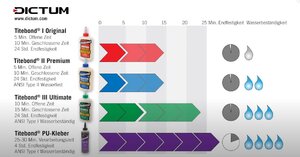
but also Tidebond is offering different types with different periods of drying
I think Tidebond I Classic is often used
11.JPG

 
For the structural part ( bulkheads and keel ) I am using Elmer's WoodGlue Max.
  • Bonds stronger than wood
  • Resists Heat, mold & mildew
  • Easy water clean-up
  • Sandable & paintable
  • 20 to 30 minute clamp time, 24 hours to the full bond
Carpenter's Wood Glue MAX combines real wood fibers in its formula, which delivers superior staining when the job is done

1599662217760.png
 
Back
Top