- Joined
- Jan 9, 2020
- Messages
- 10,566
- Points
- 938

Hello Dear All
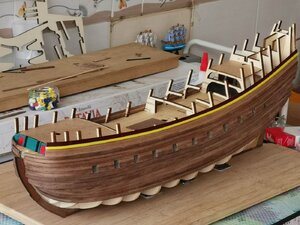
It has been almost exactly two weeks since my last update - being back at work, and with students eager to book as many classes as they possibly can, leaves me with very limited time. In my last post I mentioned that I was going to continue with the lower planking as I still need to fabricate a new stand for that, I continued work on the upper wales and surroundings.
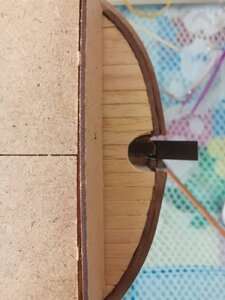
First off the "luizenplecht" deck (the deck between the front of the forecastle and the galleon) was planked using 4mm Abachi planks.
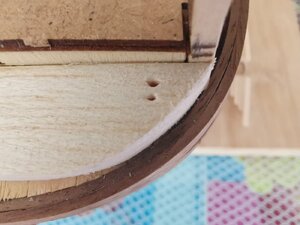
Now came a tricky part. As the wales that go above the luizenplecht deck, still need to follow the curvature of the forecastle, I made a template out of Balsa around which I could bend the planks into their correct shape and fix them temporarily until the glue dried.
After three planks were attached to the hull in this manner, it was time for the first coloured planks to go on, two x 2.5mm planks painted in yellow and glued on top of each other, and then a 6mm wide plank in red. the yellow was no problem, but I couldn't use the red that Kolderstok supplies with the Batavia. For the Batavia, the colour is perfect, but not for the Haarlem. I had to duplicate the "maroon" red as it appears on the City of Haarlem's Coat of Arms (see below).

I obtained the exact colour code as per the Coat of Arms and the special red was mixed by a Chinese paint company called, "Botny". I did not want a water-based paint for painting the exterior wooden surfaces of the ship, so that was the second change that they had to make for me. While we were busy, I also had to address the green which is used on the Batavia replica. As the Haarlem would essentially have used the same green, it was important to get this shade right. Courtesy of Danny Mulders's build log, I knew the exact code of green as used on the replica of the Batavia and Botny also mixed the green for me to specs.
So this is what it looks like on the ship.
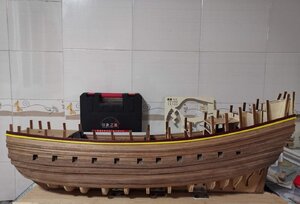
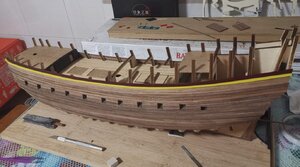
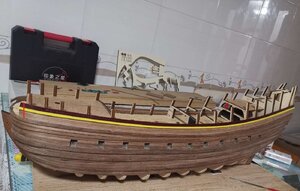
To me the red looks like a fraction too dark, but it is a hell a lot of closer to what it should be than if I had simply used the red. The red line on the above picture, indicates how the wales will be trimmed once the front wall of the forecastle is in place.
This front wall would give me the opportunity to see how the green looks on the ship as it is mainly green while the two doors are painted in red. Then there are two "ladders" or "steps" (that run from the luizenplecht deck to the upper deck at the forecastle) that are painted black. These two ladders had to be scratch-built - as Hans jokingly said" "it will practice your fine cutting and carving skills"!
Yes, Hans - it did! Ten times to be exact!!!
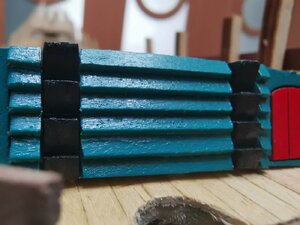
Finally I had two samples that I thought worthy of not throwing away.
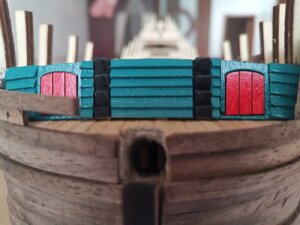
All in all, I must say that I am very happy with the green colour. The light in my apartment is really not good, but based on the official press photographs of the Batavia replica and the real-life appearance of the green, we are very close.
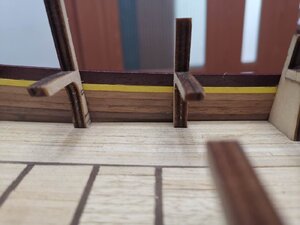
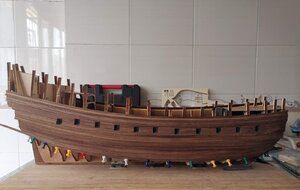
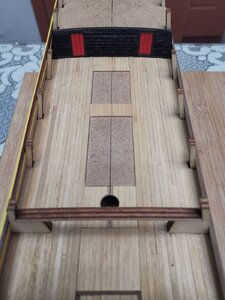
Planking from the inside.
Front wall and doors are in place. (I will worry about the hinges and handles later).
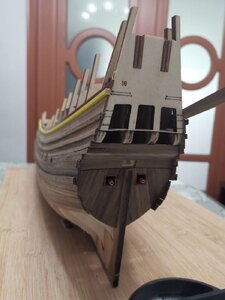
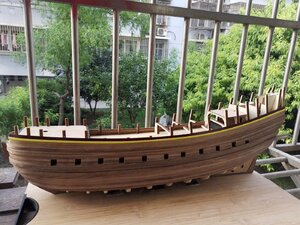
View of the curvature of the wales from the stern.
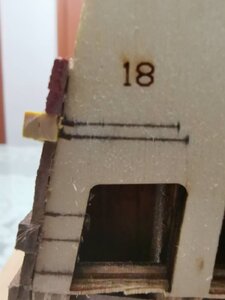
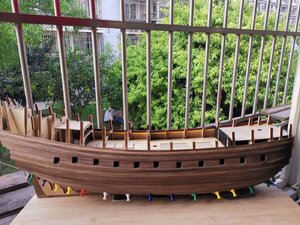
And lastly, a note on the accuracy and precision of this kit. The top two lines on Bulkhead #18 indicate the exact position where the two uppermost wales must ideally be. After laying thirteen planks above the first wale, this was the result! Hats off Hans!
Now this whole exercise has to be repeated on the starboard side. It is quite obvious that I build slowly, but when I get to the result as shown in the last picture, it is all worth it.
Thank you so much for looking, reading and following. As always, your comments (and criticisms) are most appreciated. Until next time stay safe and healthy.
Kind regards - Heinrich
It has been almost exactly two weeks since my last update - being back at work, and with students eager to book as many classes as they possibly can, leaves me with very limited time. In my last post I mentioned that I was going to continue with the lower planking as I still need to fabricate a new stand for that, I continued work on the upper wales and surroundings.

First off the "luizenplecht" deck (the deck between the front of the forecastle and the galleon) was planked using 4mm Abachi planks.

Now came a tricky part. As the wales that go above the luizenplecht deck, still need to follow the curvature of the forecastle, I made a template out of Balsa around which I could bend the planks into their correct shape and fix them temporarily until the glue dried.
After three planks were attached to the hull in this manner, it was time for the first coloured planks to go on, two x 2.5mm planks painted in yellow and glued on top of each other, and then a 6mm wide plank in red. the yellow was no problem, but I couldn't use the red that Kolderstok supplies with the Batavia. For the Batavia, the colour is perfect, but not for the Haarlem. I had to duplicate the "maroon" red as it appears on the City of Haarlem's Coat of Arms (see below).

I obtained the exact colour code as per the Coat of Arms and the special red was mixed by a Chinese paint company called, "Botny". I did not want a water-based paint for painting the exterior wooden surfaces of the ship, so that was the second change that they had to make for me. While we were busy, I also had to address the green which is used on the Batavia replica. As the Haarlem would essentially have used the same green, it was important to get this shade right. Courtesy of Danny Mulders's build log, I knew the exact code of green as used on the replica of the Batavia and Botny also mixed the green for me to specs.
So this is what it looks like on the ship.


To me the red looks like a fraction too dark, but it is a hell a lot of closer to what it should be than if I had simply used the red. The red line on the above picture, indicates how the wales will be trimmed once the front wall of the forecastle is in place.
This front wall would give me the opportunity to see how the green looks on the ship as it is mainly green while the two doors are painted in red. Then there are two "ladders" or "steps" (that run from the luizenplecht deck to the upper deck at the forecastle) that are painted black. These two ladders had to be scratch-built - as Hans jokingly said" "it will practice your fine cutting and carving skills"!
Yes, Hans - it did! Ten times to be exact!!!


Finally I had two samples that I thought worthy of not throwing away.

All in all, I must say that I am very happy with the green colour. The light in my apartment is really not good, but based on the official press photographs of the Batavia replica and the real-life appearance of the green, we are very close.

Planking from the inside.

Front wall and doors are in place. (I will worry about the hinges and handles later).

View of the curvature of the wales from the stern.

And lastly, a note on the accuracy and precision of this kit. The top two lines on Bulkhead #18 indicate the exact position where the two uppermost wales must ideally be. After laying thirteen planks above the first wale, this was the result! Hats off Hans!
Now this whole exercise has to be repeated on the starboard side. It is quite obvious that I build slowly, but when I get to the result as shown in the last picture, it is all worth it.
Thank you so much for looking, reading and following. As always, your comments (and criticisms) are most appreciated. Until next time stay safe and healthy.
Kind regards - Heinrich


 I will be looking forward to the start of your build log. With regards to the planking - for sure, it is a daunting prospect and one that I am not nearly finished with. Rest assured that when you get to that stage of your build, I will share everything that I have picked up along the way - so don't worry too much.