VOC SPIEGELRETOURSCHIP BATAVIA 1628 - KOLDERSTOK 1:72

@Jimsky . Thank you so much for the kind advice, Jim! I have faired the hull - not too much at first - and will continue that process as the pattern of the planks begins to develop. To make things even more interesting - this is a single-plank kit so there is simply no room for mistakes!:eek:
 
Heinrich,

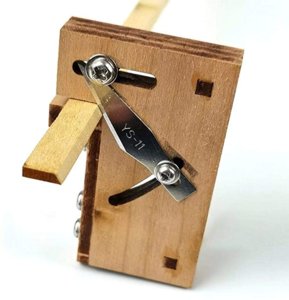
I assume you will have taper/chamfer the bottom edge of the planks as you progress. Do you have or have you found a tool/jig to do that?

Jan
 
Last edited:
@Pathfinder65 I know that the bottom edges have to be chamfered as the planking progresses, but I was not aware that there was a special tool for that!
 
Thank you so much for that, Jan! I will certainly look into it!
 
Hi Heinrich,

You are doing great work on the kit.
In respect to the planking, start with setting out the wales, these determine the complete shape of the hull. From there you can plank downward from the wales to the keel and upward from the keel to the wales unti you meet somewhere half way.
 
If you want to follow real planking of the era check this great link.

It is Vasa in 3d, she was Dutch build and from the same era like Batavia.
 
@Maarten Dear Maarten. Thank you very much for the encouraging words. It is no secret that I hold your work in the highest possible esteem, so I am very glad you like it. Thank you for the advice and the amazing article. Your advice is exactly the same as Kolderstok's so I am indeed starting off at the wales and moving downwards . I have already laid the first strip directly below the gunports.
Kind regards - Heinrich
 
Hello Zolly. Thank you for the interest. The last 9 days (including today) have been spent planking. I will post an update in three or four days' time.
 
Dear Model Shipbuilding Friends

I trust that you are all well and keeping safe.

Normally, I try to post weekly updates when a certain “phase” (in my mind) of the build process has been completed. This time, though, I knew that (in my case) a week was to impossible to complete the next part. The reason - PLANKING!!!

From the outset of the build this was the part that I dreaded the most. I had never done anything of the kind before and to worsen matters, the Batavia requires only ONE layer of planking. Get it wrong the first time and there is no chance of hiding any imperfections below a second layer. The thought of “measure twice, cut once” would be very important as did the words of one of the guru’s on the Dutch site - “KEEP CALM”! So, I told myself that if I could only lay one plank a day - so be it!

What makes the Dutch ships even more tricky are the multiple curvatures in one plank - this would require not only lateral bending, but also vertical shaping.

Build 236.jpg

So without further ado, the spare kettle was boiled and strip by strip the wood was soaked for about 5 minutes.
Build 237.jpg

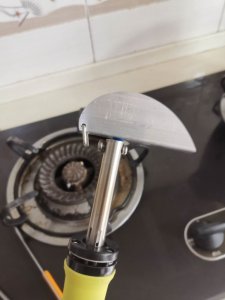
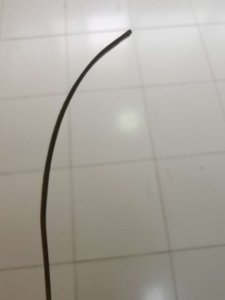
While the wood was soaking, the plank bender from Kolderstok was brought to operating temperature. And let me assure you - this is the best 45 Euros that I have ever spent. The plank bender is in essence a soldering iron with two fittings for drying and shaping planks. The rounded headpiece is shown above . As soon as it has become sufficiently hot, simply insert in the one end of the plank into the little ring attached to the head and gently bend the plank around the head. As soon as the plank is removed, it has its required shape, and is dry, ready to be installed.
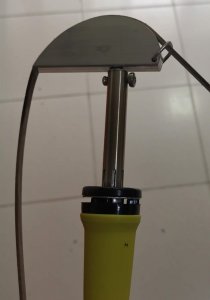
Build 238.jpg

Build 239.jpg

Plank ready for installation. The exact curvature, how sharp the angle must be, etc. are all determined by the user.
Build 240.jpg

Build 241.jpg

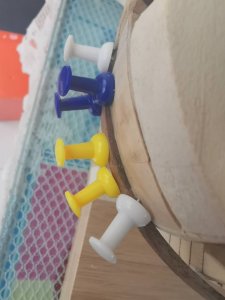
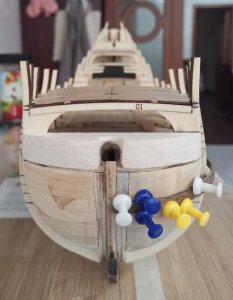
Plenty of push pins were used to secure the plank while drying. At this point I really appreciated all the hard work that went into the basswood filler block as I felt much more at ease that once driven home, the pushpins were not going anywhere.
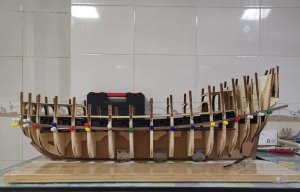
Build 242.jpg

And the first plank is laid.

The vertical bending is a LOT more difficult. The plank is again thoroughly brushed with cold or lukewarm water until pliable, bent by hand into the correct curvature and secured with the help of numerous push pins attached to the bulkheads. Then it was a case of walking away and waiting for the plank to dry completely into its correct shape and before any gluing could occur. Once finally glued, it was again a case of walking away and waiting at least 4 hours for the glue to dry. Yes, if there was a second layer of planks, I could have used CA which would have hurried matters along greatly, but seeing that I have NEVER been able to apply CA neatly, this was not an option.

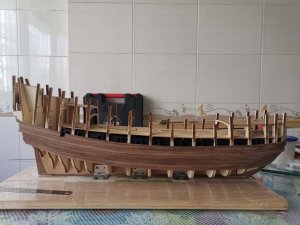
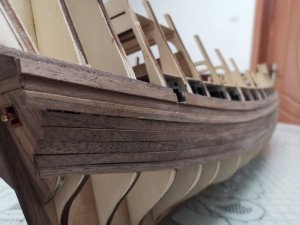
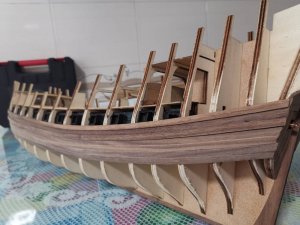
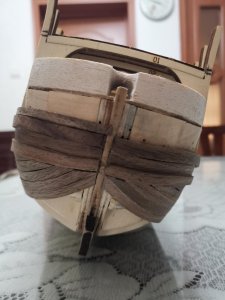
So for two weeks that was my life. Most days I laid two planks (one on either side), some days three and even four on one momentous occasion! :D And that brings us to the point where I am now - fourteen days of work, 15 minutes of posting! 21 planks are laid. What the strory does not tell is all the headscratching, refitting, wrongly cut planks especially as I was trying to figure out HOW and WHERE the "verlore gangen" (Dutch) - literally translated as "Lost planks" (No, not dropped planks) should go. Now I am as low down on the hull as I can comfortably work on my building board. To go further, I will have to fabricate some sort of "jig" that will allow me to turn the ship upside down. So, I have decided to continue planking from the top wale upwards for the time being. Here are the progress shots.
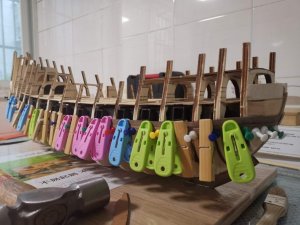
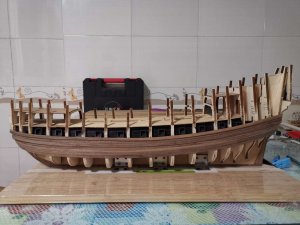
WeChat Image_20200420135914.jpg

WeChat Image_20200425180901.jpg

Port side - lightly sanded.

WeChat Image_20200429025913.jpg

Starboard side - not sanded at all.

WeChat Image_20200429025907.jpg

Rear - Quarter view starboard side.

WeChat Image_20200426133340.jpg

Rear-Quarter view port side.

WeChat Image_20200429025901.jpg

Bow symmetry. The little gaps will hopefully disappear after a thorough sanding - remember ... no filler can be used!
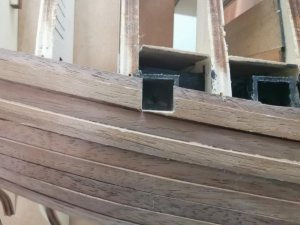
WeChat Image_20200429025846.jpg

First gunport opened up. This presents its own challenge and will take me a long time to do the way that I want it done.

So please bear with me if I don't post as many updates as before, This to me is the crucial part of the build and one that requires all of my concentration. I still follow the forum whenever I take a break and I wish you everything of the best with all of your builds and projects.

Thank you for visiting my log and for following - it is greatly appreciated. And remember - comments AND criticism are always welcome!

Kind regards - Heinrich
 
Hello Heinrich,

Considerably small update becomes really huge and awesome! Great job planking - looks smooth and even. Challenges make our hobby captivating!
 
Thank you very much for your kind words, Jim! It is really appreciated! I agree with you 100% about the challenges. In this case, I am challenging myself - the kit is absolutely great to work with. The bulkheads all line up, everything is symmetrical and the structure is strong; so it is my own ability that is challenged ! :)
 
Good work Heinrich.
To close the gaps you can mix up some sanding dust from the planks with pva and fill the gaps with it.
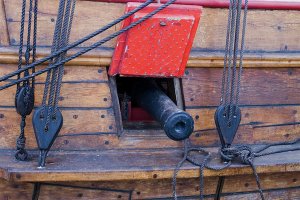
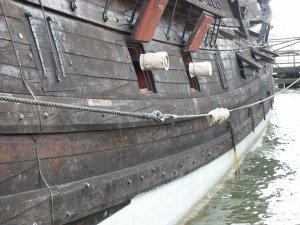
One remark about the planks around the gun ports is to cut the planks a little shorter to create a gun port seal. In this way you create much more detail.
 
@Maarten Hi Maarten. Thank you very much for the kind words. I have read about the trick with sanding dust and PVA and will certainly try that. Does the PVA have to be diluted and if so, in what ratio do you recommend?

I'm not sure exactly what you mean by "shorter". Do you mean so that the hole is smaller? The gunports still need to get a red-painted lining of 1mm x 3mm inside them.

Many thanks in advance and kind regards - Heinrich
Greetings heinrich. We have already discussed the shape of gunports at the stern. O.
střílna Duyfken.jpg

gunport batavia.jpg
 
@Maarten Hi Maarten. Thank you very much for the kind words. I have read about the trick with sanding dust and PVA and will certainly try that. Does the PVA have to be diluted and if so, in what ratio do you recommend?

I'm not sure exactly what you mean by "shorter". Do you mean so that the hole is smaller? The gunports still need to get a red-painted lining of 1mm x 3mm inside them.

Many thanks in advance and kind regards - Heinrich
Hi Heinrich, the red painted lining creates the same effect of you place these slightly recessed.
I would not dillute it, then it becomes a kind of wood putty in the same color as your planking.
 
Back
Top