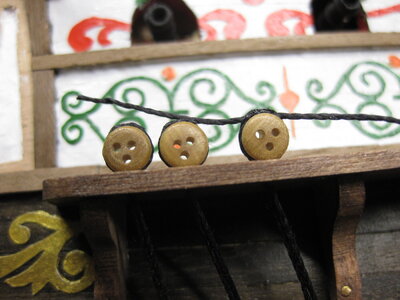
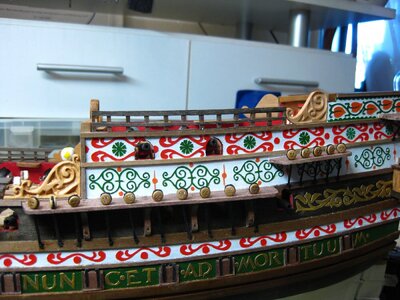
VOC SPIEGELRETOURSCHIP BATAVIA 1628 - KOLDERSTOK 1:72

I hope the uncertainty gets resolved soon. Sterkte!
Thank you very much Johan. A decision HAS to be taken in the following week and I will obviously keep you all posted.

As far as the video goes - thank you very much for that. I can't watch any YouTube videos in China, but our members can. As long as they are enjoying the video and find it interesting, that is all that matters to me!

So thank you so much for posting the video.
 
Wow... I just saw the first 30 minutes. And it is fantastic. I understood why Heinrich is fascinated with this ship.

Thank you for posting this video. I will watch the last 30 minutes tonight. Fantastic!!!

Cheers
Daniel
Great stuff Daniel! There is nothing like relaxing late-night with a good video or book. And you are right - there is plenty to find fascinating when delving into its history.
 
Just saw the four-part video of the Batavia. And why did you want to build this ship? She was better off left at the bottom. We all seem to be building sunken ships. What’s with that?
 
@Vfordyce As to building sunken ships - you have a very good point! :)However, I am just using the Batavia as basis for my build - I am building the Haarlem (built by the same master shipwright, in the same shipyard - 8 years later than the Batavia (1636). The Haarlem had a much more successful career - she sailed at least for 11 years before she was wrecked off the coast of South Africa in 1647. Not many lives were lost and the 60 men who stayed behind (voluntarily) were the ones who advised the VOC to start a Halfway Station at the Cape - which became South Africa.

So, my intentions were all good! :p
Yeah, I was just kidding, anyway. The most popular ships seem to be the ones that have been brought up or that still exist, possibly because we have so much information available on them.
 
Right ... back to the Haarlem.

I have mentioned that courtesy of @pietsan Piet Sanders on Modelbouwforum that I have discovered a new way (or new to me at least) way of attaching the deadeyes to the chainplates and the hull. I first wanted to try it out, before posting anything, but now that I have done one, I can tell you it works like a charm!

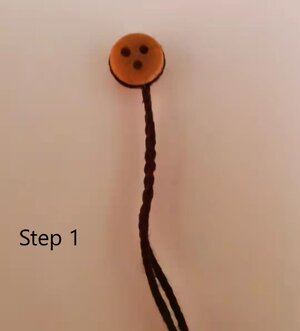
Step 1.jpg

The first step is to wrap the deadeye in rope as per normal (yes, you have read right - no more unsightly and ungainly brass wire that has to be twisted and soldered! In this case, I have used 0,5mm brown rope.

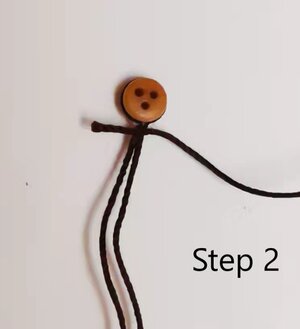
Step 2.jpg

Next a piece of rope (Piet suggests 0,3mm) is attached to the rope directly underneath the deadeye ...

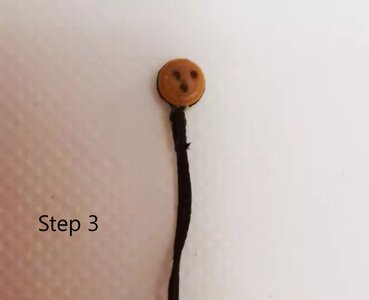
Step 3.jpg

... and secured with a number of windings. In this case I have used 4 windings. This is important as you have to use the same number of winds on all deadeyes - that way they will stand at identical heights from the chainplate.

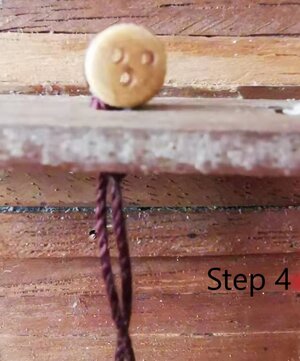
Step 4.jpg

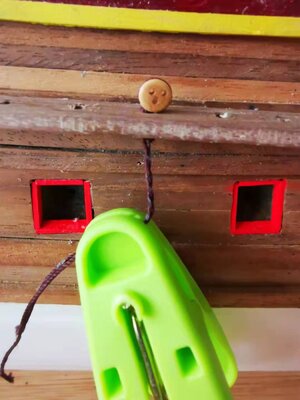
The two strands of rope are then simply inserted through the pre-drilled hole in the chainplate.

微信图片_20211102090246.jpg

The two strands of rope are then lightly coated with white PVA glue and turned together to form a natural twist. You will keep on twisting until the rope is tight but not so tight that it distorts its shape. Now you simply wait a few minutes for the glue to bind the windings and with the glue still damp insert the twisted rope into the pre-drilled hole in the hull.

b14560400647c4c7aff1562c07bc491.jpg

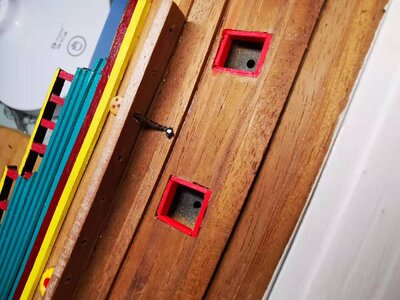
And all that is left is to secure the rope with a brass nail - the head of which can be blackened with a touch of black paint once fully inserted. And voila!

bf6f956c3fb1eee88c165a8ead0bf7f.jpg

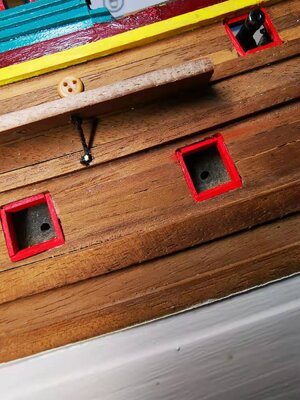
If there is a better or easier way to do this, I have yet to find it! Thanks Piet!

2c8a20b73f77012e28cc0e3d8a50bab.jpg

cfe2eea462ceeed01204a763f316600.jpg

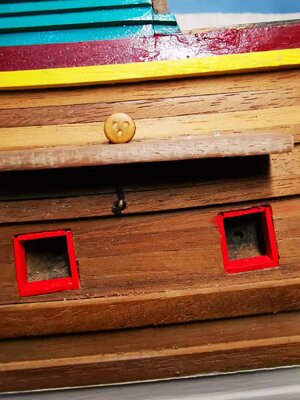
Now I can get moving on the rest of these.
 
Right ... back to the Haarlem.

I have mentioned that courtesy of @pietsan Piet Sanders on Modelbouwforum that I have discovered a new way (or new to me at least) way of attaching the deadeyes to the chainplates and the hull. I first wanted to try it out, before posting anything, but now that I have done one, I can tell you it works like a charm!

View attachment 266581

The first step is to wrap the deadeye in rope as per normal (yes, you have read right - no more unsightly and ungainly brass wire that has to be twisted and soldered! In this case, I have used 0,5mm brown rope.

View attachment 266582

Next a piece of rope (Piet suggests 0,3mm) is attached to the rope directly underneath the deadeye ...

View attachment 266583

... and secured with a number of windings. In this case I have used 4 windings. This is important as you have to use the same number of winds on all deadeyes - that way they will stand at identical heights from the chainplate.

View attachment 266584

The two strands of rope are then simply inserted through the pre-drilled hole in the chainplate.

View attachment 266585

The two strands of rope are then lightly coated with white PVA glue and turned together to form a natural twist. You will keep on twisting until the rope is tight but not so tight that it distorts its shape. Now you simply wait a few minutes for the glue to bind the windings and with the glue still damp insert the twisted rope into the pre-drilled hole in the hull.

View attachment 266586

And all that is left is to secure the rope with a brass nail - the head of which can be blackened with a touch of black paint once fully inserted. And voila!

View attachment 266587

If there is a better or easier way to do this, I have yet to find it! Thanks Piet!

View attachment 266588

View attachment 266589

Now I can get moving on the rest of these.
Aha, the instructions for my ship also say to use the brown rope but it wasn't clear if they twisted the two pieces together, I think I will do the same thing, thank you for sharing.
 
@RichieIt's a pleasure Richie and it is as secure as any brass wire twisted around the deadeye.
 
I used this method on my galeon. But..... sorry to say. You do it wrong. You start on the deadeye, but you should be start on the nail the same way you discribe. And end with a half stich on the deadeye. And secure it with a drop of glue. Keep the rope straight from nail to deadeye, not twisted together. So it wil looks like 2 steel bars going up next to eachother. After you did all ropes, a little Black paint on the rope complete the suggestion of steel bars.
You will discover that do it so, you can better positioned the nails and all the ropes will be straight up.
This is the way Piet did discribe it.
 
@Steef66 Hello Stephan. Nope, not this time. Here is @pietsan Piet's tutorial as he executed it on the Willem Barentsz:

De puttings worden gemaakt van 0,5 mm bruin draad van Kolderstok, links op de foto (A) dit draad word om de juffer gelegd waarna ik een bindsel maak van 0,1 mm ook bruin draad (B) en het bindsel word gelegd bij (C). Om de puttings allemaal even lang te maken tel ik de slagen van het bindsel voor iedere juffer, (D)

English:

The puttings are made of 0.5 mm brown wire from Kolderstok, left on the photo (A) this wire is laid around the deadeye after which I make a binding of 0.1 mm also brown wire (B) and the binding is laid at (C). To make the puttings all the same length I count the strokes of the binding for each deadeye, (D)

JPG_1660_6360_bewerkt-1.jpg

Vervolgens smeer ik ong. een cm van het draad wat ik eerst ineen heb gedraaid in met witte houtlijm, waarna het overtollige draad word afgesneden,

Then I cover approx. a cm of the wire that I first twisted together with white wood glue, after which the excess wire is cut off,

JPG_1663_6363_bewerkt-1.jpg

Daarna word het eindje met de lijm die nog niet droog is in één van de gaten in het berghout gestoken,

Then the end - with the glue that not yet dry - is inserted into the corresponding hole in the hull (wale),

JPG_1664_6364_bewerkt-1.jpg

Waarna de putting met een nageltje word vast gezet en geborgd,

After which the whole assembly is secured with a nail.

JPG_1670_6365_bewerkt-1.jpg

Daar de nageltjes wel zwart zijn maar enigszins glimmen tip ik ze aan met mat zwart nr. 33 van Humbrol,

Even though the nails are black in color, they are somewhat shiny so I touch-up the heads with Matte Black No 33 from Humbrol.

JPG_1661_6361_bewerkt-1.jpg

So my assembly is spot-on. The only mistake I made is to say that Piet uses 0,3mm rope for the binding, when he in fact uses 0,1mm.
 
This rope method looks so much easier and neater in my view. Is it ship dependent?
Hi Grant. I honestly don't know if it is ship dependent, but I can't see why it would be. This way you can execute a virtual perfect assembly without distortion and soldering of wires. You also ensure a perfect fit around the deadeye.
 
I used this method on my galeon. But..... sorry to say. You do it wrong. You start on the deadeye, but you should be start on the nail the same way you discribe. And end with a half stich on the deadeye. And secure it with a drop of glue. Keep the rope straight from nail to deadeye, not twisted together. So it wil looks like 2 steel bars going up next to eachother. After you did all ropes, a little Black paint on the rope complete the suggestion of steel bars.
I think there's nothing wrong with either method. To me the results of both described methods are comparable in the sense that one will have a knot somewhere, either on top of the deadeyes or below the nails through the hull, beneath the chainplates. At the end of the build the knots will be obscured, either by the lanyards or by the chainplates, so, in my humble opinion, it's whatever method works for you ánd pleases your eye (and most importantly, the Admiral's eye) is the one to work with.
And, every method will have it's pro's and it's cons, which is kind of a cliché, but no less true.
Have fun!
 
@RDN1954 Hi Johan. There is no knot with Piet Sanders's method at all. The only reason why it may look like a knot on my execution is because if I have not yet cut off the excess rope.
 
Piet explains.

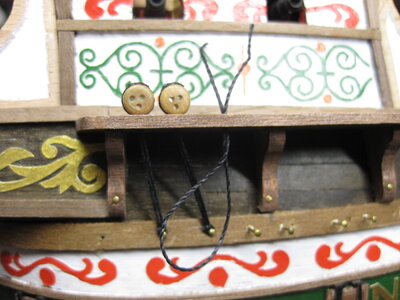
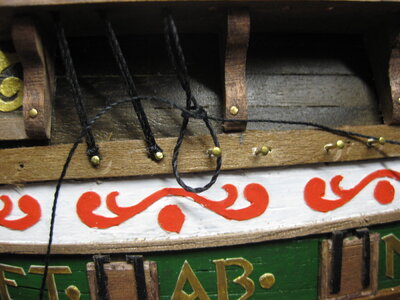
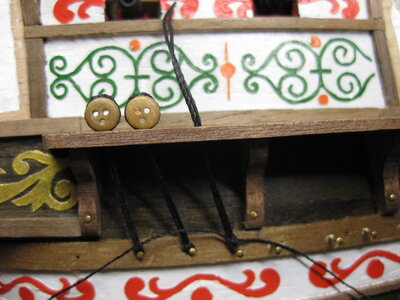
Omdat hier de gaten in de rusten zijn geboord gaat het iets anders; ik sla de nagel in het berghout waar het putting ijzer aan vast komt niet helemaal vast en leg daar het touw omheen waarna ik de nagel vast tik en het touw dus op die manier aan de onderkant al vast zit. Dan haal ik de twee eindjes van onder naar boven door het stropgat en leg het om het jufferblok en leg er dan een halve steek in die ik fixeer met een beetje slow-zap (sec. lijm) waarna ik de losse eindjes met een scherp hobbymesje afsnij. Daarna leg ik met een dun touwtje een heel klein bindsel om de dubbele draad onder tegen de nagel zodat het touw bij elkaar word getrokken wat ik ook fixeer met een klein druppie lijm en de losse eindjes weer wegsnij. Misschien voor velen ietwat bewerkelijk, maar wel een mooi resultaat als het klaar is en het voordeel van touw is dat het altijd past en je de juffers allemaal even netjes en strak op de rusten kunt plaatsen exact op de zelfde hoogte te zien op de foto's

Because the holes in the rests are drilled here, things are a bit different; I drive the nail into the mountain wood where the putting iron is attached to not completely and put the rope around it, after which I tap the nail and the rope is already attached to the bottom that way. Then I pull the two ends from bottom to top through the noose hole and put it around the damsel block and then put a half stitch in it which I fix with a little slow-zap (sec. glue) after which I cut the loose ends with a sharp hobby knife cut off. Then I put a very small binding with a thin string around the double wire under the nail so that the rope is pulled together, which I also fix with a small drop of glue and cut the loose ends away again. Perhaps a bit laborious for many, but a nice result when it's finished and the advantage of rope is that it always fits and you can place the damsels neatly and tightly on the rests at exactly the same height as seen in the photos

Pdf of other method
 

Attachments

Back
Top