Willem Barentsz by Kolderstok AD 1596

Todays progress report:

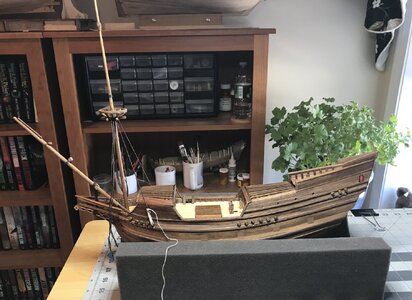
1) Added the 28 (14 to a side) deadeyes. Lot's of bad words required to place the fastening nails that hold the deadeyes in place :mad::mad:

2) Added the bowsprit and uttered more bad words while trying to get the gammoning right. :mad::mad:

View attachment 425168

Another build step completed.

Jan
I was looking for the "Double-Love button", upon seeing this picture. Jan, your WB looks incredible. You are absolutely right when you say that there is a glow emanating from that hull. I tell you; you just cannot beat Kolderstok's walnut for quality wood and incredible finishing!
 
My stock of bad words needs constant attention in order to avoid being short of this useful toolset. I need them in every stage of any build and they are used to highlight and rectify any issue I might encounter.
Can't say much about the deadeyes and the bowsprit installation, but they appear to be just fine.
Steady as she goes, Jan.
I think you are spot on with the bad word theory. It's a very useful tool set indeed.
I was looking for the "Double-Love button", upon seeing this picture. Jan, your WB looks incredible. You are absolutely right when you say that there is a glow emanating from that hull. I tell you; you just cannot beat Kolderstok's walnut for quality wood and incredible finishing!
Indeed the walnut in the kit is great to work with. I really like the look of the oil finish.

Jan
 
Todays progress report:

1) Added the 28 (14 to a side) deadeyes. Lot's of bad words required to place the fastening nails that hold the deadeyes in place :mad::mad:

2) Added the bowsprit and uttered more bad words while trying to get the gammoning right. :mad::mad:

View attachment 425168

Another build step completed.

Jan
Good morning Jan. The Danish oil look is WOW. I have a spare bad word jar if you need one. Not much going on in Grants shipyard at the moment…ROTF. Cheers Grant
 
I have a spare bad word jar if you need one
Thank you for the offer of the bad word jar. I probably wouldn’t have difficulty filling a second one. The hull has 14 deadeyes per side. The deadeyes are wrapped in a black wire with the ends twisted and then inserted in the appropriate hole in the hull. A small nail is then inserted to fasten the deadeyes in place. That’s where the bad words started. Tweezers, small nails, mini needle nose pliers, push pin tool, etc., little bitty nails and big fingers all contributed to the words as those little nails inadvertently slipped out of those tools to never be seen again.

The photos in the build manual.

4C2A7B34-BE5E-412A-8FD3-90793745EDD4.jpeg
4E7C8C31-3C4F-4410-9A91-E0ED6BB21835.jpeg

No putzing around in the boatyard in my socks until I vacuum the rug.

Jan
 
OPINON NEEDED: Danish Oil application

@Heinrich, @Kolderstok.

This is the result of applying the second application of Danish oil. I waited 24 hours plus before lightly sanding the first application and applying this coat. I've never worked with Danish oil and I'm wondering how many coats to apply. Three, four or more?

I've stained the masts with MinWax light Oak stain do I apply Danish oil to those also?

View attachment 424509

Jan
The wood will soak up the oil until it is saturated. At that moment a thin film will occur on the surface which gives the wood a full and slightly “fat” tone. Be careful here, as this will not show evenly over the surface, and therefore isn’t always nice. I think two or three layers are enough to create a rich and natural tone to the wood without giving it a layer.
Btw Danish oil is a mix of Tung oil and some other natural oils (one of them linseed, as far as I can remember), this all diluted with a natural turpentine.
Thank you for the information. I decided two coats would be sufficient. So far I like the outcome.

Jan
 
Oh Boy, busy time in the household. Moving books, bookcases, wall hangings, etc., Painters coming to paint our Den. I did have a bit of time here and there to work on the WB.

The start of the "fun" stuff. Started with the placement of the shrouds for the Fore Mast. I added the deadeyes to the single shrouds P&SB. But couldn't figure out how to keep the tension the same on both sides.
Looking at the build instructions the next step in the rigging procedure was the Fore Stay. I thought placing that now would help with the tension problem. Hmm, that presented a new challenge.

IMG_4190.jpeg

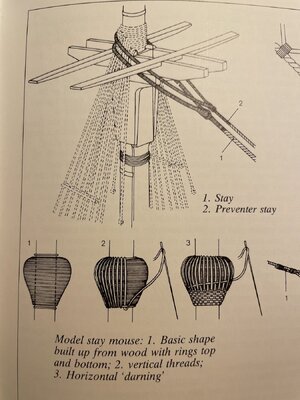
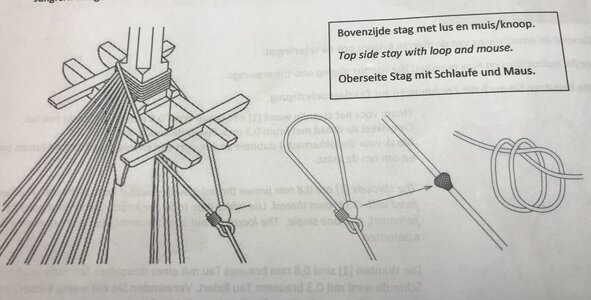
The build instructions showed a "Top side stay with loop and mouse".

IMG_4191.jpeg

MOUSE?????

Time for research. I checked all the rigging books (2) in my vast model shipbuilding library, searched SOS postings for "mouse", read all of the postings on various methods to create one of those critters and wondered how a "Novice" was going to go about it.

The "Jan" method.

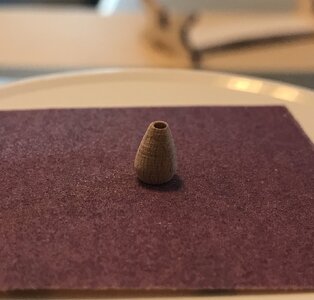
Cut a piece of 5mm dowel to a guesstimated length after drilling a .8mm hole through it.
Insert a toothpick into the little bitty dowel piece.
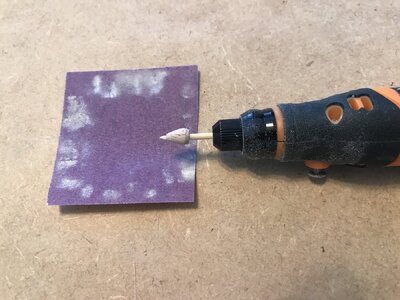
IMG_4192.jpeg
Chuck the toothpick with dowel piece into a small cordless drill.
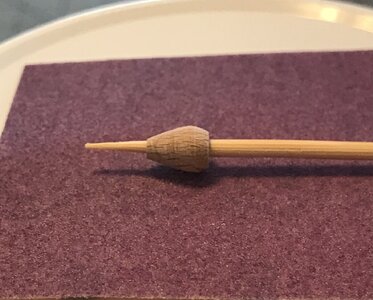
Sand the dowel piece to mouse shape via 220 grit sand paper.

The almost finished product.

IMG_4196.jpeg


IMG_4195.jpeg

Viola, the "Jan" mouse. My next step is to "wrap" this little critter.

Jan
 
What an excellent "Mouse", Jan! The WB is really bringing your artistic talents and creativity to the fore. That is a great outcome and will look splendid on the little ship.
 
What an excellent "Mouse", Jan! The WB is really bringing your artistic talents and creativity to the fore. That is a great outcome and will look splendid on the little ship.
Hi Heinrich. Yup that little ship is working on my imagineering. I really had to think about creating that little critter.

Jan
 
Agreed 100% - Jan is clearly loving this build and with it go the increased confidence levels.
Heinrich my friend you have a lot to do with my thinking outside of the "BOX". I am grateful for your "mentoring".
Excellent Jan! When I joined this forum a couple of years ago you would have never attempted that level of detail: AND THEN YOU WENT OUT AND DID IT! Bravo my friend!
You are absolutely right Paul, a couple of years ago I would have tied a "Granny Knot" and bumbled on to the next build step.

Jan
 
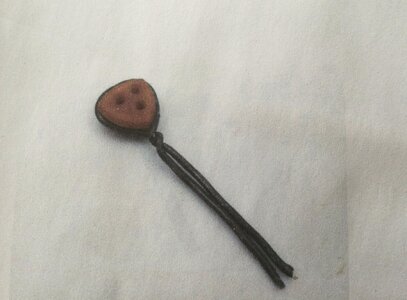
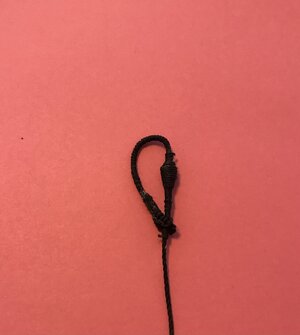
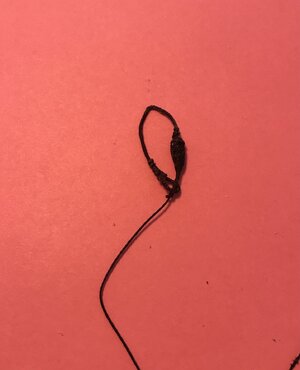
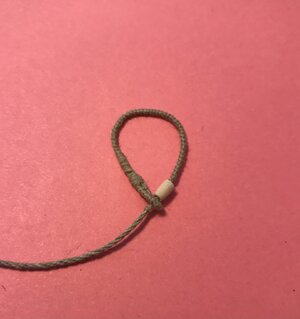
Update on that :mad::mad::mad: Mouse.

It took a lot of imagineering, big bad words and a few unsuccessful attempts, but I think I have a good prototype.

First go around.

IMG_4198.jpeg
Ugh, big and bulky looking.

Second, third and finally fourth attempt.


IMG_4201.jpeg

Still to big and bulky looking.

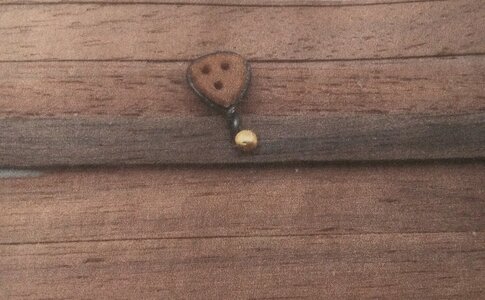
And finally the latest attempt. This one looks like a keeper.

IMG_4204.jpeg

I think when I switch to the kits rigging material and do the final seizing it will look OK as the stay for the Foremast. I think the "mouse" will either be painted the same color as the rigging material or seized with the same colored rigging thread. Haven't imagineered that as yet.

Jan
 
Make sure the loop is big enough to fit over the mast and the shrouds. Otherwise you will add some more new words to your vocabulary :)
Hans, a great suggestion. I took a short piece of the white rigging thread looped it over the mast and the shrouds down through the top and marked where the loop and mouse should meet. It was the only way I could figure out how long to make the seized portion from the eye to the tip of the mouse.

Jan
 
Back
Top