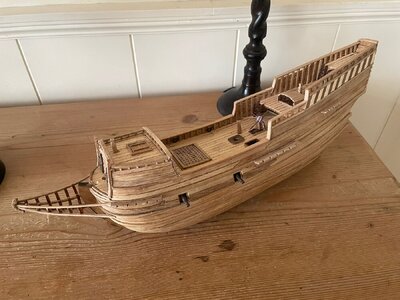
Willem Barentsz by Kolderstok AD 1596

Could you please expand a little on that correlation?
Sure, Johan. Just as Jan's build of his WB was interrupted (albeit only temporarily) by the icebox that had to be moved, Barentsz's journey was first halted and ultimately defeated by the ice when it first halted the ship's progress and then crushed it. In both instances the advent of ice was responsible in the mission being halted or stopped altogether.
 
Sure, Johan. Just as Jan's build of his WB was interrupted (albeit only temporarily) by the icebox that had to be moved, Barentsz's journey was first halted and ultimately defeated by the ice when it first halted the ship's progress and then crushed it. In both instances the advent of ice was responsible in the mission being halted or stopped altogether.
Ah, yes, of course. I was thinking there might have been a bit of a smaller occurrence...
 
I have minor revision in progress. I was having a hard time rigging the first deadeyes on the Fore mast. There was not very much wiggle room with the deadeyes inserted into the hull and I had an awful time trying to insert the lashing thread. So going back to @Heinrich’s log (around page 130 or so) I decided to follow his method and Re-Do all the hull mounted deadeyes.

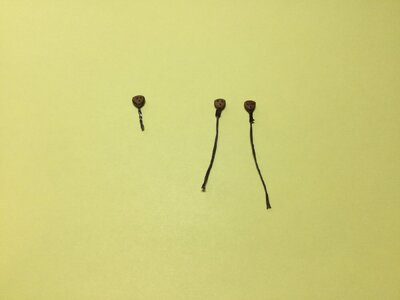
The deadeye on the left is done following the build instructions, wrapping a piece of wire around it and twisting the wire. The ones on the right are done by wrapping a piece of #5 thread around the deadeye, twisting the thread and then applying PVA to stiffen the thread.

96BF1F5E-6423-4984-81DB-60283F769EED.jpeg

5492DD8A-7059-41C7-B376-D7E6A10BF71B.jpeg

Only twenty five more to go.

Jan
 
This is a thing which I had to experience too with a more recent build :)
In the end I placed the deadeye with steel wire, but did not put the nail in and did not fold it to the hull. Then rigging all the threads, fold the deadeye to the hull, put the nail in it, and then bringing it all to tension.
Not the easiest way…

Hans
Kolderstok
I trust it was during the pilot build of the Halve Maen, that you experienced this, Hans. :) Nudge ... nudge ... wink ... wink
 
Aaahh! Finally, all my nudging has paid dividends - a first look at the all-elusive Halve Maen! You were right, Hans - it is very different from the other companies' renderings we have seen so far. Congratulations!
 
This is a thing which I had to experience too with a more recent build :)
In the end I placed the deadeye with steel wire, but did not put the nail in and did not fold it to the hull. Then rigging all the threads, fold the deadeye to the hull, put the nail in it, and then bringing it all to tension.
Not the easiest way…

Hans
Kolderstok
Hi Hans, that sounds like one of my attempts, I unfolded the deadeyes, added the rigging treads, folded the deadeye against the hull and tried to tension the assembly. But I couldn't get the Port or Starboard sides even and in line. So...

Jan
 
Scale is 1:50 , so the same as the WB ship and the Duyfken.
This one is made in oak
Oak will certainly be a build challenge. I like the 1:50 scale to build in. After the WB is rigged the Duyfken is next on my build list. I was hoping to alternate between the two little ships, but I can only work about two hours max when I have a long session. Eyes and hands aren't they what used to be.

Jan
 
Tread lightly Jan. Calling it "Her Hoover" Unless of course you haven't mastered its use and she forbids you using it. :)
Oh it's definately her machine and I have learned to stay out of her way when she is operating the "Hoover". I'm religated to using a small shop vac to "hoover" my shipyard. Something about her not wanting to deal with "itty-bitty-little things on the floor and little piles sawdust".
 
This is a thing which I had to experience too with a more recent build :)
In the end I placed the deadeye with steel wire, but did not put the nail in and did not fold it to the hull. Then rigging all the threads, fold the deadeye to the hull, put the nail in it, and then bringing it all to tension.
Not the easiest way…

Hans
Kolderstok
I think I’m on the right track. I’ve diddled around with this for a week or more trying different versions of tying off the deadeyes and then trying to rig them.
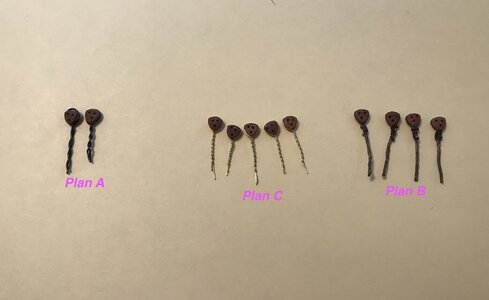
493A1E0F-FAD5-452B-ACA6-A465E0EAF571.jpeg
Wrapping the deadeyes to be inserted into the hull.

Plan A, use the 0.7mm wire supplied in the kit.
Plan B, use the 0.5 mm rope in the kit
Plan C, use a more flexible 0.5 mm brass wire

Plan A. Twist the 0.7mm wire around twenty eight deadeyes, insert deadeyes into hull (14 to a side) and fix them in place with a nail. That build step went very well, no problems there. The start of rigging presented the first problem. The deadeyes were flush to the hull and had to be “adjusted /bent“ out be able to thread the rigging rope and then “adjusted/bent” back in to tension the rigging rope. A nip here and tuck there tensioning the assembly and the deadeye attached to the shroud popped out and disappeared forever in the carpet. So it was onto Plan B.

Plan B, follow Heinrich’s method and redo all twenty eight deadeyes using the thread method, place them in the hull and fasten with a nail. Unfortunately trying to rig them was a worse disaster than Plan A. My poor attempt at wrapping the deadeyes with the cord allowed a quite a bit of flexibility and looked terrible. On to Plan C.

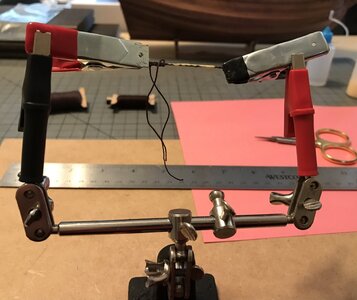
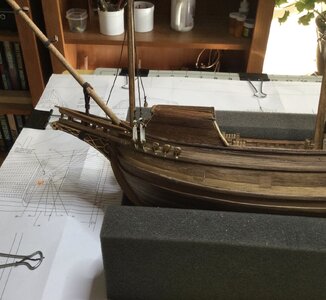
Plan C. Wrap the deadeyes in 0.5mm brass wire. Place enough deadeyes in the hull to rig the foremast shrouds ( note: I’ve gotten smarter after Plan A and B) start the rigging.
4C37BF92-DE4E-4790-9651-36326B830B6E.jpeg
SUCCESS

The softer and smaller diameter wire is more flexible and easier to work with.

Woo, woo, I think I’ve finally got a working plan.

Jan
 
Back
Top