Canoe21
Lawrence
Hello Henrich, Thanks for sharing this is a great picture.View attachment 359349
My all-time favorite picture of Bluenose - in every single respect! This obviously includes the rigging and sail arrangement as well.
Regards Lawrence
 |
As a way to introduce our brass coins to the community, we will raffle off a free coin during the month of August. Follow link ABOVE for instructions for entering. |
 |
 |
The beloved Ships in Scale Magazine is back and charting a new course for 2026! Discover new skills, new techniques, and new inspirations in every issue. NOTE THAT OUR FIRST ISSUE WILL BE JAN/FEB 2026 |
 |
Hello Henrich, Thanks for sharing this is a great picture.View attachment 359349
My all-time favorite picture of Bluenose - in every single respect! This obviously includes the rigging and sail arrangement as well.

Yeah, it took a couple of tries before I was satisfied with the colors. I found a picture somewhere on the internet, plus the rational behind the colors. Green offers better visibility in foggy weather, whereas the yellow color provides visibility against the grey Atlantic Ocean.I'm doing a little catchup here Johan. The port side dory looks way better with the contrasting yellow and green. I too intend to fully rig my BN with full sails, I just don't know yet how I will make them look full of wind.

Howdy Grant,Good morning Johan. Have you taken a shipbuilder’s sabbatical? Hope everything is all good with you guys? Cheers Grant

Good evening Johan. Holidays are always good. I know that feeling of ….how do I make this…. Happens every morning when I walk into the shipyardHowdy Grant,
No, not a sabbatical, but the Admiral and I were on a vacation to one of the Canarian islands.
All is well, except for a persist respiratory virus, which is bugging me a little, but rest assured, work on the BN started again.
The break gave me time to think about a lot of how-to's: how to make mast hoops, how to make all sorts of hardware to be added to the spars. A lot of that hardware is not part of the YQ-kit.
I almost completely left the YQ build instructions for what they are, since I decided to use to the Model Shipways drawings for the standing- and running rigging and the sails.
Quite frankly, I'm also rather anxious for the next steps; there are a lot of parts to be made and I still don't have a clou on how that'll work out. I guess a lot of re-do's and a rapidly filling swear yars are in my near future...
Stay safe,
Johan
 . Seeing what you still have to do I guess some swear jars will be required
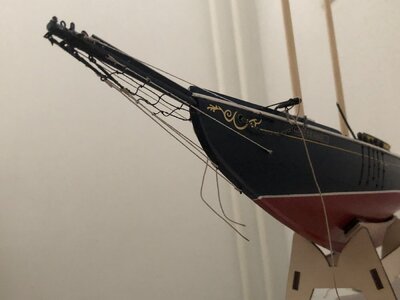
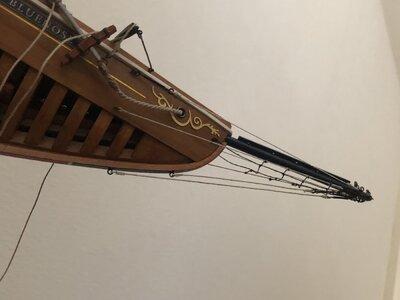
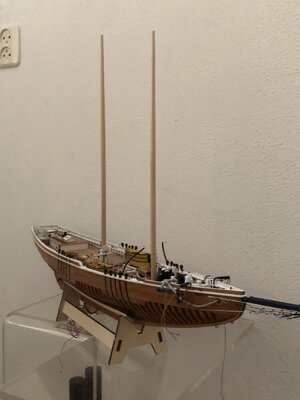
You passed the first rigging chapter in a great way, Johan.The past few days I have occupied myself with the rigging of the bowsprit. It was a little, not-so-little job I've been dragging my feet about, because quite frankly, there's a lot of rope in a very tight space, getting worse by every added rope.
As starting point I used the drawings of Model Shipways, rope diameters included.
I have to be honest though, I had to simplify certain details, because I am most definitely not a dental technician or a watchmaker.
One of the most nasty jobs was adding the footropes and the stirrups. They're in, but they won't win a beauty contest.
Now I started work on the main- and fore-mast details and the masthoops, so it will be a while before I'll be able to show some progress.
From the port side:
View attachment 365832
From the starboard side:
View attachment 365835
Overview from the starboard side:
View attachment 365834

Thanks, Paul. At least I now know why I was dragging my feet: my instincts about this to be a little challenge proven right.It looks very promising to me Johan.
Thanks for stopping by and feel free to come again.The first time I visit this build log. Nice work on you Blue Nose, Looks fantastic. And I can see you don't have a Japanese saw in your workshop. Good
Thanks Peter. A tiny area, that's exactly right. The worst is that at the tip there are 8 lines coming together and requiring proper attachment to the bowsprit. No room to move...You passed the first rigging chapter in a great way, Johan.A lot of fiddling in a tiny area and it looks orderly!
Regards, Peter
Hey Dean, thanks so much. I still need a little tightening for the bobstays from tensioning the fore topmast stay. Other than that it's pretty much okay. I actually searched for working turnbuckles, but making my own was a lot more fun (and somewhat cheaper).Great job Johan! Not easy to get all of the ropes tight without working turnbuckles!
Good morning Johan. Awesome to see your BN active again after your break. Ha…now is the “fun” part. Time to get yourself into knots…and your swear jar outThe past few days I have occupied myself with the rigging of the bowsprit. It was a little, not-so-little job I've been dragging my feet about, because quite frankly, there's a lot of rope in a very tight space, getting worse by every added rope.
As starting point I used the drawings of Model Shipways, rope diameters included.
I have to be honest though, I had to simplify certain details, because I am most definitely not a dental technician or a watchmaker.
One of the most nasty jobs was adding the footropes and the stirrups. They're in, but they won't win a beauty contest.
Now I started work on the main- and fore-mast details and the masthoops, so it will be a while before I'll be able to show some progress.
From the port side:
View attachment 365832
From the starboard side:
View attachment 365835
Overview from the starboard side:
View attachment 365834
 . Your BN is a beaut (no doubt ) and I found as I rigged my Victory it adds so much to how the ship looked. The turnbuckles look good and so far so good Johan. Enjoy. Cheers Grant
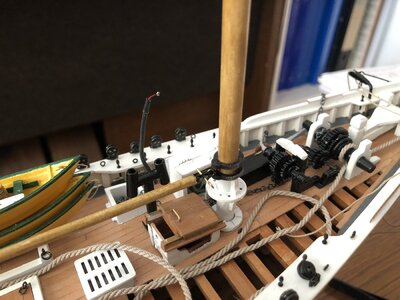
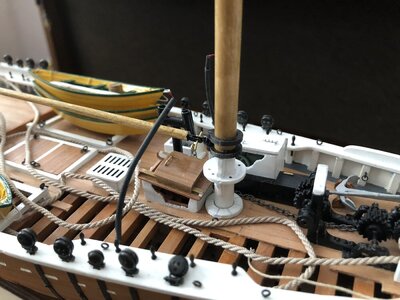
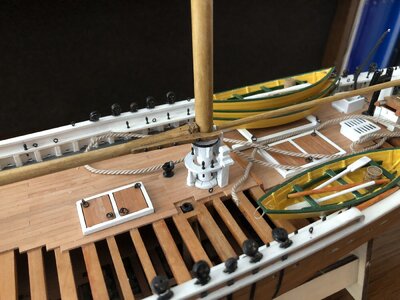
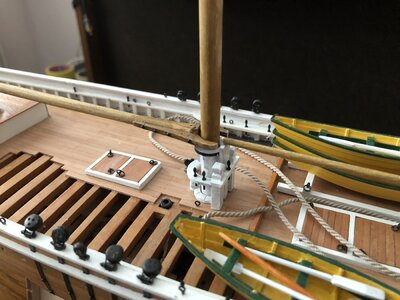
Well, well, that’s a lot of new stuff on your BN, Johan. A solid base with the masts and booms on length. And those mast hoops, what a wonderful job to keep you busy in between. And to make several diameters.After rigging the bowsprit, work on the spars began in earnest, with the odd little job to complete all the various deck components. I use those little jobs as stop-gap activity.
The lower fore- and main mast spars have been provided with the hardware to support the fore- and main booms.
I fabricated a simplified fore boom hinge, in between the very simple YQ solution and the rather complex configuration per the MS drawings. The interface per the MS drawings was maintained though, since I plan to use the MS rigging schemes.
Below two pictures of the foremast with the fore boom temporary installed.
Several parts had to be fabricated, amongst others the fife rail (more nails required than per the YQ instructions) and the mast foot rosette.
View attachment 366542View attachment 366544
Below two pictures of the main mast, with the main boom support in place. In order to check the boom/mast interface, I attached the necessary parts to the boom. The boom is also a temporary install; still requires a lot of details to be added.
View attachment 366543View attachment 366546
Before continuing my journey upwards I into the masts, towards the tressles, I first needed to fabricate the mast hoops. It will not be possible to install those at a later moment.
The mast hoops are not part of the kit, so I needed to make my own.
I've seen xamples of people, making them from wood, almost in the same manner as the original hoops were produced.
Being lazyI copied for the most part @Peter Voogt 's process.
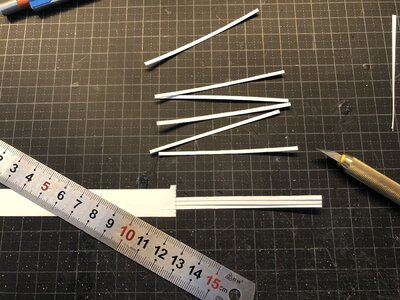
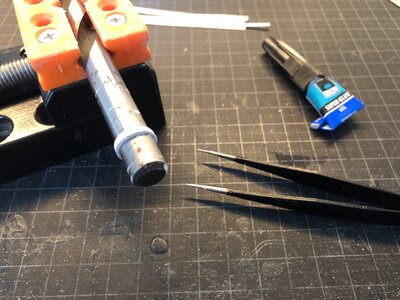
I bought some sturdy sheet of white paper, with a thickness of 0,4mm, 0,0016" and cut strips with a width of 2mm, 0,08" and a length of 74mm, 2,9". The length was determined by wanting to have two complete revolutions around the mast, plus an overlap, with an inner diameter of the hoop of 10mm, 0,39". The overlap is about 5mm, 0,2".
Marking and cutting the strips:
View attachment 366577
Form the strips around a drill bit of dia 10mm, 0,4". I secured the ends with a drop of super glue gell:
View attachment 366578
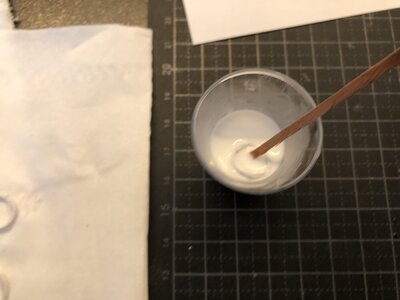
Soak the hoops in a solution of 50% water and 50% D2 wood adhesive.
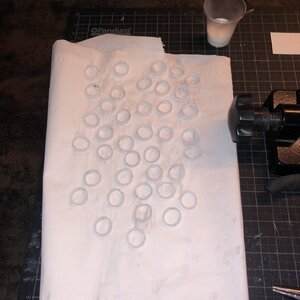
View attachment 366580
And then we let them dry. To seal the hoops I will apply a single coat of white paint, but that's not for now.
I still need to make the hoops for both topmast sails...
View attachment 366628

Yep, the topmast hoops will be about 2mm smaller in diameter.Well, well, that’s a lot of new stuff on your BN, Johan. A solid base with the masts and booms on length. And those mast hoops, what a wonderful job to keep you busy in between. And to make several diameters.
Regards, Peter
Before continuing my journey upwards I into the masts, towards the tressles, I first needed to fabricate the mast hoops. It will not be possible to install those at a later moment.
Good morning Johan. All the little details !!! The boom hinge on the foremast is so good! The main boom looks spot on. You are owning this. Mast hoops and mast bands made from paper or cardboard is the best. It works so well and comes out realistic at our scales. I can’t believe I used copper for my Victory mast bands, it is one of my disappointments- ahh we live and learn right.After rigging the bowsprit, work on the spars began in earnest, with the odd little job to complete all the various deck components. I use those little jobs as stop-gap activity.
The lower fore- and main mast spars have been provided with the hardware to support the fore- and main booms.
I fabricated a simplified fore boom hinge, in between the very simple YQ solution and the rather complex configuration per the MS drawings. The interface per the MS drawings was maintained though, since I plan to use the MS rigging schemes.
Below two pictures of the foremast with the fore boom temporary installed.
Several parts had to be fabricated, amongst others the fife rail (more nails required than per the YQ instructions) and the mast foot rosette.
View attachment 366542View attachment 366544
Below two pictures of the main mast, with the main boom support in place. In order to check the boom/mast interface, I attached the necessary parts to the boom. The boom is also a temporary install; still requires a lot of details to be added.
View attachment 366543View attachment 366546
Before continuing my journey upwards I into the masts, towards the tressles, I first needed to fabricate the mast hoops. It will not be possible to install those at a later moment.
The mast hoops are not part of the kit, so I needed to make my own.
I've seen xamples of people, making them from wood, almost in the same manner as the original hoops were produced.
Being lazyI copied for the most part @Peter Voogt 's process.
I bought some sturdy sheet of white paper, with a thickness of 0,4mm, 0,0016" and cut strips with a width of 2mm, 0,08" and a length of 74mm, 2,9". The length was determined by wanting to have two complete revolutions around the mast, plus an overlap, with an inner diameter of the hoop of 10mm, 0,39". The overlap is about 5mm, 0,2".
Marking and cutting the strips:
View attachment 366577
Form the strips around a drill bit of dia 10mm, 0,4". I secured the ends with a drop of super glue gell:
View attachment 366578
Soak the hoops in a solution of 50% water and 50% D2 wood adhesive.
View attachment 366580
And then we let them dry. To seal the hoops I will apply a single coat of white paint, but that's not for now.
I still need to make the hoops for both topmast sails...
View attachment 366628
