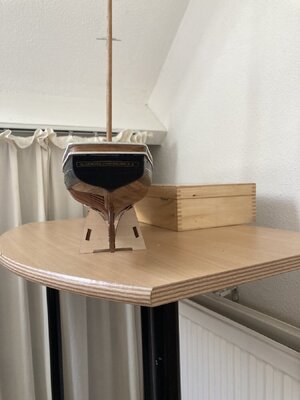
YQ Bluenose Ted R (COM PLETED)

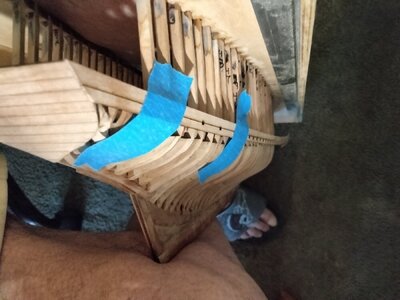
Finished installing the waterways. The port side came out much better than the starboard. Part of the improvement was me going skill (maybe) but the starboard side was not evenly spaced due to damage to the jig upon frame removal.
Happy camper,
TedIMG20240621103915.jpgIMG20240621103911.jpgIMG20240621103848.jpg

IMG20240621103845.jpg

IMG20240621103823.jpg

IMG20240621103836.jpg

IMG20240621103840.jpg

IMG20240621103842.jpg

IMG20240621103819.jpg

IMG20240621103812.jpg

IMG20240621103808.jpg

IMG20240621103755.jpg
 
I'm having problems accessing the stern while working on parts 30, 33 and 34. Sheet 8-1 figures 17 and 18.
Would it be unreasonable to to go one step ahead and remove the hull from the jig to provide easier access to this area.
Ted
 
When I align the transom so that the planking will flow over tightly after it is sanded; the top end of the transom looks too high.
I'm going to try dry fitting the topsides if the planking to try and get a better feel for this.
IMG20240622105350.jpgIMG20240622092211.jpg
 
I glued up parts 31 and 32 and clamped them in place.
Shaped the finish transom using my plank bender and glued in place.
 
Hi Ted
,
This part was what gave me the most problems.

I spent an incredibly long time on this.

First of all, I am not a fan of pre-printed decks.

What I did, I traced this part onto a piece of thin cardboard.

Glued the slats onto this cardboard and kept a little longer than the part itself.
You can choose from 2 options.

Plank the hull and glue the wide extension piece on and sand it towards that, or the other way around.

I chose the first order.

You will soon have to deal with a railing. , which you also have to take into account.
I didn't get the right look at the transom

I solved this by painting the hull black and painting it a little wider with the black paint, which in reality was then added.

Then an extension piece on the open side placed and to extend the black paint a bit

(Cosmetic camouflage as I call it.);)

All perfect, No, but no one who has seen my model has noticed this.

Here is my photo, I hope you can do something with this.

Regards

Henk
Spiegel.JPG
 
Last edited:
Hi Ted. In addition to Henk's post:
I see in your last post that you have already took off the transom part.
The part must be in place much higher.
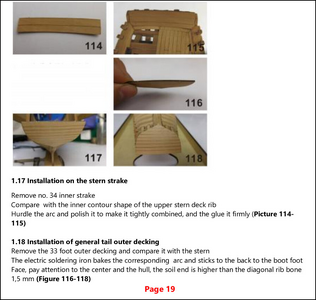
It's documented on page 19:
1719221954419.png
The inner part (see picture 114 + 115) and outer planks (see picture 117 + 118) must be at the same height as the 'spider legs'. Everything was flattened horizontally so that the lower part of the railing would later lie flat on it.
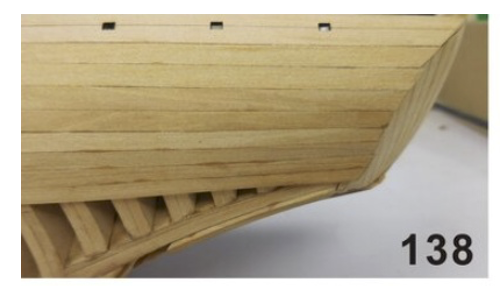
And you have to realize that on the planked side the hull planks have to fit to that rear part.
See this picture from the manual, pag 23:
1719222512100.png
The common option for that planking is that the end of the planks fit over the transom part.

I think that you have to take more time to study the plans and manual.
So, always look a few steps ahead in the manual. That you fully understand 'the why' of what you are doing.

What helped me was taking some hull planks and lay them over the frames and look for the flow of them over the frame to that transom part. From the top where the railing will come to the bottom where the transom parts meets the keel.
Regards, Peter
 
Last edited:
In your booklet see page 19 picture #117& 118. On your redo move the transom down until the two yellow lines match. If it ends up being too low, you can always add a plank on top.

6mdi4j4l.png

This is another of the many tough to get right areas of this ship. Good luck.

I just now see where Peter has already covered this.
 
By
Hi Ted. In addition to Henk's post:
I see in your last post that you have already took off the transom part.
The part must be in place much higher.
It's documented on page 19:
View attachment 455283
The inner part (see picture 114 + 115) and outer planks (see picture 117 + 118) must be at the same height as the 'spider legs'. Everything was flattened horizontally so that the lower part of the railing would later lie flat on it.
And you have to realize that on the planked side the hull planks have to fit to that rear part.
See this picture from the manual, pag 23:
View attachment 455284
The common option for that planking is that the end of the planks fit over the transom part.

I think that you have to take more time to study the plans and manual.
So, always look a few steps ahead in the manual. That you fully understand 'the why' of what you are doing.

What helped me was taking some hull planks and lay them over the frames and look for the flow of them over the frame to that transom part. From the top where the railing will come to the bottom where the transom parts meets the keel.
Regards, Peter
I have been using the hull planks and the part 31/32 aligned with the waterways to come out with the elevation I used. That's why it was installed so low. So that the top of the transom met with the top of part 32.
Thank youz
TedIMG20240624075502.jpg
 
Last edited:
By

I have been using the hull planks and the part 31/32 aligned with the waterways to come out with the elevation I used. That's why it was installed so low. So that the top of the transom met with the top of part 32.
Thank youz
TedView attachment 455310
That’s looking better, Ted.
Another check: that the scuppers are aligned just above the waterways.
Regards, Peter
 
In your booklet see page 19 picture #117& 118. On your redo move the transom down until the two yellow lines match. If it ends up being too low, you can always add a plank on top.

View attachment 455300

This is another of the many tough to get right areas of this ship. Good luck.

I just now see where Peter has already covered this.
Thank you Daniel.
 
Back
Top