YQ Bluenose Ted R

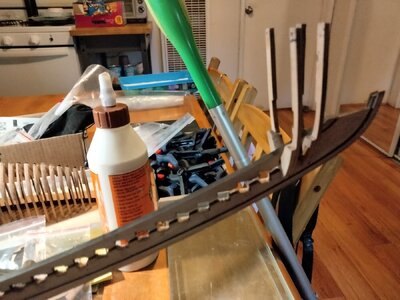
I have a big question. I'm filing the frames to fit the keel. So far this connection has been kept really tight. Now I'm wondering how I'm going to get the frames in one by one with the keel inverted. My current thinking is to complete the frame building/fitting process and then go back and make the connection looser. I don't know how loose and still keep tolerances. I still have to make the marks shown on the individual frame plans
Please advise if in totally off track.
In this post in my build-log I described how I did it:
Installing Frames <— Click
But please look in the other build-logs to find the method you feel comfortable with.
By lifting the jig a bit, be sure the top of the frames are always at the same level of the under side of the jig-plate.
(Consider what it would be like if the plate lay flat on the surface and you could not push the frames down far.)
Regards, Peter
 
Last edited:
Hi Ted, for my method of frame glue up to the keel see my post #125, #166, and #169. Note where I had used a solid board of poplar which is a good stable wood to mount the jig to. At the point of glue up I cut out the center leaving a small ledge for the frames to sit on.
 
In this post in my build-log I described how I did it:
Installing Frames <— Click
But please look in the other build-logs to find the method you feel comfortable with.
By lifting the jig a bit, be sure the top of the frames are always at the same level of the under side of the jig-plate.
(Consider what it would be like if the plate lay flat on the surface and you could not push the frames down far.)
Regards, Peter
Thank you,I will try this with a dry fit
 
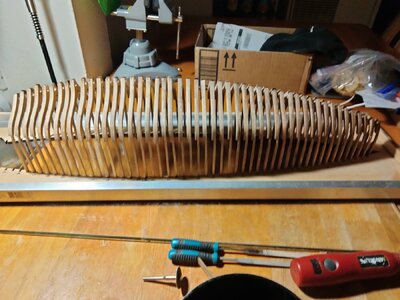
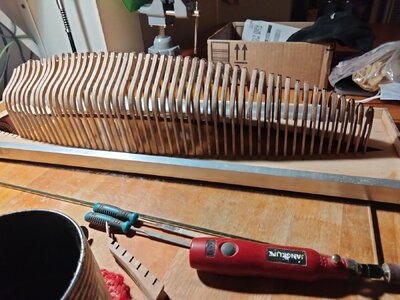
49 frames fitted to the keel and jig. I'm going to go back and do a dry run as if I was glueing up. Will check that the keelson fits at the same time
Kinda proud of myself, this being my second build
Thank you all for the guidance and assistance so far through this project.
Ted

IMG20240405154652.jpg

IMG20240405154647.jpg
 
Looking good Ted.
For the fit of the frames with the keel and keels on parts, I dry fitted each and every frame individually,before attempting assembly of the frames. That way I knew if something didn't go together smoothly, it wasn't caused by the fit of the frame.
Quite a few people, myself included, used distance blocks between the individual frames, about halfway between the jig, holding the frames, and the keel. This to maintain parallelism between the frames during assembly.
 
Thank you, I'm during them individually. Going to disassemble everything and temp install frames one and fifty four. Then go through the assembly process another time checking for and finish. Also going to check the keelson fitment.
Is their some scrap material, or combination of such, that you used for the spacers?
Ted

I used the left over material from the tool, slightly sanded down. I forgot the exact measure though...
 
I'm sanding using 320, 400 and then 600 grit. Should I use a finer grit to achieve the polished finish im seeing in other Bluenose models. I've found very little information on the finish processing the build logs. I think it's my lack of experience to and everyone else it's just common knowledge.
Ted
 
Is their some scrap material, or combination of such, that you used for the spacers?
Hi Ted, I used the waterway boards as a temporary spacer. this is the gap that the ribs must have between them in order for the waterway boards to fit. While this method is not the easiest it is the most accurate. In my case I made sure that what I called the set-up frames, (I arbitrarily chose the first and the 49th frame) were square and plumb relative to the notched jig. The gaps should be dictated by the spacing in the jig as well as the spacing in the keel. The trick is to get the keel exactly above the jig at each gap, which is why I plumed and squared the set-up frames. I also set a string line down the center on the jig to plumb up to on every 4th or 5th frame. Each frame has 3 points of glue down so if your alignment is correct the only problems you should encounter would come from warpage within any given frame. This is where I took advantage of the waterway boards as a helper just prior to glue down of the longitudinal runners.

IMG_2493.jpg
 
Last edited:
Hi Ted, I used the waterway boards as a temporary spacer. this is the gap that the ribs must have between them in order for the waterway boards to fit. While this method is not the easiest it is the most accurate. In my case I made sure that what I called the set-up frames, (I arbitrarily chose the first and the 49th frame) were square and plumb relative to the notched jig. The gaps should be dictated by the spacing in the jig as well as the spacing in the keel. The trick is to get the keel exactly above the jig at each gap, which is why I plumed and squared the set-up frames. I also set a string line down the center on the jig to plumb up to on every 4th or 5th frame. Each frame has 3 points of glue down so if your alignment is correct the only problems you should encounter would come from warpage within any given frame. This is where I took advantage of the waterway boards as a helper just prior to glue down of the longitudinal runners.

View attachment 440310
Very good option, the only drawback being the fragility of the waterways.
 
I think I've got a handle on it now. Maybe I m a little hinky after fighting the twisted keel on the Swift build.
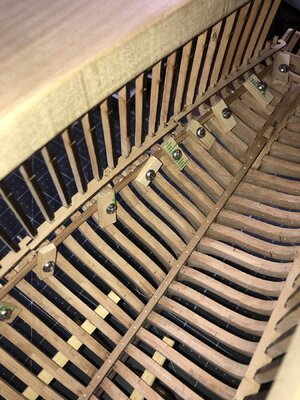
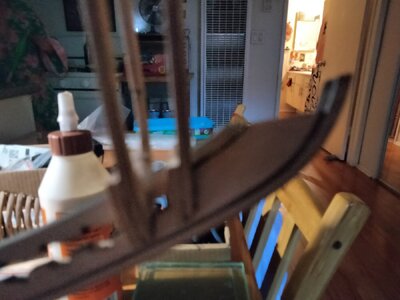
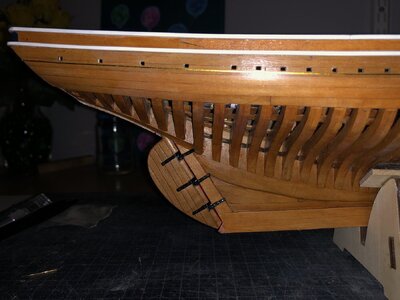
I'm going through and making sure the top of frame keelson is fitting correctly. I can't imagine what a nightmare that would be to sand/file out after glueing. Is the gap between the keel and keelson normal (see second photo.)17124395900025980122317311116836.jpg
Thank you for the training.
Ted17124394815544088776456140841462.jpg
 
I think I've got a handle on it now. Maybe I m a little hinky after fighting the twisted keel on the Swift build.
I'm going through and making sure the top of frame keelson is fitting correctly. I can't imagine what a nightmare that would be to sand/file out after glueing. Is the gap between the keel and keelson normal (see second photo.)View attachment 440322
Thank you for the training.
TedView attachment 440321

Yep, there's a gap between keel and keelsons:
IMG_4283.jpeg
 
Have fitted up to frame 20 to both keel and keelson.
Looking good Ted.
For the fit of the frames with the keel and keels on parts, I dry fitted each and every frame individually,before attempting assembly of the frames. That way I knew if something didn't go together smoothly, it wasn't caused by the fit of the frame.
Quite a few people, myself included, used distance blocks between the individual frames, about halfway between the jig, holding the frames, and the keel. This to maintain parallelism between the frames during assembly.
Do you wait for the glue to set on one frame prior to glueing another?
 
Sorry for so many questions.
Did you install the brass nails in the keelson prior to installing? It looks like it is really tight at the bow if you wait until it is installed l.
 
Back
Top