- Joined
- Oct 1, 2023
- Messages
- 1,138
- Points
- 393


Maybe it's also a good idea to follow Dan's suggestion to overlay the offending frames on the appropriate drawing to check the geometry of these frames, to make sure they are according to drawing. Maybe also check a couple more, like from 44 to 49.I did as you suggested
I believe the elevator of the deck level was caused by me trying to keep the frames tight to the keel instead of firmly anchored to the bottom of the jig level.
I will reassemble take some photos and post them prior to glueing.
View attachment 441891
Thank you
Ted

I'm following both yours and Dan's advice. The frames all compare well. See attached photos of the frames in a stack. Next I'll reinstall, take new photos and ask what you guys think. The bottom tops of the frames are a little worse for wear and tear.Maybe it's also a good idea to follow Dan's suggestion to overlay the offending frames on the appropriate drawing to check the geometry of these frames, to make sure they are according to drawing. Maybe also check a couple more, like from 44 to 49.
Again, take your time; it's gonna bite you if you don't ( personal experience...)
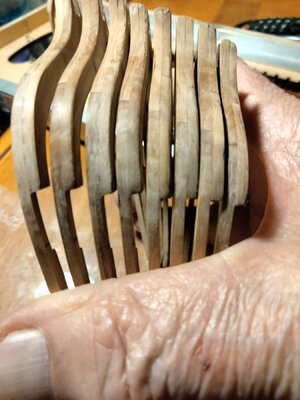
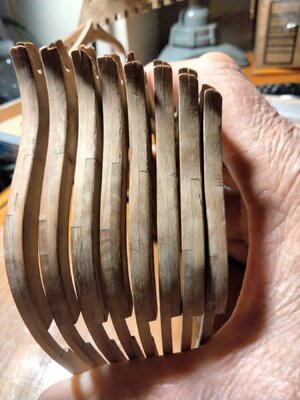

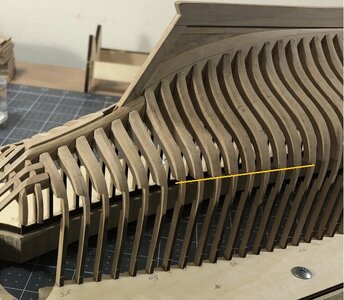

I was thinking the same thing. I believe this is close as I can get it. I had discussed getting replacement with Heinrich but it wast expensive. The imperfections will get me further training when correcting. Im sure the model will be beautiful when finished. I'm learning and having a blast.Ted at this point all I know to do is show you what mine looked like at this stage. I may have had a +- 1mm deviation. Unless someone else has some more suggestions, you will just have to decide how you want to proceed on this one.
View attachment 442086
When it comes time to lay in your upper deck crossbeam supports, I think piece #103. you may run into some additional sanding/filling requirements to achieve the proper elevation for your deck. It is difficult to tell from your photos though. Good luck!

Frames in place but not glued. I think it's good this time. Confirmation would be appreciated.View attachment 442046View attachment 442047View attachment 442048
I was thinking the same thing. I believe this is close as I can get it. I had discussed getting replacement with Heinrich but it wast expensive. The imperfections will get me further training when correcting. Im sure the model will be beautiful when finished. I'm learning and having a blast.
Ps I did get a strake out and checked the fairing and d xk levels. Close but not perfect.
Thanks again.
Ted
Eventually the deck beams will sit on top of four longerons, parts 101 and 102, if I'm not mistaken. These parts sit against the inside of the frames and should be aligned with the transition of the frame, forming the notch. The deck beams are sitting against the fwd face of the frames. So slight deviations to nominal shouldn't be a big bother and, as Dan mentioned, if need be, you can remove some of the offending material.I was thinking the same thing. I believe this is close as I can get it. I had discussed getting replacement with Heinrich but it wast expensive. The imperfections will get me further training when correcting. Im sure the model will be beautiful when finished. I'm learning and having a blast.
Ps I did get a strake out and checked the fairing and d xk levels. Close but not perfect.
Thanks again.
Ted

Thank you,Eventually the deck beams will sit on top of four longerons, parts 101 and 102, if I'm not mistaken. These parts sit against the inside of the frames and should be aligned with the transition of the frame, forming the notch. The deck beams are sitting against the fwd face of the frames. So slight deviations to nominal shouldn't be a big bother and, as Dan mentioned, if need be, you can remove some of the offending material.
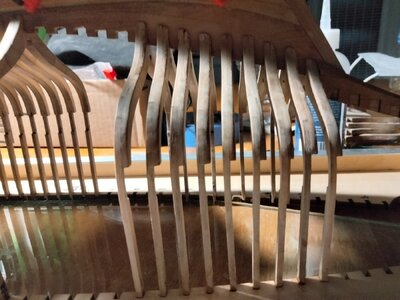
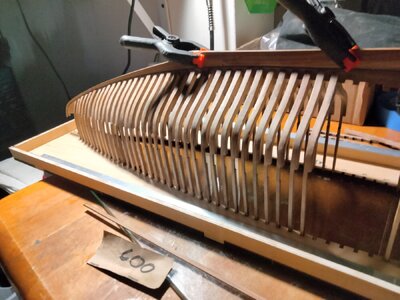
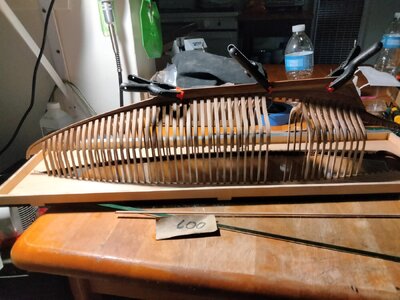

A big step to make the Cathedral-view, Ted. For sure you can be proud.Here's everything up to frame 49. If I had been offered for a lit to come out this good from the start I would have taken it.
I know it's rough and doesn't measure up to the standards of that w site but I'm happy and a little proud.
It's so much better than my first model the Virginia Swift.View attachment 442305View attachment 442306View attachment 442307View attachment 442308View attachment 442309

Thank you. I'm going to study the last parts for the transom on the build logs. Lester did a you tube video but later had fit problems with the same area l.A big step to make the Cathedral-view, Ted. For sure you can be proud.
Regards, Peter

This little bugger can be a pain. It's complex and one needs to pay careful attention to its position on those keel extensions.I'm going to study the last parts for the transom on the build logs.

This little bugger can be a pain. It's complex and one needs to pay careful attention to its position on those keel extensions.
Good luck, Ted
How correct you are. This really fiddley.This little bugger can be a pain. It's complex and one needs to pay careful attention to its position on those keel extensions.
Good luck, Ted
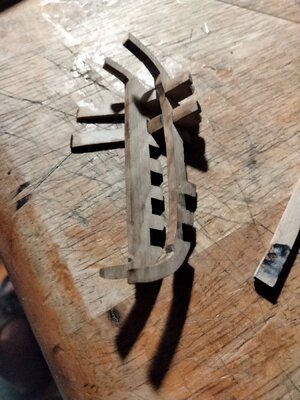


Ok, I'll go with your, and it seems everyone else's recommended way. It looks like it is easier to keep the transom extensions straight that way.It's very much a personal preference, but I made a subassambly out of this one, minus frame 55 and trimmed it before attachment to the keel extensions.
View attachment 442598
View attachment 442599


I'm trying to get mine to look that good
