I wouldn’t blame you. Seems like a lot of work that might not get noticed if the deck is busy.I was not so happy with my San Francisco Cross Section decking. On that one I planked the length of the deck in one piece and used a #11 blade to score the decking in order to simulate individual planks. I just could not do a job that I was pleased with using that technique although I did improve from the lower to the upper deck.
For the BP, I decided to use individual planks. I first decided on the staggering pattern. I find I like a 3 plank repeat so that is what I went with. I did some approximations on scale and actual length of planking a a full sized ship and used that as a base for the length of planks. I adjusted for considerations of spacing on the model. In the end I used 56mm planks on the fore and aft deck and 73mm planks on the main deck. The false deck was lined and marked so that I could see the pattern as I was laying down the planking. I only made one error around the gratings on the main deck, but I caught it before the glue has fully set and made the correction.
One thing I learned was to ensure I had enough glue around the edges of gratings and the overhanging ends of a deck. I have some splintered areas to fix from cutting off the excess planking in those areas.
I have not made up my mind about adding simulated nails to the ends of the planks. I did a worse job on those on my last build than I did with the scoring, so I may just forego doing it on the BP.
-

Win a Free Custom Engraved Brass Coin!!!
As a way to introduce our brass coins to the community, we will raffle off a free coin during the month of August. Follow link ABOVE for instructions for entering.
-

PRE-ORDER SHIPS IN SCALE TODAY!
The beloved Ships in Scale Magazine is back and charting a new course for 2026!
Discover new skills, new techniques, and new inspirations in every issue.
NOTE THAT OUR FIRST ISSUE WILL BE JAN/FEB 2026
You are using an out of date browser. It may not display this or other websites correctly.
You should upgrade or use an alternative browser.
You should upgrade or use an alternative browser.
ZHL Black Pearl Golden 2021 - 1:64 - JeffT [COMPLETED BUILD]
- Joined
- Apr 20, 2020
- Messages
- 313
- Points
- 278

I completed the bow filler pieces per the instructions. As I understand it the fillers are one of the improvements over the original version of the model. A word of caution to future builder of the BP. There are two sets of filler pieces, one set each for port and starboard. They look and are numbered exactly the same. I built and glued the first one and squared it up using the corner a rigid plastic parts box from my last build. No problem. I then build the second one following exactly the same process. As I was squaring it up, I realized that I was using the same corner as I used for the previous piece. A little light in the back of my head went on saying "Wait a minute, that doesn't seem right!" Luckily I noticed before the glue have begun to set that I built the two pieces so that both fit the port side of the ship. I was able to disassemble the part and reglue it in the correct orientation for the starboard side.
View attachment 204396
I glued the small deck on top of the bow fillers and keel.
View attachment 204397
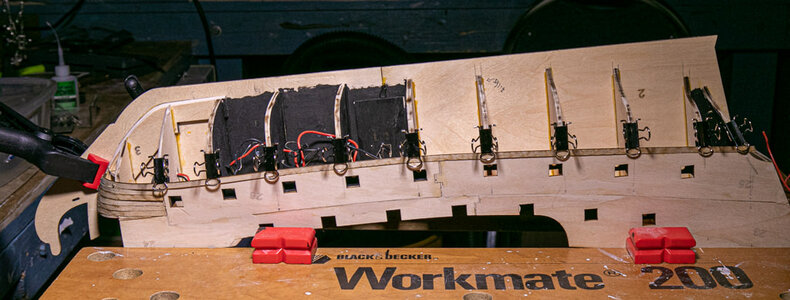
Before adding the bulwarks, I added small wiring for the stern lights using the same technique Reggie used for his BP build. I created a slot for the wiring using filler pieces that will be covered later in the build.
View attachment 204399
I glued the lower bulwarks together and added the gunport backings. A bit of care is needed here as a couple of the backings fit tight to the bulkheads when you add them to the model. I did some dry fitting and it looks like everything will go together OK.
View attachment 204398
Jeff...just a gentle reminder...please make sure your lanterns are mounted as close to the edge as possible. Otherwise, you may have the same problem I encountered with the Zeus casting not having enough room on top of the transom.
How did you mount the ones outside, Reggie?Jeff...just a gentle reminder...please make sure your lanterns are mounted as close to the edge as possible. Otherwise, you may have the same problem I encountered with the Zeus casting not having enough room on top of the transom.
You are doing great job, and progressing quick and fine. I am touched by your motif to build this beauty, since it is almost the same motif I had building the same ship dedicated to my doughter- she told me once that her hreatest wish for her wedding would be me to build for her Black Pearl- she is also fascinated with Pirates of the Carribean like your daughter.
Wishing you a good luck, good fun, your daughter will be proud of you
Below, Black Pearl anchored in my daughter's apartment.
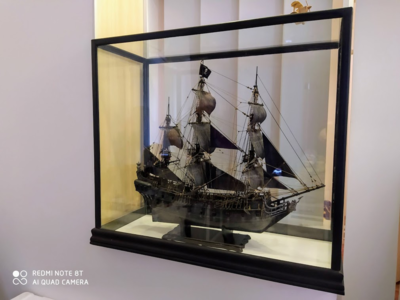
Wishing you a good luck, good fun, your daughter will be proud of you
Below, Black Pearl anchored in my daughter's apartment.

- Joined
- Apr 20, 2020
- Messages
- 313
- Points
- 278

How did you mount the ones outside, Reggie?
Permission to butt in to your thread @Jeff T..... Responding to Vic @Vfordyce .... Vic, I didn't do a good job mounting the two end lanterns on the stern... I put them too much towards the inside so that I was forced to mount the gold ornament at a weird angle, protruding out towards the rear because it was too wide. As to how I mounted them, I just used a good dollop of CA gel... The LED wire served to stabilize the connection also.
Thanks. Sorry, Jeff.Permission to butt in to your thread @Jeff T..... Responding to Vic @Vfordyce .... Vic, I didn't do a good job mounting the two end lanterns on the stern... I put them too much towards the inside so that I was forced to mount the gold ornament at a weird angle, protruding out towards the rear because it was too wide. As to how I mounted them, I just used a good dollop of CA gel... The LED wire served to stabilize the connection also.
No problem. This is good stuff. I will find the right pieces in the parts and do some testing now while it is still relatively easy to fix any problems. I guess I should take the time to reread Reggie's build and make some notes as to where the issues were. I think my wires may not out to the sides far enough based on Reggie's comment.Thanks. Sorry, Jeff.
Yes please notice that your leads for LED for lanterns is not correct... it will not be possible to mount 2 lanters on the stern tr
ansom -- they are actually mounted on the bulwarks near the transom, if you plan lanterns there you will not be able to mount stern decorations- Neptunes with seafish : Here is the correct position for side lanterns as on my Black pearl ....
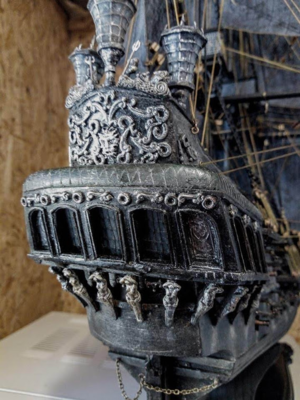
ansom -- they are actually mounted on the bulwarks near the transom, if you plan lanterns there you will not be able to mount stern decorations- Neptunes with seafish : Here is the correct position for side lanterns as on my Black pearl ....

Last edited:
Wow. Where did you get the decorations above the window. They didn’t come in my kit. Also, how did you do the crosshatching on the wood below the transom?Yes please notice that your leads for LED for lanterns is not correct... it will not be possible to mount 2 lanters on the stern tansom -- they are actually mounted on the bulwarks near the transom, if you plan lanterns there you will not be able to mount stern decorations- Neptunes with seafish : Here is the correct position for side lanterns as on my Black pearl ....
View attachment 204523
Reggie and @s.solajic,
Your comments have been heard and here is my solution to fix the problem. I re-cut and re-routed the channels for the wires starting from what I already had. The channels were cut all of the way to the bulwarks. Thanks for the catch, I suspect you saved me a lot of heartache later.
Jeff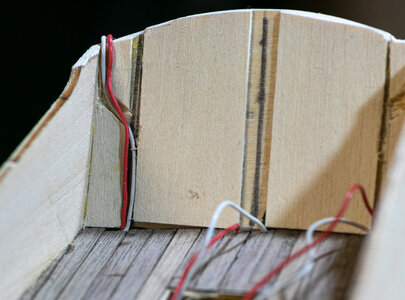
Your comments have been heard and here is my solution to fix the problem. I re-cut and re-routed the channels for the wires starting from what I already had. The channels were cut all of the way to the bulwarks. Thanks for the catch, I suspect you saved me a lot of heartache later.
Jeff

It is a scratch build. not a kit complete build. Decorations on the stern are mixture of modeling baking clays, metalic parts, and some 3D printed partsWow. Where did you get the decorations above the window. They didn’t come in my kit. Also, how did you do the crosshatching on the wood below the transom?
You did am awesome job of creating those decorations.It is a scratch build. not a kit complete build. Decorations on the stern are mixture of modeling baking clays, metalic parts, and some 3D printed parts
I’m not sure if she and her husband will be able to see it or not, but I glued a picture of the two of them behind the windows under the quarterdeck. I‘ll try to get a picture if I can get the right angle.You are doing great job, and progressing quick and fine. I am touched by your motif to build this beauty, since it is almost the same motif I had building the same ship dedicated to my doughter- she told me once that her hreatest wish for her wedding would be me to build for her Black Pearl- she is also fascinated with Pirates of the Carribean like your daughter.
Wishing you a good luck, good fun, your daughter will be proud of you
Below, Black Pearl anchored in my daughter's apartment.
View attachment 204443
Hello Jeff.
I just browsed through your Black Pearl build. I will be very interested in how the LED's look when finished. Good start so far.
I just browsed through your Black Pearl build. I will be very interested in how the LED's look when finished. Good start so far.
Hallo @Jeff TI just started building the ZHL Black Pearl Golden Version 2021. This was inspired by the build logs of Reggie (WarrLight) and Vic (Vfordyce). My daughter who has degrees in film and education just moved her first home and I am building the BP her and her husband as a house warming gift. She was totally enamored with the "Pirates of the Caribbean" series when she was younger, so this seemed like the perfect model. Her house warming gift is likely to be somewhat late to actually be a house warming gift, but I am sticking with that a reason to build the BP. I selected the Golden version of the BP due mainly to the lower price, size, and shorter assembly time.
So I will forego the box inventory. The 2021 version seems to be identical to the 2019 version built by Reggie. As far as I can tell the main difference is the stern decoration which is made of metal as opposed to carved on the stern bulkhead. I inventoried all the parts and found everything to be in the boxes. I started on 26-Dec and will catch up the build log over the next few days.
I started with assembly of the false keel. I was impressed that the keel had no warp. The assembly required gluing the two halves together along with the reenforcing pieces. The supports for the planks at the bow was shaped and glued into position. I am using my old Workmate extensively for this build as it is still very flat and clamps the BP keel well. I used the supplied base board as an additional support.
I dry fit the bulkheads and decks to the keel. Everything fit well. I glued the bulkheads in place using some pine blocks to keep everything perpendicular. The keel went together well.
we wish you all the BEST and a HAPPY BIRTHDAY

I finally finished the first planking on the BP. Lots of distractions the last few weeks since I am back working again after the holiday break. I am not completely happy with the first planking job, but I completed it. I seemed to have some difficulty with the wood strips supplied with the kit. I have a lot of sanding and filling to do, but since I cannot do that in the house, I will have to wait until some time in the future that looks and feels like spring. There is currently about 2-3 feet (0.6-1 m) of snow outside my back door where I usually do my sanding.
I will be doing some other things over the next month or so such as the gun carriages and possible some of the masts although I have the same problem with sanding the masts.
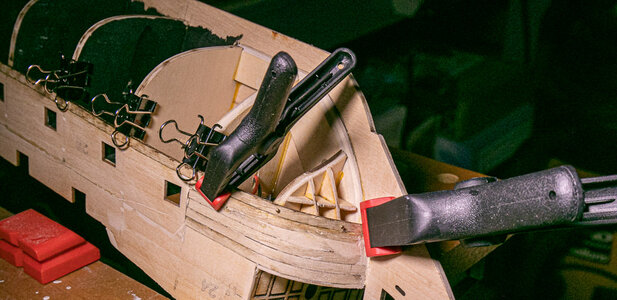
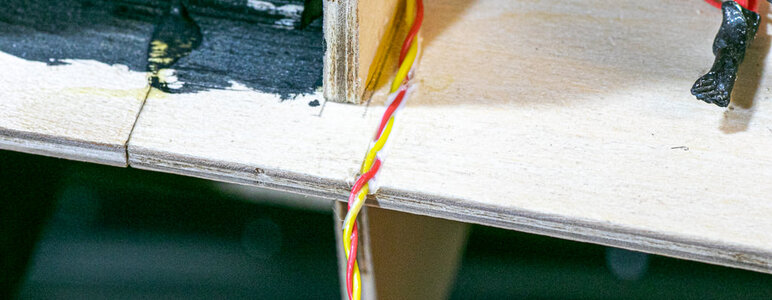
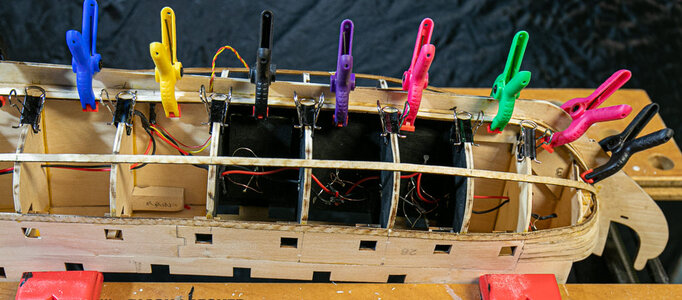
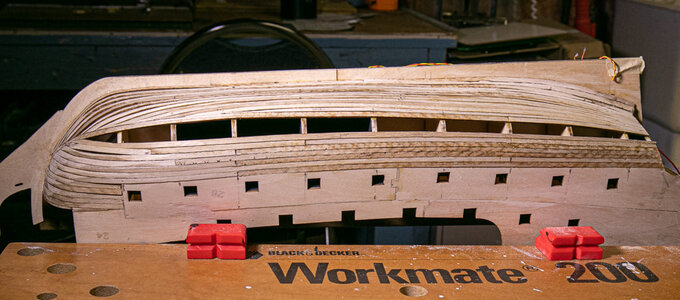
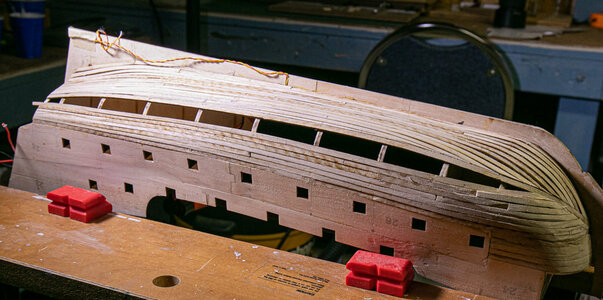
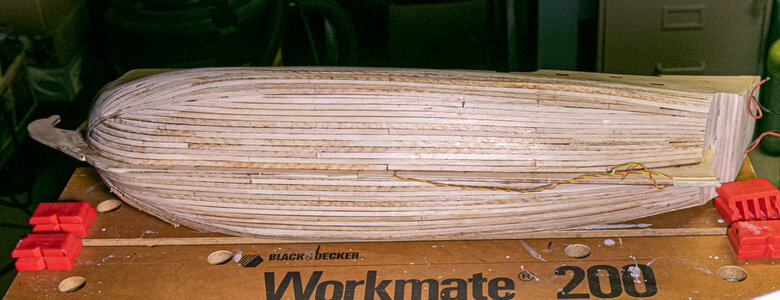
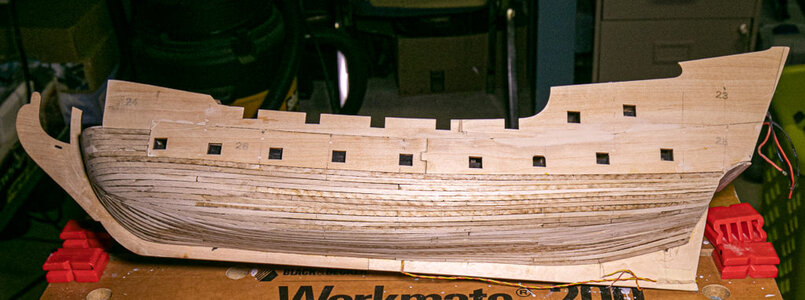
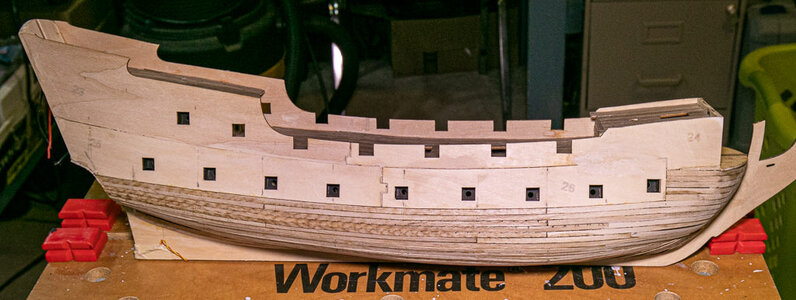
I will be doing some other things over the next month or so such as the gun carriages and possible some of the masts although I have the same problem with sanding the masts.


Looking good, Jeff. I’m enjoying your build. I don’t have any problem sanding outdoors here in Texas. (But I still do the masts inside where my shipyard is.)I finally finished the first planking on the BP. Lots of distractions the last few weeks since I am back working again after the holiday break. I am not completely happy with the first planking job, but I completed it. I seemed to have some difficulty with the wood strips supplied with the kit. I have a lot of sanding and filling to do, but since I cannot do that in the house, I will have to wait until some time in the future that looks and feels like spring. There is currently about 2-3 feet (0.6-1 m) of snow outside my back door where I usually do my sanding.
I will be doing some other things over the next month or so such as the gun carriages and possible some of the masts although I have the same problem with sanding the masts.
View attachment 211465View attachment 211466View attachment 211467View attachment 211468View attachment 211469View attachment 211470View attachment 211471View attachment 211472View attachment 211473
I hope the comment on sanding in Texas was somewhat "tongue in cheek"!Looking good, Jeff. I’m enjoying your build. I don’t have any problem sanding outdoors here in Texas. (But I still do the masts inside where my shipyard is.)
great start I also built this one there is a log here someplace on the forum will watch this one
Two days.I hope the comment on sanding in Texas was somewhat "tongue in cheek"!Does San Antonio have Winter?


