I had the same problems with my Boats. Mine were a bit different and even more fragile. I installed the rudders but wish I hadn’t. They are delicate and wobbly. The kit came with three boats, but I had to use one for spare parts.I spent the last 2 weeks working on the ships boat/gig. Not the easiest project. The ribs are very delicate and break easily (3 broken during assembly). Even so, I was able to get it completed. I put in the floor boards early to add some strength and support to the ribs during planking. I stained the boat a dark walnut to the match gun carriages. I still have the oars to work on and I am considering whether to add a version of oarlocks. We'll see about that.
I had a number of small gaps between planks which is understandable with the quality of the wood strips provided. The wood strips were very thin and very difficult to sand the edges. To fill the gaps, I mixed white glue and wlanut sanding dust at about 1.5 to 1 parts and filled gaps with that. I thought it worked surprizingly well.
View attachment 214919View attachment 214920View attachment 214921View attachment 214922View attachment 214923View attachment 214924View attachment 214925
What would I do differently if I could start over? First, I think I would try to assemble the frames and keel to the gunwale while it was still attached to the full laser cut piece. This would have added some additional stabilization the the ribs during the assembly process which would have helped considerably. I also would have considered a filler piece at the bow between the first and second rib. Since the bow deck would cover the filler, I think it would have been a good addition to get better planking at the bow.
I have not worked on the tiller and rudder yet. I am considering putting them in the bottom of the boat instead of attaching them to the stern. I have enough experience in small boat handling and storage to know that rudders and tillers are typically removed during transport and storage. Any thoughts on this?
-

Win a Free Custom Engraved Brass Coin!!!
As a way to introduce our brass coins to the community, we will raffle off a free coin during the month of August. Follow link ABOVE for instructions for entering.
-

PRE-ORDER SHIPS IN SCALE TODAY!
The beloved Ships in Scale Magazine is back and charting a new course for 2026!
Discover new skills, new techniques, and new inspirations in every issue.
NOTE THAT OUR FIRST ISSUE WILL BE JAN/FEB 2026
You are using an out of date browser. It may not display this or other websites correctly.
You should upgrade or use an alternative browser.
You should upgrade or use an alternative browser.
ZHL Black Pearl Golden 2021 - 1:64 - JeffT [COMPLETED BUILD]
Hi Jeff good job on the ship's boat, mine nearly ended up in the bin on a couple of occasions it's not an easy build. I think it should have a small jig to hold the parts together while the planking is done. It's surprising strong when completed. If you are going to round off the ores take care they brake very easily mine had to be remade. I attached the rudder and it didn't look to bad.I spent the last 2 weeks working on the ships boat/gig. Not the easiest project. The ribs are very delicate and break easily (3 broken during assembly). Even so, I was able to get it completed. I put in the floor boards early to add some strength and support to the ribs during planking. I stained the boat a dark walnut to the match gun carriages. I still have the oars to work on and I am considering whether to add a version of oarlocks. We'll see about that.
I had a number of small gaps between planks which is understandable with the quality of the wood strips provided. The wood strips were very thin and very difficult to sand the edges. To fill the gaps, I mixed white glue and wlanut sanding dust at about 1.5 to 1 parts and filled gaps with that. I thought it worked surprizingly well.
View attachment 214919View attachment 214920View attachment 214921View attachment 214922View attachment 214923View attachment 214924View attachment 214925
What would I do differently if I could start over? First, I think I would try to assemble the frames and keel to the gunwale while it was still attached to the full laser cut piece. This would have added some additional stabilization the the ribs during the assembly process which would have helped considerably. I also would have considered a filler piece at the bow between the first and second rib. Since the bow deck would cover the filler, I think it would have been a good addition to get better planking at the bow.
I have not worked on the tiller and rudder yet. I am considering putting them in the bottom of the boat instead of attaching them to the stern. I have enough experience in small boat handling and storage to know that rudders and tillers are typically removed during transport and storage. Any thoughts on this?
Nice little build. I agree with your jig comments. I like the idea of the rudder stored in the boat. Makes sense to me.
I completed the capstan and the skylight. To do the capstan, I glued the top/bottom directly on the 8 inner pieces and then removed them from the laser cut piece. It when quite well and they are now equally spaced with no measuring. I assembled the capstan around the mast dowel being careful to not let the glue set to the dowel before puling the capstan off of it. I stained the capstan with black acrylic and used a file to remove some of the black to give it a slightly worn look.
I guess this is a real fantasy ship. I believe this is the first time that I have ever seen a capstan that encircles a mast. I an not sure that would work on real life.
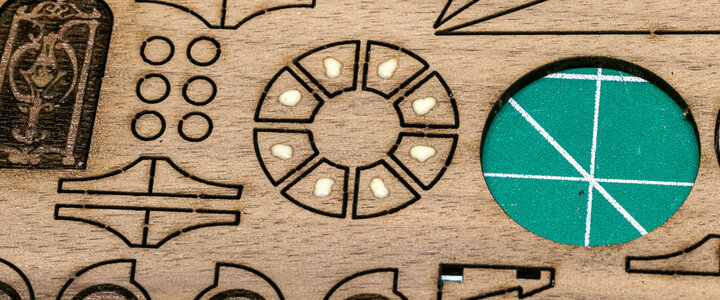
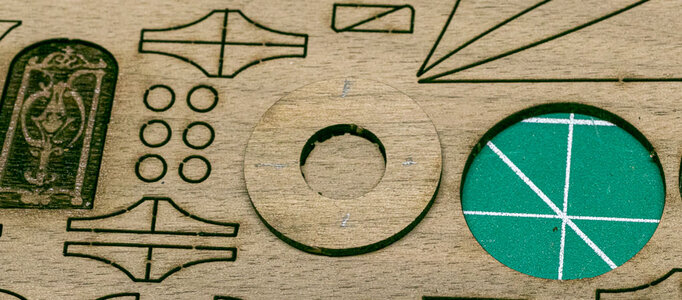
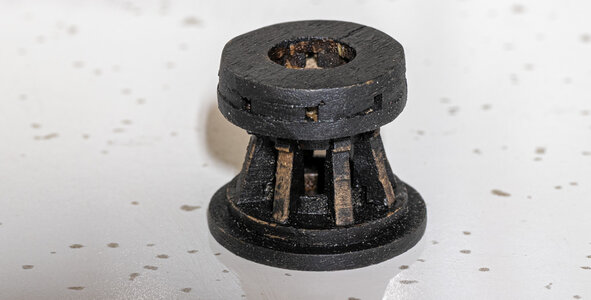
I also competed the skylight. It assembled well and I gave it a coat of walnut stain.
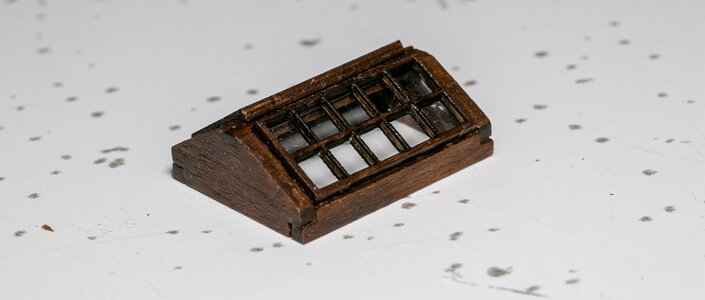
I guess this is a real fantasy ship. I believe this is the first time that I have ever seen a capstan that encircles a mast. I an not sure that would work on real life.


I also competed the skylight. It assembled well and I gave it a coat of walnut stain.

Yeah, I can't see how it would work either, unless it turns the whole mast. That would not be good for sailing. Also, in the all-version scenario where you can see inside the starboard part of the ship, there are no bits or anchor ropes. It's all done with magic!
That's a really good way to do the top of the capstan I wouldn't have thought of that. Just show's how many different ways we can do the same job. The capstan on the mast annoyed me to but it's like that in the movie, maybe the guy's in Hollywood haven't done their homework.I completed the capstan and the skylight. To do the capstan, I glued the top/bottom directly on the 8 inner pieces and then removed them from the laser cut piece. It when quite well and they are now equally spaced with no measuring. I assembled the capstan around the mast dowel being careful to not let the glue set to the dowel before puling the capstan off of it. I stained the capstan with black acrylic and used a file to remove some of the black to give it a slightly worn look.
I guess this is a real fantasy ship. I believe this is the first time that I have ever seen a capstan that encircles a mast. I an not sure that would work on real life.
View attachment 216094View attachment 216095View attachment 216097
I also competed the skylight. It assembled well and I gave it a coat of walnut stain.
View attachment 216096
Last edited:
The ship's wheel assembled fairly easily. The instructions showed 3 different versions, none of which was what was supplied for this version of the kit. I decided to mount the wheel and the rope cylinder using two brass nails cut off at appropriate lengths. The rope was pulled through a hole in the base and glued there. I used a small amount of diluted white glue on the underside of the cylinder to keep the rope in place. Due to their fragile nature, I decided not to round off the wheel spokes.
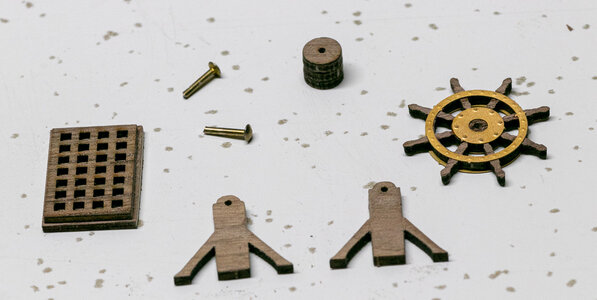
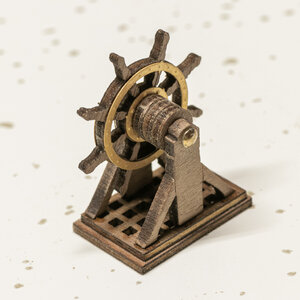
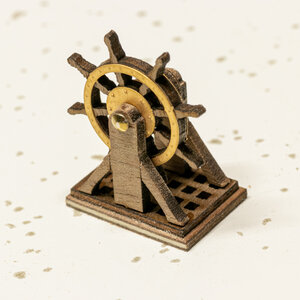
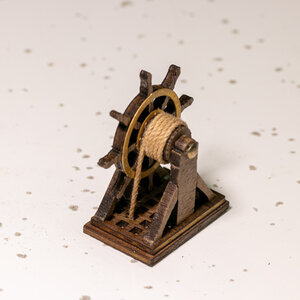


Last edited:
Nice, good job improvising. Looks great.
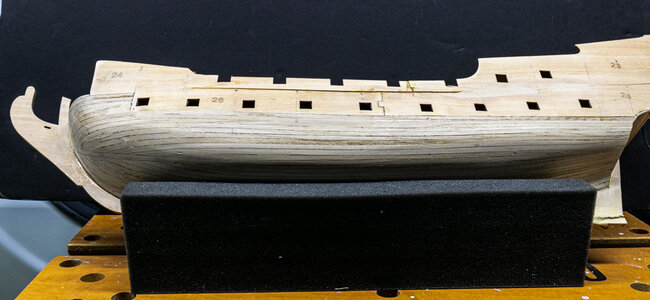
I took advantage of the past weekend's warmer weather and shoveled the snow off a working area on the back patio. I spent an enjoyable afternoon sanding the inner planking on the BP. I am fairly happy with the results even though I needed to use a putty to fill some gaps. I have since refined the sanding a bit more from the photos shown as you can see some low spots.
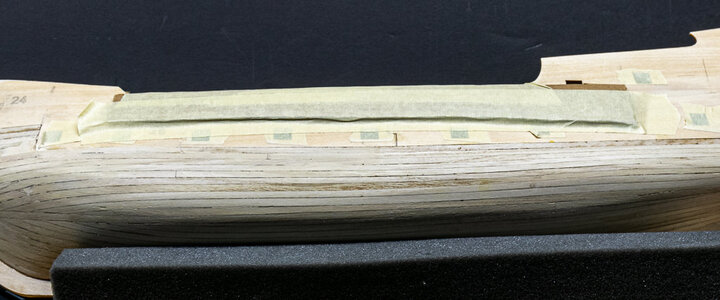
I had some problem with overbending the the bulwarks while sanding (The hull was sitting in my lap), so I added temporary support in the form of stiff cardboard held in place with masking tape. Problem solved.
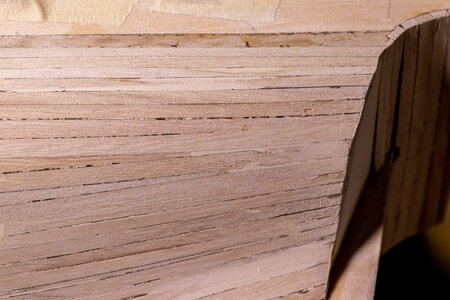
Detail of the stern planking which needed very little fill.

I had some problem with overbending the the bulwarks while sanding (The hull was sitting in my lap), so I added temporary support in the form of stiff cardboard held in place with masking tape. Problem solved.

Detail of the stern planking which needed very little fill.

Last edited:
It has been a while since my last post. I have had difficulties with working on the model between work and several physical situations. The one most relevant to the model was that I developed a skin irritation from either the CA glue I have been using or the walnut veneer that is used for the outer planking. Either way, I had to wait nearly a month for the rash to go away and have been wearing gloves while working on the model. Now that the situation has cleared up, I am back to working on it again. I am not so certain that the wood does not have something in it that caused the issue. I also had a lot of problems getting the 0.5 mm thick planking to stick well after gluing. I think that is related to the fact that the strips are incredibly dry. Since CA glue needs a certain amount of water to adhere well I have taken to soaking the strips for 5-10 minutes and letting them sit overnight before attempting to glue them. This technique seems to have done the trick to get the glue to set fairly quickly.
Anyway, I am nearly done with planking. I still have a few strips to get in place around the stern and inside the forecastle bulwarks. I should be ready to sand down the hulk in the next week. I also have patched a number of places where my shirt sleeve has caught on the strips on the hull and broken off pieces. This was prevalent in the areas I did before starting to soak the strips.
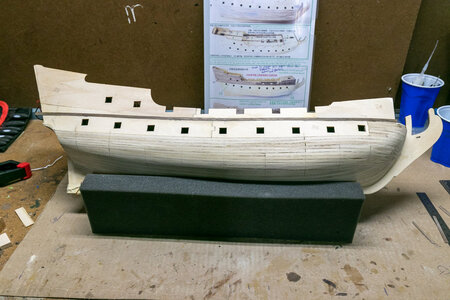
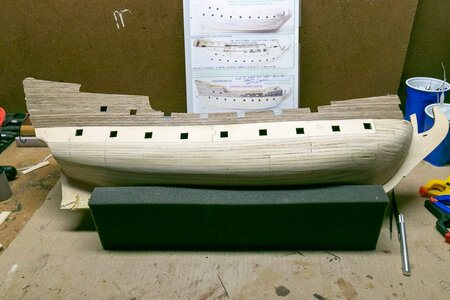
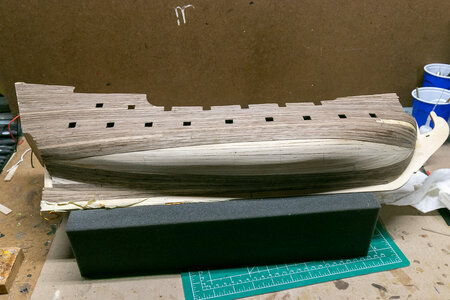
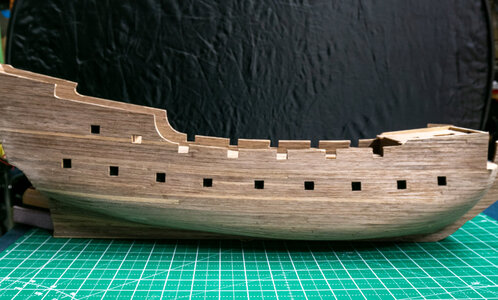
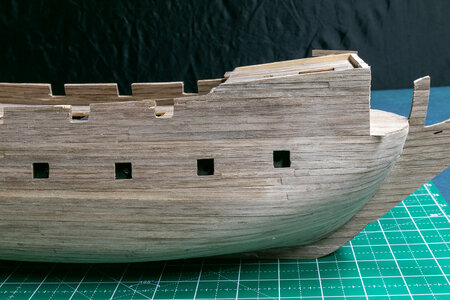
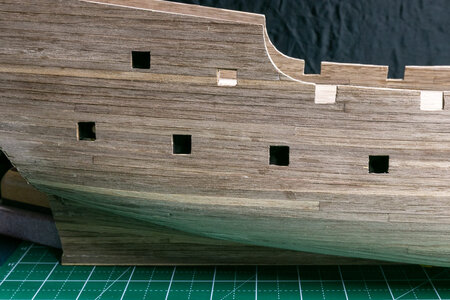
Anyway, I am nearly done with planking. I still have a few strips to get in place around the stern and inside the forecastle bulwarks. I should be ready to sand down the hulk in the next week. I also have patched a number of places where my shirt sleeve has caught on the strips on the hull and broken off pieces. This was prevalent in the areas I did before starting to soak the strips.


OK Jeff! Good to see your coming along. Your Peal has great shape nice lines.
Making good progress, Jeff!It has been a while since my last post. I have had difficulties with working on the model between work and several physical situations. The one most relevant to the model was that I developed a skin irritation from either the CA glue I have been using or the walnut veneer that is used for the outer planking. Either way, I had to wait nearly a month for the rash to go away and have been wearing gloves while working on the model. Now that the situation has cleared up, I am back to working on it again. I am not so certain that the wood does not have something in it that caused the issue. I also had a lot of problems getting the 0.5 mm thick planking to stick well after gluing. I think that is related to the fact that the strips are incredibly dry. Since CA glue needs a certain amount of water to adhere well I have taken to soaking the strips for 5-10 minutes and letting them sit overnight before attempting to glue them. This technique seems to have done the trick to get the glue to set fairly quickly.
Anyway, I am nearly done with planking. I still have a few strips to get in place around the stern and inside the forecastle bulwarks. I should be ready to sand down the hulk in the next week. I also have patched a number of places where my shirt sleeve has caught on the strips on the hull and broken off pieces. This was prevalent in the areas I did before starting to soak the strips.
View attachment 228407View attachment 228408View attachment 228409View attachment 228412View attachment 228410View attachment 228411
Good to see to your progress the planking looks great, I found the walnut splinters very easily take care trimming around the edges.
Thanks, I have already learned that. Working on the edges requires a lot of care.Good to see to your progress the planking looks great, I found the walnut splinters very easily take care trimming around the edges.
I have been busy with the build and have not been posting much for that last few weeks so I am going to put up several smaller postings over the next couple of days.
I worked on the stern gallery. Since the stern gallery is curved. I soaked the piece in water and dried it over a one gallon paint can. The resulting curve was almost perfect.
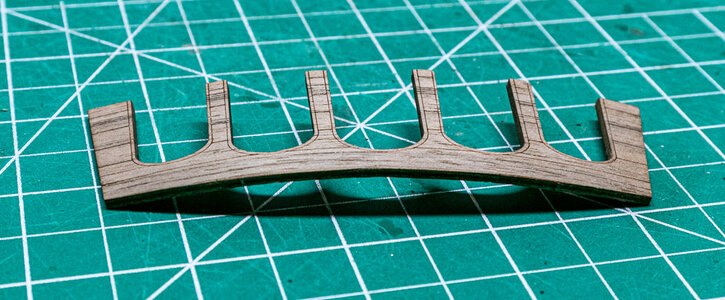
The materials supplied for the roof part of the gallery was the right height, but was not wide enough to get the curve or side widths. I split some of the extra square material and laminated them together. I drew the curve on the laminated stern piece and cut it accordingly.
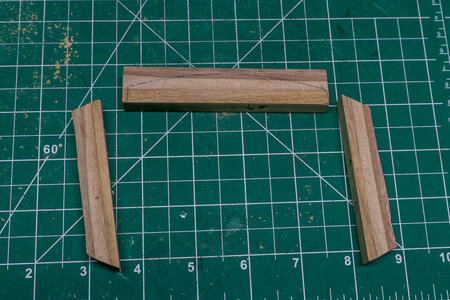
The stern gallery was built per the instructions and glued to the stern of the ship. I realized after I took the picture that it was not completely straight and adjusted before the glue could dry. I think it may be a good idea to take pictures and look at them to see things like this. I seem to see issues better this way.
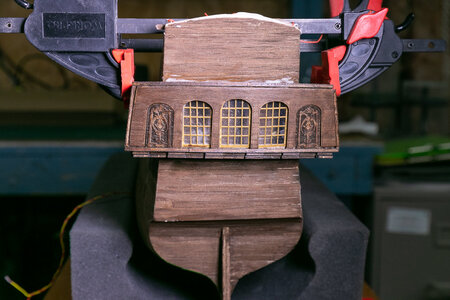
I glued on the three pieces of the roof of the gallery and sanded them to shape, but forgot to take pictures. I will show it in a future posting.
I worked on the stern gallery. Since the stern gallery is curved. I soaked the piece in water and dried it over a one gallon paint can. The resulting curve was almost perfect.


The materials supplied for the roof part of the gallery was the right height, but was not wide enough to get the curve or side widths. I split some of the extra square material and laminated them together. I drew the curve on the laminated stern piece and cut it accordingly.

The stern gallery was built per the instructions and glued to the stern of the ship. I realized after I took the picture that it was not completely straight and adjusted before the glue could dry. I think it may be a good idea to take pictures and look at them to see things like this. I seem to see issues better this way.

I glued on the three pieces of the roof of the gallery and sanded them to shape, but forgot to take pictures. I will show it in a future posting.
I forgot to mention that the 2 pieces at the sides of the rear widows were a bit of a problem. They were sized just a bit smaller than the holes cut for them. I had to place some material behind them in order to effectively position the etched pieces. I haven't seen this issue noted in any other posts. I will have to decided whether to do some gold edging on these pieces, but that can wait for a while.I have been busy with the build and have not been posting much for that last few weeks so I am going to put up several smaller postings over the next couple of days.
I worked on the stern gallery. Since the stern gallery is curved. I soaked the piece in water and dried it over a one gallon paint can. The resulting curve was almost perfect. View attachment 233649View attachment 233650
The materials supplied for the roof part of the gallery was the right height, but was not wide enough to get the curve or side widths. I split some of the extra square material and laminated them together. I drew the curve on the laminated stern piece and cut it accordingly.
View attachment 233653
The stern gallery was built per the instructions and glued to the stern of the ship. I realized after I took the picture that it was not completely straight and adjusted before the glue could dry. I think it may be a good idea to take pictures and look at them to see things like this. I seem to see issues better this way.
View attachment 233652
I glued on the three pieces of the roof of the gallery and sanded them to shape, but forgot to take pictures. I will show it in a future posting.
Looking good! I used the same technique for my BP.I have been busy with the build and have not been posting much for that last few weeks so I am going to put up several smaller postings over the next couple of days.
I worked on the stern gallery. Since the stern gallery is curved. I soaked the piece in water and dried it over a one gallon paint can. The resulting curve was almost perfect. View attachment 233649View attachment 233650
The materials supplied for the roof part of the gallery was the right height, but was not wide enough to get the curve or side widths. I split some of the extra square material and laminated them together. I drew the curve on the laminated stern piece and cut it accordingly.
View attachment 233653
The stern gallery was built per the instructions and glued to the stern of the ship. I realized after I took the picture that it was not completely straight and adjusted before the glue could dry. I think it may be a good idea to take pictures and look at them to see things like this. I seem to see issues better this way.
View attachment 233652
I glued on the three pieces of the roof of the gallery and sanded them to shape, but forgot to take pictures. I will show it in a future posting.
After getting the gallery, skylight and gratings on the model it was time to check to see how the lights look. I am relatively pleased with the way they turned out. I still have the lanterns to figure out, but they will have to wait for a while as I assume I would knock them about too much to assemble at this stage of the build.
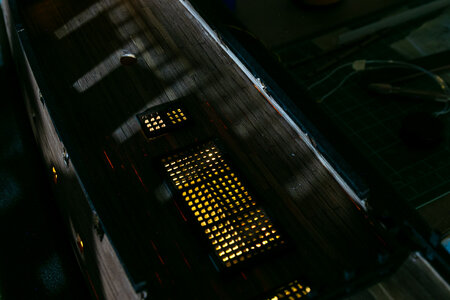
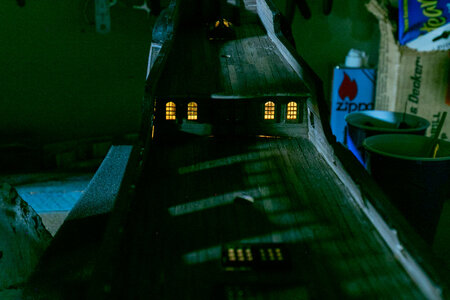
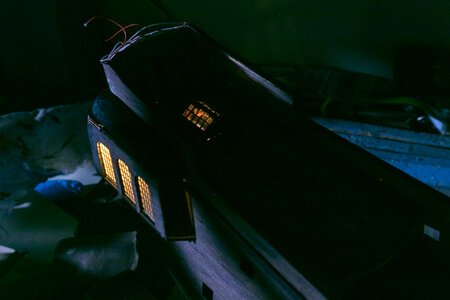


Based on my experience with the lanterns, that's probably a wise choice. If I had it to do over, I would install them last.After getting the gallery, skylight and gratings on the model it was time to check to see how the lights look. I am relatively pleased with the way they turned out. I still have the lanterns to figure out, but they will have to wait for a while as I assume I would knock them about too much to assemble at this stage of the build.
View attachment 233907View attachment 233908View attachment 233909
Like a number of things with this build, I probably learned it from your build.


