A lot of progress in a short amount of time, well done. How are you finding the rigging instructions? Are you going to fit sails?
-

Win a Free Custom Engraved Brass Coin!!!
As a way to introduce our brass coins to the community, we will raffle off a free coin during the month of August. Follow link ABOVE for instructions for entering.
-

PRE-ORDER SHIPS IN SCALE TODAY!
The beloved Ships in Scale Magazine is back and charting a new course for 2026!
Discover new skills, new techniques, and new inspirations in every issue.
NOTE THAT OUR FIRST ISSUE WILL BE JAN/FEB 2026
You are using an out of date browser. It may not display this or other websites correctly.
You should upgrade or use an alternative browser.
You should upgrade or use an alternative browser.
ZHL Black Pearl Golden 2021 - 1:64 - JeffT [COMPLETED BUILD]
Hi, Tony.
I find that the rigging instructions leave some significant amount of room for individual interpretation. That is a nice way of saying they aren't very good. My set of plans currently has all sorts of hand written notes and liberal use of highlighting pens to try to follow them. I have chosen to take my own interpretation in some cases. Once I get the main mast rigged I will share something I am doing that is not as per instructions and not really as per reality either. The capstan around the mast drives me a bit crazy, but I assume it was useful in order to have enough space for crew "meetings" for the movie.
I am going to add sails and will follow the same process that you did for your BP (https://shipsofscale.com/sosforums/threads/zhl-black-pearl-2020-golden-edition.6734/post-189924). I am off to Joanns and/or Hobby Lobby today to see about getting some replacement material since the cut and glue method requires more material than is provided with the kit.
I have finished the running rigging except for braces and sail handling related rigging. Perhaps "finished" is too strong of word. I have actually run and tied off the rigging lines, but left the lines long enough to loosen and reset once the sails are in place. Even though the lines are fairly taut, I suspect the weight of the sails may lead to overly tight and slack lines somewhere on the ship. The blocks for the braces have not been secured into place yet since they may need to be moved/spaced along the stays so they look good together.
I have started working on the sails, but there seems to be a steep learning curve on these. This is the first time I have hung sails on a ship let alone making the panels from bulk material. I am still experimenting on how to do this effectively.


I have started working on the sails, but there seems to be a steep learning curve on these. This is the first time I have hung sails on a ship let alone making the panels from bulk material. I am still experimenting on how to do this effectively.
Wow how do you manage to keep your Pearl so neat and tidy, ever since I started rigging mine is a mess with ropes all over the place. There was a lot of trail and error when I did my sails, I made 4 or 5 before I was happy with them. I attached my sails to the yards before putting them on the masts, I'm interested to see how you go as yours might be a better method as the sails get in the way when belaying the ropes.I have finished the running rigging except for braces and sail handling related rigging. Perhaps "finished" is too strong of word. I have actually run and tied off the rigging lines, but left the lines long enough to loosen and reset once the sails are in place. Even though the lines are fairly taut, I suspect the weight of the sails may lead to overly tight and slack lines somewhere on the ship. The blocks for the braces have not been secured into place yet since they may need to be moved/spaced along the stays so they look good together.
View attachment 260019
View attachment 260020
I have started working on the sails, but there seems to be a steep learning curve on these. This is the first time I have hung sails on a ship let alone making the panels from bulk material. I am still experimenting on how to do this effectively.
I had to show your comment to my wife. Probably the only time she has actually seen someone write “neat and tidy” about me. She thinks it must be about a different JeffT.
This is my first attempt at sails, so we will see how it goes with my method. A number of video builds I have seen do the sails on the ship. The simplified sail rigging probably makes it a fairly straightforward (notice the lack of saying “easy”) process.
This is my first attempt at sails, so we will see how it goes with my method. A number of video builds I have seen do the sails on the ship. The simplified sail rigging probably makes it a fairly straightforward (notice the lack of saying “easy”) process.
I completed my sails. I was able to mold one of them to get a small billowing shape and get it mounted. The sails were the kit sails airbrushed with an earth brown/yellow acrylic paint mixture. There will be some delay as I am doing some consulting work over the next week or so and this has to go to the back burner for a while. I also started tiding up my running rigging at the belay points and probably will have enough time to start this week on making some rope hanks to hang from the belaying pins.
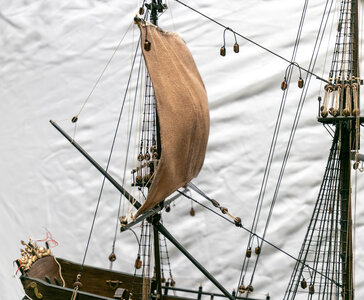
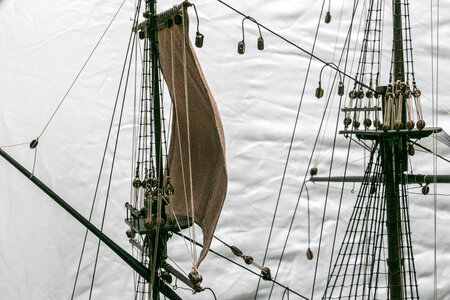


Good job on the sail, how difficult was it to tie to the yard. I don't think I could have attached mine with the yards in place.
I was not too difficult to tie with the yard in place. The hardest part was making sure I was going under the foot ropes instead of over them. I had to back out a few times due that error. I have not decided whether to start at the lower sails and work up or start at the upper sails and work down on the fore and main masts. Likely I will work up. I will have to try attaching the sails to the yards before mounting to the the masts in a future build. It would really be nice to have your adjustable height stand/bench for doing this job.Good job on the sail, how difficult was it to tie to the yard. I don't think I could have attached mine with the yards in place.
On my first mast I worked down the next one I worked up, I found working up the mast a lot easier. Looking at my model now it's finished I think I should have hitched up or furled the two main sails as they hide a lot of the deck. Another thing I noticed was the kit sails where too long so I reduced the height of mine. I made that bench 20 years ago this is the first time it's been used for what it was made for.
I am adjusting the length of my sails as well. Perhaps this is a point in favor of doing the sails after the yards have been installed?
Just checking in on your beautiful build. Now that's the way to photograph a ship!!!I have been having a knee issue the last week or so, so little progress. However, just for fun, I took one of my recent pictures and put the BP on the ocean at night. Not anywhere near a perfect composite, but fun nevertheless.
View attachment 263706
I hope to get back to work on the sails in the next few days.
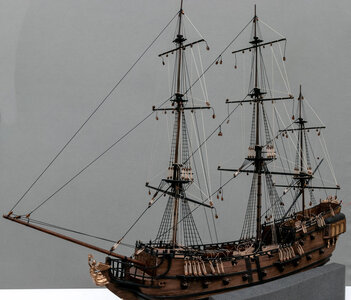
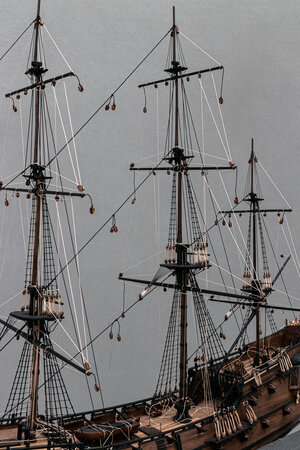
I have not posted in a while, but I have been slowly progressing with the sails to the point where I have all sails attached and rigged. I am not completely satisfied with the job, but I think it is acceptable. I ended up adding more pin rails in different locations than the plans called for in order to keep rigging running fairly straight and not tying too many lines to the same pin. Pictures are more worthwhile than words in this post. I will post some more detailed shots in a future post.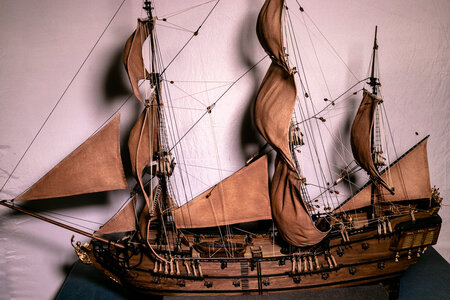
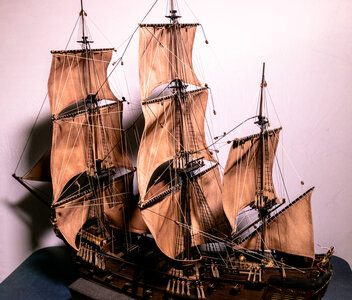
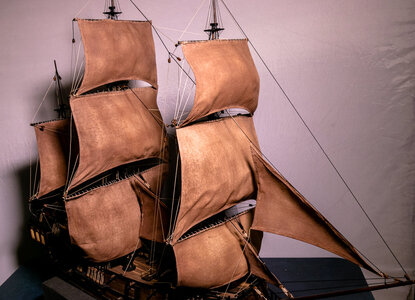
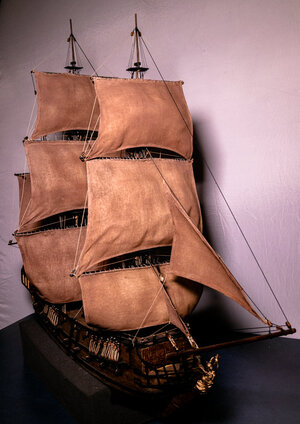
If it quits raining before the snow starts falling, I'll will get outside for some pictures with better lighting.
I still have the anchors to mount/rig, rope loops to add to pins, and the stern lanterns to place on the ship. I am glad I didn't have them in place while doing the rigging. I haven't decided on mounting the ship yet, but I am happy to be close enough to that point to have to make a decision soon.
WOW Jeff, I love the color and billowing look of the sails! Very well done.I have not posted in a while, but I have been slowly progressing with the sails to the point where I have all sails attached and rigged. I am not completely satisfied with the job, but I think it is acceptable. I ended up adding more pin rails in different locations than the plans called for in order to keep rigging running fairly straight and not tying too many lines to the same pin. Pictures are more worthwhile than words in this post. I will post some more detailed shots in a future post.View attachment 269641View attachment 269642View attachment 269643View attachment 269644
If it quits raining before the snow starts falling, I'll will get outside for some pictures with better lighting.
I still have the anchors to mount/rig, rope loops to add to pins, and the stern lanterns to place on the ship. I am glad I didn't have them in place while doing the rigging. I haven't decided on mounting the ship yet, but I am happy to be close enough to that point to have to make a decision soon.
The color is diluted earth brown acrylic paint sprayed with an airbrush. Sails are coated with a diluted (1:1) liquid starch:water mixture. I should have taken a picture of my rig for getting the shape. Basically I followed Olha Batchvarov technique (
- starting at about 18:36). I modified it to use springs in the corners.
Great work, I found with my BP once I added the sails the ship it started to look completely different ready to sail off into the sunset. You have done a wonderful job attaching the sails with the yards in place. Looking forward to see the finished model.
I rigged the anchors. I decided to use the same basic method detailed by Reggie in his Black Pearl build (https://shipsofscale.com/sosforums/threads/rigging-anchors-and-catheads.5816/post-124925). The supplied materials and plans are not very good in this area so the builder is left to his/her own ingenuity. I thought Reggie's ideas worked well for this model.
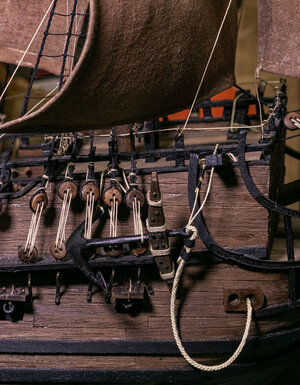
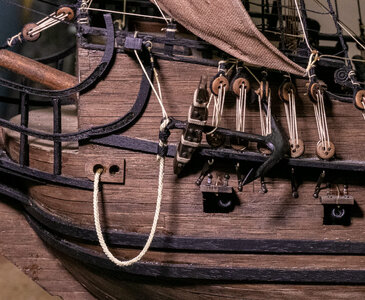
I noticed I had turned the deadeye sideways when installing the anchor on the port side and have fixed it. I am always amazed how easy it is to miss things until you see it isolated in a still photo.


I noticed I had turned the deadeye sideways when installing the anchor on the port side and have fixed it. I am always amazed how easy it is to miss things until you see it isolated in a still photo.
Let there be lights!
I have put off the lights at the stern for most of the build. Previously I described in a post how I placed copper tubing to mount the lanterns, but I did not place the lanterns until the last bit of the build.
I practiced my solder skills (novice at best) and soldered in the LEDs. The pictures show the progression from the port side to the starboard side. I enlarged the hole in the bottom of the plastic lanterns so that they fit fairly tightly onto the tubing with the wire in the center. After soldering the LEDs, I slid on the lanterns,. added a bit of CA glue into the bottom of the lanterns, and added the covers.
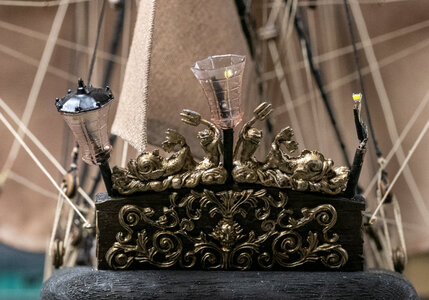
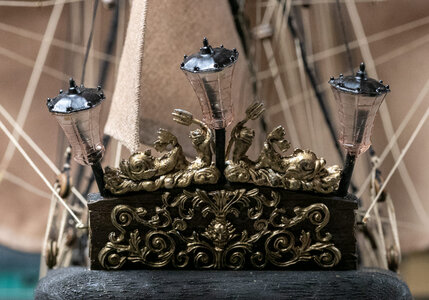
I still have some touch up on the black paint (especially the starboard light post), but I think they turned out fairly well.
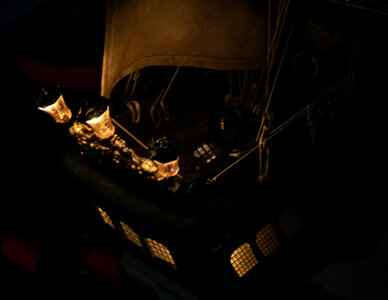
Here's the "night" view with lights on.
Still to do:
Add more rope coils
Mount the ship
Finish wiring in the light switch/battery unit (after mounting)
I have put off the lights at the stern for most of the build. Previously I described in a post how I placed copper tubing to mount the lanterns, but I did not place the lanterns until the last bit of the build.
I practiced my solder skills (novice at best) and soldered in the LEDs. The pictures show the progression from the port side to the starboard side. I enlarged the hole in the bottom of the plastic lanterns so that they fit fairly tightly onto the tubing with the wire in the center. After soldering the LEDs, I slid on the lanterns,. added a bit of CA glue into the bottom of the lanterns, and added the covers.


I still have some touch up on the black paint (especially the starboard light post), but I think they turned out fairly well.
Here's the "night" view with lights on.

Still to do:
Add more rope coils
Mount the ship
Finish wiring in the light switch/battery unit (after mounting)
I think that with the lanterns mounted, I will straighten out the tridents on the stern decoration.
The lighting looks great!!Let there be lights!
I have put off the lights at the stern for most of the build. Previously I described in a post how I placed copper tubing to mount the lanterns, but I did not place the lanterns until the last bit of the build.
I practiced my solder skills (novice at best) and soldered in the LEDs. The pictures show the progression from the port side to the starboard side. I enlarged the hole in the bottom of the plastic lanterns so that they fit fairly tightly onto the tubing with the wire in the center. After soldering the LEDs, I slid on the lanterns,. added a bit of CA glue into the bottom of the lanterns, and added the covers.
View attachment 270036
View attachment 270037
I still have some touch up on the black paint (especially the starboard light post), but I think they turned out fairly well.
Here's the "night" view with lights on.
View attachment 270038
Still to do:
Add more rope coils
Mount the ship
Finish wiring in the light switch/battery unit (after mounting)


