Gilles' 19-inch Canoe - cherry - Canoe # 1 [COMPLETED BUILD]

Joined
Feb 18, 2019
Messages
684
Points
353

Well, since I will be making this size and the other (using different woods), here is the image with them both: for size comparison.

_DSC0759 a.jpg

Sorry, the building bases don't look as nice as the you guys!
I think the membership at large is going to get sick of seeing canoes!!
G
 
Well, since I will be making this size and the other (using different woods), here is the image with them both: for size comparison.

View attachment 159728

Sorry, the building bases don't look as nice as the you guys!
I think the membership at large is going to get sick of seeing canoes!!
G

Nope...

NEVER get tired of looking at canoes.!!:p
 
Well, the strip-wood from the "Lumberyard" came in today.
The quality of the wood is great: freshly cut. The strips themselves are over dimension but all is good.
I should have time to work on the model later today.
G
 
The difference in dimension is actually quite large:
Square section 3/32 x 3/32" or 0.096 x 0.096" (2.5 x 2.5 mm) strips are actually 0.112" x 0.106 (2.87 x 2.75 mm).

Here is a view of a 3/32" basswood strip sandwiched between 2 cherry stips:

20200723_154738 copy.jpg

However, work on this canoe (19") has began.
G.
 
Second strip installation:

2nd strip cc.jpg

The third strip is a contrasting strip (Basswood), then I moved on to place the fourth strip on one side:

4th strip aa.jpg

So far, a couple of hours work and all together 7 strips are in place (4 on one side, 3 on the other), alternating sides from one strip to the next.
G
 
Last edited:
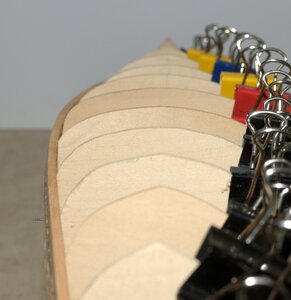
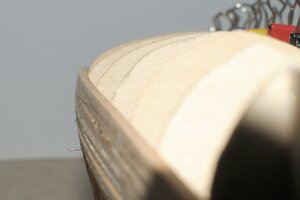
7 strips have been installed on each side (6 cherry + 1 basswood).
Strip # 7 marks the start of the most difficult area to plank on the canoe's "mid-ship" section: from the sides (vertical) towards the bottom of the canoes where the planking progressively runs more or less horizontal . From there, the strip need to be twisted form the center (horizontal) area to the front and back (vertical),
The strips being oversize make it slightly more difficult than usual. Until this rounded area is covered with the planking, it looks like the best approach is to give a slight bevel to the strips edge to reduce creating a large gap on the outside face of the canoe: which is something that is normally not needed.
Although I will post something (sometimes today) about this in the support section related to planking, here are a couple of images showing the progress on this 19-inch model.

_DSC0922 a.jpg

_DSC0924 a.jpg

So all this means a lot more scraping / sanding later once the planking is done.
G.
 
GILLES SUPER BUILD AND FAST ALSO, WILL START MINE THIS WEEKEND TRYING TO DO A COUPLE MORE DRY FITTING OF FRAMES ON THE LE ROCHEFORT, AND FINISHING UP THE PLANKING ON THE ARMED LONG BOAT, THEN WILL PUT IN SOME TIME ON THIS ONE HOPE I DO NOT SCREW IT UP. GOD BLESS STAY SAFE DON
 
So this is the end of day 3: picked up the wood from the post office on Thursday Afternoon. So far and all together, there is about 15 hours of work in this: including assembling the building base.

Did not quite close the hull today... Tomorrow for sure... Only about an hour needed to complete...
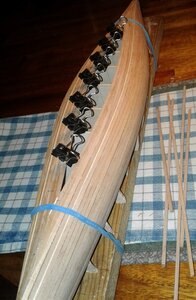
I decided to include a second "contrast" strip from stem to stern towards the bottom of the hull.


20200725_215950 a.jpg

G.
 
- First step in planking = done
- Preliminary scraping / fairing / sanding = done

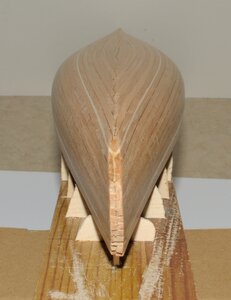
Closing the hull was achieved by laying the strips in somewhat of a "herringbone pattern".
Note the thin contrasting strip at the bottom.


_DSC0960 aa.jpg

The next step will be to remove the hull from the building base and then complete the planking up to the top of the stem and stern.

G.
 
Back
Top