The Naval Cutter ALERT- 1777, POF by Jimsky

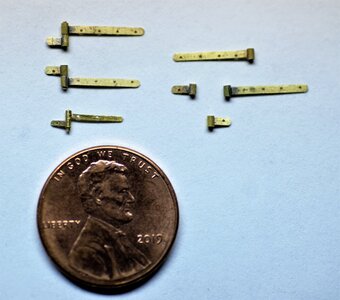
Meanwhile, I am getting ready for the internal structure components assembly, This will include various styles of doors. The kit provided doors look plain and simple. I made a decision to make my own, from scratch. Doors will require hinges, ...so I made some as the test.
600_1283.jpg

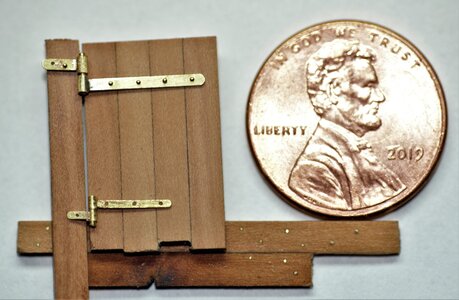
The material is brass, strip, and tubing. The upper hinge strip is 0.9mm, and 1.00mm tube, The bottom (smaller hinge) is 0.7mm for both strip and tubing.
600_1284.jpg

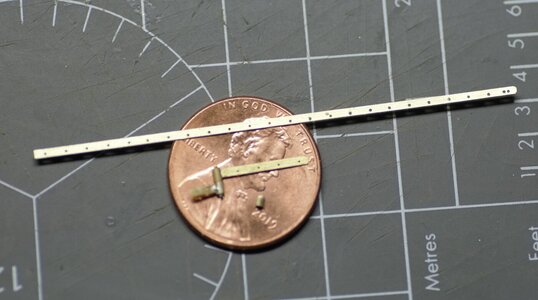
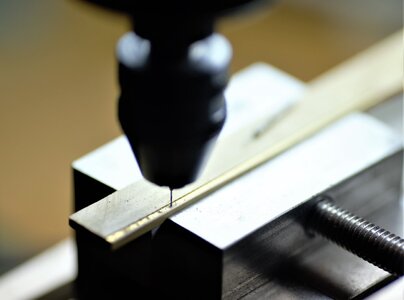
All pieces were soldered using the butane torch and soldering silver paste. The holes are 0.25mm drilled using the boxwood jig and mill. This setup works great, I use the same drill bit for all the holes. They are not in-line for now, I have to master this. But as POC ( Proof Of Concept) it is pretty acceptable.
600_1259 (2).jpg

600_1256.jpg

...so, let it be!!!
 
Meanwhile, I am getting ready for the internal structure components assembly, This will include various styles of doors. The kit provided doors look plain and simple. I made a decision to make my own, from scratch. Doors will require hinges, ...so I made some as the test.

View attachment 194848

The material is brass, strip, and tubing. The upper hinge strip is 0.9mm, and 1.00mm tube, The bottom (smaller hinge) is 0.7mm bor both strip and tubing.

View attachment 194849

All pieces were soldered using the butane torch and soldering silver paste. The holes are 0.25mm drilled using the boxwood jig and mill. This setup works great, I use the same drill bit for all the holes. They are not in-line for now, I have to master this. But as POC ( Proof Of Concept) it is pretty acceptable.

View attachment 194850

View attachment 194852

...so, let it be!!!
Hi Jim, herewith I provide you CA (Conceptual Approval) :).

They look great.
 
Many thanks, Knut @Norway and everyone for your comments and 'likes' & 'loves'

Until my Thanksgiving turkey ready for the holiday dinner, I have a few hours to work on my Alert. Just for a fun and change routine of frames assembly, I made...
Who would think you have to do masonry work when ship modeling? I didn't...but I did. Take a look at the below photo.

IMG_1744.JPEG

It does familiar to Alert kit builders but most likely for others means a board with laser-cut lines. Well...this is the platform for the galley (cooking) stove. Modelers will have to paint to imitate actual bricks. JoleyRodger @Jolley Roger described his method painting (link below) and his platform was a 'real-deal'. I love it!!


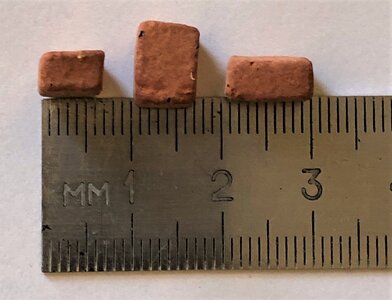
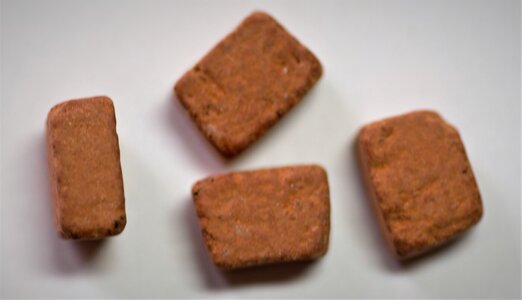
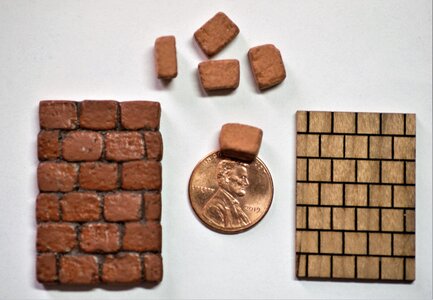
Browsing the internet and making a simple 'Google' search, I screamed 'WOW' and choose a bit different approach. Check the image below. Yes... they are real bricks, just miniature once.
IMG_1743.JPEG
IMG_1748.jpeg
600_1304.jpg

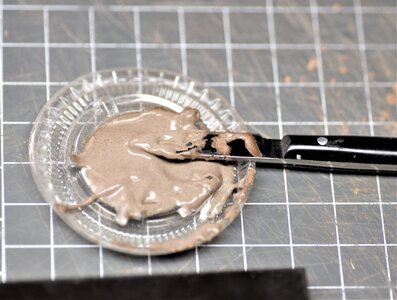
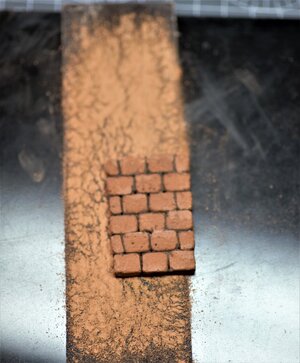
So...without further ado, I become a mason or bricklayer. As the mortar, a mixture of dyed PVA glue and wood filler was used to bond them together. Surprisingly, it works well and dries fast.

600_1298.jpg

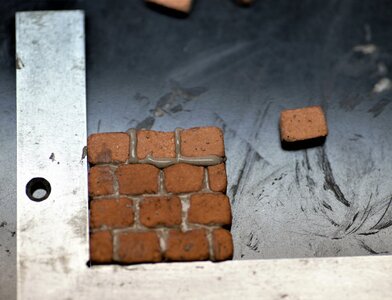
Here are the first few rows of work
600_1296.jpg

Completed platform undergo sanding flat. This side will be glued to the deck beams. I use 80 grit sandpaper.
600_1299.jpg
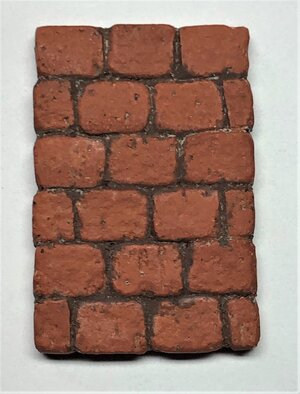
...and here is the final result
600_1302.jpg

IMG_1747.JPEG

It took a few hours to complete, but...how much fun it was - hard to calculate!!! ;) Thanks again, Happy Thanksgiven everyone, health, and happiness to all you love and care!
 
Many thanks, Knut @Norway and everyone for your comments and 'likes' & 'loves'

Until my Thanksgiving turkey ready for the holiday dinner, I have a few hours to work on my Alert. Just for a fun and change routine of frames assembly, I made...
Who would think you have to do masonry work when ship modeling? I didn't...but I did. Take a look at the below photo.

View attachment 195492

It does familiar to Alert kit builders but most likely for others means a board with laser-cut lines. Well...this is the platform for the galley (cooking) stove. Modelers will have to paint to imitate actual bricks. JoleyRodger @Jolley Roger described his method painting (link below) and his platform was a 'real-deal'. I love it!!


Browsing the internet and making a simple 'Google' search, I screamed 'WOW' and choose a bit different approach. Check the image below. Yes... they are real bricks, just miniature once.
View attachment 195493
View attachment 195494
View attachment 195495

So...without further ado, I become a mason or bricklayer. As the mortar, a mixture of dyed PVA glue and wood filler was used to bond them together. Surprisingly, it works well and dries fast.

View attachment 195496

Here are the first few rows of work
View attachment 195497

Completed platform undergo sanding flat. This side will be glued to the deck beams. I use 80 grit sandpaper.
View attachment 195498
...and here is the final result
View attachment 195499

View attachment 195500

It took a few hours to complete, but...how much fun it was - hard to calculate!!! ;) Thanks again, Happy Thanksgiven everyone, health, and happiness to all you love and care!
Jim, I'm afraid you went on the other side :) I've seen little beds, pillows, curtains, chairs... but bricks! Beautiful. Happy Thanksgiving!
 
Definitely worth spending a few hours on this Thumbsup.
The only trouble is that them bricks comes in bags of 300. Thus, unless you start modelling miniature houses, you'll have to build a whole lotta ships :D
Did you buy copper plates for the Charley Noble as well?

Happy Thanksgiving!
 
Definitely worth spending a few hours on this Thumbsup.
The only trouble is that them bricks comes in bags of 300. Thus, unless you start modelling miniature houses, you'll have to build a whole lotta ships :D
Did you buy copper plates for the Charley Noble as well?

Happy Thanksgiving!
Many thanks, Poul! I was lucky to find a bag with only 60 bricks. Funny enough, the store was 'around the corner', in City, just a matter of crossing the bridge

Did you buy copper plates for the Charley Noble as well?
Not yet...:D
 
Many thanks, Poul! I was lucky to find a bag with only 60 bricks. Funny enough, the store was 'around the corner', in City, just a matter of crossing the bridge


Not yet...:D
Maybe you can share the stores info on small bag of bricks, so we don't have to come to your town and look!

Great work on this, you lead with inspiration of others to follow your high level of detailed work!
 
Maybe you can share the stores info on small bag of bricks, so we don't have to come to your town and look!

Great work on this, you lead with inspiration of others to follow your high level of detailed work!
Alternatively you can go a little bit further down the scratch build road and make the bricks yourself with air-drying terracotta clay. It's cheap, it's easy, it's available everywhere and you can make them in a size fitting exactly to your needs
 
Alternatively you can go a little bit further down the scratch build road and make the bricks yourself with air-drying terracotta clay. It's cheap, it's easy, it's available everywhere and you can make them in a size fitting exactly to your needs
But . . . I have been trying to follow the Yellow Brick Road behind the bashful lion. . . Rich (PT-2)
 
Many thanks, Knut @Norway and everyone for your comments and 'likes' & 'loves'

Until my Thanksgiving turkey ready for the holiday dinner, I have a few hours to work on my Alert. Just for a fun and change routine of frames assembly, I made...
Who would think you have to do masonry work when ship modeling? I didn't...but I did. Take a look at the below photo.

View attachment 195492

It does familiar to Alert kit builders but most likely for others means a board with laser-cut lines. Well...this is the platform for the galley (cooking) stove. Modelers will have to paint to imitate actual bricks. JoleyRodger @Jolley Roger described his method painting (link below) and his platform was a 'real-deal'. I love it!!


Browsing the internet and making a simple 'Google' search, I screamed 'WOW' and choose a bit different approach. Check the image below. Yes... they are real bricks, just miniature once.
View attachment 195493
View attachment 195494
View attachment 195495

So...without further ado, I become a mason or bricklayer. As the mortar, a mixture of dyed PVA glue and wood filler was used to bond them together. Surprisingly, it works well and dries fast.

View attachment 195496

Here are the first few rows of work
View attachment 195497

Completed platform undergo sanding flat. This side will be glued to the deck beams. I use 80 grit sandpaper.
View attachment 195498
...and here is the final result
View attachment 195499

View attachment 195500

It took a few hours to complete, but...how much fun it was - hard to calculate!!! ;) Thanks again, Happy Thanksgiven everyone, health, and happiness to all you love and care!
Hallo my friend,

how was the turkey? - I hope you all (in the states) had enjoyed it

Very good work - the brickwall for the oven is looking very good - and many thanks for showing your method in detail

@PoulD - great video - many thanks for sharing

I have learnt a lot today ...... Great
 
Back
Top