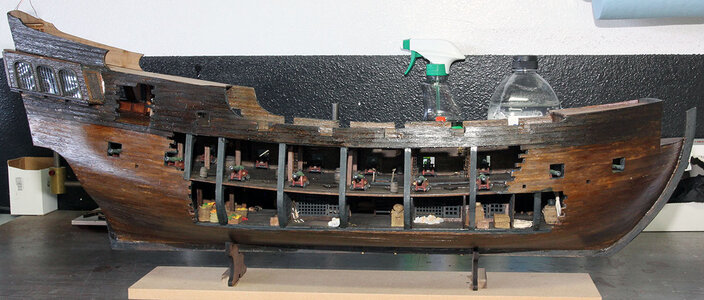
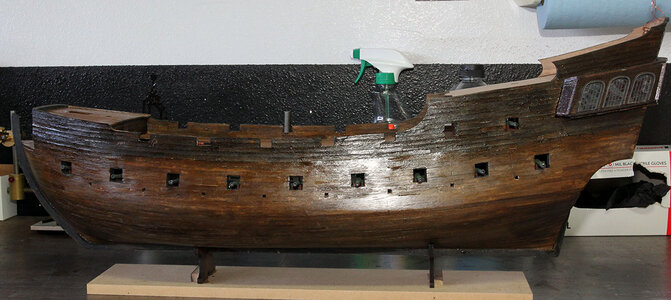
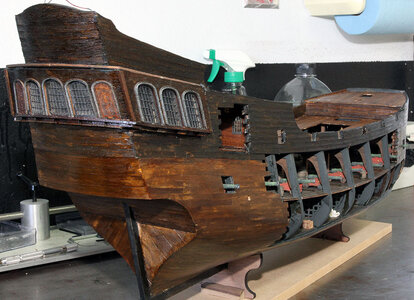
Black Pearl 1:50 ZHL

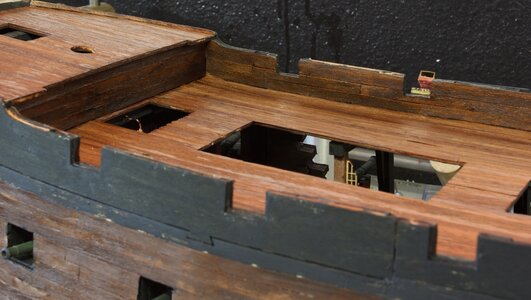
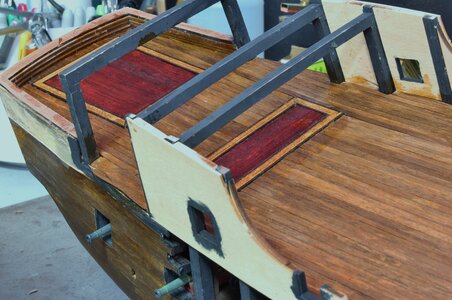
I then painted the gun ports on the main deck black and went to work planking the main deck. This is another place where there is some pretty confusing instructions. I’m going to skip the long explanation and just say the planking on the deck is intended to be done with the .5x3.8x500mm strips. I added some insert in the captains cabin just to make it look fancy. There’s a crazy optical illusion going on with the bloodwood insert on the rear of the captain’s cabin. It is narrower in the front but only by 1 mm. It looks square when you can’t see the sides and then looks like a really drastic taper when you can see the sides.
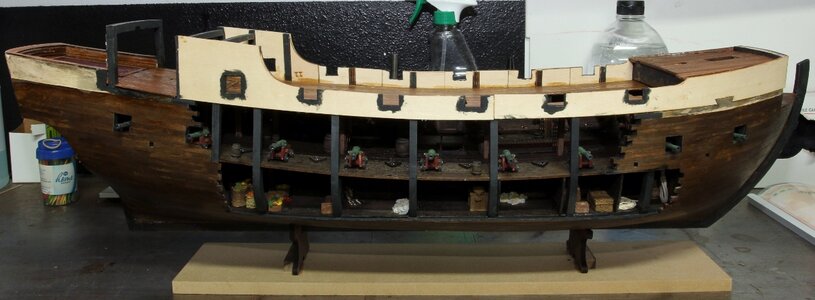
BP366.jpg

Here you can see the insets better. I painted over everything with amber shellac to add an older feel. I like the contrast with the sides so It won’t be monotone, but it has a similar feel to it.
BP368.jpg

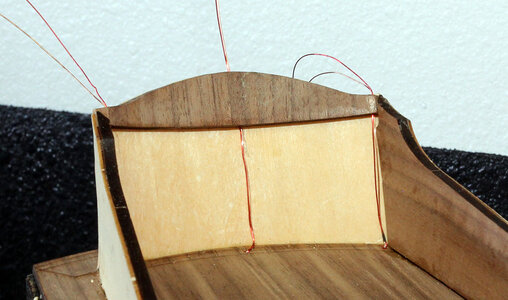
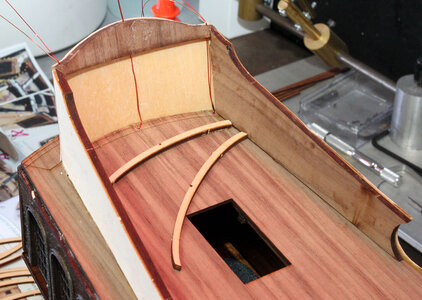
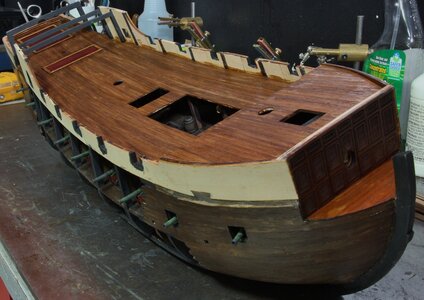
In the photo below on each side of the upper foredeck there is a piece of walnut on the inside of the plywood. These are actually pieces of the included 2mm X 5mm X 500mm strips that have been cut down bent and sanded to match the plywood. This is another place I was a little confused at what ZHL wanted me to do, but it finally made sense after looking at the table in the front of the manual for item number 29.
BP369.jpg

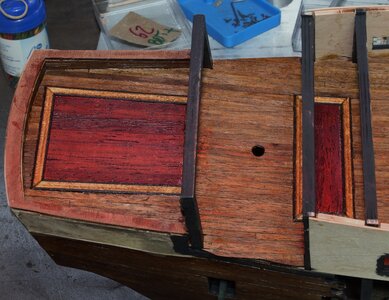
Here’s a close up of the insets in the captain’s cabin. The bloodwood and the strips around it are just some samples I bought from a company that sells veneer. They had a sample back for about $35 that had a little roughly 4X9 inch rectangle of about 60 different types of wood veneers. The bloodwood seemed perfect for the pearl to me. You can really see the optical illusion I was talking about in this photo.
BP370.jpg

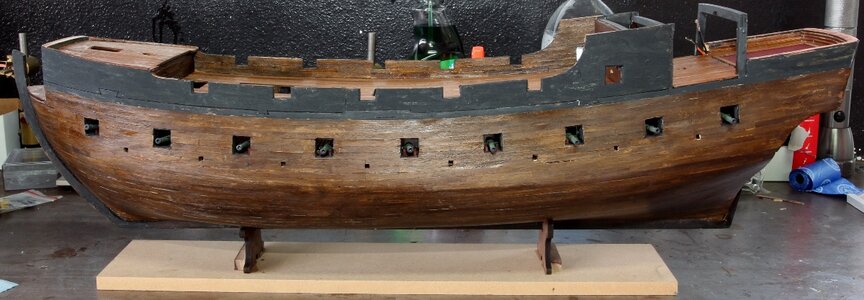
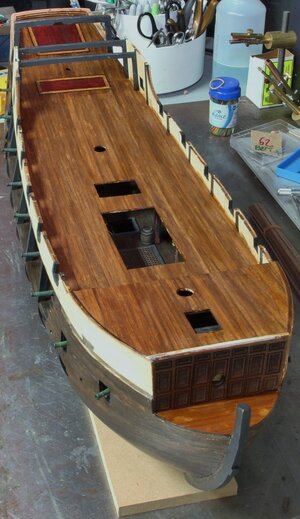
Here’s an overall view from the top front. Next up is planking the inside of the bulwarks and doing the wall on the front of the captain’s cabin.
BP371.jpg
 
I then painted the gun ports on the main deck black and went to work planking the main deck. This is another place where there is some pretty confusing instructions. I’m going to skip the long explanation and just say the planking on the deck is intended to be done with the .5x3.8x500mm strips. I added some insert in the captains cabin just to make it look fancy. There’s a crazy optical illusion going on with the bloodwood insert on the rear of the captain’s cabin. It is narrower in the front but only by 1 mm. It looks square when you can’t see the sides and then looks like a really drastic taper when you can see the sides.

View attachment 210752

Here you can see the insets better. I painted over everything with amber shellac to add an older feel. I like the contrast with the sides so It won’t be monotone, but it has a similar feel to it.

View attachment 210753

In the photo below on each side of the upper foredeck there is a piece of walnut on the inside of the plywood. These are actually pieces of the included 2mm X 5mm X 500mm strips that have been cut down bent and sanded to match the plywood. This is another place I was a little confused at what ZHL wanted me to do, but it finally made sense after looking at the table in the front of the manual for item number 29.

View attachment 210754

Here’s a close up of the insets in the captain’s cabin. The bloodwood and the strips around it are just some samples I bought from a company that sells veneer. They had a sample back for about $35 that had a little roughly 4X9 inch rectangle of about 60 different types of wood veneers. The bloodwood seemed perfect for the pearl to me. You can really see the optical illusion I was talking about in this photo.

View attachment 210755

Here’s an overall view from the top front. Next up is planking the inside of the bulwarks and doing the wall on the front of the captain’s cabin.

View attachment 210756
Very nice touch, Jodie! I like the color.
 
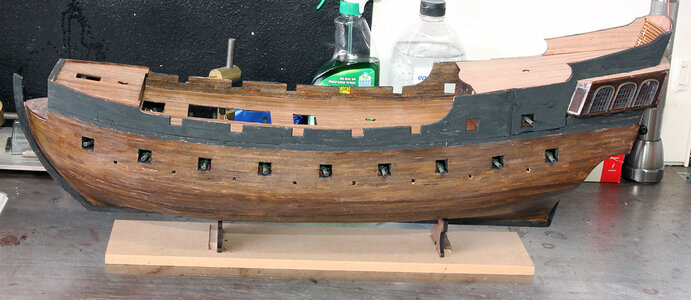
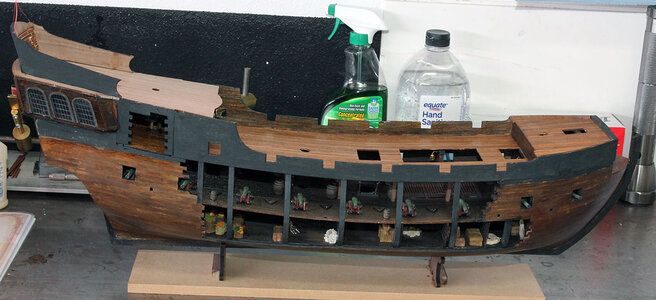
I got the inside bulwarks planked. I decided to paint black on the plywood before I put the planks on to hide any gaps. It only took a couple hours. I once again cut the planks down to just a touch longer than the distance between the gun ports to make it easier to install them. I then darkened them with black stain and covered with a coat of shellack.

BP375.jpg

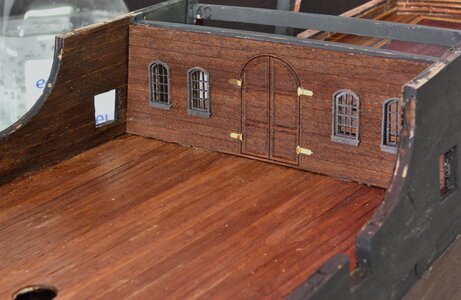
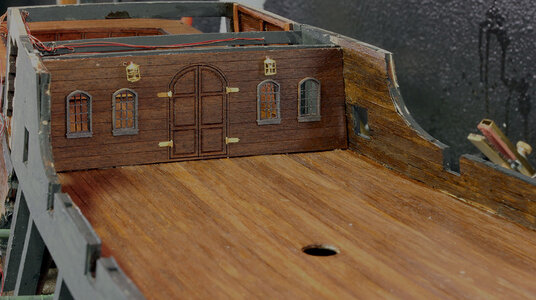
I them moved on to the front wall of the captain’s cabin. I used the black stain like had on the previous planking and coated with shellack. This particular piece of wood didn’t take the stain like the rest of the wood in the kit. I had to consult the admiral about the color for the window frames. I painted several of them different colors from bright white to true black. We finally settled on the Pearl Black below. This is Creatix Pearl Black from Hobby lobby. I bid not install the hinges with the door open because I just didn’t want the door open.

BP376.jpg

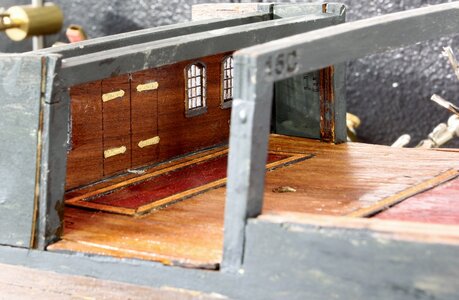
I added the black strip of card stock at the bottom of the wall to keep light from leaking under the wall.

BP379.jpg


Here’s where it was at this point.

BP378.jpg
 
This would be a good point to talk a little about the captain’s cabin assembly. As of writing this I still haven’t completely figured out what order to do all of this in. I went back and forth through the manual several times. There doesn’t seem to be any reason to put the front wall of the captain’s cabin in as early as it shows in the directions, but doesn’t matter. Installing the remaining walls vs planking up to the bottom of the captains cabins is a tough question. At this point you don’t really want to put in the side pieces as they’d be I the way of a lot of work, but at the same time you don’t really want to finish the planking without the walls in. Below is the order I decided to use for assembly. I’ll put in an edit here later if I think I would have been better off doing it differently.

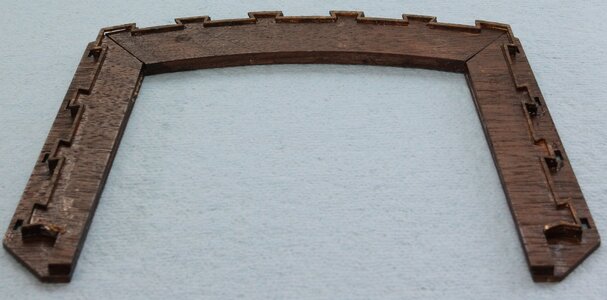
So at any rate the next thing I assembled was the horseshoe that goes around the back of the cabin. This part is made up of 5 pieces. There is one larger piece, on the bottom in the photo below, it goes all the way around the back. Then there are three pieces that glue to the bottom of that and a 5th piece which is the thin zig zag around the side.

It’s not a big deal but looking at the manual I went from thinking it was two pieces to thinking they changed it either to or from 3 pieces to thinking I was missing parts before I finally figured it out.

BP377.jpg

I went ahead and planked the stern up to the top where the horseshoe shaped piece went on. Didn’t see any reason to wait on it, it would have just made it harder to get the top plank on.

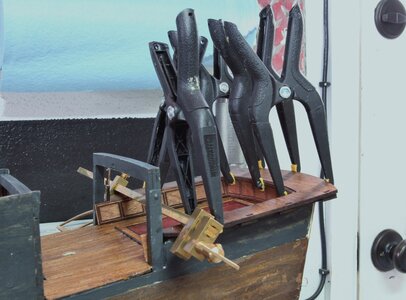
So my next step was to place the horseshoe piece on the top of the walls. The horseshoe shaped piece was about 1/8 of an inch wider than the distance between the walls. My solution was to drill a hole and put a nail in on one side, then use the brass bar clamp below to squeeze the sides in. I then drilled a hole in the other side and inserted another nail. Finally I glued the inner walls, and clamped as below to hold everything in place.

BP381.jpg

I had to notch the horseshoe for my wires to attach the rest of the lighting. You can see the wires and the small nails I put in the top, in the photo below.

BP382.jpg

Here you can see where I planked the stern up.

BP383.jpg

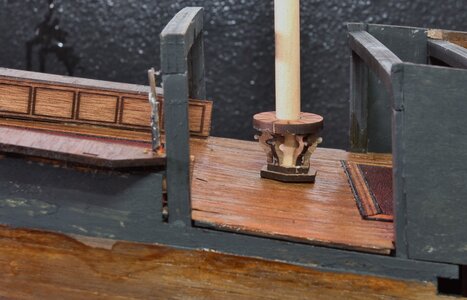
Next up I built the little table that goes around the mizzen mast. The bottom of the table needs to match the deck and the top be perpendicular to the mast. This requires cutting the legs. This was a pretty fiddley project. ZHL could have helped immensely by cutting the legs to the correct length instead of all the same.

BP384.jpg
 
Are you going to have the cutout on the starboard side of the captain’s cabin? I had mixed the pieces up and had the cut out plywood on the starboard side and the cutout walnut on the port side. By the time I figured out that you could take out the starboard side to peek into the cabin, it was too late. Everything was glued into place. BTW, it’s looking good, Jodie!
 
I got the inside bulwarks planked. I decided to paint black on the plywood before I put the planks on to hide any gaps. It only took a couple hours. I once again cut the planks down to just a touch longer than the distance between the gun ports to make it easier to install them. I then darkened them with black stain and covered with a coat of shellack.

View attachment 214746

I them moved on to the front wall of the captain’s cabin. I used the black stain like had on the previous planking and coated with shellack. This particular piece of wood didn’t take the stain like the rest of the wood in the kit. I had to consult the admiral about the color for the window frames. I painted several of them different colors from bright white to true black. We finally settled on the Pearl Black below. This is Creatix Pearl Black from Hobby lobby. I bid not install the hinges with the door open because I just didn’t want the door open.

View attachment 214747

I added the black strip of card stock at the bottom of the wall to keep light from leaking under the wall.

View attachment 214748


Here’s where it was at this point.

View attachment 214749
Hi I've been watching this build progress and would like to comment on how good it's looking especially the paint job on the cannons. I am currently working on the golden edition and sometimes regret not buying the bigger version but at the time all I wanted was something to get me back into modelling.
Tony
 
Vic, I'm going to have the opening cutout on the starboard side. The instructions are confusing about what to do when. I think some of the pictures are the Sealed version so it looks like you should put both sides in.

Thanks Tony, my goal is to have the whole ship weathered by the time I'm done.

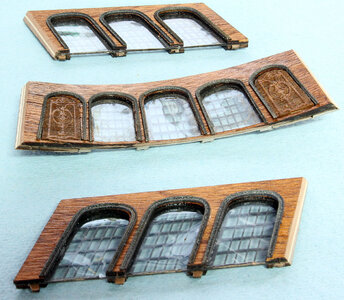
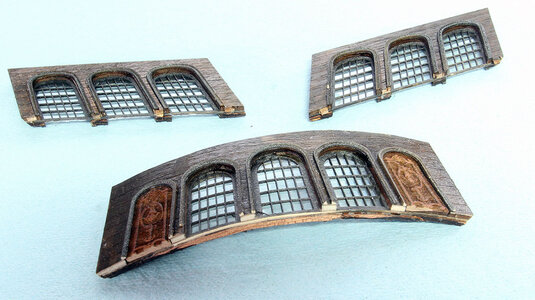
I started working on the walls for the captain’s cabin. First I started on the back wall. I knew it had to be curved . Once again this isn’t very clear in the manual, but there are three pieces that make up the wall not including the clear plastic for the windows. The outer pieces are walnut, the middle is the thin window grid part, and the inside I’m guessing is mahogany. At any rate it’s rough grained and hard to bend. I made a mistake in trying to bend the inner part first, and here’s the result.

BP386.jpg

I should have bent the outside walnut piece first. I had no issue at all bending it with the curling iron method. I did leave it in the rectangular part with the 25 on it and removed it after I bent it.

BP387.jpg

I painted the window grids with the pearl paint mentioned before and glued all of the walls together. I used window plastic from my model railroad supplies, I don’t know if there was supposed to be something included in the kit. I didn’t really put much effort into looking for it as I knew I had the stuff for the train layout.

BP390.jpg

Next I cut the two walls to fill in the sides of the captain’s cabin. I actually had trouble finding them because I was looking for light colored plywood and they’re actually walnut. They were also in the second box instead of the one with all the other wall parts. Here they are glued in. This is the opening I was discussing with Vic.
BP389.jpg

Once again the inner wall didn’t line up with the outer skin. As of writing this I still haven’t decided what I’m going to do about this. I didn’t want to hack the inner wall to the point it would line up because it’s visible from the inside. I may adjust the outside though rite now I’m leaning toward just closing the gun port on the outside and hiding it.

BP388.jpg

I got the rear wall fixxed but haven't taken a photo yet. More to come in the next couple days.
 
I had to hack up the walls using my belt sander; otherwise, the gun ports would be off with the plywood on the outside. To get a curve on the back wall, I had to soak for a few days and wrap around a paint can using rubber bands. I’m really interested to see how your cutout wall will look when you are finished. I wish I had had the foresight and skill to make that happen. Good build, Jodie!
 
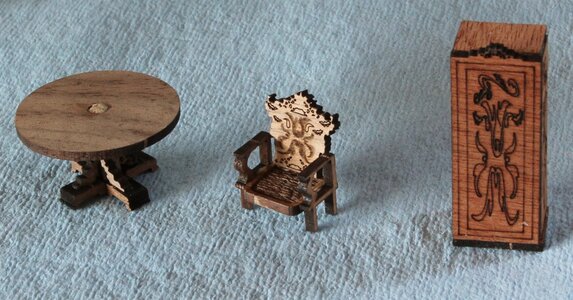
I built the supplied furniture for inside the cabin. Here’s what is included. I made a mistake on the table and cut the dowel pin in the center to short. The instructions point to the dowel with a label that says “8mm”. I assumed this meant the dowel should be 8mm long, but I now believe the intent is for the 8mm of the dowel to be between the base and the ring under the table. So it should be more like 16mm total length. I added a spacer to raise my table.

BP391.jpg

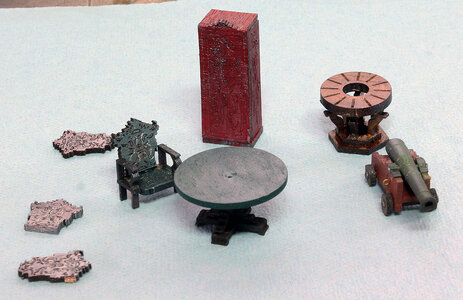
Then I did a little painting to add some variation to the colors.

BP392.jpg

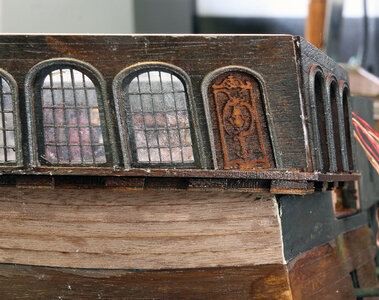
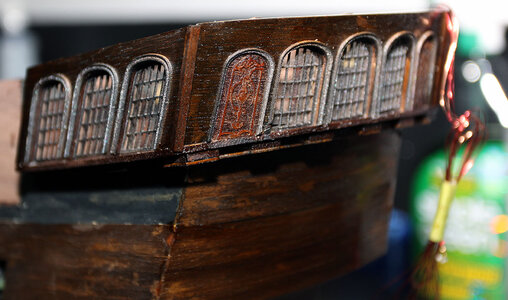
Next I added some finish to the sides and back of the captain’s cabin. There are a lot of pieces here. I painted the arches before attaching them. I pretty much managed to piece the inner part of the back wall section back together.
Then the next puzzle to tackle, is the manual shows the ship without these parts attached and the next photo with them attached. Then a phot with everything missing and then totally completed. Pretty cool magic trick if you can pull it off. Being as I flunked out of magic class, I approached it differently.

As you can see in the photos built the back wall with the bend in it before placing it on the model. The manual shows placing just the furthest back walnut piece and then gluing everything on the inside after the side walls and rear are assembled. I think this would be incredibly hard to do given that the outer walls and the back wall need to be chamfered on the ends to fit. The angle of the rear wall is also off and I had to sand the top and bottom of the back wall to get a good fit. Here’s the prepped walls you can see the chamfers I sanded on with a disk sander.

BP394.jpg

And then from the outside.

BP395.jpg

I finally remembered to take a photo of where I attached the magnet wires to the wires that I ran from the bottom of the boat. I had to buy some extra magnet wire as I mentioned earlier in this thread. So I bought red to differentiate the positive and negative. I think running the 2 larger wires to this point was a good decision as I didn’t have to work around the 18 little wires for the last several months

BP396.jpg

I finished soldering the lanterns, and as I had said back when I did the others, . I made a video of soldering the LED’s on. Problem is I haven’t figured out a way to post it. My phone won’t e-mail it because it’s too big. I will eventually work on that problem most likely.

Here’s the lanterns and other wires.

BP397.jpgBP399.jpgBP400.jpg

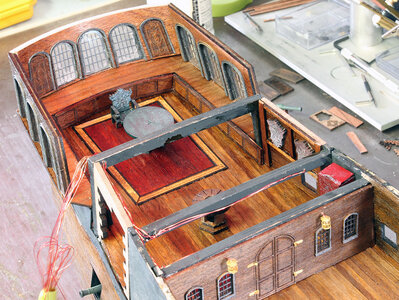
I added the furniture and canon and decided it was time to put the walls on. Even with the sanding I still had a little gap on the end and below the stern plate. If I sanded more from the bottom it would mess up the window frame, and if I sanded the top more it wouldn’t match with the site, you can see them below.

BP402.jpgBP404.jpg

Here’s a couple shots from the top.

BP406.jpgBP407.jpg

I cut a small wedge filler from scrap for under the rear wall where the gap was and then used a walnut angle piece to make a trim strip for the corners. Here’s the corner after patching it up.

BP409.jpg

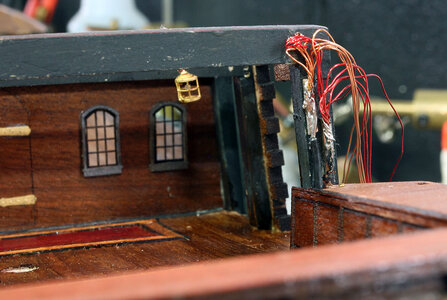
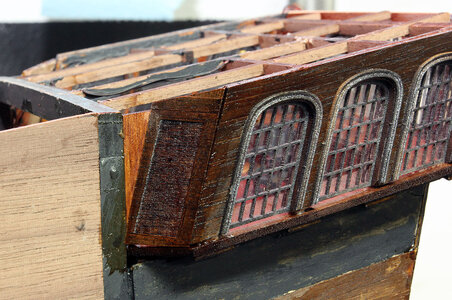
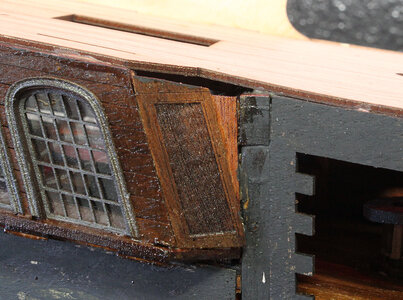
And finally to close in the cabin I used the two pieces the manual calls for. There is a photo in the manual taken from the inside of the ship that points to something, it took me a while to figure out it’s pointing at a tringle shaped piece of mahogany that glues to the back of the black frame in the phot below. The walnut side piece then lays on the triangle. The walnut piece needs a lot of shaping work to get to where it matches all the surrounding parts. I even got it to short and had to glue an extra piece on top.

BP410.jpg
 
I built the supplied furniture for inside the cabin. Here’s what is included. I made a mistake on the table and cut the dowel pin in the center to short. The instructions point to the dowel with a label that says “8mm”. I assumed this meant the dowel should be 8mm long, but I now believe the intent is for the 8mm of the dowel to be between the base and the ring under the table. So it should be more like 16mm total length. I added a spacer to raise my table.

View attachment 215602

Then I did a little painting to add some variation to the colors.

View attachment 215603

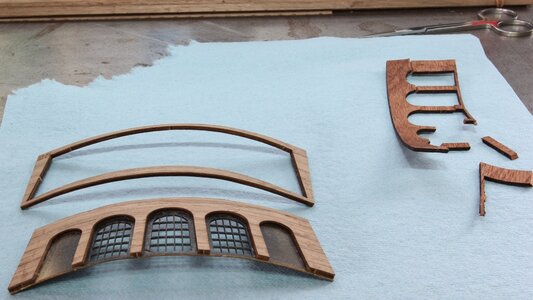
Next I added some finish to the sides and back of the captain’s cabin. There are a lot of pieces here. I painted the arches before attaching them. I pretty much managed to piece the inner part of the back wall section back together.
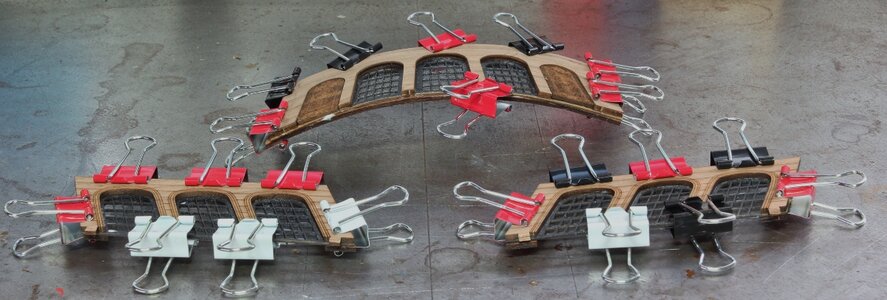
Then the next puzzle to tackle, is the manual shows the ship without these parts attached and the next photo with them attached. Then a phot with everything missing and then totally completed. Pretty cool magic trick if you can pull it off. Being as I flunked out of magic class, I approached it differently.

As you can see in the photos built the back wall with the bend in it before placing it on the model. The manual shows placing just the furthest back walnut piece and then gluing everything on the inside after the side walls and rear are assembled. I think this would be incredibly hard to do given that the outer walls and the back wall need to be chamfered on the ends to fit. The angle of the rear wall is also off and I had to sand the top and bottom of the back wall to get a good fit. Here’s the prepped walls you can see the chamfers I sanded on with a disk sander.

View attachment 215605

And then from the outside.

View attachment 215606

I finally remembered to take a photo of where I attached the magnet wires to the wires that I ran from the bottom of the boat. I had to buy some extra magnet wire as I mentioned earlier in this thread. So I bought red to differentiate the positive and negative. I think running the 2 larger wires to this point was a good decision as I didn’t have to work around the 18 little wires for the last several months

View attachment 215607

I finished soldering the lanterns, and as I had said back when I did the others, . I made a video of soldering the LED’s on. Problem is I haven’t figured out a way to post it. My phone won’t e-mail it because it’s too big. I will eventually work on that problem most likely.

Here’s the lanterns and other wires.

View attachment 215608View attachment 215609View attachment 215610

I added the furniture and canon and decided it was time to put the walls on. Even with the sanding I still had a little gap on the end and below the stern plate. If I sanded more from the bottom it would mess up the window frame, and if I sanded the top more it wouldn’t match with the site, you can see them below.

View attachment 215611View attachment 215612

Here’s a couple shots from the top.

View attachment 215613View attachment 215614

I cut a small wedge filler from scrap for under the rear wall where the gap was and then used a walnut angle piece to make a trim strip for the corners. Here’s the corner after patching it up.

View attachment 215615

And finally to close in the cabin I used the two pieces the manual calls for. There is a photo in the manual taken from the inside of the ship that points to something, it took me a while to figure out it’s pointing at a tringle shaped piece of mahogany that glues to the back of the black frame in the phot below. The walnut side piece then lays on the triangle. The walnut piece needs a lot of shaping work to get to where it matches all the surrounding parts. I even got it to short and had to glue an extra piece on top.

View attachment 215616
That’s smoother than mine. I had the same issues, but you did a better job with it imho.
 
Vic, I'm going to have the opening cutout on the starboard side. The instructions are confusing about what to do when. I think some of the pictures are the Sealed version so it looks like you should put both sides in.

Thanks Tony, my goal is to have the whole ship weathered by the time I'm done.

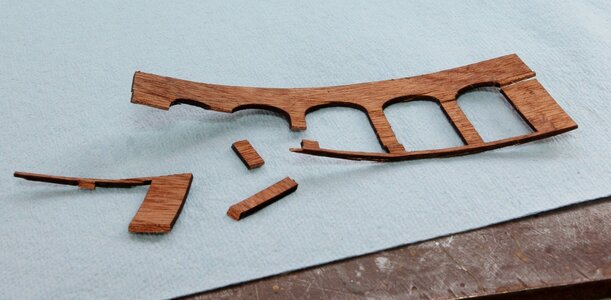
I started working on the walls for the captain’s cabin. First I started on the back wall. I knew it had to be curved . Once again this isn’t very clear in the manual, but there are three pieces that make up the wall not including the clear plastic for the windows. The outer pieces are walnut, the middle is the thin window grid part, and the inside I’m guessing is mahogany. At any rate it’s rough grained and hard to bend. I made a mistake in trying to bend the inner part first, and here’s the result.
View attachment 215042

I should have bent the outside walnut piece first. I had no issue at all bending it with the curling iron method. I did leave it in the rectangular part with the 25 on it and removed it after I bent it.

View attachment 215043

I painted the window grids with the pearl paint mentioned before and glued all of the walls together. I used window plastic from my model railroad supplies, I don’t know if there was supposed to be something included in the kit. I didn’t really put much effort into looking for it as I knew I had the stuff for the train layout.

View attachment 215044

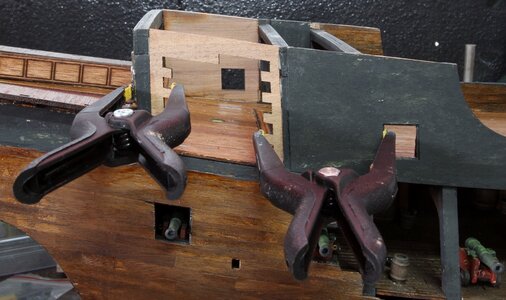
Next I cut the two walls to fill in the sides of the captain’s cabin. I actually had trouble finding them because I was looking for light colored plywood and they’re actually walnut. They were also in the second box instead of the one with all the other wall parts. Here they are glued in. This is the opening I was discussing with Vic.
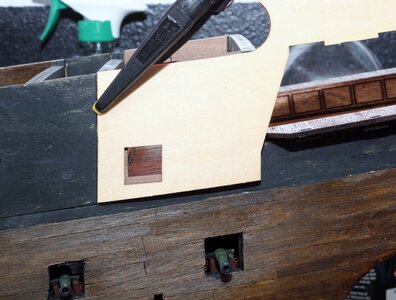
View attachment 215045

Once again the inner wall didn’t line up with the outer skin. As of writing this I still haven’t decided what I’m going to do about this. I didn’t want to hack the inner wall to the point it would line up because it’s visible from the inside. I may adjust the outside though rite now I’m leaning toward just closing the gun port on the outside and hiding it.

View attachment 215046

I got the rear wall fixxed but haven't taken a photo yet. More to come in the next couple days.

Appreciate all the detail documentation and pictures.
The ship looks great, can't wait to start my BP.
 
I must say mate, you are doing a smash up good job! WOW! I see your Admiral provides you with the necessary inspiration to move you forward! Bravo! I am glad I found this forum and your build in particular. Your build to this point has provided me with a much better understanding to what stormy seas I will encounter by attempting such a build.

I ordered this same kit from Max a few days ago after my Admiral and I went through some old, dusty DVD’s and watched the first three movies of the “Pirate’s” series again. I fear now that i may have jumped into shark-infested waters with this kit, but San Diego is a Naval City and I have plenty of time on my hands, now retired at 66 years young.

Actually, I’ve always wanted to try scaling a wooden ship since I was a kid. I’m finishing up the Revell plastic 1/96 version of the USS Constitution now. Just finished all standing rigging and onto the final leg of doing the running rigging with sails. I think this build is what pushed me into my desire to do one REAL wooden ship. Several months back I even bought the Revell 1/72 version (plastic) of the “Pearl”, but after looking into wooden kits more I decided to go with ZHL’s All-scenario version.

I sort of look back on my life and think more like a Renaissance man, more a Jack-of-all trades and a master of none. I fill up a lot of my time with golf, kayaking, N scale Kato trains, Ham radio, gardening...well, a lot more things since I retired at 62 and needed interests to keep me out of trouble with the Admiral. LOL...

Well, enough about me....I just thought you should know that you are a bit responsible for sucking me into this task staring me down in my future. Your build motivated me to order the “Pearl from ZHL. I plan it will take me years to do this ship, if I even can complete it. (At the very least, it will provide a decent fire to roast marshmallows while I sip rum and watch the sun set over the Pacific) But God willing, it will be my first and last ship to attempt most likely. So, considering my $600 could have been gone in an evening at a local Indian Casino, my money invested on this kit will go a lot farther!

Didn’t mean to hijack your thread with such a ramble, but I do want to thank you again for providing us deck hands with this build and it’s documentation. Your Admiral can be very proud of you in many ways, Be well and sail with the wind at your back!

Rick from San Diego
 
Last edited:
I must say mate, you are doing a smash up good job! WOW! I see your Admiral provides you with the necessary inspiration to move you forward! Bravo! I am glad I found this forum and your build in particular. Your build to this point has provided me with a much better understanding to what stormy seas I will encounter by attempting such a build.

I ordered this same kit from Max a few days ago after my Admiral and I went through some old, dusty DVD’s and watched the first three movies of the “Pirate’s” series again. I fear now that i may have jumped into shark-infested waters with this kit, but San Diego is a Naval City and I have plenty of time on my hands, now retired at 66 years young.

Actually, I’ve always wanted to try scaling a wooden ship since I was a kid. I’m finishing up the Revell plastic 1/96 version of the USS Constitution now. Just finished all standing rigging and onto the final leg of doing the running rigging with sails. I think this build is what pushed me into my desire to do one REAL wooden ship. Several months back I even bought the Revell 1/72 version (plastic) of the “Pearl”, but after looking into wooden kits more I decided to go with ZHL’s All-scenario version.

I sort of look back on my life and think more like a Renaissance man, more a Jack-of-all trades and a master of none. I fill up a lot of my time with golf, kayaking, N scale Kato trains, Ham radio, gardening...well, a lot more things since I retired at 62 and needed interests to keep me out of trouble with the Admiral. LOL...

Well, enough about me....I just thought you should know that you are a bit responsible for sucking me into this task staring me down in my future. Your build motivated me to order the “Pearl from ZHL. I plan it will take me years to do this ship, if I even can complete it. (At the very least, it will provide a decent fire to roast marshmallows while I sip rum and watch the sun set over the Pacific) But God willing, it will be my first and last ship to attempt most likely. So, considering my $600 could have been gone in an evening at a local Indian Casino, my money invested on this kit will go a lot farther!

Didn’t mean to hijack your thread with such a ramble, but I do want to thank you again for providing us deck hands with this build and it’s documentation. Your Admiral can be very proud of you in many ways, Be well and sail with the wind at your back!

Rick from San Diego
Looking forward to your build, Rick. Please start a build log. I would love to follow it.
Vic
 
Looking forward to your build, Rick. Please start a build log. I would love to follow it.
Vic
Hi Vic,
Well, I’m a real greenie novice when it comes to this hobby. Not sure a published build would do any good for most of the folks in this hobby. I figure that I need to stock my work station with all the necessary tools and equipment before my kit arrives. Likely not to start until next month but I guess it wouldn’t hurt to start a log here when I start. No doubt will need advice for sure.
BTW, I went to school with a boy named James Fordyce many years ago back in PA. He might be in your family tree.
Rick
Uncle Harry lived in Uniontown. Dad was from there. The BP is my second ship. Please feel free to visit my build. I’m fairly new at this too. And the newbies and old salts can always learn from each other. And we might just be able to pass on what we learned about what you’re doing. The great thing is the people here aren’t here to criticize. We’re here to encourage and share. Sorry to highjack your thread, Jodie. I’ll get off now.
 
Thanks for the compliments Rick. With all the threads on here now you ought to have a good shot at predicting where the problem areas are. I'm also a N-scale train guy. Same screen name on N-scale.net. Haven't been on the trian site much lately. I got quite a bit done last weekend but haven't had time to write it up, will hopefully get that done tomorrow.
 
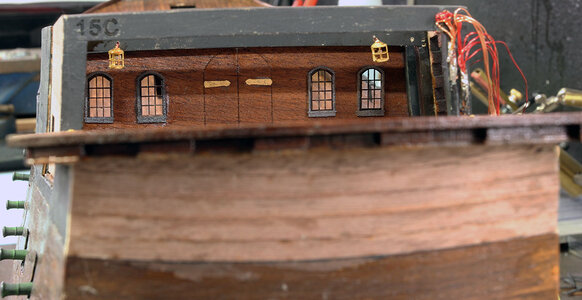
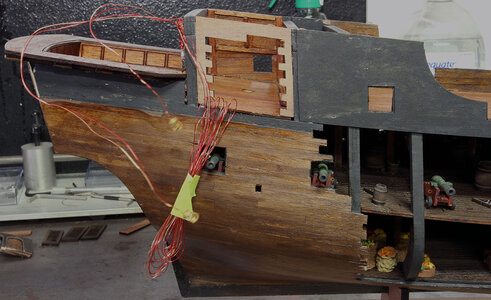
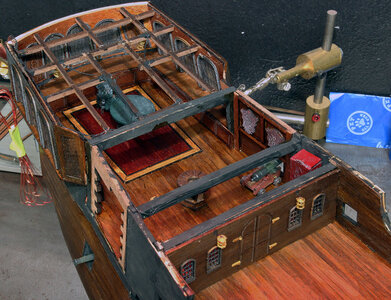
I think this is pretty much ready for the next deck to be attached above. Before I do that I wanted to consider maybe adding a few more items, and also figure out what I need to do with the wires going to the back lantern. I decided this would be one of those place I should stop and think about it a bit before I close it up.

BP414.jpg

BP415.jpg

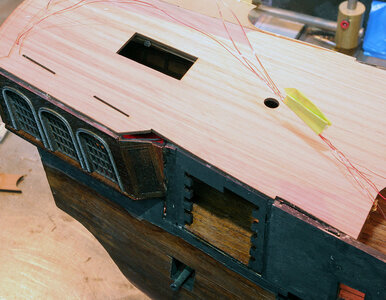
So I mounted the aft deck which shows how far off the front of the captain’s cabin is. I decided to just fix the small gaps instead of trying to adjust the completed work. I also drilled 3 holes in the deck to bring the wires for the rear lanterns through. I placed the upper side parts on temporarily to figure out where to drill the holes.

BP416.jpg

If I had seen this how these fit together before I built it I would have used the upper deck to shape the side pieces. Good tip for anyone building this kit that hasn’t gotten this far.

BP418.jpg

Here’s the port side with a filler piece and the last of the thin plywood pieces.

BP419.jpg

And the starboard side after filling it in and trimming the plywood to fit around it.

BP420.jpg

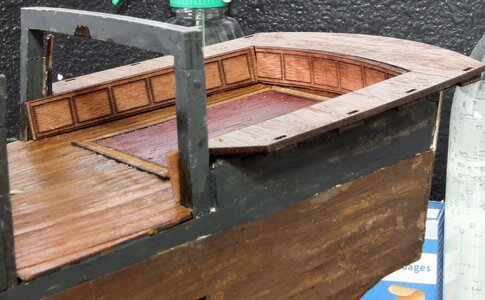
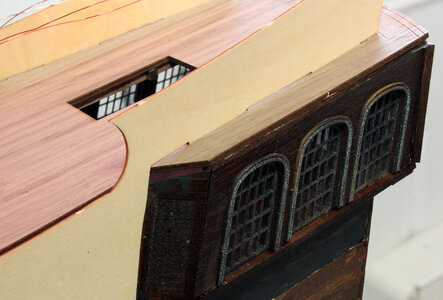
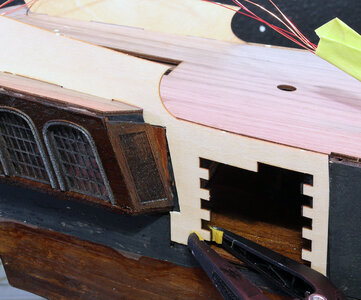
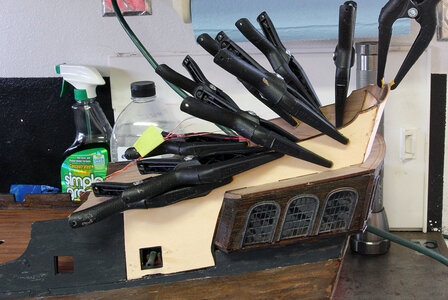
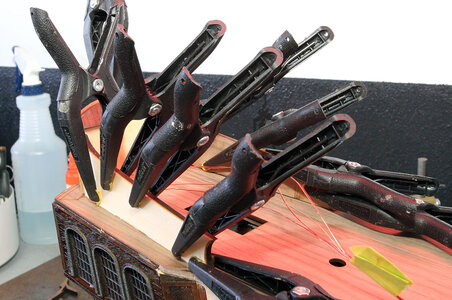
The next thing I needed to do was add the sides and stern above the captain’s cabin area. There are six parts in the photo below. The two thin plywood sides 2 sides made from walnut and the two aft pieces. I soaked the two stern pieces and arched them with a curling iron. (EDIT: THere are several plywood parts that go against the stern pieces. The parts are K4 in the manual. You can see them 4 photos below this text. You can use these parts as guages to arch the stern pieces.) My sides were closer together than the width across the new side walls. I used my disk sander to angle the ends of the back piece and make a angled notch on each side piece. Unfortunately I didn’t get a photo of that. Here’s all of the parts clamped in place.

BP421.jpg

BP422.jpg

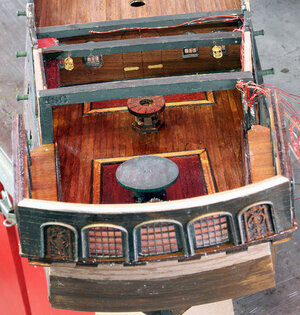
In the photo below you can see the notch I cut in the top of the thicker side piece for the back part to set into. After this dried I drilled three holes through the top aft walnut piece for the magnet wires going to the three lanterns on the rear. The photos in the manual are pretty comical in relation to figuring out how these should be routed. There are photos where they look like they go to the rear, and even one where it appears the upper deck is in place and planked but the wires look like they are going through the front of the cabin. This arrangement made sense to me so I went with it.
BP423.jpg

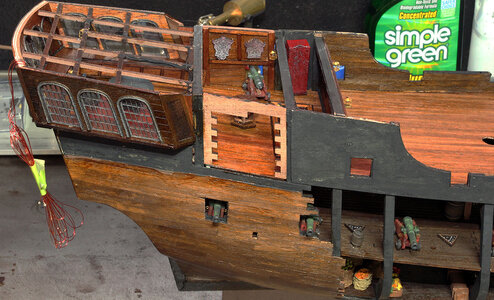
Here’s another good tip if you haven’t gotten this far. The arched pieces in the photo below are grouped together, there are about 8 of them. The manual shows them in place with a bunch of filler plastered on them. I thought the photo was just of a layer of planking. If I had realized these were in the kit I would have used them to bend the stern parts to a matching radius. As it is, I was pretty close but had to clamp them in. There is also a note in the manual that says to run the wires for the lanterns through the groove in the back of these parts. I think running the wires separate will make it easier to hook up the lanterns.
BP424.jpg

So I painted the outside black in preparation for the rest of the planking.

BP425.jpg

BP426.jpg

I got to the point above on a Friday night and kind of went planking crazy on Saturday and Sunday. I thought I had taken some photos before the point below but I guess I just got lost having so much fun I forgot about it.

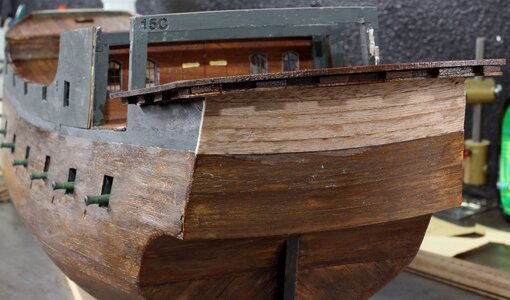
I started staining the newly added planking and got it a lot darker than I had intended originally. After over doing about 5 percent of it I decided I couldn’t take it off so I just made the whole upper portion much darker. I really like the effect it came out with.

BP427.jpg

BP428.jpg

BP430.jpg

Hopefully I can get this thread caught up to where I'm at tomorrow.
 
Last edited:
Back
Top