Continuing with the first layer of planking. I must say, this is probably my least favorite aspect of the build, mainly because it is so hard to complete the job without some misstep or miscalculation. There are always one or two (or 10) strakes that just refuse to behave the way you want them to. So, no matter how hard I try to fair my bulkheads properly, the end result is some strakes are sunken, while some sit high, some get crinkles, while some leave gaps. Fortunately, wood is a forgiving material, and most problems can be fixed with a bit of wood filler and sandpaper.
After gluing the first three full-width strakes, I put in a temporary batten and allowed it to folllow its natural curve. Knowing that I will have to narrow the strips towards the bow and the stern, I decided, for expediency, to trim the strips to the maximum half of their width(rather than going thru the complex calculations of measuring the vertical distances of the various bulkheads).
Using my xacto knife, I cut a master strip to the proper width which I then used as a pattern to cut more strips. I alternately glued each strake on the port side and then the starboard side, trying to make sure that the strakes are aligned with each other.
View attachment 212874
View attachment 212876
View attachment 212875
I then went down towards the keel and worked on the garboard plank.
After trimming the edge of the planks to the appropriate shape, I soaked them in water and after a while clamped them against the keel. The garboard plank has to be twisted quite severely, because it has to go from a 90degree angle against the keel, to almost a flat towards the stern and bow. Once clamped, I hit it with heat from a blow dryer for a few minutes, in order to keep its shape.
I do the above process for the 2nd plank as well.
View attachment 212877
View attachment 212880
I proceeded to glue the garboard and the 2nd plank using CA gel glue at the contact points and Elmer's wood glue along the length of the strip. The model has a false rabbet at the bow where the tips of the planks neatly get tucked into.
View attachment 212878
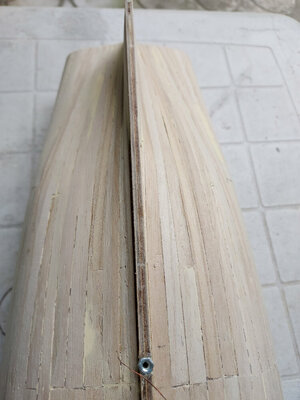
Towards the stern the garboard lies flat on the deadwood area. I tried to let the plank follow its natural curve towards the stern, but it winds up too far up (down?) Along the deadwood area.
View attachment 212885
I had to wrestle with it a little bit to get it to lay along the edge of the last bulkhead. I chiseled part of the deadwood area so that the planks will lay level and not bulge too much for the 2nd planking. The plan was to chisel about 1mm on the deadwood area and sand down the plank to a thickness of 1mm, so the net result is a flat level area which would then receive the 2nd plank, with the net result that it will be the same thickness as the rudder.
I was too much of a scaredy cat to chisel too much of the keel, so I wound up with still a slight bulge around the deadwood area. I will try to fix later on with sandpaper.
View attachment 212881
View attachment 212882
I had a minor problem with the garboard where it bends abruptly after the first bulkhead. The plank got a noticeable crinkle due to the severe angle. I will fix later on with a bit of filler.
View attachment 212884
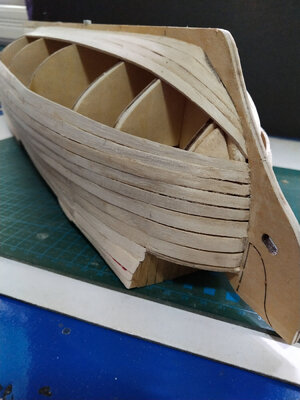
So after the first 2 planks are glued, it was just a matter of adding more planks to close the gap.
View attachment 212887
View attachment 212886
The last gap is always problematic, as it requires planning and trial and error to close it. I employed a mixture of stealers wedges, drop planks and fillers. It wasn't the prettiest job, but it got it done.
View attachment 212891
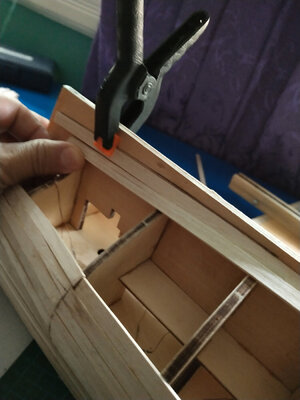
By the way, I wanted to show my approach to prepare for my display mounting bolts. The model comes with two pedestals where I plan to drill holes for a 3mm bolt. Before planking, I inserted reinforcing blocks on the inside of the keel. I drilled (very carefully) a hole thru the keel, about 15mm deep. I cut a portion of the keel so that I can position and glue the threaded nut directly over the drilled hole.
View attachment 212892
View attachment 212893
Will continue to the next post.


")


