i know what you are saying in regards to the resin side pieces not even close to fitting but by raising your bulkheads at the waist you throw off the lines of the ship and will only encounter more problems down the road. i have come to the conclusion that the ship in the pictures on the box and on the web were build around the resin pieces not vice versa. also if you check out some of the smaller resin chunks you will notice that they are too big for this ship. i suspect that they are a mixture of the 1:50 and the 1:30 scales. i have decided not to use any of the resin globs and just make a wooden ship model with some trim work detailed cannons and deck furniture. it will be renamed the h.m.s. louise after the wife. good luck with your build. the lights are a nice touch, especially at the stern.
-

Win a Free Custom Engraved Brass Coin!!!
As a way to introduce our brass coins to the community, we will raffle off a free coin during the month of August. Follow link ABOVE for instructions for entering.
-

PRE-ORDER SHIPS IN SCALE TODAY!
The beloved Ships in Scale Magazine is back and charting a new course for 2026!
Discover new skills, new techniques, and new inspirations in every issue.
NOTE THAT OUR FIRST ISSUE WILL BE JAN/FEB 2026
You are using an out of date browser. It may not display this or other websites correctly.
You should upgrade or use an alternative browser.
You should upgrade or use an alternative browser.
I will chime in and say that I don't like working with resin. Although the detail is better than plastic, it is harder to work with.
A few tips - 1) You have to use superglue on it. 2) You also have to be careful cutting and sanding it, because it can be brittle and is also carcinogenic (wear a mask). 3) You will need to primer it before painting, or the paint will flake off. 4) Be sure to rinse in soapy water and gently clean with a toothbrush prior to using them, to remove the releasing agent. 5) If you need to bend it, you can heat it up and bend similar to wood.
Best of luck!
Last edited:
same ship. maybe i got a monday or friday manufactured kitWow @shipahoy ! Are we talking about the same kits here? Reggie seems to be doing a wonderful on his Kool-Aid induced ZHL built!
- Joined
- Apr 20, 2020
- Messages
- 313
- Points
- 278

Sorry it's been a while since my last post. I've been working on a lot of small things, not necessarily in the same order as the instructions. I tried not to do any pieces that might break while I am still working on the hull.
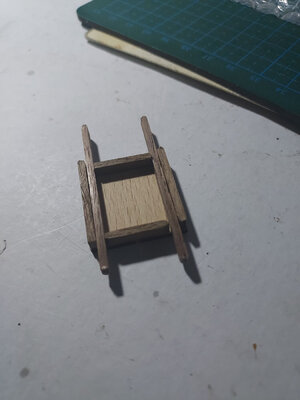
I assembled the slider that goes on top of the upper deck. Aside from the 2 square panels, all the other parts are DIY.
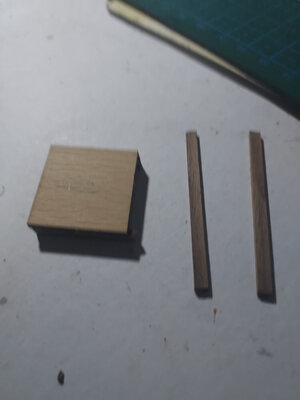
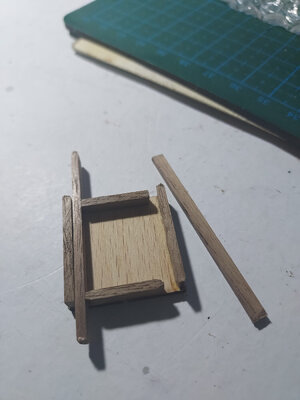
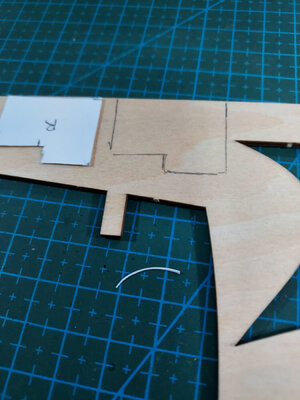
There are supposed to be 3 wall panels that frame the stairs, but hard as I looked, I couldn't find the parts in the kit. So, again, I had to DIY the pieces from leftover plywood.

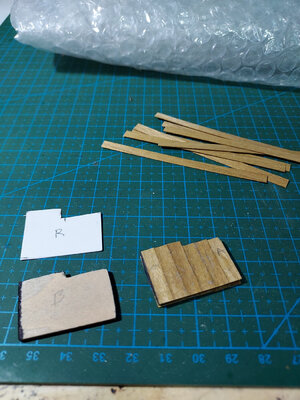
According to the plans, the leftmost wall is supposed to extend all the way downstairs, but since I had already installed the stairs previously, it's not possible to extend it so.
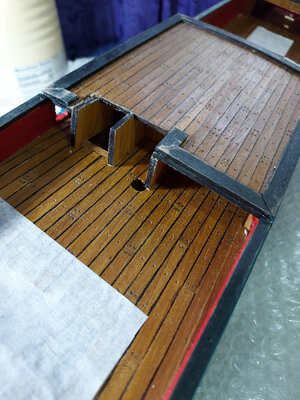
Here's the finished product. Still some minor paint touchups needed but otherwise complete.
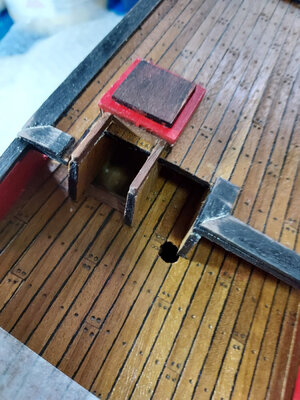
I assembled the slider that goes on top of the upper deck. Aside from the 2 square panels, all the other parts are DIY.


There are supposed to be 3 wall panels that frame the stairs, but hard as I looked, I couldn't find the parts in the kit. So, again, I had to DIY the pieces from leftover plywood.


According to the plans, the leftmost wall is supposed to extend all the way downstairs, but since I had already installed the stairs previously, it's not possible to extend it so.

Here's the finished product. Still some minor paint touchups needed but otherwise complete.

- Joined
- Apr 20, 2020
- Messages
- 313
- Points
- 278

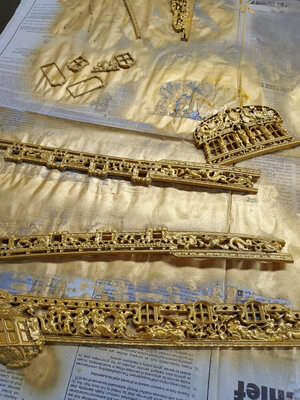
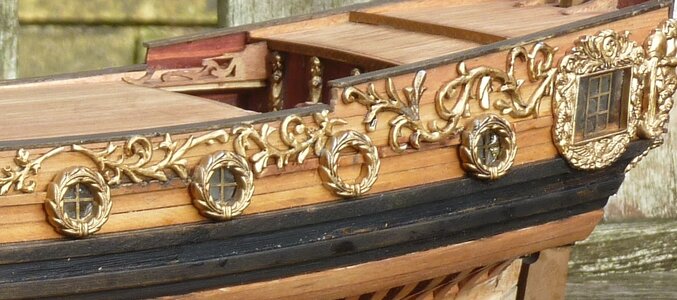
Next, I thought I'd work on the resin carvings. I was just too eager to see how they would look like all painted up.
First I took out my Dremel and a bunch of dental bits to clean out the null areas of the carvings. Following the advice of our friends, I just made sure I wore a mask to avoid the unhealthy resin dust.
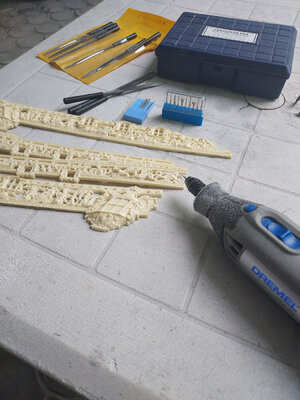
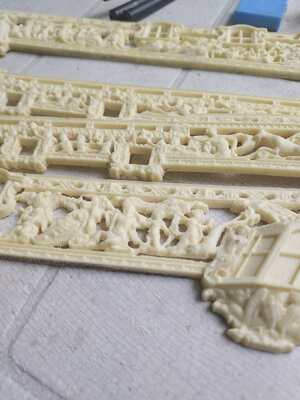
Prior to painting, I scrubbed the pieces using a stiff brush and soap and water.
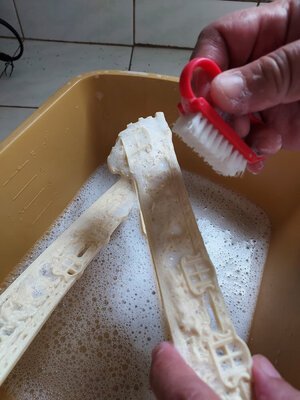
I prepped them by spraying primer.
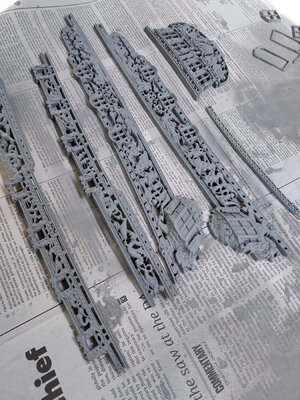
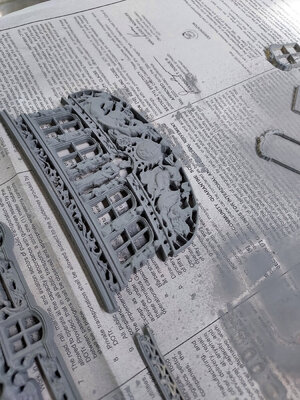
Then, finally, two coats of gold spray paint. I don't have an air brush, so I had to be content with paint in a can.
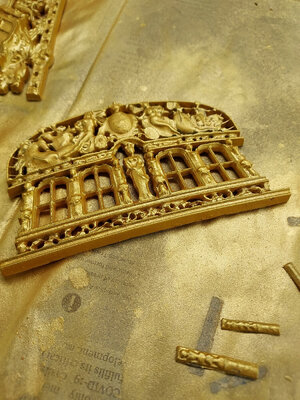
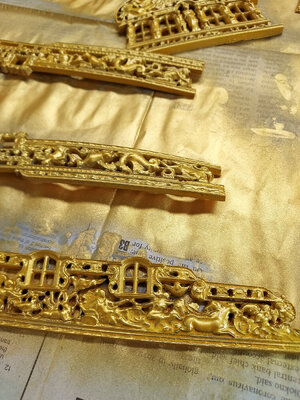
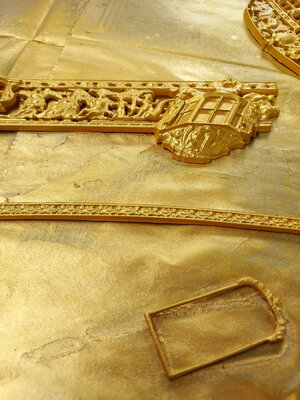
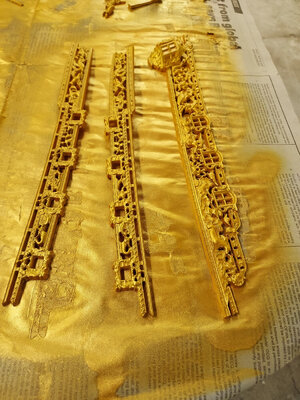
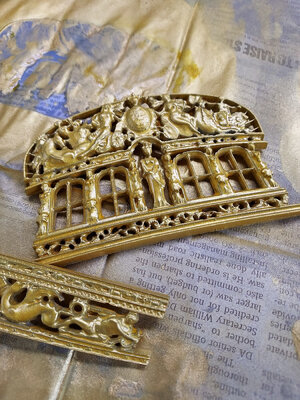
I took one piece and I experimented with applying a light black wash over it, but I thought the wash diminished the glimmer of the gold somewhat, as can be seen in the 2nd picture below.
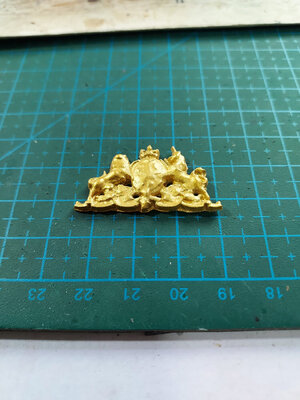
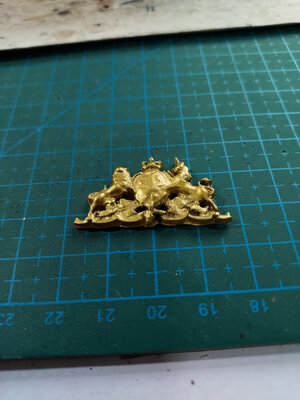
So maybe I will defer the black wash for now.
However , I am thinking I will need to protect the gold finish from fading and scratches.
So, question to our friends please. Is it a good idea to apply poly over the gold paint? I am just concerned that poly will dull the finish.
Thanks everyone.
First I took out my Dremel and a bunch of dental bits to clean out the null areas of the carvings. Following the advice of our friends, I just made sure I wore a mask to avoid the unhealthy resin dust.


Prior to painting, I scrubbed the pieces using a stiff brush and soap and water.

I prepped them by spraying primer.


Then, finally, two coats of gold spray paint. I don't have an air brush, so I had to be content with paint in a can.


I took one piece and I experimented with applying a light black wash over it, but I thought the wash diminished the glimmer of the gold somewhat, as can be seen in the 2nd picture below.


So maybe I will defer the black wash for now.
However , I am thinking I will need to protect the gold finish from fading and scratches.
So, question to our friends please. Is it a good idea to apply poly over the gold paint? I am just concerned that poly will dull the finish.
Thanks everyone.
Attachments
- Joined
- Apr 20, 2020
- Messages
- 313
- Points
- 278

Next I worked on the doors, windows and trimmings for the midship gallery.
I glued on a piece of translucent plastic to the back of the frames. I used CA gel glue to attach, but the plastic kept peeling off. After a few retries, I discovered that the plastic was too smooth so the glue was having difficulty getting a good grip. So, I sanded the plastic to make it a bit coarse and sure enough it worked. One other problem I had was, no matter how hard I tried, I always wound up with some glue smear on the plastic.
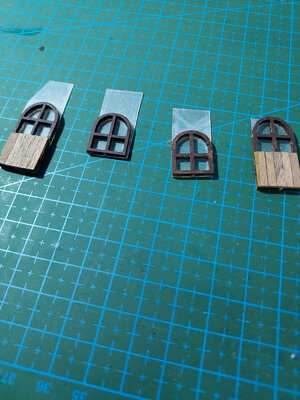
The doors and windows fit nicely after a bit of sanding. You can see the glue smears, but such is life. Note to self for the next project: Learn how to avoid glue smears.
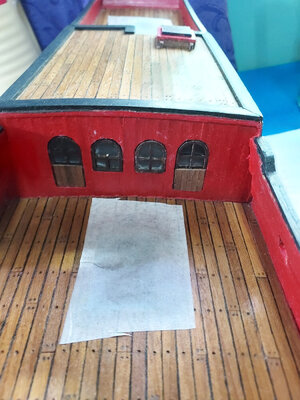
I then glued on the gold trimmings. A few observations, more of a complaint. The resin pieces seem to be off in their dimensions. The door frames had to be installed off-center because there is not enough room laterally, as the windows encroach on the space. Secondly, and this was alluded to by our friend @shipahoy, the emblem piece below the windows is way too big, which makes one suspect that it might have been proportioned for the larger 1:30 model.
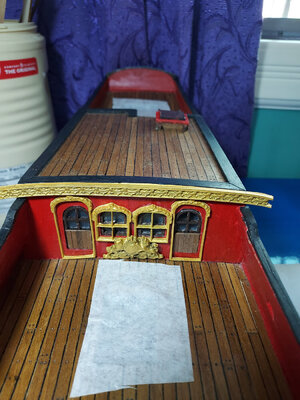
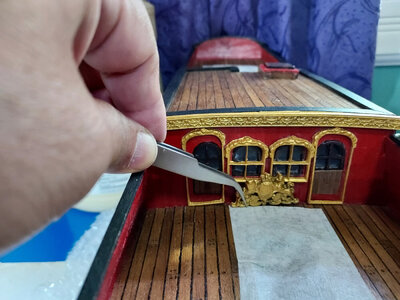
I will have to be content with it, as there isn't much I can do to correct it at this point. Hopefully it won't be too noticeable since there will be a lot of stuff in front of it to sort of cover it. Just something for Yuan Qing and ZHL to improve on, for the next iteration.
However, having said this, I am still having lots of fun working on this model, faults and all. Let this not detract from the fact that I still believe that, overall, it is good value for the money.
I glued on a piece of translucent plastic to the back of the frames. I used CA gel glue to attach, but the plastic kept peeling off. After a few retries, I discovered that the plastic was too smooth so the glue was having difficulty getting a good grip. So, I sanded the plastic to make it a bit coarse and sure enough it worked. One other problem I had was, no matter how hard I tried, I always wound up with some glue smear on the plastic.

The doors and windows fit nicely after a bit of sanding. You can see the glue smears, but such is life. Note to self for the next project: Learn how to avoid glue smears.

I then glued on the gold trimmings. A few observations, more of a complaint. The resin pieces seem to be off in their dimensions. The door frames had to be installed off-center because there is not enough room laterally, as the windows encroach on the space. Secondly, and this was alluded to by our friend @shipahoy, the emblem piece below the windows is way too big, which makes one suspect that it might have been proportioned for the larger 1:30 model.


I will have to be content with it, as there isn't much I can do to correct it at this point. Hopefully it won't be too noticeable since there will be a lot of stuff in front of it to sort of cover it. Just something for Yuan Qing and ZHL to improve on, for the next iteration.
However, having said this, I am still having lots of fun working on this model, faults and all. Let this not detract from the fact that I still believe that, overall, it is good value for the money.
I always use a dark diluted wash of paint over the gold ornamentation. It gives a much more realistic and slightly dulled finish and provides some depth to the mouldings. It looks more like brass that needs polishing. I use "Paint Factory Metallic Shimmering Gold" that contains acetone and zylene, and after a couple of days curing I brush in a wash of spirit-based dark oak woodstain, holding the model in a position where the stain won't run off the moulding too readily, and then gently buff it before it dries with a soft brush and a rag.

Scary business all that cutting out with dental drill bits!
- Joined
- Apr 20, 2020
- Messages
- 313
- Points
- 278

Ha ha ha...Right on Paul @dockattner ...makes me appreciate even more the kind of precise skills you guys must have to be able to drill inside people's mouths without inflicting too much pain.Scary business all that cutting out with dental drill bits!
- Joined
- Apr 20, 2020
- Messages
- 313
- Points
- 278

Thanks for the info @Chris. I will try the wash one more time. I guess I missed the final step of buffing with a brush or rag. That is beautiful work you did on those carvings by the way.I always use a dark diluted wash of paint over the gold ornamentation. It gives a much more realistic and slightly dulled finish and provides some depth to the mouldings. It looks more like brass that needs polishing. I use "Paint Factory Metallic Shimmering Gold" that contains acetone and zylene, and after a couple of days curing I brush in a wash of spirit-based dark oak woodstain, holding the model in a position where the stain won't run off the moulding too readily, and then gently buff it before it dries with a soft brush and a rag.
View attachment 225820
Imagine if your resin carving was squirming around while you were trying to do precision drilling!
How about an experiment on a small piece with a wash? You could always paint over it if you didn't like it. But I wouldn't necessarily use black - how about fleshtone wash or umber? Vallejo has a line of washes...
How about an experiment on a small piece with a wash? You could always paint over it if you didn't like it. But I wouldn't necessarily use black - how about fleshtone wash or umber? Vallejo has a line of washes...
- Joined
- Apr 20, 2020
- Messages
- 313
- Points
- 278

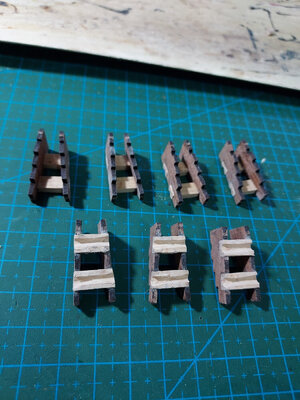
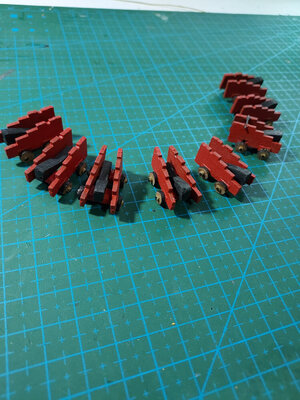
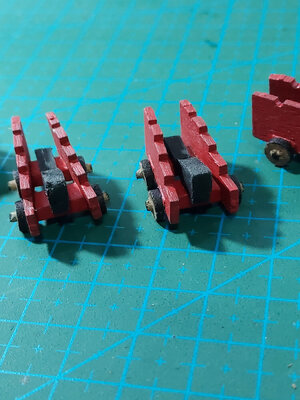
Srarted working on the cannon carriages. I think I got a break on this task, since I only have 8 of them to do.
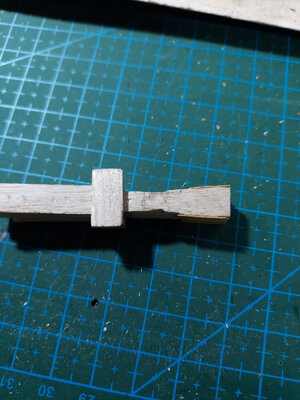
I put together a quick jig to help me align the pieces properly. A piece of wood strip goes underneath the assembly, forming a sort of an undercarriage.
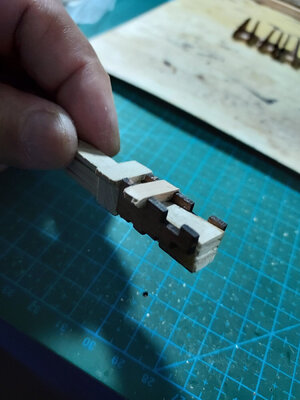
Then using a dental drill bit, I carved out an indentation where the axle will go.
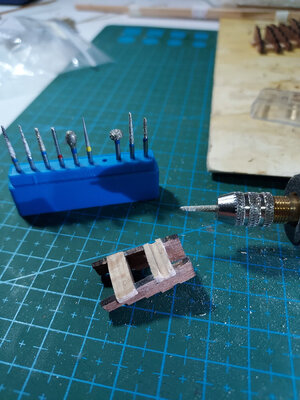
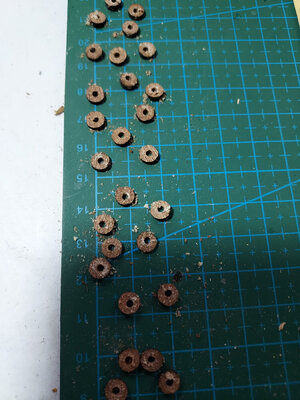
The wheels needed holes to be drilled at the center.
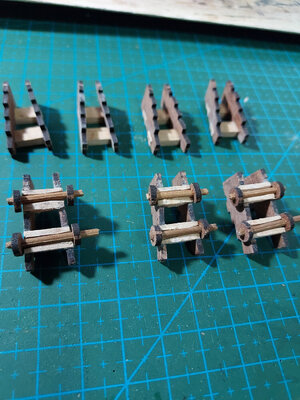
The wheel asembly is then attached.
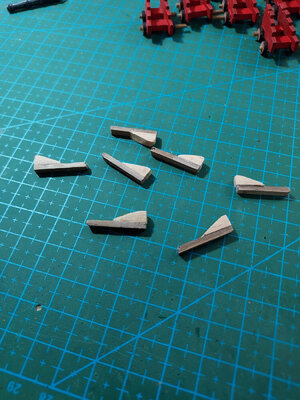
The piece where the guns rest on top of had to be DIYed.
Once assembled, I applied colors.
After applying primer on the guns, I painted them black and then applied burnished bronze powder for added effect.
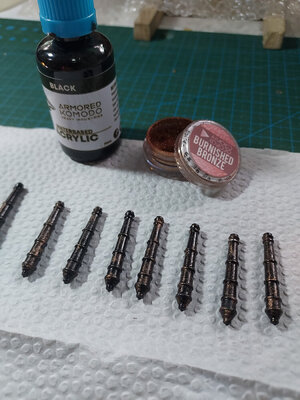
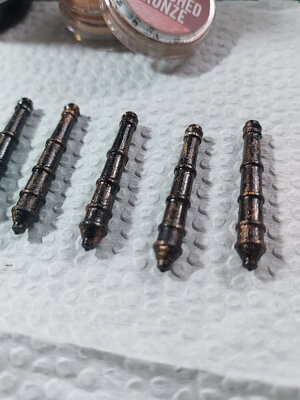
I put together a quick jig to help me align the pieces properly. A piece of wood strip goes underneath the assembly, forming a sort of an undercarriage.


Then using a dental drill bit, I carved out an indentation where the axle will go.


The wheels needed holes to be drilled at the center.

The wheel asembly is then attached.

The piece where the guns rest on top of had to be DIYed.

Once assembled, I applied colors.


After applying primer on the guns, I painted them black and then applied burnished bronze powder for added effect.


It's really interesting to see the exquisite looking castings don't fit very well, hard to believe that it's the same company that produces the POF Bluenose. You are doing a fantastic job with this model.
- Joined
- Apr 20, 2020
- Messages
- 313
- Points
- 278

Thanks @Jay ...just trying to make the most of what is in the kit. Learning a lot too in the process. Keep safe my friend.You’re doing great Reggie. Great build log.
- Joined
- Apr 20, 2020
- Messages
- 313
- Points
- 278

Thanks @Tony H . The kit is far from perfect but on the whole it is still a fun build. I have just accepted all its faults and instead look at its many positive features. Quite a good learning experience for me as well. Keep safe always.It's really interesting to see the exquisite looking castings don't fit very well, hard to believe that it's the same company that produces the POF Bluenose. You are doing a fantastic job with this model.
It sure looks like the bow piece is supposed to be cut. I had to use the dremel to cut some pieces of my Black Pearl or they would break when I tried to use my knife.I couldn't wait to dive right into it. After taking a quick inventory of the parts, I noticed that some pieces have just a small sticker to identify their part number. As a safety precaution, I took pictures of the different pieces and penciled in the part number in case the sticker falls off.
After I read through the assembly instructions, I cut the specific pieces I need using my Xacto knives.
View attachment 201739
By the way, I built this simple desk clamp from scrap pieces of wood to hold the keel in place while I worked on it.
View attachment 201740
Just a minor note, the laser cutting on some of the pieces didn't cut all the way through. Not a big deal, but I must've expected better especially after my great experience with the Black Pearl.
View attachment 201741
View attachment 201742
View attachment 201743
Before gluing anything, I thought it was important to dry fit the bulkheads to the keel. One nice feature of this ship is the lower deck piece which sits on the bulkheads and the deck has notches that fit into the bulkheads. This serves to make sure the bulkheads lay straight and in alignment.
View attachment 201744
View attachment 201745
View attachment 201746
To ensure that the bulkheads remain aligned when I glue them, I drew vertical pencil marks. I also drew horizontal lines on the bulkhead and the keel as a marker to make sure the bulkheads are inserted all the way through.
View attachment 201747
View attachment 201748
There is a piece on the bow which I am not sure if I should cut it or not. Decided to leave it alone for now. My guess is, it's probably intended to protect the bow from breaking while working on it.
View attachment 201749
On the stern, there are 4 pieces (part no. 14) which look like they require some slight trimming. There is another piece that is supposed to slide right into the notch, but it appears the notch needs to be about 2mm deeper so the other piece is flush against them.
View attachment 201750
View attachment 201751
I would agree on the poly. I can’t tell you how many times the glue didn’t bond well to the tung oil.Reggie, you have been a busy dude. I also chose to do my planking with clear poly. Planking sure takes a lot of time to do doesn’t it? Love watching your progress.
But Anna is petite.Reggie now that Bluenose is well established and everyone is up and running with their builds, I am concentrating on my big girl - and only my big girl!
I’m going to try a rose gold wash.Imagine if your resin carving was squirming around while you were trying to do precision drilling!
How about an experiment on a small piece with a wash? You could always paint over it if you didn't like it. But I wouldn't necessarily use black - how about fleshtone wash or umber? Vallejo has a line of washes...


