-

Win a Free Custom Engraved Brass Coin!!!
As a way to introduce our brass coins to the community, we will raffle off a free coin during the month of August. Follow link ABOVE for instructions for entering.
-

PRE-ORDER SHIPS IN SCALE TODAY!
The beloved Ships in Scale Magazine is back and charting a new course for 2026!
Discover new skills, new techniques, and new inspirations in every issue.
NOTE THAT OUR FIRST ISSUE WILL BE JAN/FEB 2026
You are using an out of date browser. It may not display this or other websites correctly.
You should upgrade or use an alternative browser.
You should upgrade or use an alternative browser.
I've got a 'deja vu' feeling. I built Royal Caroline, starting from the Panart kit quite a few years ago. (I did not use anything from the kit but the bulkheads). Now the bulkheads of this ZHL kit and the way they are built together are looking exactly the same as those of the Panart kit. Would this just be a coincidence?
János
János
Canoe21
Lawrence
Hello Reggie, Golly but you are moving along very fast in your build, that sure looks like a very nice kit to build, will have to look into it when my Oliver Cromwell and my up coming Bluenose is finished. Yes I also per the polly on your decks. Nice job you are doing on your deck planks with your simulated tree nails.
Regards Lawrence
Regards Lawrence
- Joined
- Dec 16, 2016
- Messages
- 1,178
- Points
- 493

Hi Reggie, Just letting you know that you have someone else sitting in the background following your build. Your presenting a nice and interesting log of your RC build and it’s well worth dropping in from time to time to see your progress. Although I probably won’t be commenting a lot, just know that I’m here following.
- Joined
- Apr 20, 2020
- Messages
- 313
- Points
- 278

Hello Reggie, Golly but you are moving along very fast in your build, that sure looks like a very nice kit to build, will have to look into it when my Oliver Cromwell and my up coming Bluenose is finished. Yes I also per the polly on your decks. Nice job you are doing on your deck planks with your simulated tree nails.
Regards Lawrence
Thanks much Lawrence @Canoe21 ...I am generally happy with the kit. No major problems encountered so far. Fingers crossed. Am very happy to start reading thru your build of the Oliver Cromwell. Such a beautiful ship and exquisite work. Keep safe
- Joined
- Apr 20, 2020
- Messages
- 313
- Points
- 278

Hi Reggie, Just letting you know that you have someone else sitting in the background following your build. Your presenting a nice and interesting log of your RC build and it’s well worth dropping in from time to time to see your progress. Although I probably won’t be commenting a lot, just know that I’m here following.
Thanks for the support @Ken. Am still going by through a lot of growing pains in my learning process. But that's a big part of the joy in this hobby. Keep safe always.
- Joined
- Apr 20, 2020
- Messages
- 313
- Points
- 278

I've got a 'deja vu' feeling. I built Royal Caroline, starting from the Panart kit quite a few years ago. (I did not use anything from the kit but the bulkheads). Now the bulkheads of this ZHL kit and the way they are built together are looking exactly the same as those of the Panart kit. Would this just be a coincidence?
János
That's a very interesting observation @janos, although I hesitate to get into the matter of coincidence with the Panart kit, for fear that we may be opening a can of worms. I did find it curious, though, that the YuanQing model had some instructions and drawings in Italian. Keep safe always.
Hi Reggie, I hope you don't mind but I'm going to join the viewing party. I have admired several RC builds at 1:30 but I fear they are beyond me - I wasn't aware of this 1:50 kit so I will watch with great interest. I won't be tackling anything new in the near future as I am neck-deep in my current project - but a man can dream!
- Joined
- Apr 20, 2020
- Messages
- 313
- Points
- 278

Hi Reggie, I hope you don't mind but I'm going to join the viewing party. I have admired several RC builds at 1:30 but I fear they are beyond me - I wasn't aware of this 1:50 kit so I will watch with great interest. I won't be tackling anything new in the near future as I am neck-deep in my current project - but a man can dream!
Welcome and thanks for dropping in @dockattner. I am just now discovering your Vasa build and admire your decision to dive into that project. That is one beautiful ship. Am really looking forward to reading through your posts and pick up bits of learning along the way. Keep safe Paul.
You raise an interesting point: my decision to build a ship like the Vasa... In retrospect, as you will learn as you work your way through my build log, that may not have been my best option. But she truly is a beauty - and if I'm going to spend so much time on something it might as well be a ship I truly like. The fact that the mother ship has been raised and I can access the research surrounding her just makes it all the more fun. Anyway, this is YOUR build log so I'll stop talking about myself - I'm super excited to track with your build and encourage you along the way!Welcome and thanks for dropping in @dockattner. I am just now discovering your Vasa build and admire your decision to dive into that project. That is one beautiful ship. Am really looking forward to reading through your posts and pick up bits of learning along the way. Keep safe Paul.
- Joined
- Apr 20, 2020
- Messages
- 313
- Points
- 278

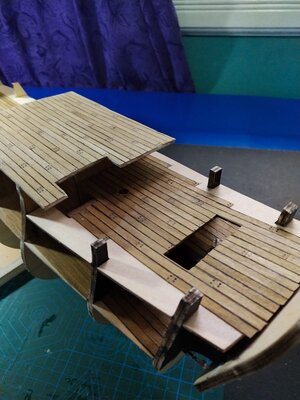
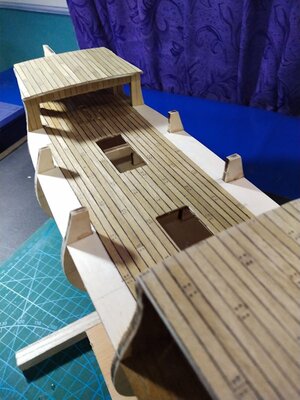
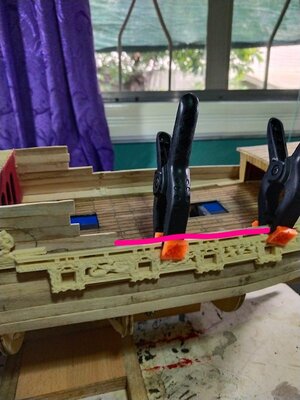
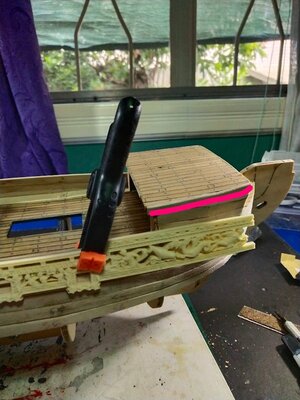
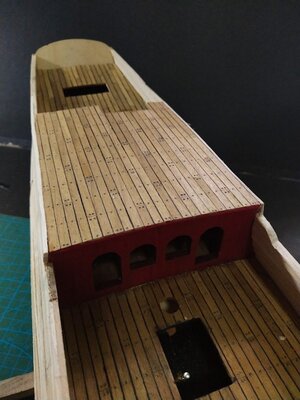
I spent the last few days working on the deck. I glued on the roof sections in the midship gallery and the fore castle. The profile of these pieces are curved slightly so I used my F-clamps to keep their shape.
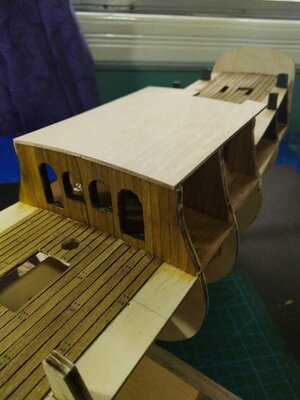
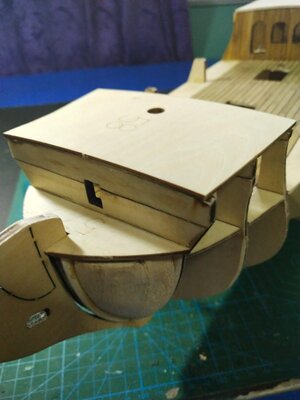
Gluing the roof of the fore castle at this time might have been a mistake. I realized I will have to paint/oil the inside wall, including the bulwarks at a later time. The roof will make this task just a bit more difficult.
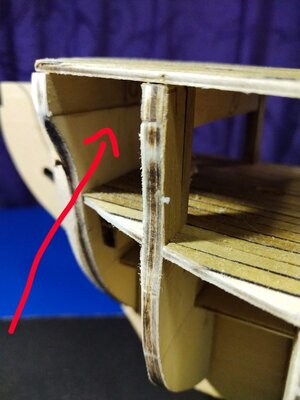
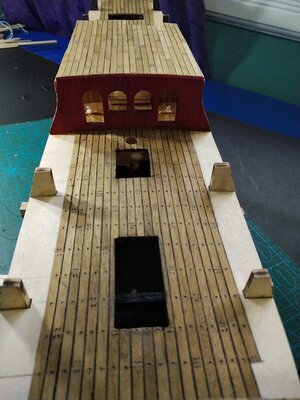
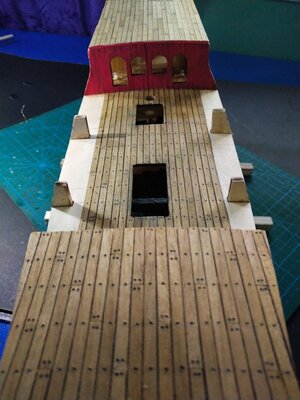
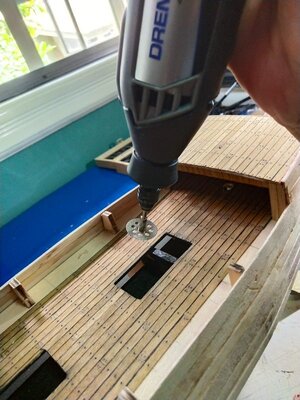
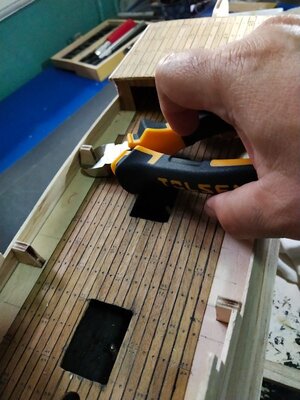
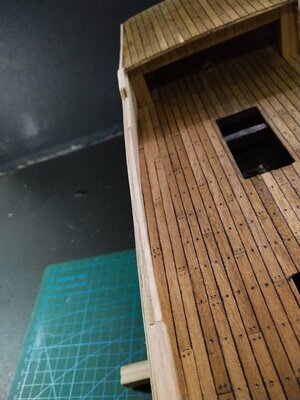
I did as much of the deck planking as I could, leaving the area around the bulwarks for later since these will still have to be trimmed later ( after the hull planking is done).
As mentioned before, I am using the four butt shift planking system.

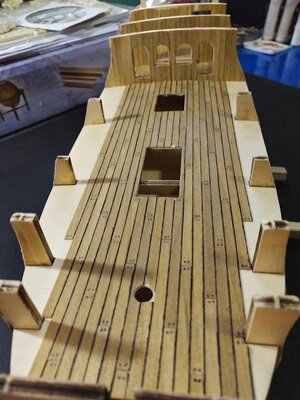
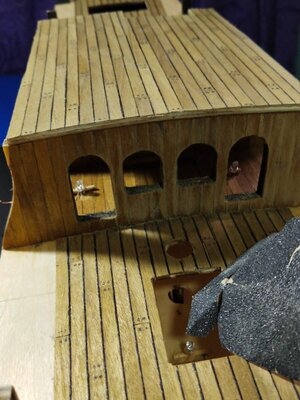
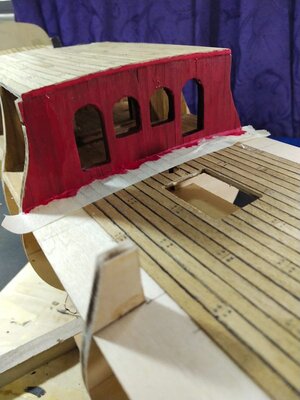
I thought I'd add a bit of color to the deck, decided to sand the front wall of the gallery (originally finished with poly) and tried a reddish/magenta paint finish. This will later on be adorned with gold resin carvings and I thought it will look a bit more exciting with a red background.
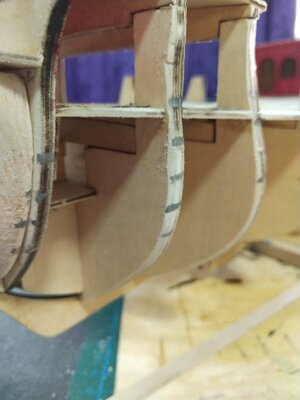
Next up will be planking the hull. But first, I faired the bulkheads to provide better grip for the planking strips.
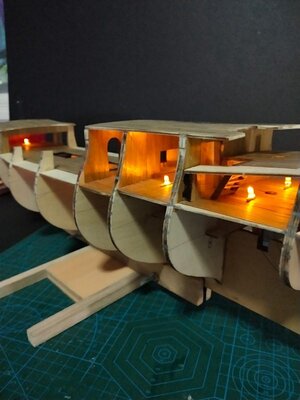
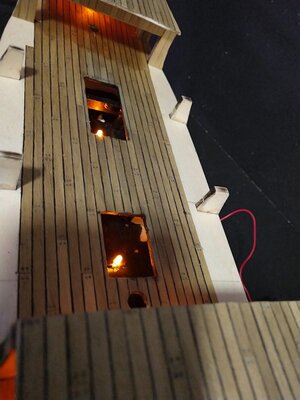
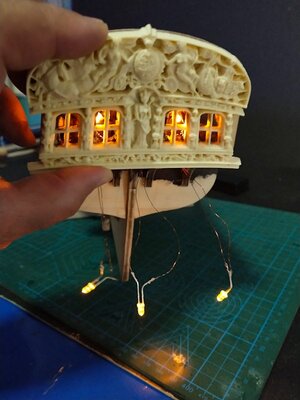
Also, before sealing the hull, I just had to make sure the wiring for my lights is squared away. I had a lot of leftover 5mm yellow LEDs and resistors from my previous build so I used them here. I also have a 9volt battery/switch module. Based on my calculations, I needed a 330ohm resistor for each light which I soldered to the positive lead of the light. The lights are wired in parallel, positives to positives and negatives to negatives. That was a lot of soldering, so I experimented by lumping 2- 3 LEDs hooked up to a 330ohm resistor, and voila, they lit up with barely a noticeable reduction in their brightness. This saved me quite a bit of time. By the way, I also used a thin 0.25mm insulated/enameled copper wire for all my wiring. This was really so easy to use and I didn't have to worry about the wires crossing each other and causing a short.
One final test for the lights before I start planking. The 3 LEDs hanging loose on the stern are meant for the lanterns later on.
That's it for now. It's been a breeze putting this kit together so far.
Thanks for dropping by.


Gluing the roof of the fore castle at this time might have been a mistake. I realized I will have to paint/oil the inside wall, including the bulwarks at a later time. The roof will make this task just a bit more difficult.

I did as much of the deck planking as I could, leaving the area around the bulwarks for later since these will still have to be trimmed later ( after the hull planking is done).
As mentioned before, I am using the four butt shift planking system.


I thought I'd add a bit of color to the deck, decided to sand the front wall of the gallery (originally finished with poly) and tried a reddish/magenta paint finish. This will later on be adorned with gold resin carvings and I thought it will look a bit more exciting with a red background.


Next up will be planking the hull. But first, I faired the bulkheads to provide better grip for the planking strips.

Also, before sealing the hull, I just had to make sure the wiring for my lights is squared away. I had a lot of leftover 5mm yellow LEDs and resistors from my previous build so I used them here. I also have a 9volt battery/switch module. Based on my calculations, I needed a 330ohm resistor for each light which I soldered to the positive lead of the light. The lights are wired in parallel, positives to positives and negatives to negatives. That was a lot of soldering, so I experimented by lumping 2- 3 LEDs hooked up to a 330ohm resistor, and voila, they lit up with barely a noticeable reduction in their brightness. This saved me quite a bit of time. By the way, I also used a thin 0.25mm insulated/enameled copper wire for all my wiring. This was really so easy to use and I didn't have to worry about the wires crossing each other and causing a short.
One final test for the lights before I start planking. The 3 LEDs hanging loose on the stern are meant for the lanterns later on.


That's it for now. It's been a breeze putting this kit together so far.
Thanks for dropping by.
I spent the last few days working on the deck. I glued on the roof sections in the midship gallery and the fore castle. The profile of these pieces are curved slightly so I used my F-clamps to keep their shape.
I like the red!View attachment 207354
View attachment 207355
Gluing the roof of the fore castle at this time might have been a mistake. I realized I will have to paint/oil the inside wall, including the bulwarks at a later time. The roof will make this task just a bit more difficult.
View attachment 207356
I did as much of the deck planking as I could, leaving the area around the bulwarks for later since these will still have to be trimmed later ( after the hull planking is done).
As mentioned before, I am using the four butt shift planking system.
View attachment 207370
View attachment 207357
View attachment 207358
View attachment 207359
I thought I'd add a bit of color to the deck, decided to sand the front wall of the gallery (originally finished with poly) and tried a reddish/magenta paint finish. This will later on be adorned with gold resin carvings and I thought it will look a bit more exciting with a red background.
View attachment 207361
View attachment 207362
Next up will be planking the hull. But first, I faired the bulkheads to provide better grip for the planking strips.
View attachment 207363
Also, before sealing the hull, I just had to make sure the wiring for my lights is squared away. I had a lot of leftover 5mm yellow LEDs and resistors from my previous build so I used them here. I also have a 9volt battery/switch module. Based on my calculations, I needed a 330ohm resistor for each light which I soldered to the positive lead of the light. The lights are wired in parallel, positives to positives and negatives to negatives. That was a lot of soldering, so I experimented by lumping 2- 3 LEDs hooked up to a 330ohm resistor, and voila, they lit up with barely a noticeable reduction in their brightness. This saved me quite a bit of time. By the way, I also used a thin 0.25mm insulated/enameled copper wire for all my wiring. This was really so easy to use and I didn't have to worry about the wires crossing each other and causing a short.
One final test for the lights before I start planking. The 3 LEDs hanging loose on the stern are meant for the lanterns later on.
View attachment 207364
View attachment 207365
View attachment 207366
That's it for now. It's been a breeze putting this kit together so far.
Thanks for dropping by.
Last edited:
- Joined
- Apr 20, 2020
- Messages
- 313
- Points
- 278

Great progress in assembly, the deck planking looks awesome. Will you put additional treenails as depicted in the shown image (red arrows)
View attachment 207415
Thanks for the observation @Jimsky ..I initially was not planning to add them, but you are right, and after considering that in real life the planks are 20-25 feet long, I do need to put in additional treenails in between the butt joints. Appreciate the comment.
Very good decision - and if you make additional treenails, I would make two nails - it is much more realistic like the Mondfeld pattern shown by Jim (sorry Jim)Thanks for the observation @Jimsky ..I initially was not planning to add them, but you are right, and after considering that in real life the planks are 20-25 feet long, I do need to put in additional treenails in between the butt joints. Appreciate the comment.
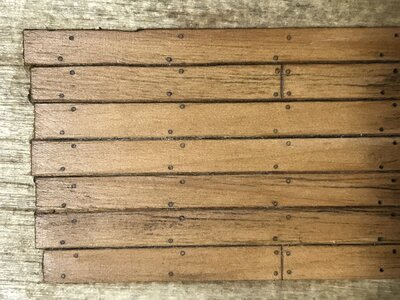
Here it is a photo showing a beautiful deck sample, and I think it is a photo Jim posted also once
- Joined
- Apr 20, 2020
- Messages
- 313
- Points
- 278

Very good decision - and if you make additional treenails, I would make two nails - it is much more realistic like the Mondfeld pattern shown by Jim (sorry Jim)
Here it is a photo showing a beautiful deck sample, and I think it is a photo Jim posted also once
View attachment 207616
That looks good @Uwek. Unfortunately it was too late as I was too quick to add the additional single treenails. But I really like the twin nails and for sure I will adopt that method for my next build.
Thanks, Uwe! This is from my test samples. I use hornbeam timber for the deck planking.Very good decision - and if you make additional treenails, I would make two nails - it is much more realistic like the Mondfeld pattern shown by Jim (sorry Jim)
Here it is a photo showing a beautiful deck sample, and I think it is a photo Jim posted also once
- Joined
- Apr 20, 2020
- Messages
- 313
- Points
- 278

Now that the wiring for my LEDs is finished, I can start working on the first layer of planking the hull.
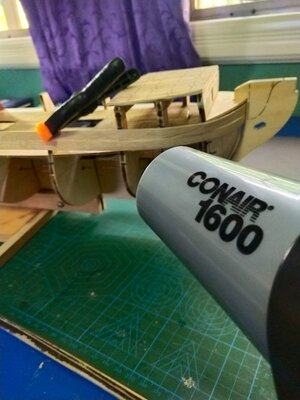
I set my first plank aligned with the top of bulkhead 4 and 5 in midship. I just let the strake follow its natural path and it lines up perfectly on the bow just below the bow landing (I didn't know the correct name for it). The basswood strips are really easy to work with. I just soaked them in water and lay them right on the hull. A little heat from a hair dryer and they are set.
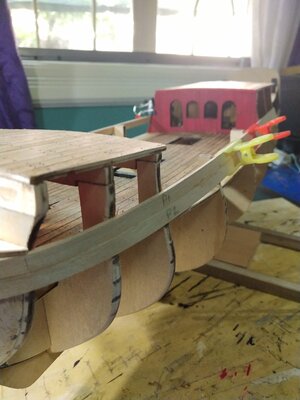
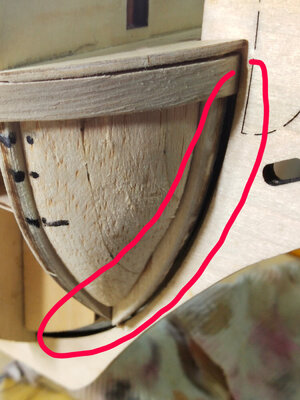
The model has a false rabbet on the bow which helps to keep the planks in place.
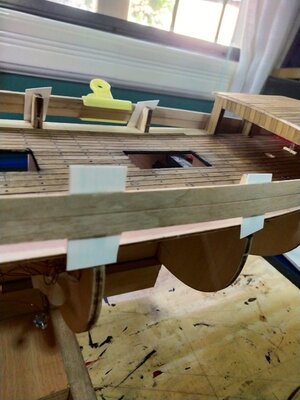
When I started to glue the planks, I just inserted a piece of stiff plastic where the bulkhead posts are so the glue doesn't stick to them. These posts will be cut off later on once the hull planking is done.
I glued on 3 full width strips initially, using CA gel on the contact points and Elmer's wood glue along the length of the strip to butt it against the adjacent strip.
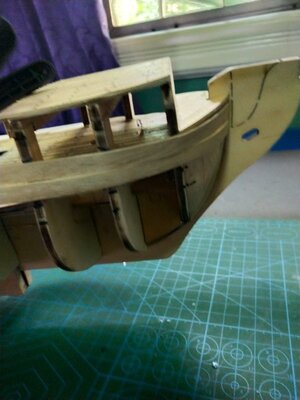
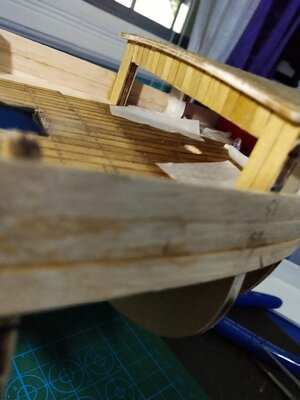
Before I added any more strips, I pinned a temporary batten to establish how much I need to trim the ends of the strips at the narrow end of the bow and stern. It turns out, I needed to shave half the widths of the strips at the ends.
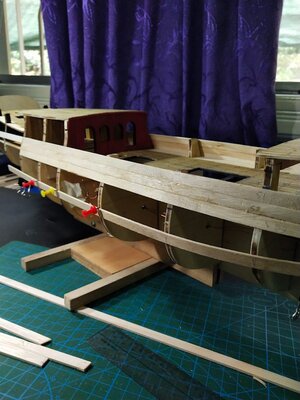
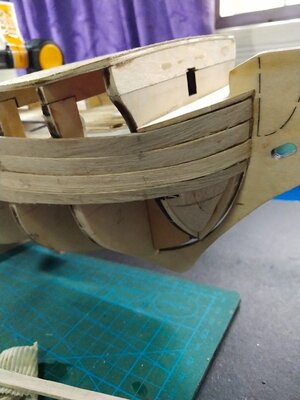
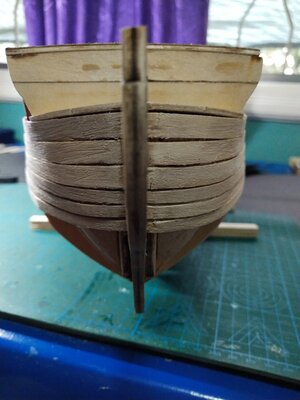
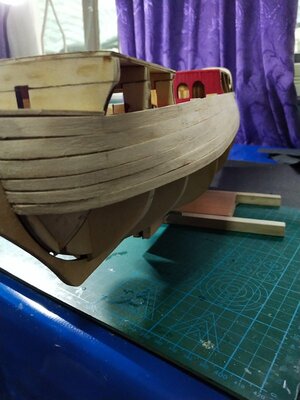
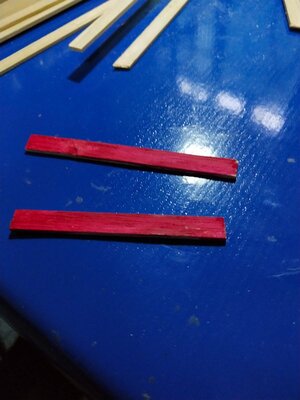
Remember earlier I mentioned that I made a mistake by gluing the roof of the forecastle prematurely? It makes added work when it's time to plank the side of the forecastle because I needed to paint the insides. I worked around it by taping the area and tried not to smear any red paint with my paint brush. An even better solution, I painted one side of the strips before I glued it to the side.
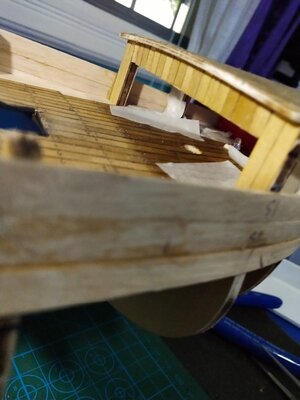
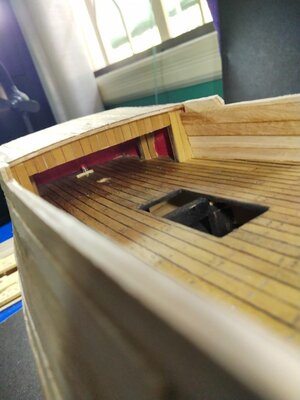
Now, that I have the bulwark planking done, I can finally trim the posts, which served to set the angle of the bulwarks and provide clamping areas for planking.
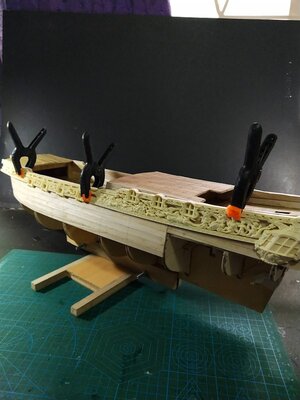
I had to take pause before I continued with planking, and I decided to dry fit the resin carvings to make sure I don't have trouble later on. True enough, as it was, if I align the middle resin piece against the top edge of the bulwark, they won't line up properly along the top edge of the forecastle and the stern piece.
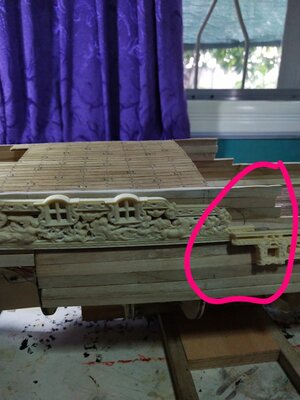
In order to line them up properly, I needed to add 2 more strips on top of the bulwarks.
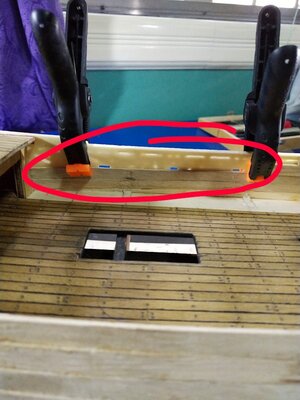
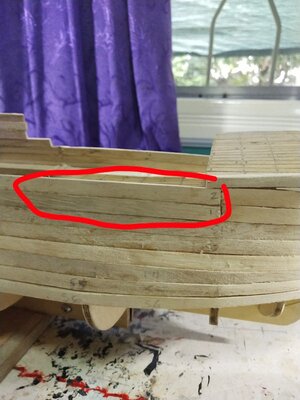
This enables me to raise the fore resin piece so that it aligns properly.
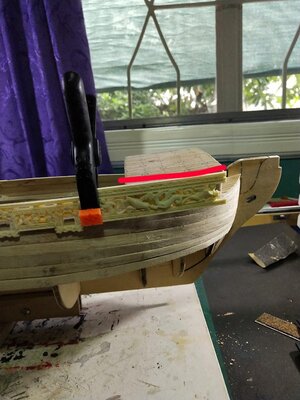
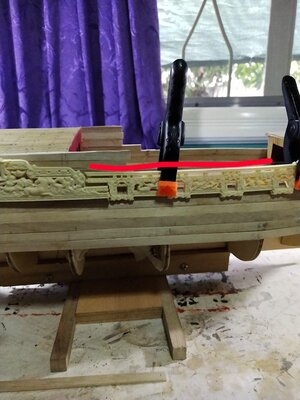
I am hoping that since I raised the resin carving up by 14mm, when I drill the canon holes thru the hull, the holes will not be too high. Keeping my fingers crossed.
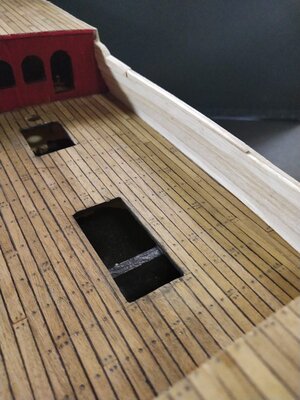
After I added the additional strips midship, and some more planks on the hull.
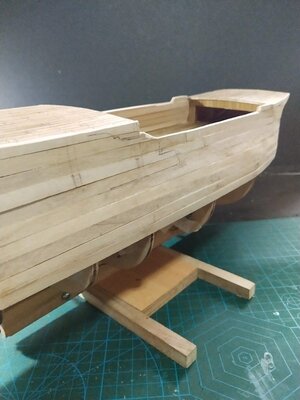
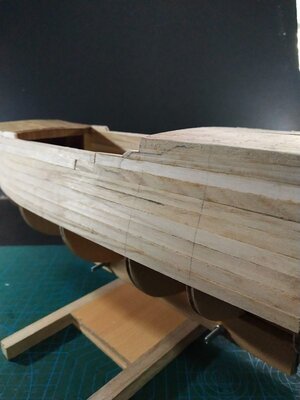
More to come on my next post.
I set my first plank aligned with the top of bulkhead 4 and 5 in midship. I just let the strake follow its natural path and it lines up perfectly on the bow just below the bow landing (I didn't know the correct name for it). The basswood strips are really easy to work with. I just soaked them in water and lay them right on the hull. A little heat from a hair dryer and they are set.


The model has a false rabbet on the bow which helps to keep the planks in place.

When I started to glue the planks, I just inserted a piece of stiff plastic where the bulkhead posts are so the glue doesn't stick to them. These posts will be cut off later on once the hull planking is done.

I glued on 3 full width strips initially, using CA gel on the contact points and Elmer's wood glue along the length of the strip to butt it against the adjacent strip.


Before I added any more strips, I pinned a temporary batten to establish how much I need to trim the ends of the strips at the narrow end of the bow and stern. It turns out, I needed to shave half the widths of the strips at the ends.


Remember earlier I mentioned that I made a mistake by gluing the roof of the forecastle prematurely? It makes added work when it's time to plank the side of the forecastle because I needed to paint the insides. I worked around it by taping the area and tried not to smear any red paint with my paint brush. An even better solution, I painted one side of the strips before I glued it to the side.


Now, that I have the bulwark planking done, I can finally trim the posts, which served to set the angle of the bulwarks and provide clamping areas for planking.


I had to take pause before I continued with planking, and I decided to dry fit the resin carvings to make sure I don't have trouble later on. True enough, as it was, if I align the middle resin piece against the top edge of the bulwark, they won't line up properly along the top edge of the forecastle and the stern piece.


In order to line them up properly, I needed to add 2 more strips on top of the bulwarks.


This enables me to raise the fore resin piece so that it aligns properly.


I am hoping that since I raised the resin carving up by 14mm, when I drill the canon holes thru the hull, the holes will not be too high. Keeping my fingers crossed.

After I added the additional strips midship, and some more planks on the hull.


More to come on my next post.
- Joined
- Apr 20, 2020
- Messages
- 313
- Points
- 278

Here's how it looks with the new alignment for the resin carvings.
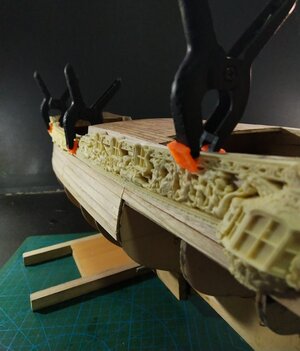
A closer look at the carvings.
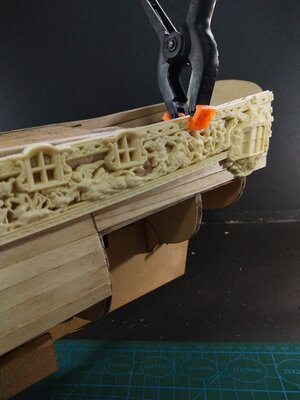
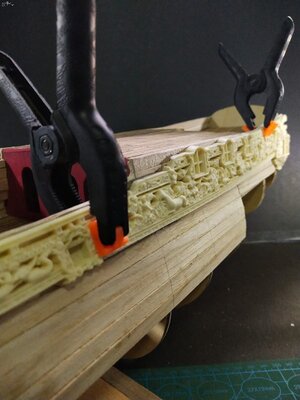
One more minor problem. The rear most window on the carving is positioned too far towards the stern, so that it falls outside of the cabins.
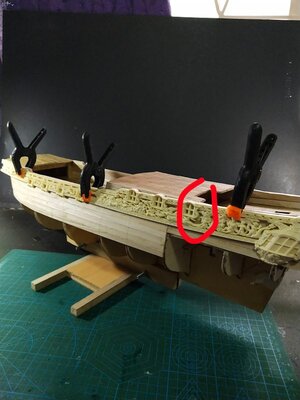
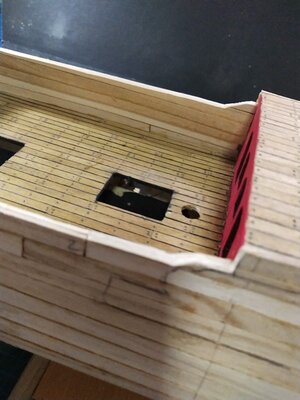
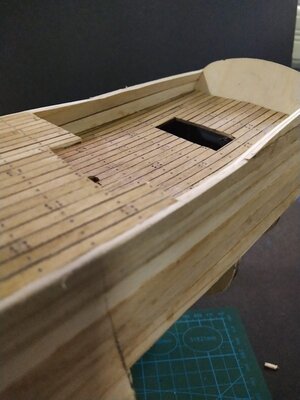
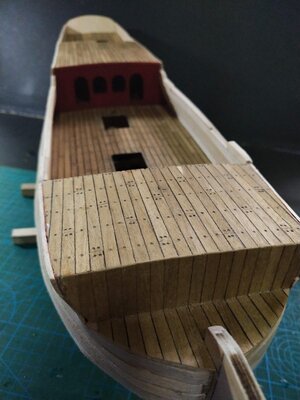
So, after dry fitting the resin pieces, I went on to add another layer of basswood planking on the inside of the bulwarks. This gives them a bit more strength as well as provides enough thickness for the 4mm railings later on.I also finished planking the deck.

A closer look at the carvings.


One more minor problem. The rear most window on the carving is positioned too far towards the stern, so that it falls outside of the cabins.

So, after dry fitting the resin pieces, I went on to add another layer of basswood planking on the inside of the bulwarks. This gives them a bit more strength as well as provides enough thickness for the 4mm railings later on.I also finished planking the deck.


