Black Pearl 1:50 ZHL All-Scenario version

Joined
Mar 1, 2021
Messages
315
Points
168

Captain's Log ~~~ March 08, 2021

Today is an exciting day. The day is cool, seas still calm but skies are clouding due to an approaching winter storm. There will be no red skies tonight, only the burning of midnight oil because the booty from the far distant land of ZHL has arrived. The estimated weight of the haul is 7.5 kg's. The boxed unraveling reveals the treasure, a 1:50 scale wooden ship kit of the Black Pearl in the All-Scenario version. So, its time to sit back for a bit and pour some rum into a fine glass. Best to first layout the goods on the Captain's pool table. In this way, the Admiral will be able to see how I could justify the expense. Quickly now, before she returns from the market.

The Admiral may doubt my true will and desire to complete this voyage. Her idea of money better spent might be visiting a not-too-distant port in Las Vegas. A little R & R, have a nice dinner after gaming some slots, followed by a show, and retiring for the evening to a luxury suite. Then, to awaken the next morning to gorge oneself with champagne, a full buffet brunch and parting amenities before sailing off to our home port. Alas, such a diversion allows the locals to just laugh themselves silly from picking my pockets as they present me with a final Bill of Departure. Just another fool who leaves a bit poorer for taking a 24-hour tour.

Shiver me timbers! Now these words from a loyal swashbuckler, "Captain, I believe the Admiral is discussing plans with her aide-de-camp (my mother-in-law) to chart reservations for you to sail them both to the Isle of Vegas, and anchor at a port called Treasure Island in the not-too-distant future." (The charts reveal this as dangerous territory, with an enemy ship floating in a fountain of Emerald water.) I can see she will not be denied her share of the contract agreement between us, which guarantees her equal doubloons and subsidies for any unnecessary squander taken by me, the Captain of the ship.

"This to: I saw her laughing and heard her talking to the gulls sitting on the rail, saying that he's not likely to keep the Pearl afloat for too long, a doubting Thomas." Experience tells her that you'll lose interest over time and this task may be above your pay grade. As a retired Captain, the Admiral predicts that I'll be off to other new endeavors long before the planking of the second skin.

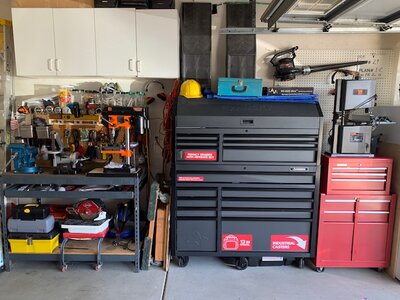
Truth be told, the only restrictions I have been forewarned about by the Admiral is TO NOT BUILD ANYWHERE NEAR THE GALLEY OR THE DINING ROOM TABLE. So it is, the Captain's Quarter's will be my abode. (The garage workbench with my trusty hounds at my side and at my feet.) "Okay, for now we are safe from any mutiny, and being forced to 'dancing with the hempen jig' is not part of the Admiral's current plans for me. So, I will put this parched message in a bottle and have you cast it overboard for posterity. You can bear witness that you saw me set my hand and seal to this pledge as follows:

For the words I write about the build, and despite all progress on this ship,
entries are for hopes that will give us a plank to offer constructive lip.
I know this challenge will last more than a year, rather than mere months you see,
yet, hopefully entertaining for all those aboard taking this voyage with me.

You see this thread will not be about being a pro and making it all work and no play,
but rather for learning and hearing from mates who may have something to say.
I send to each of you bucko's upon me starting this two-box kit,
cheers and wishes for good health, all glued together with time in a bottle as I see fit.

.....and so it begins, my thread on the build of the Black Pearl. Ahoy mates!


Disclaimer: (I am 66 years young. I decided to do something I've never done before, that is to build a wooden ship model. Since I enjoyed the "Pirates" movies, I looked in many places for a "wooden" Black Pearl " kit. Eventually, I found a Chinese manufacturer, ZHL on the internet after a few searches, so I ordered the Pearl. I've been doing a lot of reading, research and YouTube vids on model ship building over the past few months. Ordering new tools and making some. Now, I have discovered the SHIPS OF SCALE forum. After joining, I see there may exist two sides of the spectrum in regard to who and what is credible or not as a legitimate model and/or supplier of these type kits. I personally don't have a dog in this fight since I possess little knowledge and skill in regard to this hobby or craft. I'm just a simple mate who'll enjoy some rum when documenting my build. In simple terms, I added building a $500+ wooden ship to my retirement bucket list to relax, not to raise my blood pressure...LOL!)
 
Last edited:
Welcome aboard Captain, if you need any help we have a few deck hands willing to work on any problems if the need arise.
 
Hi it's always good to see another BP started, like you I'm new to this forum and building a BP ( the smaller version ). I wish you a pleasant build it will be frustrating at times but there's always someone to help
Thank you Tony. This forum will be a great helper for sure!
 
Captain's Log ~~~ March 10, 2021

I wanted to say a word about the process of order and delivery from ZHL My emails to ZHL were responded to by Max Zeng. Max seems to be a very customer centric type of guy, responding to each email promptly within 24 hours. I ordered my kit on 2/27 and it arrived at my front door in San Diego on March 8th. My kit is a Pole #1 & Pole #2 offering, which is a partial build. I read comments about the different versions of the BP and thought that new buyers would receive Poles 1-3 for a complete build. Apparently, my assumption is not the case as Max informed me that Pole #3 is an additional $75.00. So, if you guys have different input, the joke may be on me. You know what they say about the word assume. LOL!

03:09:21A.jpg

Since I don't plan to start the Pearl right away, I was a bit concerned dealing with an offshore company and possibly finding out months later that parts were missing. Max assured me that they would make good for any missing parts up to six months. This concerned me some since I don't have any specific timeline to build the Pearl. While there are YouTube videos on what comes in the box, I laid out Pole 1 & 2 on my pool table separately. This shows the magnitude of the kit for your money.

03:09:21C.jpg
Pole 1 parts with plans

03:09:21D.jpg
Pole 2 parts with plans

Closeups reveal that I decided to take inventory vs, the parts list and label everything to give me a clear understanding of what is what. I can honestly say that all parts were included and there was a few more in many cases than the count. This took some time because some of the parts in the Pole 1 part list are in the Pole 2 box. Go figure. Finally, the doofus that I am realized that the little red star must have been an indication to look in the second box....of course nothing stated as much in the plans....more laughs. After hitting a good portion of rum, I started to become very familiar with all the pieces. So, when build time comes I'll know right where to look.

I would recommend keeping all the pieces together until you are ready to work on what is needed. Although everything is laser cut and very clean, small pieces could have a tendency to separate from the panels. So, its best to be extremely careful or you'll be looking for something so small that will end up in the most improbable place, frustrating the hell out of you. Overall, things looked pretty good and for my money's worth, at least everything is there and with that comes the peace of mind that parts are labeled and safely back in the box. For me, that’s a good start!

I'm planning on redoing my workbenches in the garage in order to keep the Admiral happy. I‘ll be getting some needed tools that will be a big help. I recently got a little bench top air brush/compressor setup and today a new soldering and hot air gun station arrived. Yeah I can see by the time this is done, it may be a bit crazy throwing a grand at something you never did before. However, this is a bucket list item for me and I’ll enjoy the challenge and diversion to add to my retirement. My brother said, "why in the hell didn't you start with a smaller kit?" I laughed. Told him I'm into the running rigging now on my plastic Revell 1:96 scale USS Constitution and the Admiral wants that completed before I start the Pearl.

Sailing off for now, but in the next week I hope to send a few pics of my setup and some of the tools I have so you mates can add any other thoughts. Just like in real estate they say location, location, location....I'm of the belief this endeavor for me is about preparation, preparation, preparation. I think I want to make the build process easier for novices to follow. So, I plan to make an outline and/or format that will show the steps in parallel with the plan booklets. (example: Steps 1-10) then follow that with construction steps and notes (example: 1-12), add some pics each time or perhaps a video that will highlight the Captain's Log thread.

Looking forward to the coming year mates! Should be a helluva sail.

Ahoy all!
 
Last edited:
It have the feeling, that this will be a diverting and interesting building log -> I will follow with big interest
 
Hope you will not turn your pool table into a shipyard's worktable :D Will be watching your build log as you progress.
 
Captain’s Log ~~~ March 18, 2021

Good news mates! My order for LED rations from Evans Design has arrived! Not much to sustain you here for a little over $100 bucks. I‘ve decided to run a 30-light parallel design. Three flickering orange bulbs for the stern lamps, six yellows for the Captain’s cabin, and 21 warm white throughout the rest of the ship. I’m going to connect three tiny switches to my bus line to control the lower, main and Captain’s quarters with on-off‘s for different looks!

I’m really enjoying all the Black Pearl build threads progress and some that are finished! While I’m chomping at the bit to get started, the Admiral is putting pressure on me to finish the plastic Revell 1:96 USS Constitution before starting the Pearl! Only so you can understand my plight, I’ll give you a one time look through the spyglass to let you see what made me want to find this forum and decide to do a real wooden ship!

I’ve reached a point on the Constitution where I started the running rigging...and I want to do the sails, (Admiral’s orders)...but since they are plastic, I‘m going to play around with the idea of making them out of cloth...so, as you can see the Constitution is in dry dock for now and the Pearl is still in the box. So, land lubber it is for me for now. Fear not, the Captain’s new dry dock (workbench setup) for the Pearl in the garage is almost completely tooled and ready!

More to follow by early next week!

In the meantime, all be well. Ahoy

7A346B2A-A209-4FBD-8C6E-F1A395BEE40D.jpeg
Evans Design LED’s and parts
USS Revell Constitution 1:96 scale below:
DB91E475-12E9-4DDC-B320-138A693BC296.jpeg
33813FB5-2E2E-41C7-947D-2C81FFAE94E9.jpeg
20654208-BC8E-4842-A4F8-D5DA909A435F.jpegF3AE0674-D77B-428F-8762-1AD38B723619.jpeg7B321313-5063-4776-BE34-1589EC3530C0.jpeg3527F2BC-B959-47C2-AEA0-82BF11147ED8.jpeg
 
Last edited:
Captain’s Log ~~~ March 22, 2021

Ahoy mates! Methinks the shipyard is complete and ready to “spring” into action. While not specifically for the Pearl, I decided to bring in a few new tools to either replace or add to the workshop! Worked on cleaning up everything most of the weekend! Here are a few pics before I turn it all back into a mess! Everything is so organized now I can’t find anything.

F9B8E9EB-CEB4-4598-AAF6-7F06F1027198.jpeg
The airbrush/compressor and the hot gun/soldering station is new.
D3F80916-F46D-4276-BD8B-7370F1882D40.jpeg
The belt/disc sander, drill press and bandsaw all from WEN! About $300 if you take the time to shop around!
9975E0C7-B1DD-4F44-A0C9-6CCA302EA6CA.jpeg
Hopefully, after walking the Bears each morning and starting the day with some Dark Roast, this is where the Captain will be for the next year or so in the mornings.
7D55B564-5831-41E3-B95E-3F60E0B2B59B.jpeg
“Fire in the hull”, the Captain opened the Pole #1 box while the Admiral was working in her office. The keel parts #1 & #2 are vertical! Now, if I only knew where I put the glue? Hope to start by this weekend!
For those of you scoundrels who want to see the Bears, here is Ryker and Raina!

596C011B-59B4-4443-970C-BB4BF5D77DA2.jpeg
Pure bred Akita’s, will be 3 and 2 on April 8th and 9th. More than capable of keeping the ship rat free and unruly pirates in line!
Be well mates! Ahoy all!
 

Attachments

  • 6484901C-AA1C-460D-A1F4-EBA494BC9698.jpeg
    6484901C-AA1C-460D-A1F4-EBA494BC9698.jpeg
    108.8 KB · Views: 26
  • 9F314888-22C6-40E7-96E6-6E7C893222A6.jpeg
    9F314888-22C6-40E7-96E6-6E7C893222A6.jpeg
    81.5 KB · Views: 33
Last edited:
Captain’s Log ~~~ March 23, 2021

Now that I’ve had a few weeks to do some more research, read other mate’s build logs, etc., as a novice I feel I’m going to approach my build a bit differently and a little out of sequence to the plans provided in the kit. I see the greatest challenge for me will be with getting the planking and wiring done right! I ordered a couple of used books on model kit building and planking from Amazon because I need to better understand the concepts and steps required. The kit plans give very little guidance for novice builders and it sure doesn’t leave me with a whole lot of confidence. I bet many first time builders become to hasty to glue and quit their builds after trashing their attempts to plank the hull! So, I’ve decided to look into other parts of the build too and find wiring the LED’s are a big #2 concern for me. Getting this aspect of the build right will go a long way for a unique presentation, allowing for several different ways to accent the ship!

I recall being a bit fearful of wiring the 12v setup that comes with the kit after reading some of the logs here! I purchased the pre-wired LED’s from Evan Designs (pictured in Captain’s Log 03-18-21) and figured a 3v system a bit easier. However, after reviewing the plans, I kind of like how the coffin makes contact with the ship’s keel and offers a seamless lighting design.

A32CC992-C911-4CA4-B160-FAFB9D524E32.jpeg

So, the four copper plates A-D above are for the Anode tie-in (A) and the three Cathode ties for the three light parallels (B-D) with respective resistors.

E4051AFC-A6DB-4E5D-9C14-C7DDD4CFADAC.jpeg

The four poles in the coffin lid 1-4 (placed under the ship) align with the copper contacts above placed in the keel, which powers the 12v system by the AC apapter that connects to the coffin side input. Pretty straight forward! The challenge I see was wiring the LED’s that came with the kit.

287C0AC9-4983-48FF-858F-90CDCFC4907D.jpeg

I laughed at the comments some of the mates here said about trying to solder two wires to a 1.2mm LED. Yep, those two white dots above are the LED’s that come with the BP kit. (my kit came with 33 LED’s) Evan Designs pre-wired LED’s make a lot of sense because it‘s easy to launch these babies into space while trying to solder two wires On to them. Easy to end up in never-never land of lost LED’s. Yet, I got to thinking that perhaps I still could use these lights even though I could barely see them.

FF4043B3-9D9C-4424-9DCE-C1857F25C352.jpeg

Alligator clips can work if you decide to use them to hold these LED’s but it requires a bit of reconfiguring!

22F29484-8D48-4875-9C55-DBAD43FD1997.jpeg

I flattened out the clip teeth and filed the clip to a smooth, flat bite. Now, for the moment of truth!

35F424C8-1122-42C0-A845-DDA5C87DF676.jpeg

Yep, the lower clip is holding the LED very securely without a countdown launch and at least it gives me a shot at soldering a wire to it. Once one wire is on the other side is a piece of cake! So, I may try to see if I can make the 12v system work too! If so, I have a few ideas how to use both the 3v & 12v systems for my build to offer it a unique twist!

Have a great day mates! Ahoy all!
 
Last edited:
Your making me jealous all those new tools, the tiny LEDs are very bright for there size. One thing I found when installing my LEDs I should have drilled the holes for the wires before glueing the bulkheads it would have been a lot easier. BTW I like the dogs we don't see many of that breed around here.
 
Your making me jealous all those new tools, the tiny LEDs are very bright for there size. One thing I found when installing my LEDs I should have drilled the holes for the wires before glueing the bulkheads it would have been a lot easier. BTW I like the dogs we don't see many of that breed around here.
I guess I waited too many years to get the right tools to do certain projects! Now retired, I have a lot of free time on my hands. Trust me Tony, those two Bears of mine are better for me than going to the gym....

Yeah, one of the things I picked up from the other builds was to pre-drill the bulkheads before setting them in place.
 
Your making me jealous all those new tools, the tiny LEDs are very bright for there size. One thing I found when installing my LEDs I should have drilled the holes for the wires before glueing the bulkheads it would have been a lot easier. BTW I like the dogs we don't see many of that breed around here.
BTW, is that a pic of your dog? A Weimariner?
 

Captain's Log ~~~ March 27, 2021

Build time today: 1.5 hours
Total build time: 2.5 hours

Construction start for the Black Pearl (All-Scenario version)

Outlining the Black Pearl Steps 1 through 26 in Pole #1 plan book
Remove parts 1 & 2 (5mm) —Keel
Remove parts 3-16 (6mm) —Bulkheads
NOTE: Parts 3 (combo of parts K5 & J21), 15, & 16 will not be set into the keel at this time. Place them aside from the other bulkheads.
Remove parts 17, 18, & 19 (2 each) (5mm)—Keel reinforcers.
Remove part 21 (lower deck) and set it off to the side.
Remove parts A1-A7 (6mm)—Starboard Bulkhead halves on the walnut board.
Remove parts 6D-12D (2 each) off the (3mm) board.
The above parts (excluding parts 3, 15, & 16) are the only parts used for Steps 1-26.

WARNING: Follow the plans with an open mind and try to familiarize yourself with the parts. Study the pictures and be prepared to improvise! Chinese to English translation and build transition in the kit plans can leave a lot more questions than answers.

This is me when I don’t follow my own advice.
1616889242952.png

Steps & Notes for construction on this phase:

1. Observe the fairing lines on any of the bulkheads and do some of the rough sanding prior to gluing the ribs to the keel. NOTE: Keep the groove on all the right side bulkheads. Do not sand flush!
2. If you are installing LED lights, now is a good time to drill holes in the bulkheads for any bus lines or wires, before gluing them to the keel.
WARNING: Mistake 1: I drilled my wire holes too close to the keel slot in my first three bulkheads...measure out at least 3/4-1" to make sure the center bulkhead holes clear parts 17-19 that go in after the bulkheads are glued to add additional support to the keel. Luckily, I caught this mistake but I will still have to re-drill the holes for those first three bulkheads. Arrrgggghhh!

#5.JPG
3. Dry fit the bulkheads and get comfortable with their relationship to each other. Firm fit but not too tight to the keel. Don’t rush to pick up the glue.
4. Dry fit the lower deck and note it’s relationship to the bulkheads and keel. Make pencil marks to note the relation of the deck to the
bulkheads.

 #1.jpg

#2.JPG

#3.JPG

#4.JPG

At this stage, I once again removed the bulkheads and was overthinking a bit. I used my micrometer to mark center point to center point in millimeters from bulkhead center to center. (just approximations, for what use I don't know but it seemed to be useful at the moment) I forgot to take a picture of the lower deck dry fit.

NOTE: Mixing some 502 CA adhesive to a good wood glue like Titebond Ultimate will enhance the bonding performance. A strongly bonded ship skeleton will endure the rigors of planking and future sanding and it seems like a good idea.

#6.JPG

5. READY FOR GLUE. Place down some parchment or wax paper to cover
the work area for gluing the keel. Square up the keel and glue it together.
(Parts 1 & 2) Allow glue to thoroughly dry.

#7.JPG

Following the charts of those who proceeded me, I grabbed anything that would add some weight to the keel to keep it flat so it would not buckle to the drying glue. Waited almost 24 hours before moving on.

NOTE: It is very important to square all parts when gluing the bulkheads to the keel. It may be best to work from the middle of the hull outward, leveling, squaring, and gluing each bulkhead one at a time. Right angle brackets, a small level, various clips and vises can be your best friend. Make sure to keep the right side bulkheads level and in alignment with each other. Let the glue thoroughly dry before proceeding!

#8.JPG


#9.JPG

I only glued the first three bulkheads today (#9, #10, & #11) starting from the center and working stern to bow. From all that I have read, it seems that you can't underestimate the importance of keeping everything squared and level. The plan instructions emphasize the importance to make sure that the right side (starboard) bulkheads are level to each other. I used the green level above to show me that reality and I used the yellow level to check each bulkhead.

NOTE: I chose to dry fit parts 17, 18 & 19 to help determine the correct positions of the bulkheads. I was careful to not be sloppy with the glue so they should be able to come back out as I proceed to the next grouping and then I will re-insert them to help again with the alignment

6. After all bulkheads are in place, proceed with fitting and gluing parts 17, 18, & 19 (2 each) to the keel. With proper alignment this step will add integrity and strength to the keel. Again, keep things square then glue and clamp as needed.

7. Once the glue dries take the lower deck and carefully dry fit it into place. Be careful to not force anything. Make any pencil marks as needed then remove the deck. NOTE: Use a razor knife to deepen the laser lines of the deck, making the boards more vivid after finishing. Lightly sand and apply your finish to the lower deck and set it aside to dry. Once satisfied, glue the lower deck into position and adding some weight to the deck is a good way to make sure it is contacting all surfaces while the glue is drying.
  1. Staining all the bulkheads is not necessary but you may want to finish the visible walnut bulkheads (A1-A7) on the exposed starboard side to match your chosen finish for the interior cells, posts, and beams of the lower deck.
  2. The next step after all the glue is dry is to finish, fit and glue parts A1-A7. These are the walnut bulkheads and they must be installed symmetrical to the opposite side. At this point, it seems this task would be much easier if you dry fit the main deck to these bulkheads before gluing them into place. An ounce of prevention here, will save a pound of cure later if things are not square and the main deck won’t fit in.
  3. Finally, follow the plans for placement of parts 6D-12D (2 each). Working with the parts in #2 above to achieve the correct alignment.
At this point, 10% of the Pole #1 plan book will be complete.

Mates, I will work through the above steps and report back with further comments and pictures. A few sidebars as well for keeping things interesting.

Be well and ahoy all.
 
Last edited:
Back
Top