When you look at the sail/plan sheet 6 you will note the small oval deadeyes on the shrouds. From those laser cut in the kit you can see what is being asked for or to replace. I was not able to find any of that type and size so I hand filed slightly larger ones into the oval/triangle shape. Maybe your search for those will be more successful than mine was. The Dry Dock blocks and eyes are outstanding. RichHave already ordered Zoly's blocks and have a supply of quality deadeyes to use. Agree the castings..cant see any I would use at this stage but will re-examine when I get to that stage. The rigging questions I will leave until I get closer and decide on how I want to display the boat, at the moment I am thinking furled sails but that could change. Plenty of challenges to uncover between now and the rigging though.
-

Win a Free Custom Engraved Brass Coin!!!
As a way to introduce our brass coins to the community, we will raffle off a free coin during the month of August. Follow link ABOVE for instructions for entering.
-

PRE-ORDER SHIPS IN SCALE TODAY!
The beloved Ships in Scale Magazine is back and charting a new course for 2026!
Discover new skills, new techniques, and new inspirations in every issue.
NOTE THAT OUR FIRST ISSUE WILL BE JAN/FEB 2026
You are using an out of date browser. It may not display this or other websites correctly.
You should upgrade or use an alternative browser.
You should upgrade or use an alternative browser.
Bluenose Model Shipways build log - Mallacoota
- Thread starter mallacoota
- Start date
- Watchers 18
Interesting idea which never came to my mind in my own model. Hopefully it will be I a true shear and hull lines as you progress. I had to do some fillers on the outboard side of my schooner to close some gaps to the backside of the hull planking. Onwards, my friend! Rich (PT-2)Installing the second waterway board first which I think is a much better idea than the instructions of doing the intermediates between the stanchions. This way I can get a much better fit I believe...they will all sit alongside this middle timber a lot better.
View attachment 254985
I just added your build to my watch list. I have been thinking about this kit for some time now so it will be intriguing to see how you make modifications to the kit. Good luck and have fun.
Have been fitting the intermediate waterways outboard of the middle one of three. Found an annoying mistake I have made....should have bevelled the inboard side of the timbertops before installing the middle waterway plank. Not a game changer, but a silly mistake which caused me to have to sand down the timbertops more on the outboard edge than I expected. If you dont sand them down quite a bit the top hull plank will sit out a bit far with a gap to the waterboard. All good now but if I had bevelled the inside of the timbertops the waterway plank would have been slightly better positioned....whatever..!! I think Dean referred to the same issue with that gap to the planking.
It doesnt matter how much thought and care you put into this part of a build it is never enough...LOL
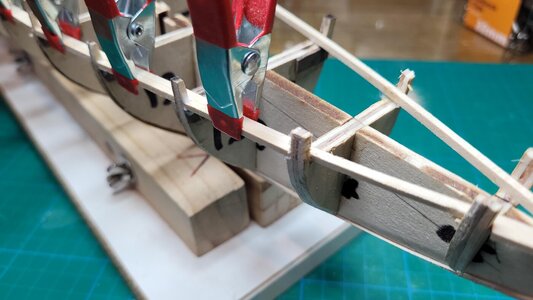
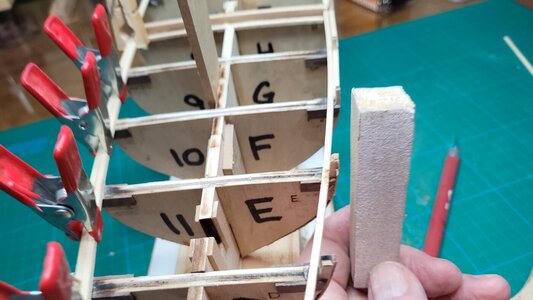
It doesnt matter how much thought and care you put into this part of a build it is never enough...LOL


Those look well placed and ready for fairing before the planking. Nice progress. RichHave been fitting the intermediate waterways outboard of the middle one of three. Found an annoying mistake I have made....should have bevelled the inboard side of the timbertops before installing the middle waterway plank. Not a game changer, but a silly mistake which caused me to have to sand down the timbertops more on the outboard edge than I expected. If you dont sand them down quite a bit the top hull plank will sit out a bit far with a gap to the waterboard. All good now but if I had bevelled the inside of the timbertops the waterway plank would have been slightly better positioned....whatever..!! I think Dean referred to the same issue with that gap to the planking.
It doesnt matter how much thought and care you put into this part of a build it is never enough...LOL
View attachment 255139View attachment 255140
Thanks Rich, always annoying when you make silly little mistakes though.It will be alright on the night.
My approach has been to install the waterboards, then the top wale level with the waterboards...sand and finish that, then a bulwark wale with the scuppers cut into the bottom edge. The kit planking plan (below) shows the quarterdeck step is managed by just stopping a plank at the great beam and the next plank running straight through. The problem is that you cant just do this because the foredeck waterway and the quarterdeck waterway are not a plank different in height...they are only about half a plank My solution (lucky) was to use some spare stock half the plank width for the quarterdeck top wale...that way you can get the wales level with their waterways and also run the longer plank straight through. You could also cut down a plank to half width if you had to. Maybe this is reflecting an earlier mistake but I dont think so as the deck planking levels are right.
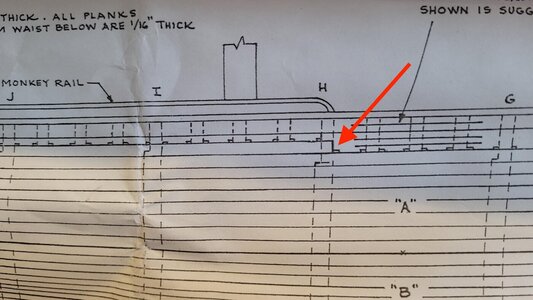
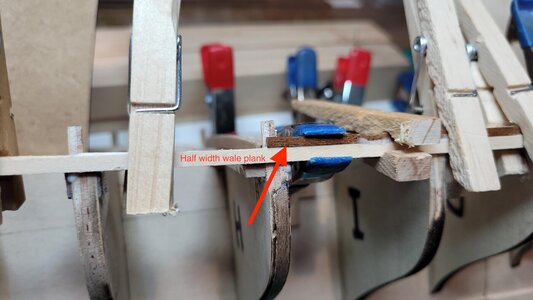


My approach has been to install the waterboards, then the top wale level with the waterboards...sand and finish that, then a bulwark wale with the scuppers cut into the bottom edge. The kit planking plan (below) shows the quarterdeck step is managed by just stopping a plank at the great beam and the next plank running straight through. The problem is that you cant just do this because the foredeck waterway and the quarterdeck waterway are not a plank different in height...they are only about half a plank My solution (lucky) was to use some spare stock half the plank width for the quarterdeck top wale...that way you can get the wales level with their waterways and also run the longer plank straight through. You could also cut down a plank to half width if you had to. Maybe this is reflecting an earlier mistake but I dont think so as the deck planking levels are right.
View attachment 255406
View attachment 255407from the hull planking detail above, which appears from the MS2130 plan, you have the information there that considers what BN had used while if you have the Saga BNII book on page 39 you can see a slightly different pattern which I personally did not try to follow. In the MS plan view I did not use the wider strakes but stayed with narrow ones which kept me our to changing widths and numbers being laid down. Follow your eyes and hands as to what is working best for your sequence of elements. Just a thought. Rich
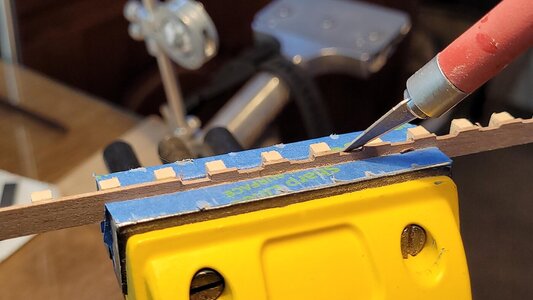
Read quite a bit of discussion about cutting off the timbertops and using 1/8th square stock to make all stanchions including the intended timbertop ones., not just the intermediates. I decided to retain the timbertops but part way through the step changed my mind as trying to make all the stanchions look consistent was a big challenge...so I cut them off on the quarterdeck and made bulwarks offline of the correct height with the stanchions pre-installed. They are fake anyway, so when and where you fake them is a moot point. This also enabled me to precut the scuppers in the right positions vs the stanchions under the bulwarks. There is no problem attaching these prefabricated bulwarks with stanchions and scuppers straight on top of the waterways. Just sit there easily
making the bulwarks
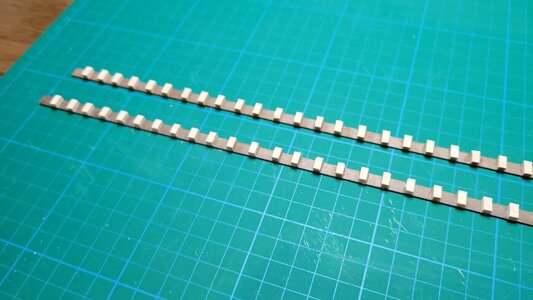
Cutting the scuppers
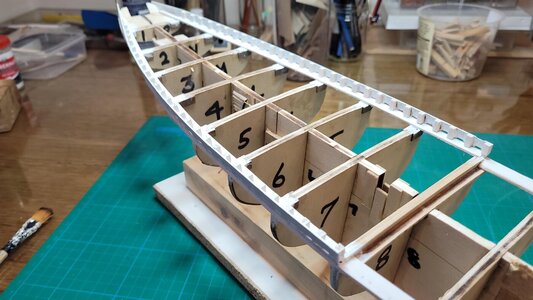
one coat of primer ready for some detail finishing...then on to foredeck and then main rail. Glad I cut the timbertops off and sorry i wasted all that effort cutting them down to 1/8th...duh..!
making the bulwarks

Cutting the scuppers

one coat of primer ready for some detail finishing...then on to foredeck and then main rail. Glad I cut the timbertops off and sorry i wasted all that effort cutting them down to 1/8th...duh..!

As the hull and deck have a shear curve you may have to scribe that to transfer to the solid stock upon which you are gluing the station. My MS BN bulkheads extended above the deck to the proper height but necessitated cutting and filing those to the correct hull side lines. Kits are definitely different in what they call upon the builder to do. Looks like you are progressing well. Rich (PT-2)Read quite a bit of discussion about cutting off the timbertops and using 1/8th square stock to make all stanchions including the intended timbertop ones., not just the intermediates. I decided to retain the timbertops but part way through the step changed my mind as trying to make all the stanchions look consistent was a big challenge...so I cut them off on the quarterdeck and made bulwarks offline of the correct height with the stanchions pre-installed. They are fake anyway, so when and where you fake them is a moot point. This also enabled me to precut the scuppers in the right positions vs the stanchions under the bulwarks. There is no problem attaching these prefabricated bulwarks with stanchions and scuppers straight on top of the waterways. Just sit there easily
making the bulwarks
View attachment 255902
Cutting the scuppers
View attachment 255903
one coat of primer ready for some detail finishing...then on to foredeck and then main rail. Glad I cut the timbertops off and sorry i wasted all that effort cutting them down to 1/8th...duh..!
View attachment 255904
Quite a few people have complained about the fit of the stern laser cutout for the main rail...all saying that it is too small for the job. I didnt have a problem with it, it fitted really well so I dont know if it has maybe been altered. Anyway it went on really well. Now on to cutting and shaping the main rail, then the buffalo and monkey rails and tops. Then I will air brush all the white topsides and decide later whether to pick out the watreways in grey (or not) ...they should be grey but I am not at all enthusiastic about cutting in around a couple of hundred stanchions. Will see how the enthusiasm level is when I get to it. After that the hull planking.
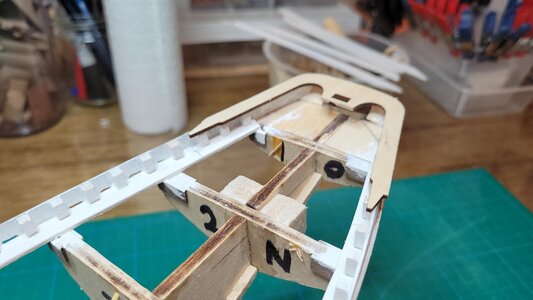
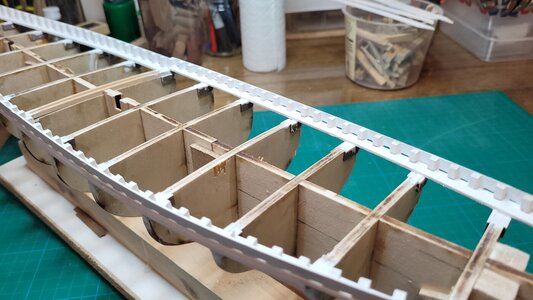
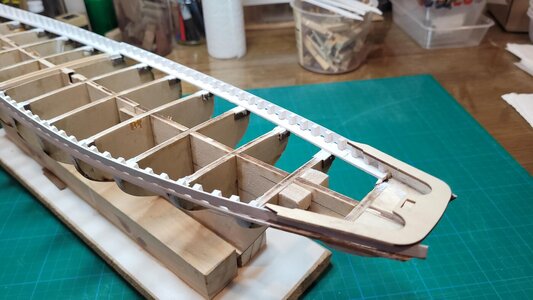


It’s looking very good John!Quite a few people have complained about the fit of the stern laser cutout for the main rail...all saying that it is too small for the job. I didnt have a problem with it, it fitted really well so I dont know if it has maybe been altered. Anyway it went on really well. Now on to cutting and shaping the main rail, then the buffalo and monkey rails and tops. Then I will air brush all the white topsides and decide later whether to pick out the watreways in grey (or not) ...they should be grey but I am not at all enthusiastic about cutting in around a couple of hundred stanchions. Will see how the enthusiasm level is when I get to it. After that the hull planking.
View attachment 256346View attachment 256347View attachment 256348
thanks the encouragement
I had multiple problems in the several scarfed railing sections shown on the plans and in the kit but it all worked out eventually. Maybe not as precise as a replacement single piece railing but I knew that the actual railings were in shorter sections so I followed that tack. The compound bend of the transom railing took more heated bending in my case for a proper fit which still was not perfectly tight. Rich (PT-2)Quite a few people have complained about the fit of the stern laser cutout for the main rail...all saying that it is too small for the job. I didnt have a problem with it, it fitted really well so I dont know if it has maybe been altered. Anyway it went on really well. Now on to cutting and shaping the main rail, then the buffalo and monkey rails and tops. Then I will air brush all the white topsides and decide later whether to pick out the watreways in grey (or not) ...they should be grey but I am not at all enthusiastic about cutting in around a couple of hundred stanchions. Will see how the enthusiasm level is when I get to it. After that the hull planking.
View attachment 256346View attachment 256347View attachment 256348
The main rails done, not easy to get width sizing right....I allowed myself a little extra width where the chainplates go through. Monkey board and moinkey rail in place.
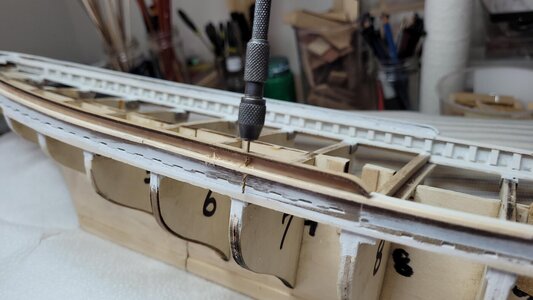
Drilling slots for the chainplates
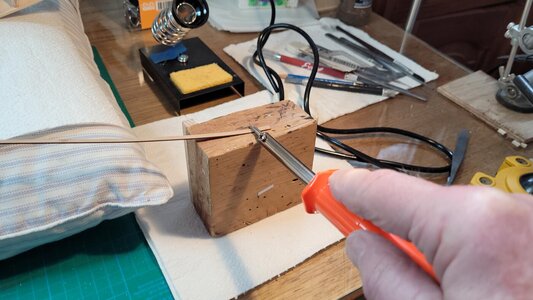
Bending curves into front of Monkey Rails...used some nice pearwood I have left over from the YQ Bluenose rather than the soft and wooly basswood which is provided for everything in the MS kit. In my opinion this is the way to bend anything...soak the stick for 5 minutes then just hold it down with the iron and bend away...moving the stick as required. Worked this out on Endeavour where every hull plank does a right angle towards the bow and nothing else I tried worked nearly as well. Dont have the iron too hot. Actually the pearwood did not take up much water so I was inclined to scorch these bends a little partly because I was using the hotter tip for the small radius curve. It works better on the larger casing of the iron just behind the tip screw. That's how I bend stuff anyway... I am sure others have better ways.
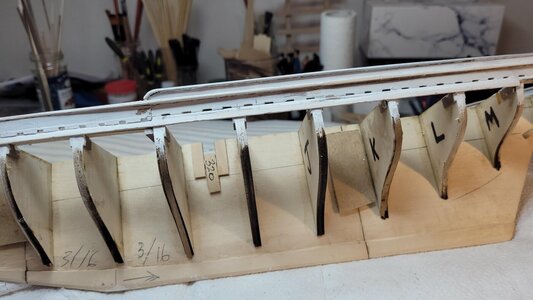
starting to look OK..a bit more fine sanding , filling and touching up with primer then i can spray the whole bulwark & rail assembly.
Drilling slots for the chainplates

Bending curves into front of Monkey Rails...used some nice pearwood I have left over from the YQ Bluenose rather than the soft and wooly basswood which is provided for everything in the MS kit. In my opinion this is the way to bend anything...soak the stick for 5 minutes then just hold it down with the iron and bend away...moving the stick as required. Worked this out on Endeavour where every hull plank does a right angle towards the bow and nothing else I tried worked nearly as well. Dont have the iron too hot. Actually the pearwood did not take up much water so I was inclined to scorch these bends a little partly because I was using the hotter tip for the small radius curve. It works better on the larger casing of the iron just behind the tip screw. That's how I bend stuff anyway... I am sure others have better ways.

starting to look OK..a bit more fine sanding , filling and touching up with primer then i can spray the whole bulwark & rail assembly.

Last edited:
Very nice progress. I particularly like the regularity and squareness of the scuppers. Another drilling challenge, possibly, will be the numerous belaying pin holes and eye bolts around the rails. Some of mine ended up too close to stantions or the bulwarks to be able to figure-8 a line around the bottom projection so I had to cheat this and glue the line to the edge of the rail knowing that it would be covered by the faux rope hanks. The MS BN also has a few falls being directed to the same pin. If you choose to include the dory tackles there are no pins for those and the note says that the fall can either be secured to the shear rod on the shrouds or around itself. I will be adding some extra pins for those four falls but there are other duplicates shown on the pin rails around the bottom of the masts. The rigging note states the BN had fewer belaying pins than other schooners so it was a problem that I am surprised to find out about. Dean worked around this and with his omission of sails and the simplified YQ kit only had falls to pins where he placed his rope hanks and left the other pins open. It made for a very clean presentation.The main rails done, not wasy to get sizing right..I allowed myself a little extra width where the chainplates go through. Monkey board and moinkey rail in place.
Drilling slots for the chainplates
View attachment 256780
Bending curves into front of Monkey Rails...used some nice pearwood I have left over from the YQ Bluenose rather than the soft and wooly basswood which is provided for everything in the MS kit.
View attachment 256781
starting to look OK..a bit more fine sanding , filling and touching up with primer then i can spray the whole bulwark & rail assembly.
View attachment 256783
Best of luck and patience as you proceed. She looks nice so far. Rich (PT -2)
Thanks Rich.I actually think this whole bulwark/rail/scupper area is the most difficult part of the whole build. Getting a good flow from the hull lines to the bulwarks... what to do about the ply timbertops.. it is IMHO a very difficult area to do really well. It is an easy hull to plank, I did the YQ one with no drop planks and no stealers, so the other 90% of the boat is straightforward. It is hard to imagine two more different kits than the YQ POF one and the MS POB one...I plan to post my opinion of a comparison when I finish this.
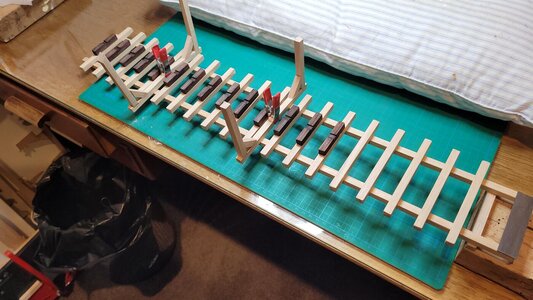
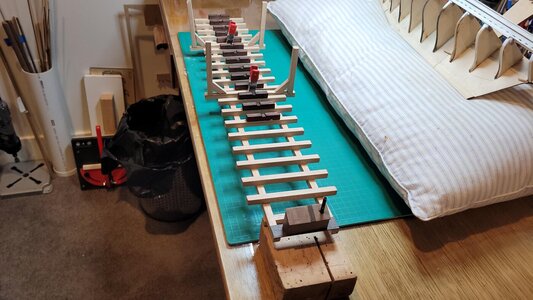
The plans show a winch engine which would have to scratch built . . . Dean and Peter have an excellent 3-D one to be printed out fo which I have a hard time imagining that inside the YQ 72 scale much less our larger 64 scale but it would be a neat item to have included with the engine covers being hinged to show it. I was satisfied to pass on that challenge as there are plenty of other opportunities but I could drift back in a strong headwind and current to try and put one inside.Just built a waterway for the final resting place of the model but it will serve to hold it from the planking onwards. Not quite finished ...no winch in the winch housing but chain comes out the front.
View attachment 257011View attachment 257012
Your launch-way looks like an good idea for a bare poles schooner. Rich (PT-2)


