• "Thank you for your Donations and Support"
    As we close this Annual Donations Drive, I want to thank you all for your Generosity in Donating to Ships of Scale. It is Greatly Apreciated !!!
    Ships of Scale continues to explore exciting things to offer to the Ship Building Community.

NORSKE LOVE - Billing Boats 1:75 scale

The next wall that will have doors…
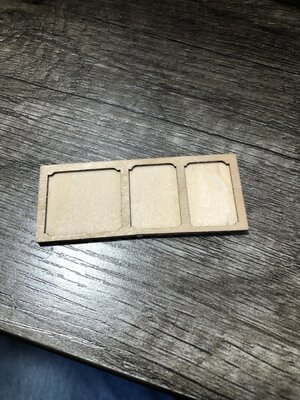
55673650-AC1A-4F39-95BB-FD8D531EF050.jpeg

Then I built doors with raised panels of pear wood, and added pear wood frame.
Cut the bottom of wall, didn’t make sense to have trim under the doors…
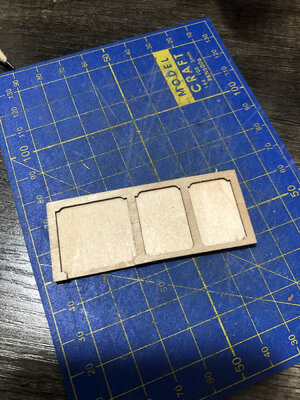
29CE3D16-BA94-42CB-8614-8ABEB2D8FE37.jpeg

Then added doors and set in place to look…
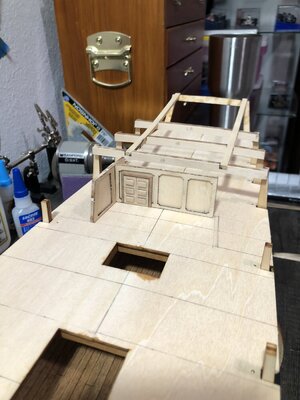
D55B6D60-D5CD-4480-B26F-42CB9B68FA7D.jpeg

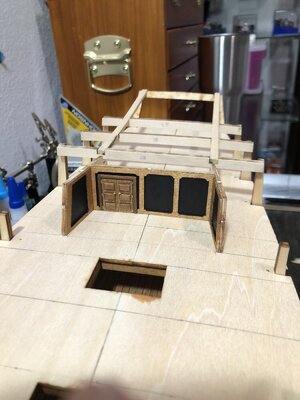
Then put all walls up to get big picture…
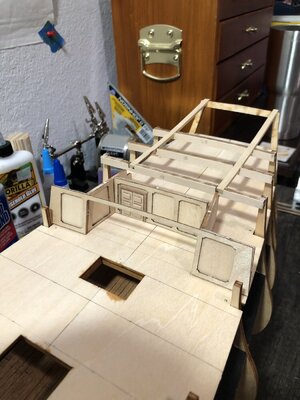
30CC4B34-3D22-4FCA-853E-D5BFB1E599F8.jpeg

The upper deck will go to closest wall with opening and I will add the coat of arms to those raised panels.
Now to glue up everything and then I can start adding columns, trim and panels. I think I will paint around the door frame black, similar to the paneled areas. I have to add door knobs and hinges…the list goes on! ;)

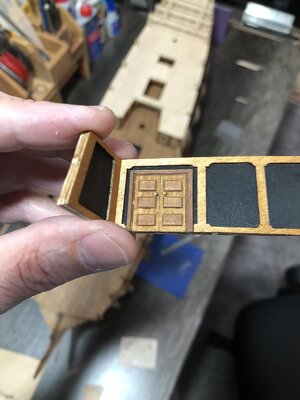
Here is the door assembly in rough state…needs sanding, stain, paint, etc…55F79882-82C3-4534-AE57-B0D50EB884FA.jpeg
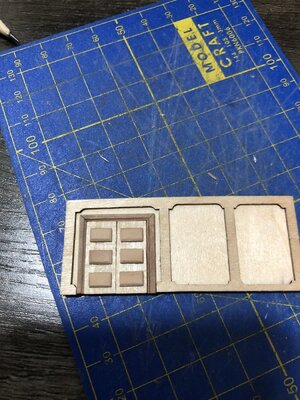
 
Hi Dean,

I’m catching up on your build of Norske Love. How is the BB brand in comparison to others?
I just happen to see in your Cazador buildlog you have the San Felipe waiting on you. For me the same, she arrived just a few days ago. why did you start with the NL first?

btw, like your work!
 
Hi Dean,

I’m catching up on your build of Norske Love. How is the BB brand in comparison to others?
I just happen to see in your Cazador buildlog you have the San Felipe waiting on you. For me the same, she arrived just a few days ago. why did you start with the NL first?

btw, like your work!
Thank you! I like your work as well. You’re doing a fantastic job on the Cazador! ;)
It’s kind of a long story…lol. I had the San Felipe waiting, but then the POF Bluenose came along and I decided to build it first as a present for my son. During the build of the Bluenose, the Norske Love was on sale at almost half price. So I couldn’t resist! Then I decided to do the NL first because so many people are already building the San Felipe that it would just be another one of many. But I will get to it eventually! :p
The BB kit leaves a lot to be desired when it comes to instructions! You have to mainly rely on the full scale plans with some isometric illustrations that are basic. The verbal instructions are only a few paragraphs. So they assume you have enough experience to put it all together without much guidance. Not a step by step instruction with pictures like the Occre kit. So it is not a beginner kit, but will be okay for those with enough experience to work with plans and a few illustrations. ;)
So I’m having fun with it, and will also be upgrading a lot of things, like pulleys, rope, wood, figurehead, etc. I’m using some of the provided wood.
 
Last edited:
Thank you! I like your work as well. You’re do a fantastic job on the Cazador! ;)
It’s kind of a long story…lol. I had the San Felipe waiting, but then the POF Bluenose came along and I decided to build it first as a present for my son. During the build of the Bluenose, the Norske Love was on sale at almost half price. So I couldn’t resist! Then I decided to do the NL first because so many people are already building the San Felipe that it would just be another one of many. But I will get to it eventually! :p
The BB kit leaves a lot to be desired when it comes to instructions! You have to mainly rely on the full scale plans with some isometric illustrations that are basic. The verbal instructions are only a few paragraphs. So they assume you have enough experience to put it all together without much guidance. Not a step by step instruction with pictures like the Occre kit. So it is not a beginner kit, but will be okay for those with enough experience to work with plans and a few illustrations. ;)
So I’m having fun with it, and will also be upgrading a lot of things, like pulleys, rope, wood, figurehead, etc. I’m using some of the provided wood.
To build and give it to your son must be great. To have something your father build is something to hold on forever.
You must have good patience, because I can bet your fingers must be itching to start with the SF and the amount of work you have on the NL tells me it will take some time.. :p
never mind, I’m watching this thread.

I’ve always being reluctant to BB kits and found them inferior to other brands. Blocks of plastic, flappy thin ply, poor manual and drawings and a less quality of lumber. However, with the right skills, alternations of the builder and a lot of patience will make a big difference I’ll guess. You will manage this poppy and lay the new standard for this kit. I’m sure. :)
Thank you, I appreciate it!
You are correct about the BB kits, this is the only one that really appealed to me. So I’m trying to make the best of a poor kit…lol. ;)
 
Hey Dean,
Yeah, slightly darker or keep it as it is. Depends on what you want to present; a more weather-worn look, or a more pristine presentation.
From the Modelbrouwers.nl webpage I copied two pictures of one of the decks of the Batavia, slightly wet ánd about 25 years old:View attachment 264064View attachment 264065

What's also shown are two ways the panels were build, one panel with butt joints (first picture) and one with overlapping joints (second picture). How the walls were build on the NL, I wouldn't know, but may be there are some resources around giving an incling on what the Norwegians did...
Lol, It was me who took these pictures of the Batavia. I tried to capture the construction in Mind when taking these pictures. At that time I was a sponsor of the project and could go freely on the wharf.
 
Great pictures!
Thanks, I remembered when I took those pictures it was raining as hell. I don’t live in the area of Batavia but was in the area for a business meeting so I saw an opportunity and took it, went to the wharf in my suit and italian shoes. The people working on the wharf were looking who that nutball was. I was not fitting in so to say… ROTF
however, determed that I was, I proceeded and did my job took the pictures and shared this on the web for reference. At that time, a plastic kit of Batavia was just released and was pretty populair.
I had the ship completely for myself alone and it was an unique opportunity!

back on topic now, sorry Dean for hijacking your topic on this subject.
No worries… good story! :p
 
For reference, here is a kit provided wall. Which is a ply that is lazer cut, backed with another piece of plywood to create inset panels. Very plain…
View attachment 267940

Which is why I chose to add columns, then a bottom trim, and finally the raised panel inset with black border. And I opted to carve the coat of arms, verses using the supplied decal.
It was a lot of extra work, but in the end it will pay off, because these walls will be mostly visible, as they are located in an open deck area. ;)
Ahh man- how do you guys get this fine detail so immaculate.
 
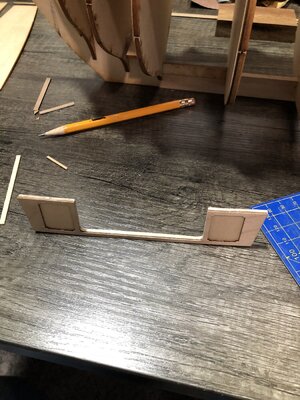
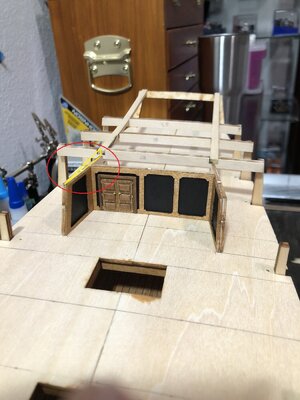
Added a board across the top of the wall to thicken the opening…thin plywood again…except the sides…sigh!
486787B6-FA54-4BEB-BD6E-5841B81B9E20.jpeg
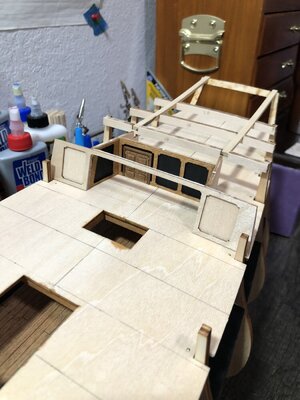
Tested the fit with the other walls…
0A09BB6B-AA36-45E7-B38C-080FBBD7E18D.jpeg
Finished the doors…stained, polished with steel wool, added door knobs and hinges…
3AB347FE-FA6D-40B6-A716-E539A54E1302.jpeg5D5D70AE-789A-4D0F-B762-AAAA3B4E973D.jpeg

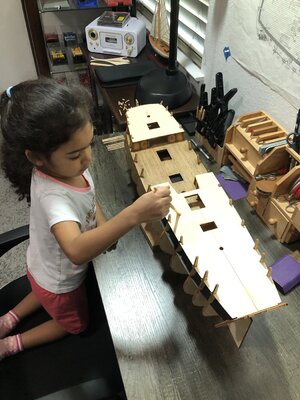
That’s it for this weekend, was too busy babysitting my granddaughter. But she’s first, the ship can wait! ;)

Next I will start adding columns and base trim. Then will be raised panels. But I need to start on the deck planks…
 
Din62, good afternoon. I watch your construction site with interest. But now that day I cannot understand how the deck will go. Will there be an additional add-on in the place that I have allocated, or is it supposed to be something else?5D5D70AE-789A-4D0F-B762-AAAA3B4E973D.jpeg
 
Back
Top