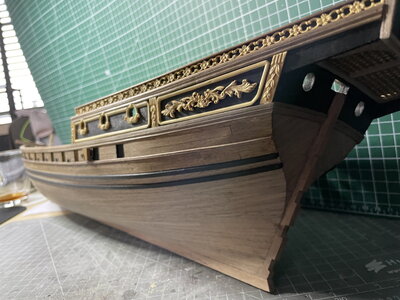
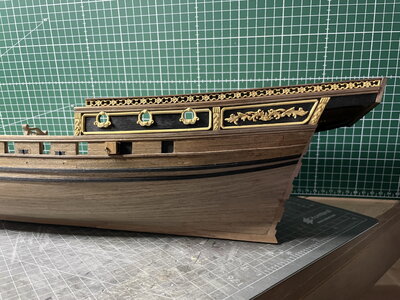
Cazador Xebec 1750 - OcCre - scale 1:60 [COMPLETED BUILD]

Great carvings Peter! Your ship is going to look awesome!
Nice tutorial on carving as well.
I don’t own gouges, so I use a triangular jewelers file for the V shapes, and a tiny rat tail file for the U shapes. And also some tiny riffler files. The rest I can do with an xacto knife (chip carving) and with the rotary bits in the Proxxon. So I suppose I employ all of the techniques, I just use files instead of gouges. ;)
 
Last edited:
Great carvings Peter! Your ship is going to look awesome!
Nice tutorial on carving as well.
I don’t own gouges, so I use a triangular jewelers file for the V shapes, and a tiny rat tail file for the U shapes. And also some tiny riffler files. The rest I can do with an xacto knife (chip carving) and with the rotary bits in the Proxxon. So I suppose I employ all of the techniques, I just use files instead of gouges. ;)
See! It’s not about the tools Dean, only the result that counts. I use these needle or jewelers files a lot and loving them.
 
See! It’s not about the tools Dean, only the result that counts. I use these needle or jewelers files a lot and loving them.
Yes, I actually prefer doing things by hand. It takes longer, but you have more control. I am getting better at the rotary, but still use the lowest speed. Although I have been using the cutting burs more than the sanding burs. So I could bump the speed up if I switch to sanding verses cutting. So many options! I like using 0000 steel wool to finish a piece and smooth it some. It’s messy, but works good! ;)
 
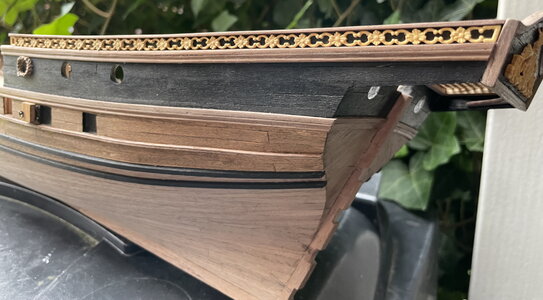
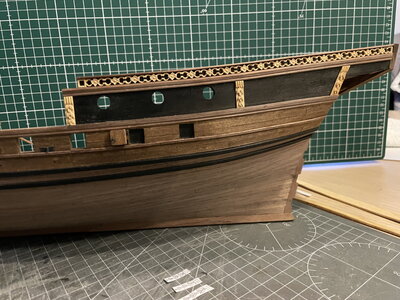
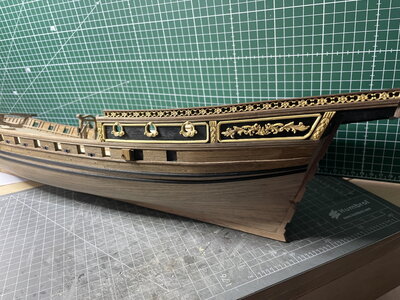
That looks awesome! It wasn't until you added the carving, that I realized you extended that upper railing. You created more work for yourself...lol. But I love it!
I wish I had made carvings when I built the Cazador, I would have replaced all of the metal decorative pieces! But I didn't have any experience back then and barely got by making the few bits I did carve...lol. ;) But I am giving it to my granddaughter, so I don't think she will mind! :p
One small thing, I noticed you left the square open on the right side and closed on the left. I assume that was oversight? I actually like it open. You can still change it, if you overlooked that. If not, no big deal, it looks awesome regardless!
 
Last edited:
That looks awesome! It wasn't until you added the carving, that I realized you extended that upper railing. You created more work for yourself...lol. But I love it!
I wish I had made carvings when I built the Cazador, I would have replaced all of the metal decorative pieces! But I didn't have any experience back then and barely got by making the few bits I did carve...lol. ;) But I am giving it to my granddaughter, so I don't think she will mind! :p
One small thing, I noticed you left the square open on the right side and closed on the left. I assume that was oversight? I actually like it open. You can still change it, if you overlooked that. If not, no big deal, it looks awesome regardless!
You have a very keen eye Dean! :)
I did extended the upper railing because I looked at some pictures of Xebecs and this was a common thing to have and I liked it. Gave me some challenges tho, because the carving had to be longer as well. One both sides….o_O

Second, about the end-squares on the carving. I designed it like this, one open, one closed. To be honest, I like both version, the closed one and the open one.:p

Your Xebec is a beauty, your granddaughter will be proud to have it, no matter how it looks like. It’s something her grandfather made with his bare hands and she will cherish this forever I’m sure! ;)
 
Bell tower, Stern decoration & woodcarving

Hello my friends,

It's been a while since my last update., but I like to share my progress so far. This update is about the stern, decorations and finally rebuilding the upper part of the stern. Before we're going to start with the stern, first I made some progress on the bell tower which I made out of walnut.

View attachment 288691

View attachment 288692

View attachment 288699

View attachment 288700

So, eventually I had to demolish the stern of the ship a bit. I needed to remove the upper part to completely remodel it.
I had some time to figure it out and now I have to do it. It wasn't an easy task and let me show you the progress....
After the upper back plate of the stern was removed, I covered the outward facing part with walnut veneer. Second was to make some profile strips out of walnut. I used a profile scraper to do the job. After this was done, I assembled the parts and it was finished however.....

View attachment 288702

View attachment 288701

View attachment 288703

View attachment 288704

This time I made a mistake. The part is too high. I have to recut everything, and to re-assemble.

View attachment 288705

Ah well, it kept me awake for one night. Nothing is worse when you put blood, sweat and tears into the fabrication of a part, but the take it all apart due to a miscalculation. Sh*t happens they say, so I needed to fix it, do the job all over and live with the consequences... lol :p

So now my frame is finished to replace it on the ship again....

View attachment 288706

View attachment 288707

See how the profile follows the boards instead of placed on top of the boards. :)

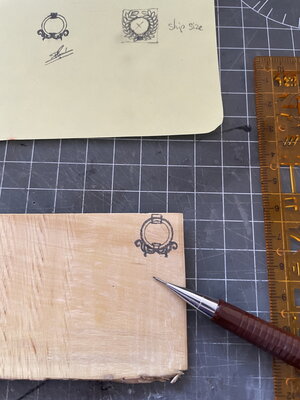
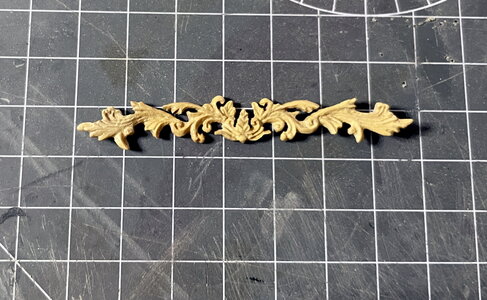
Next step is to start with some woodcarving. I did some carving in the past with my Pfeill tools. I just needed a design and I chose a Baroque theme with Acanthus leaves. After I made the drawing, I needed it to transfer it onto the wood. I use real boxwood for this matter. The carving is very small and has a dimension of 60x25mm.

View attachment 288693
View attachment 288694

When been transferred onto the wood, I use a scroll saw to saw out the basic shape / outline of the carving.

View attachment 288695

Time to start, which I do in parts. So I start with the flower on top...

View attachment 288696

Then one of the sides....

View attachment 288697

Other side as well....

View attachment 288698

All that is left is the center part....but this will have to wait until sunday...

Let's have a sneak-peak how this will gonna look onto the ship shall we?? I'm curious, can't wait....

View attachment 288708

So, the carving will be finished hopefully this weekend and I can show the full details. Until then, thank you for alle the likes and comments.

See you soon,
Pter
Dear Pter
you are doing wonderful work on this model, and wonderful carvings
 
Carving update - part 3
I changes my mind and I decide to finish one side first with all the carvings before I'll go work on the other side. Give me a bit more change of work.
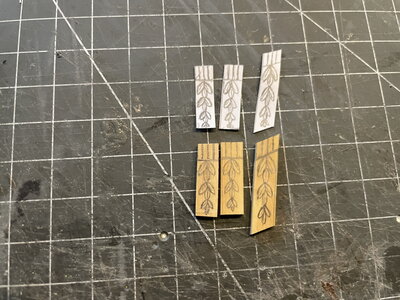
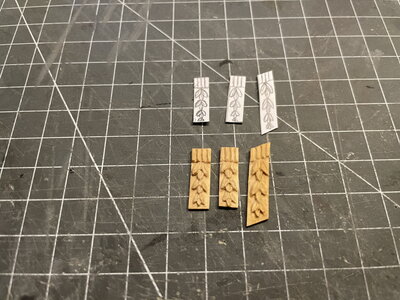
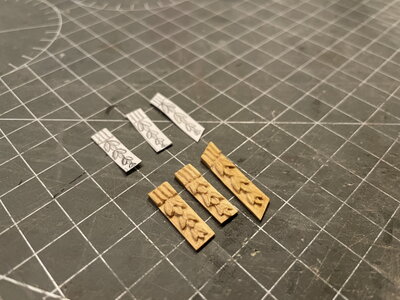
This weekend I carved the vertical "pillars" with a leaf motif. There a in total 3 pillars on each side. Between the last two pillars a frame with a flying eagle will be made. That will be a difficult carving.

Cazador_283.jpgCazador_284.jpgCazador_285.jpgCazador_286.jpg


Pter
 
Woodcarving - update 4
Ouch, I was searching for my log....it was on the 2nd page. Guess a new update is in order. I had some obligations towards my family and I was occupied by my job, so you had to wait for this update. Thank you for your patience. You guys are rocking it with all the new posts in your logs. Keep it going! :)

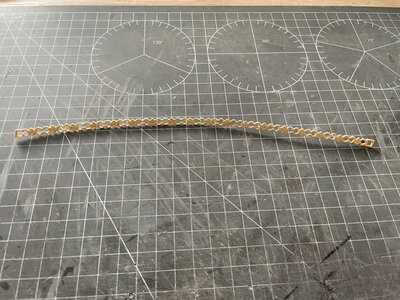
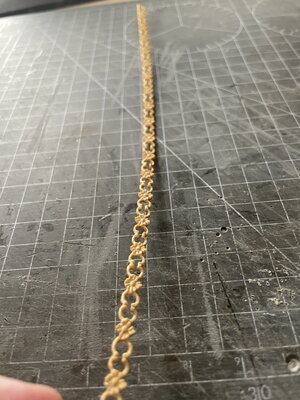
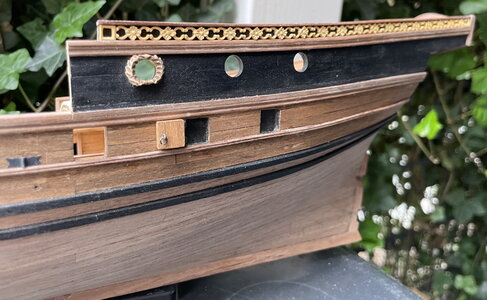
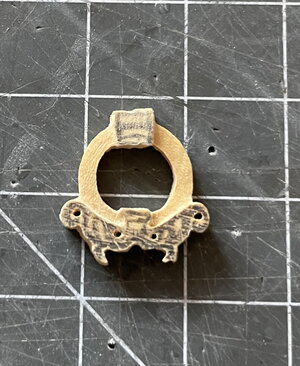
In this update I'll continue with some carving elements on the side of the ship. I made a new design for the frames around the gunports. Somehow the laurel wreath didn't do it for me. Second I made the panels and third I made the carving for the back panel.

Cazador_296.jpg

Cazador_297.jpg

Cazador_292.jpg

Cazador_293.jpgCazador_294.jpgCazador_295.jpg

Still not done, but I'm getting there....one step at the time..... ;)

If you're here reading my log, thank you and please leave a comment if you like.
Until next update,

Regards,
Pete
 
Woodcarving - update 4
Ouch, I was searching for my log....it was on the 2nd page. Guess a new update is in order. I had some obligations towards my family and I was occupied by my job, so you had to wait for this update. Thank you for your patience. You guys are rocking it with all the new posts in your logs. Keep it going! :)

In this update I'll continue with some carving elements on the side of the ship. I made a new design for the frames around the gunports. Somehow the laurel wreath didn't do it for me. Second I made the panels and third I made the carving for the back panel.

View attachment 295704

View attachment 295705

View attachment 295700

View attachment 295701View attachment 295702View attachment 295703

Still not done, but I'm getting there....one step at the time..... ;)

If you're here reading my log, thank you and please leave a comment if you like.
Until next update,

Regards,
Pete
Your carvings are gorgeous beyond reason Pter!! Great decision to change up gun port wreaths.
 
Back
Top