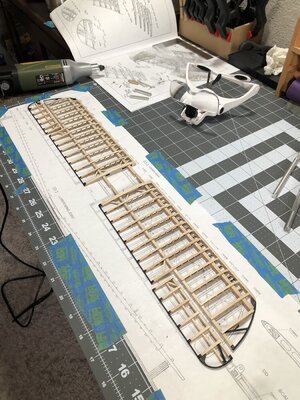
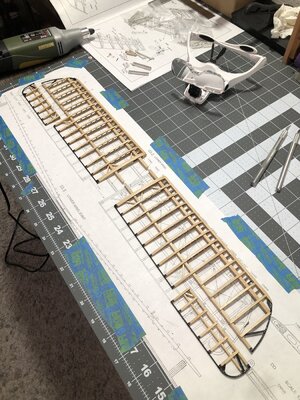
Yep, but that’s 2D, also in the 3th direction nice and straight. But 3D is your beloved work.Thank you Peter! Using the full scale plans to locate and align everything is key.
-

Win a Free Custom Engraved Brass Coin!!!
As a way to introduce our brass coins to the community, we will raffle off a free coin during the month of August. Follow link ABOVE for instructions for entering.
-

PRE-ORDER SHIPS IN SCALE TODAY!
The beloved Ships in Scale Magazine is back and charting a new course for 2026!
Discover new skills, new techniques, and new inspirations in every issue.
NOTE THAT OUR FIRST ISSUE WILL BE JAN/FEB 2026
- Home
- Forums
- Ships of Scale Build Logs
- Super Detailing Static Models / Other Genres
- Historical Trailways, Guns, Aircraft, and Cars
You are using an out of date browser. It may not display this or other websites correctly.
You should upgrade or use an alternative browser.
You should upgrade or use an alternative browser.
Model Airways Sopwith Camel 1/16 scale [COMPLETED BUILD]
I built several RC airplanes back in the 60's and 70's....my choice for wing covering back then was silk span with clear dope. Are you going to be covering these wings? Heat shrink? Just wondering.....It is straight forward, as far as wing building goes. Very similar to the wooden RC airplanes I built. I don’t thing the wing profile is any easier on a semi-symmetrical or symmetrical wing. These have a slight concave profile on the bottom. Either way you are soaking cap strips in water and bending them around the rib.
Then the ribs are installed on the spars. Then it’s time for the cross braces, leading edge ribs, the leading edge, wing tips, trailing edges, straps, then compression bars, and finally tension wires and turnbuckles.
The addition of the compression bars and tension wires is new for me.
So even though it’s a new type model, the detail required, and how I accomplish it, uses the same or similar skill sets as most models. Especially wood and metal models. Plastic models are all about painting. I used to have an airbrush and do camouflage on my plastic airplanes. So I developed my painting skills and techniques doing those. Working with the metal parts was a new thing for me on ships.
But each and every model has its own challenges and unique approach. This is a very busy and detailed model, the order and how you build it is very important. And all of the control cables are run, and the control surfaces are supposed to work with stick and rudder movement. So it’s a working static model. That looks to be a new and interesting challenge!
I did the same in the 70s with silk span and clear dope. Then they came out with the iron on film that is a lot tougher, and no fumes!I built several RC airplanes back in the 60's and 70's....my choice for wing covering back then was silk span with clear dope. Are you going to be covering these wings? Heat shrink? Just wondering.....
The kit is not meant to be covered, as it is a skeleton model, meant to show all of the frames and working components.
However I have considered covering a few panels in order to show the insignia in a few places. Will see when I get that far. I will use some artistic license and hopefully come up with an elegant solution to strategically covering a few areas.
Working on the left lower wing today.
First I had to cut some copper tape for the wing straps. First I cut the lengths, then I cut the width. You can get about two straps per piece of tape, width wise.

Then the straps were applied to the trailing edge, at every rib, and on the wing tips where applicable.
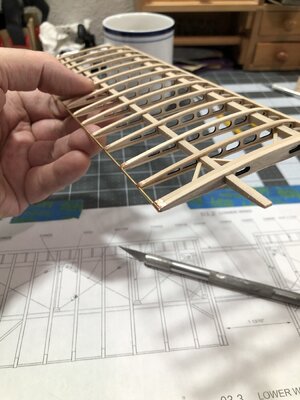
Then I sanded the leading edge to blend into the wing tip…


Then I added bolts to the right wing and started painting…

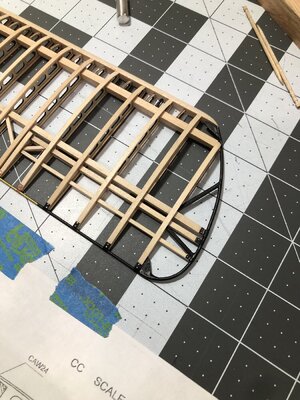
Then I started painting the left wing tip…
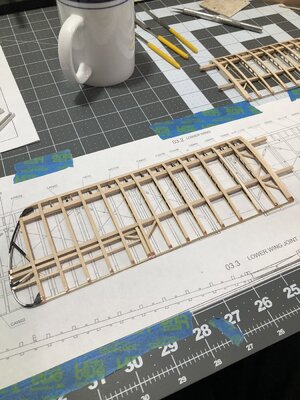
And hobby time is over for today. Admiral informed me that it’s my turn to cook dinner tonight…lol
Oh well, better do some chores and carry my weight around the house!
Thanks for dropping in!

First I had to cut some copper tape for the wing straps. First I cut the lengths, then I cut the width. You can get about two straps per piece of tape, width wise.

Then the straps were applied to the trailing edge, at every rib, and on the wing tips where applicable.

Then I sanded the leading edge to blend into the wing tip…


Then I added bolts to the right wing and started painting…


Then I started painting the left wing tip…

And hobby time is over for today. Admiral informed me that it’s my turn to cook dinner tonight…lol
Oh well, better do some chores and carry my weight around the house!
Thanks for dropping in!

Last edited:
- Joined
- Jan 9, 2020
- Messages
- 10,565
- Points
- 938

While you are racing ahead with the Sopwith, I have some naval news for you. Fluit build log by @Kolderstok Hans!
New design - 17th Century Fluytschip - Kolderstok
This is my introduction of a new kit we (=Kolderstok) have developped in the last two years. It is a 17th century Fluytschip, or Fluit. When you translate Fluit into English you get flute. Where the name fluit is derived from is not really known, but in general you can say that the shape of...
shipsofscale.com
Great! Thanks for the link Heinrich!While you are racing ahead with the Sopwith, I have some naval news for you. Fluit build log by @Kolderstok Hans!
New design - 17th Century Fluytschip - Kolderstok
This is my introduction of a new kit we (=Kolderstok) have developped in the last two years. It is a 17th century Fluytschip, or Fluit. When you translate Fluit into English you get flute. Where the name fluit is derived from is not really known, but in general you can say that the shape of...shipsofscale.com
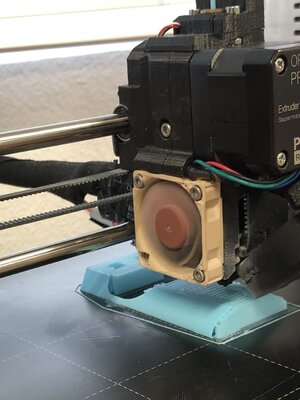
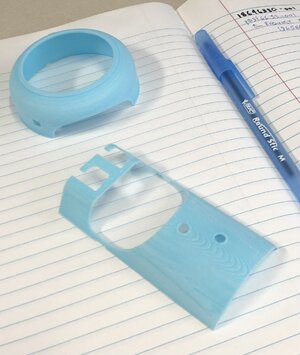
Today was painting…but first I made a test print of the cowling.
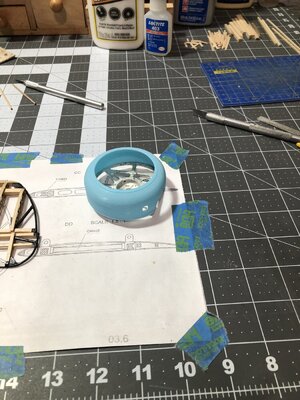
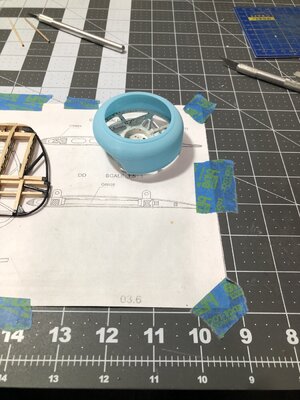
I decided not to sand it smooth. That way I could use the texture to simulate a brushed or spun metal.
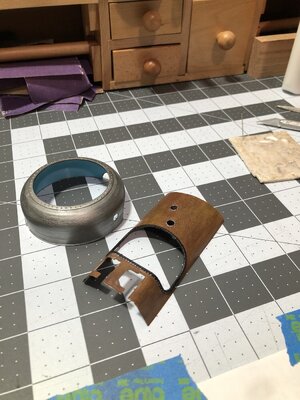
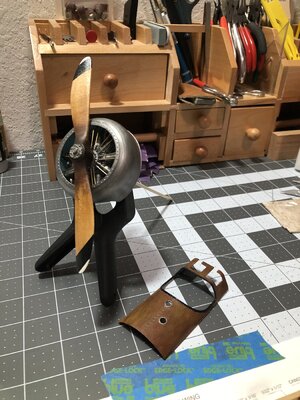
So I got out the paint. I then realized I wanted to test a new color I got…a burnt blue. Added it to the pipes on the engine.

Then I added bolt heads to the cowling and painted it, did a wash and dry brush. Finally a quick coat of clear. I probably won’t use this one, as it’s more of a test piece. I think it needs a little sanding so the grooves aren’t as pronounced. But who knows?


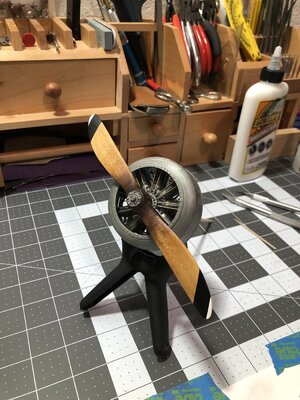
Anyway, so much for playing around with painting techniques. Back to building the lower wing!


I decided not to sand it smooth. That way I could use the texture to simulate a brushed or spun metal.
So I got out the paint. I then realized I wanted to test a new color I got…a burnt blue. Added it to the pipes on the engine.

Then I added bolt heads to the cowling and painted it, did a wash and dry brush. Finally a quick coat of clear. I probably won’t use this one, as it’s more of a test piece. I think it needs a little sanding so the grooves aren’t as pronounced. But who knows?


Anyway, so much for playing around with painting techniques. Back to building the lower wing!
Kurt Konrath
Kurt Konrath
Cowl looks like good fit and colors come out nice for test piece. Maybe a little grime to weather it a bit, unless your going for new look.
There is an old joke about the leaks and drips from these old radial engines. How do you know if a radial is out of oil? It stops dripping!
There is an old joke about the leaks and drips from these old radial engines. How do you know if a radial is out of oil? It stops dripping!
- Joined
- Sep 3, 2021
- Messages
- 5,190
- Points
- 738

Engine is looking great!Today was painting…but first I made a test print of the cowling.
View attachment 295152View attachment 295153
I decided not to sand it smooth. That way I could use the texture to simulate a brushed or spun metal.
So I got out the paint. I then realized I wanted to test a new color I got…a burnt blue. Added it to the pipes on the engine.
View attachment 295157
Then I added bolt heads to the cowling and painted it, did a wash and dry brush. Finally a quick coat of clear. I probably won’t use this one, as it’s more of a test piece. I think it needs a little sanding so the grooves aren’t as pronounced. But who knows?
View attachment 295159View attachment 295160View attachment 295161
Anyway, so much for playing around with painting techniques. Back to building the lower wing!
Cowl, from 3D model to printed hardware; very nice. However, I think I might have used some sanding action on the cowl, but I'm not sure which look you're after.
Yes, I wanted a brushed look. But it is a little too aggressive. So I have another one printing tonight. I will sand it a lot smoother, but leave some tiny grooves. At least I got to practice painting it.Engine is looking great!
Cowl, from 3D model to printed hardware; very nice. However, I think I might have used some sanding action on the cowl, but I'm not sure which look you're after.
- Joined
- Sep 3, 2021
- Messages
- 5,190
- Points
- 738

Eagerly awaiting the results of this next exercise.Yes, I wanted a brushed look. But it is a little too aggressive. So I have another one printing tonight. I will sand it a lot smoother, but leave some tiny grooves. At least I got to practice painting it.
Your 3D prints look very good. In general, your Camel is just stunning.
That looks very nice, Dean.As you probably guessed, tonight was more painting and detail of the new printed parts. I am out of matte clear, so used a satin, which is too shiny for the wood. Will have to clear coat with a matte finish.
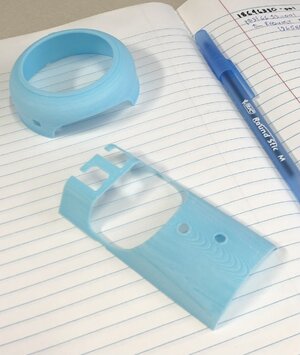
Anyway…started with these parts…
View attachment 295394
Then painted and added bolt heads…
View attachment 295395View attachment 295396
I love the wood structure on the cockpit panel. You could design it that way or is that an additional advantage of the printed layers?
Regards, Peter
- Joined
- Sep 3, 2021
- Messages
- 5,190
- Points
- 738

The
The cowling has improved by leaps and bounds, very convincing. The cockpit covering, at least that's my very personal taste, has an "exaggerated" roughness quality to it. From a distance the wood like print structure sure is a bonus.As you probably guessed, tonight was more painting and detail of the new printed parts. I am out of matte clear, so used a satin, which is too shiny for the wood. Will have to clear coat with a matte finish.
Anyway…started with these parts…
View attachment 295394
Then painted and added bolt heads…
View attachment 295395View attachment 295396
Thanks Adi! I am not sure I like the cockpit panel yet, but I am experimenting with painting on it.Your 3D prints look very good. In general, your Camel is just stunning.


