-

Win a Free Custom Engraved Brass Coin!!!
As a way to introduce our brass coins to the community, we will raffle off a free coin during the month of August. Follow link ABOVE for instructions for entering.
-

PRE-ORDER SHIPS IN SCALE TODAY!
The beloved Ships in Scale Magazine is back and charting a new course for 2026!
Discover new skills, new techniques, and new inspirations in every issue.
NOTE THAT OUR FIRST ISSUE WILL BE JAN/FEB 2026
- Home
- Forums
- Ships of Scale Build Logs
- Super Detailing Static Models / Other Genres
- Historical Trailways, Guns, Aircraft, and Cars
You are using an out of date browser. It may not display this or other websites correctly.
You should upgrade or use an alternative browser.
You should upgrade or use an alternative browser.
Model Airways Sopwith Camel 1/16 scale [COMPLETED BUILD]
- Joined
- Sep 3, 2021
- Messages
- 5,190
- Points
- 738

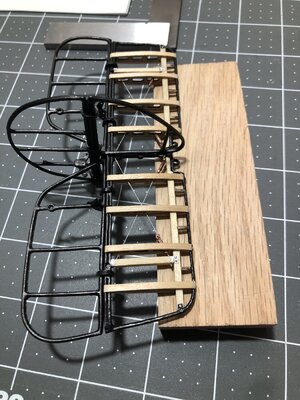
Your empennage assembly looks great, very much lifelike.Made a few improvements…added the compression brace brackets and bolt heads.
Filed and painted the hinges…
View attachment 296212
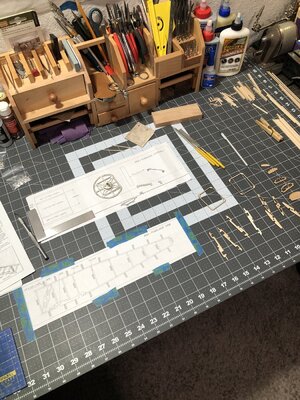
Now I am starting the fuselage, gathering components and wood to start assembly.
View attachment 296213

Great model collection!Following with interest- have model airways and Artesania Latina Camels in the stash, along with eight Wingnut Wings plastic examples...
Thank you Johan!Your empennage assembly looks great, very much lifelike.
Nice detailed work, Dean. And the hinges looks much better. No so dominant as in the previous version.Made a few improvements…added the compression brace brackets and bolt heads.
Filed and painted the hinges…
View attachment 296212
Now I am starting the fuselage, gathering components and wood to start assembly.
View attachment 296213
I see a lot of fragile wood parts for the fuselage. But I have a feeling that the manual is generally okay and showed how to handle them.
Regards, Peter
Thank you Peter! The manual is a lot of reading (27 pages)... which refers to figures and/or illustrations that sometimes are in the manual, but usually are on one of the plan sheets. I would prefer they keep the figures next to the appropriate text and in order....sigh! So you have to do a lot of looking to put it all together.Nice detailed work, Dean. And the hinges looks much better. No so dominant as in the previous version.
I see a lot of fragile wood parts for the fuselage. But I have a feeling that the manual is generally okay and showed how to handle them.
Regards, Peter
That said, the instructions are not too bad. I can figure out most of it just by looking at the plans!
Stage 4: Building the Fuselage
Building the fuselage halves…
First I built one side on the full scale jig…
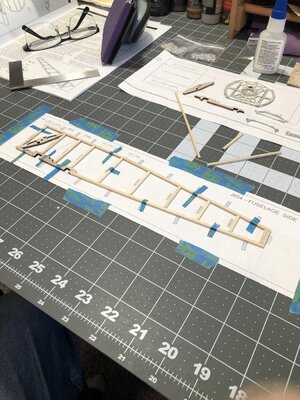
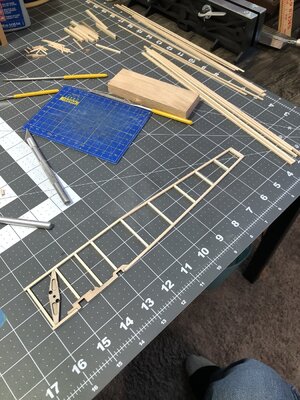
Then I built the second side, ensuring the cross brace was reversed, because this one is the inside of the frame!
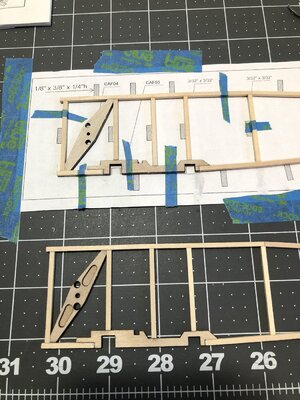
Then I had both sides built…
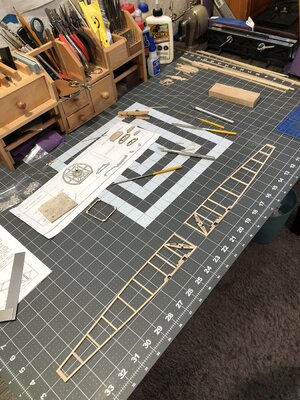
But due to variance in board size, etc. we are not done yet. First I sanded them flat on both sides.
Then to ensure horizontal braces and bulkheads are perpendicular to the sides in the next step, and not at an angle, we must ensure the outside edges where they are located, are the same!
So I clamped the two halves together and sanded the outside edges to match exactly!
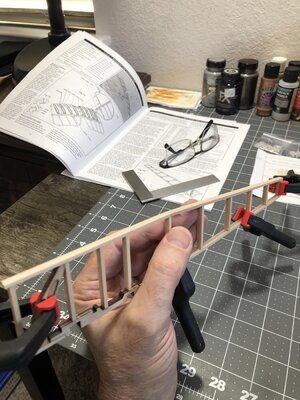
The end result is two halves that are as exact as possible moving forward. I can’t say enough how important this is, because it will help establish a true fuselage moving forward. Any variance in symmetry will result in improper angles and fit of parts.
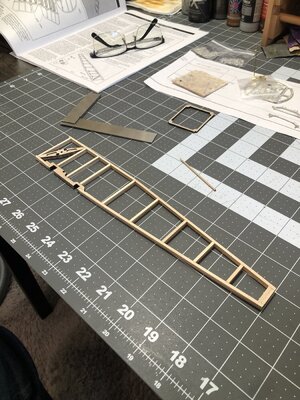
As you can see, the two halves stacked on top of one another shows the end result.
Building the fuselage halves…
First I built one side on the full scale jig…


Then I built the second side, ensuring the cross brace was reversed, because this one is the inside of the frame!

Then I had both sides built…

But due to variance in board size, etc. we are not done yet. First I sanded them flat on both sides.
Then to ensure horizontal braces and bulkheads are perpendicular to the sides in the next step, and not at an angle, we must ensure the outside edges where they are located, are the same!
So I clamped the two halves together and sanded the outside edges to match exactly!

The end result is two halves that are as exact as possible moving forward. I can’t say enough how important this is, because it will help establish a true fuselage moving forward. Any variance in symmetry will result in improper angles and fit of parts.

As you can see, the two halves stacked on top of one another shows the end result.
Last edited:
Hallo Dean, it's a real pleasure to watch your work as step by step you create an absolutely beautiful model.
Thank you Adi, much appreciated!Hallo Dean, it's a real pleasure to watch your work as step by step you create an absolutely beautiful model.
The next step is to place all of the eyes for the tension wires. The castings had to be filed and then glued on, however there were gaps in some because the frame tapers and they are all made at 90 degrees…
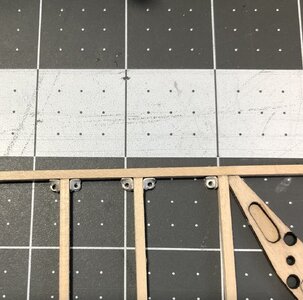
So the solution was to stain and clear coat the frame first, then glue them in place, and then fill in the gaps with pva glue on a toothpick. Once the glue was dry, I could paint them.
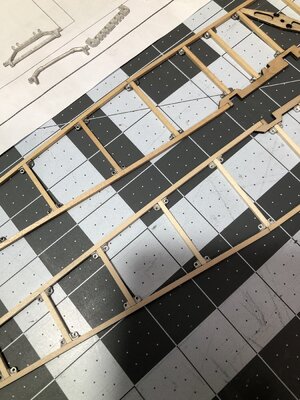
For comparison top frame is done… lower is next!
Then once both sides were finished, I started the assembly of the two sides. Working my way down the frame, one former at a time. I will revisit the eyes later, to address making them more like the actual ones used. Will have to be creative with that…lol.
Anyway…here is how far I got…
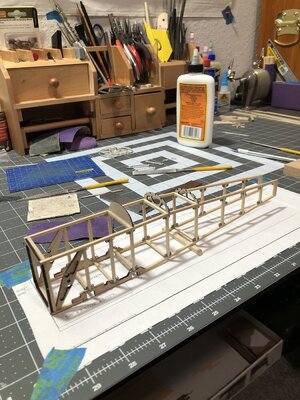
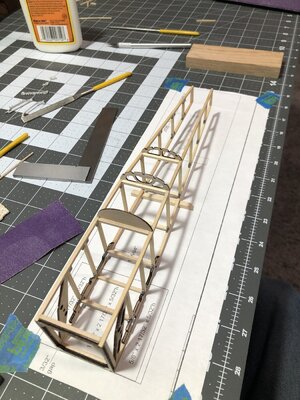

So the solution was to stain and clear coat the frame first, then glue them in place, and then fill in the gaps with pva glue on a toothpick. Once the glue was dry, I could paint them.

For comparison top frame is done… lower is next!
Then once both sides were finished, I started the assembly of the two sides. Working my way down the frame, one former at a time. I will revisit the eyes later, to address making them more like the actual ones used. Will have to be creative with that…lol.
Anyway…here is how far I got…


I found out today that my last living grandparent, my moms mother, died at the age of 103 yrs old! I am very heartbroken and will miss her dearly! She came to America from Germany, she was born in 1919, at the end of WW1. She lived to see a lot of change in the world, and she was a big inspiration and influence on me. Such a smart and beautiful woman. So I wanted to dedicate this post to her.
I love you grandma Marie!

I love you grandma Marie!

Last edited:
Sad news...what else to say... She is in a better place now.
- Joined
- Sep 3, 2021
- Messages
- 5,190
- Points
- 738

I found out today that my last living grandparent, my moms mother (my grandmother), died at the age of 103 yrs old! I am very heartbroken and will miss her dearly! She came to America from Germany, she was born in 1919, at the end of WW1. She lived to see a lot of change in the world, and she was a big inspiration and influence on me. Such a smart and beautiful woman. So I wanted to dedicate this post to her.
I love you grandma Marie!
View attachment 296610
No matter the age, losing someone you love and hold in high regard is very profound.
My sincere condolences with your loss.
My sincere condolences, I imagine your grandmother was an important source of knowledge, wisdom an humanity for all of you.
- Joined
- Dec 11, 2021
- Messages
- 287
- Points
- 238

Hi Dean,
I'm only reading now about your loss ... I think grandmothers are second mothers, sometimes even the first as in my case, and when she passed away, it was a tragedy for me. Even today, after almost 50 years, I remember when I caressed her face for last time in her hospital bed wrapped in a white sheet ...
My sincere condolences Dean.
Piero
Hi Dean. My sincere condoleances with the lost of your grandma. At the age of 103! More than a century in which she has experienced many changes. In many ways and strong generation.I found out today that my last living grandparent, my moms mother (my grandmother), died at the age of 103 yrs old! I am very heartbroken and will miss her dearly! She came to America from Germany, she was born in 1919, at the end of WW1. She lived to see a lot of change in the world, and she was a big inspiration and influence on me. Such a smart and beautiful woman. So I wanted to dedicate this post to her.
I love you grandma Marie!
View attachment 296610
While you were her grandson, you now have a granddaughter. So you and your family were gifted with 5 generations. Keep all the memories alive!
Regards, Peter
Last edited:
I'm being very pedantic here, but the Clerget 9B was a rotary engine versus a radial engine. In a radial engine, the engine is fixed to the airframe and only the crankshaft turns. In a rotary engine, the crankshaft is fixed to the airframe and the entire engine (to which the prop is directly attached) spins. Since the fixed oil supply had to feed the moving engine via "centrifugal force", rotary engines were notoriously leaky. At least that's what I remember from my days volunteering in the Military Aviation Museum in Virginia Beach.Cowl looks like good fit and colors come out nice for test piece. Maybe a little grime to weather it a bit, unless your going for new look.
There is an old joke about the leaks and drips from these old radial engines. How do you know if a radial is out of oil? It stops dripping!

