Apologies for the poor timing of my previous post. Only after that post did I see your post about the loss of your grandmother. My sincerest condolences.
-

Win a Free Custom Engraved Brass Coin!!!
As a way to introduce our brass coins to the community, we will raffle off a free coin during the month of August. Follow link ABOVE for instructions for entering.
-

PRE-ORDER SHIPS IN SCALE TODAY!
The beloved Ships in Scale Magazine is back and charting a new course for 2026!
Discover new skills, new techniques, and new inspirations in every issue.
NOTE THAT OUR FIRST ISSUE WILL BE JAN/FEB 2026
- Home
- Forums
- Ships of Scale Build Logs
- Super Detailing Static Models / Other Genres
- Historical Trailways, Guns, Aircraft, and Cars
You are using an out of date browser. It may not display this or other websites correctly.
You should upgrade or use an alternative browser.
You should upgrade or use an alternative browser.
Model Airways Sopwith Camel 1/16 scale [COMPLETED BUILD]
Hey Dean. I'm sorry to hear about the loss of your Grandma Marie. Modeling is fun but it's good for all of us to remember the things that really matter. I hope your memories will be a comfort. Blessings.
Last edited:
Dean, that is sad news. Grandparents are special people who create memories that last a lifetime.
Thank you to everyone for your condolences and kind words! I really appreciate it. I knew this day would come, but you can never truly be ready. I have too many fond memories to share. But to give you an idea of what she was like, I will share a story.
When I was very young and got my allowance, she would take me to the store, and I would pick out something I wanted to buy. She knew the money was burning a hole in my pocket, she used to say. And she would tell me, if you still want that item tomorrow, we will come back to the store and buy it. I used to get so mad and tell her it’s my money and I want to spend it. But the next day I would have already changed my mind about what I wanted…lol. She was teaching me not to be impulsive! And soon I learned if I saved that allowance, when I got my next allowance I would have twice as much to spend and could buy something even better!
And she used to say when we sat down for dinner, anyone who complained about the meal, had to cook the next one. Then she would ask how is dinner! No one complained!
She was very witty and intelligent, and taught us many important values and lessons. She will be missed, but has gone to join my grandfather. They met in college and were married 52 years until he died. When he retired from the Air Force, they played golf together, and she was very good at it.
She lived to see her grandchildren have grandchildren! So I do feel blessed to have had her in my life, but of course I wish I could see and talk to her one more time…sigh!
When I was very young and got my allowance, she would take me to the store, and I would pick out something I wanted to buy. She knew the money was burning a hole in my pocket, she used to say. And she would tell me, if you still want that item tomorrow, we will come back to the store and buy it. I used to get so mad and tell her it’s my money and I want to spend it. But the next day I would have already changed my mind about what I wanted…lol. She was teaching me not to be impulsive! And soon I learned if I saved that allowance, when I got my next allowance I would have twice as much to spend and could buy something even better!
And she used to say when we sat down for dinner, anyone who complained about the meal, had to cook the next one. Then she would ask how is dinner!
She was very witty and intelligent, and taught us many important values and lessons. She will be missed, but has gone to join my grandfather. They met in college and were married 52 years until he died. When he retired from the Air Force, they played golf together, and she was very good at it.
She lived to see her grandchildren have grandchildren! So I do feel blessed to have had her in my life, but of course I wish I could see and talk to her one more time…sigh!
Last edited:
Kurt Konrath
Kurt Konrath
This kit build is looking extremely high quality compared to most wooden frame aircraft kits.
Of course this is intended to stay uncovered I believe, which justifies the level of detail and high quality work you always produce.
Of course this is intended to stay uncovered I believe, which justifies the level of detail and high quality work you always produce.
Thank you Kurt! It has its challenges, but that is half the fun!This kit build is looking extremely high quality compared to most wooden frame aircraft kits.
Of course this is intended to stay uncovered I believe, which justifies the level of detail and high quality work you always produce.
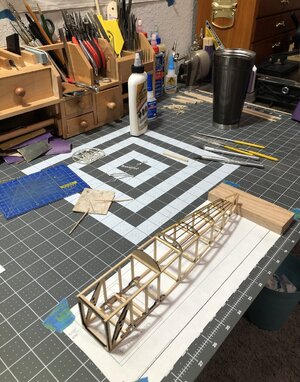
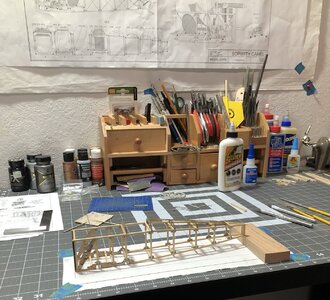
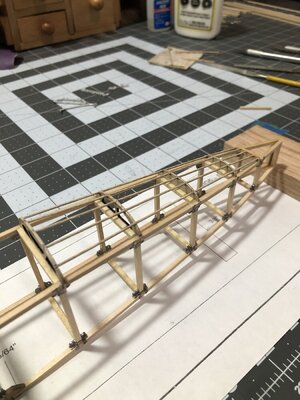
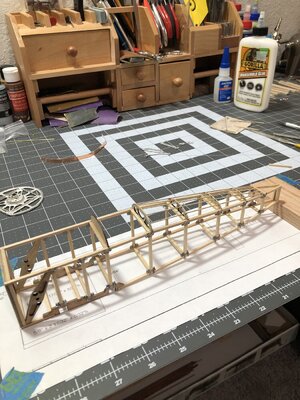
For the fuselage stringers, 1/16” square stock was called for. Oddly enough, there was not enough supplied. And I didn’t have any extra.
So I decided to take another approach that I like. I used copper round bar stock. The trick was making it look like wood and blend in. So I did some painting, dry brushing and washes to attempt to make it look like wood and a bit weathered too.
In addition the edge of the plywood is always ugly, so I painted it and did a wash to make it look better…
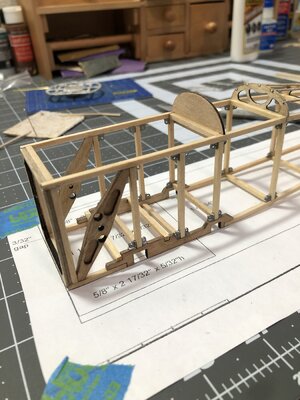
And the stringers…
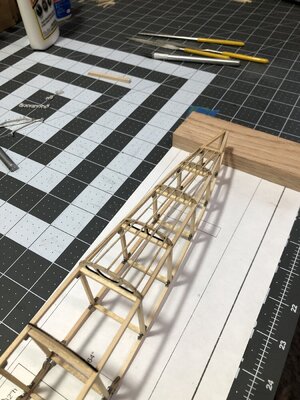
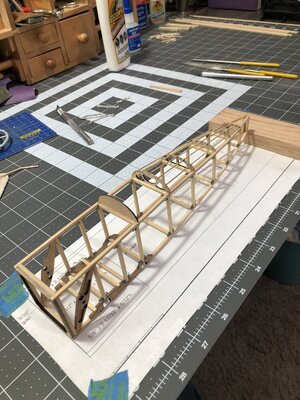
Next is more frame supports for the seat and gas tanks, then the machine gun mounts.
So I decided to take another approach that I like. I used copper round bar stock. The trick was making it look like wood and blend in. So I did some painting, dry brushing and washes to attempt to make it look like wood and a bit weathered too.
In addition the edge of the plywood is always ugly, so I painted it and did a wash to make it look better…

And the stringers…


Next is more frame supports for the seat and gas tanks, then the machine gun mounts.
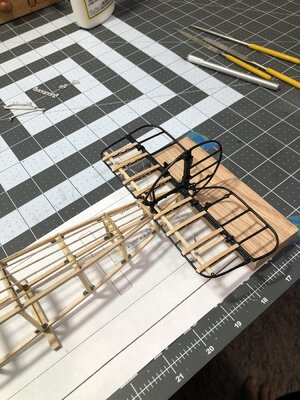
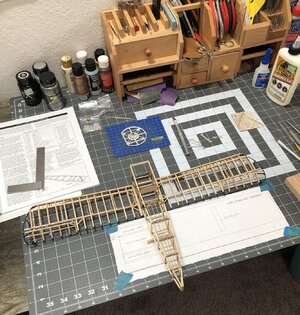
A nice view. And also one with the lower and tail wing ..........
Thank you! The fuselage will be a lot of work! So none of that will get attached for a while. So I just wanted to verify everything fits properly before I get too far along!A nice view. And also one with the lower and tail wing ..........
- Joined
- Sep 3, 2021
- Messages
- 5,190
- Points
- 738

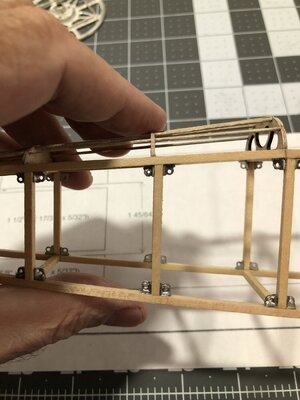
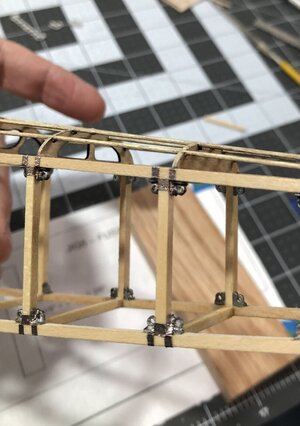
That fuselage is coming together very nice.I didn’t like the eyes sitting in the frame without any mounting straps…so I added some. It is not exactly like the real airplane, but similar enough, and better than the kit provided!
Eyes…
View attachment 296750
With straps added…
View attachment 296753
View attachment 296751View attachment 296752

Thank you!That fuselage is coming together very nice.
- Joined
- Sep 3, 2021
- Messages
- 5,190
- Points
- 738

When looking at the fuselage assembly I was surprised to see those two engine support frames in the front fuselage were originally made out of wood. Being used to aluminum, titanium, composites, castings, forgings, etc, I just assumed these parts to be either forgings or casting. Brilliant design and that no two decades after first powered flight. To put this achievement into perspective, nowadays it might take up to 15 years from conception to first flight... (But entirely different animals, I know.)
Those are the small details that make a model special! Well done, Dean!I didn’t like the eyes sitting in the frame without any mounting straps…so I added some. It is not exactly like the real airplane, but similar enough, and better than the kit provided!
Eyes…
View attachment 296750
With straps added…
View attachment 296753
View attachment 296751View attachment 296752
The engine mount is attached to that wood frame, and is metal with a firewall.When looking at the fuselage assembly I was surprised to see those two engine support frames in the front fuselage were originally made out of wood. Being used to aluminum, titanium, composites, castings, forgings, etc, I just assumed these parts to be either forgings or casting. Brilliant design and that no two decades after first powered flight. To put this achievement into perspective, nowadays it might take up to 15 years from conception to first flight... (But entirely different animals, I know.)
That assembly will be next after I finish this step. I still have to add the supports for the seat and gas tanks, then the tail skid, and finally the machine gun mounting frames. That will finish this step.
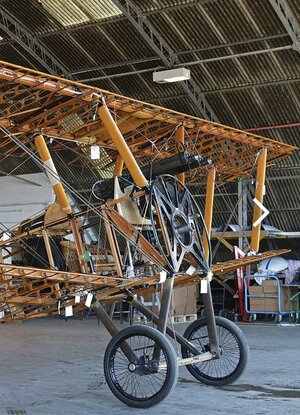
Here is an actual picture for reference…
Last edited:
Thank you Peter!Those are the small details that make a model special! Well done, Dean!
Adding the mounting straps to the eyes…
First I cut a piece of copper tape…
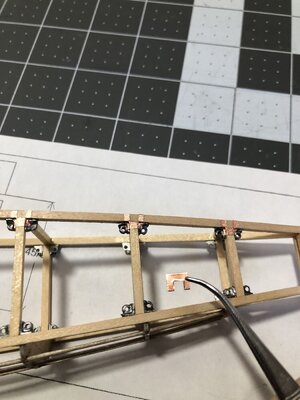
Then I stick it to the fuselage…
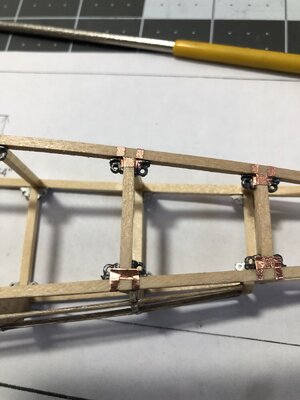
Then I press it down with a diamond rat tail file, by rolling the file across the tape. This also gives it a cast look…
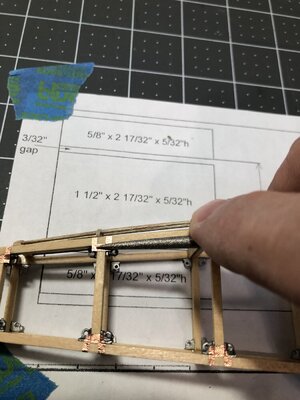
Then the remaining portion is ready to be pressed and rolled in place…
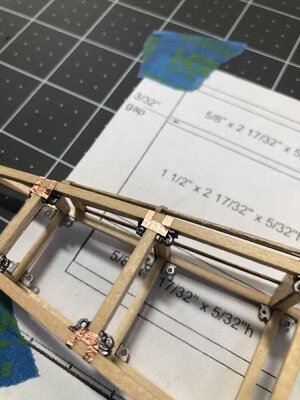
After being pressed and rolled into place with my rat tail file..
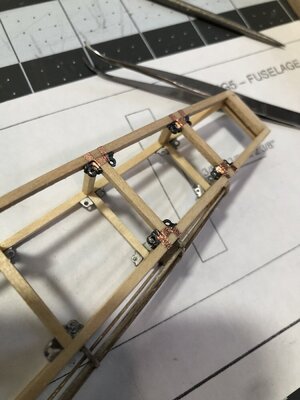
Then they are painted…
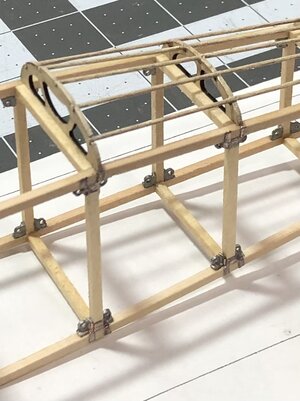
First I cut a piece of copper tape…

Then I stick it to the fuselage…

Then I press it down with a diamond rat tail file, by rolling the file across the tape. This also gives it a cast look…

Then the remaining portion is ready to be pressed and rolled in place…

After being pressed and rolled into place with my rat tail file..

Then they are painted…


