MY BLUENOSE- YUANQING SCALE 1:72 SCALE [COMPLETED BUILD]

I find your transom looking rather up to par. Thumbs-Up
Right now I'm also at the stern parts and wondering how to get it right. In frequent consultation about this subject with my Dutch co-builders, especially since some rather serious issues surfaced in that area. Due to those issues, I am considering to build the rear two frames and the four extremities into a sub-assembly and attach the assembly to the transom and frame 55. Keeping my fingers crossed...
The bow fillers are then my next challenge; I'll keep following you Lawrence.
Hello Johan, That is exactly the way that I had in mind to build the transom. But could not get all of items to fall into place. Maybe I got the two main carrier beams a bit out of place, who knows. But in looking it over it dose not look all that bad, or at least I think so.
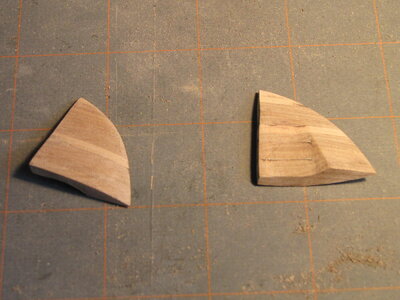
We have the two bow filler plates almost completed on the out side, the Dremel will make short work on the inside.
Regards Lawrence
 
Hello Ship Mates, Well the little fellows and I have had a rather trying week building the stern extension on our YQ-Bluenose. every time we put it together we se a different problem. Hence we have unglued it 4 or 5 times now maybe more. We have gotten it to this stage now, it's not prefect I know but I feel that we can live wit it. We have started working on the two bow filler pieces of the hull frames, let us hope we have a little more luck with these.

Regards LawrenceView attachment 295662View attachment 295663View attachment 295664
Looking good, Lawrence. Building the parts on bow and stern takes a lot of time.
And also for Johan: Think by the construction of both always in de lines of the hull. I used some strips for the hull planking to dry-fit all the time, to let the strip flow smoothly to the connecting frames.
Regards, Peter
 
And also for Johan: Think by the construction of both always in de lines of the hull. I used some strips for the hull planking to dry-fit all the time, to let the strip flow smoothly to the connecting frames.
Regards, Peter
Thanks for the advice Peter, that's exactly what I have been doing for quite some time now.
For the transom, frames 56 and 58 and the parts 51 and 52, last night I have been playing around a little bit with these parts and making a sub-assembly from these parts and then attaching it to frame 55 and the transom appeals to me more and more. Trying to come up with the cons now.
 
Looking good, Lawrence. Building the parts on bow and stern takes a lot of time.
And also for Johan: Think by the construction of both always in de lines of the hull. I used some strips for the hull planking to dry-fit all the time, to let the strip flow smoothly to the connecting frames.
Regards, Peter
Hello Peter, Thanks for your very kind words and very nice comments. Yes I also used strips of wood before my last attempt . This is when I discovered that the planks did not run on the frames evenly even when they look real good.
Regards Lawrence
 
Thanks for the advice Peter, that's exactly what I have been doing for quite some time now.
For the transom, frames 56 and 58 and the parts 51 and 52, last night I have been playing around a little bit with these parts and making a sub-assembly from these parts and then attaching it to frame 55 and the transom appeals to me more and more. Trying to come up with the cons now.
Hello Johan, Should have known better but after try to get all of these parts to fit together and look good I over looked the smoothly flowing planks idea that I have used for many years now.
Regards Lawrence
 
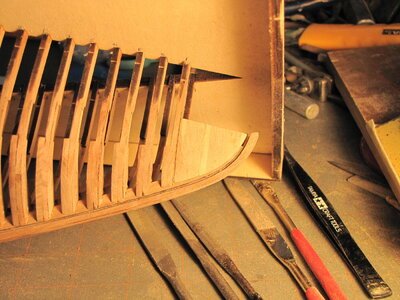
Hello Ship Mates, This AM the little fellows and I have completed forming the bow filler peace's and installed them on our YQ-Bluenose. Now it is on with cleaning more char from the inter keel # 48, 49, 50 we also have to drill these pieces so that we can install our simulated bolts before we can glue them in place.

Regards LawrenceIMG_6122.JPGIMG_6124.JPG
 
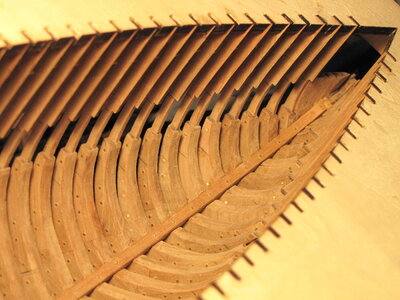
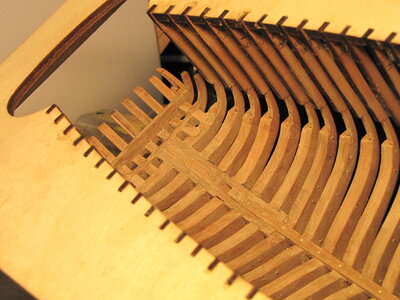
Hello Ship Mates, We got another little up date, The little fellows and I have installed the Keelson and along with it's simulated bolts. We have also cleaned up the inter hull bring out just a bit of the YQ-Bluenose pear wood color. Can hardly wait until I am able to put on a coat of Tung Oil or Varnish as I have not made up my mind as yet on which one.

Regards LawrenceIMG_6125.JPGIMG_6126.JPGIMG_6127.JPG
 
Hello Ship Mates, We got another little up date, The little fellows and I have installed the Keelson and along with it's simulated bolts. We have also cleaned up the inter hull bring out just a bit of the YQ-Bluenose pear wood color. Can hardly wait until I am able to put on a coat of Tung Oil or Varnish as I have not made up my mind as yet on which one.

Regards LawrenceView attachment 296272View attachment 296273View attachment 296274
Getting close to this stage now, wishing my build looked as good as yours... Thumbsup
 
Wow my friend that looks wonderful. I think that when that wood receives its finish it will look incredible!
 
Getting close to this stage now, wishing my build looked as good as yours... Thumbsup
Hello Johan, Thanks for the very kind words. Yes you are close behind me and I expect you to pass me in a day or so. I am sure that your build will look every bit as good and probably better once you clean her up a bit. Regards Lawrence
 
Wow my friend that looks wonderful. I think that when that wood receives its finish it will look incredible!
Hello Henrich, I do thank you very much for your very kind words and nice comments. Yes I can hardly wait to add a coat of finish, but first have to make up mu mind just what it will be.
Regards Lawrence
 
Yes those waterway boards have so many notches, you can only enjoy finishing them…lol ;)
Hello Dean, Yes you can say that again, they are very tedious and brittle as I found out today when I broke one in three pieces. No worry as I made a replacement. Tomorrow I will continue placing the temporary spacers or water ways.
Regards Lawrence
 
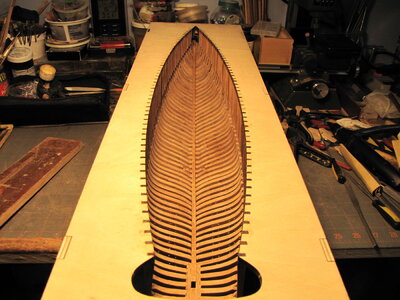
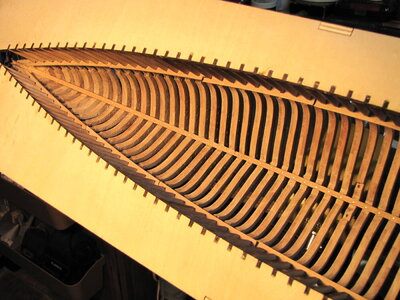
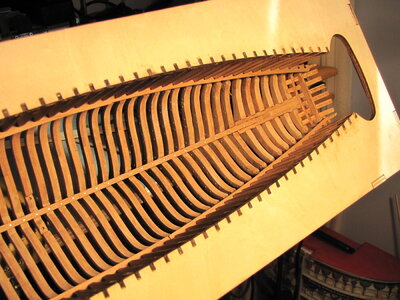
Hello Ship Mates, Well after a trying day yesterday we finally got all of the Waterways [spacers] in there temporary places so that we can start adding the interior support beams to the interior of the hull. Yesterday we had to remove the recently completed stern section as we ended up about 0.250" or 3mm, not a good thing. But today we are finally moving ahead with working on the inter hull.

Regards Lawrence IMG_6128.JPGIMG_6129.JPG
 
Hello Ship Mates, Well after a trying day yesterday we finally got all of the Waterways [spacers] in there temporary places so that we can start adding the interior support beams to the interior of the hull. Yesterday we had to remove the recently completed stern section as we ended up about 0.250" or 3mm, not a good thing. But today we are finally moving ahead with working on the inter hull.

Regards Lawrence View attachment 296663View attachment 296664
It will be a relief that those spacers are in there. You made a nice job.
Regards, Peter
 
Back
Top