• LUCZORAMA SHIPWRECK SCAVENGER HUNT GIVEAWAY. 4 Weeks of Fun • 1 Legendary Prize ((OcCre’s Fram Ship)) • Global Crew Welcome!
    **VIEW THREAD HERE**

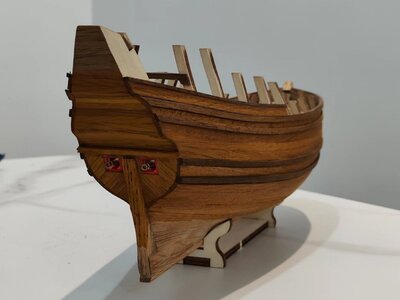
HIGH HOPES, WILD MEN AND THE DEVIL’S JAW - Willem Barentsz Kolderstok 1:50

Should be one continuous piece not two???
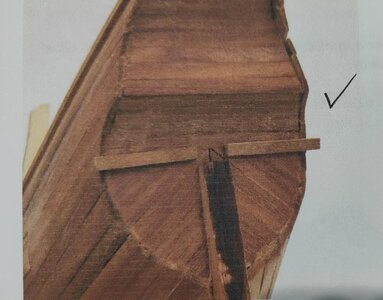
Hi Paul. I followed the kit instructions - as I did on WB #1 - and did not even think twice about it.

微信图片_20220817204151.jpg
微信图片_20220817204158.jpg
The above - which shows the two pieces - are directly from the @Kolderstok instruction manual. I also understand why Hans has done it this way - it is to allow for the rudder to lie "flat" against the false keel and to fit in between the two shorter pieces.

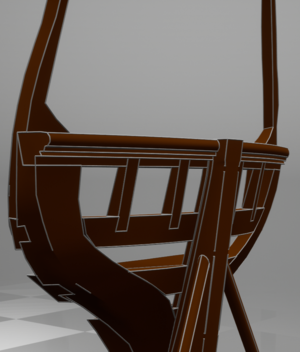
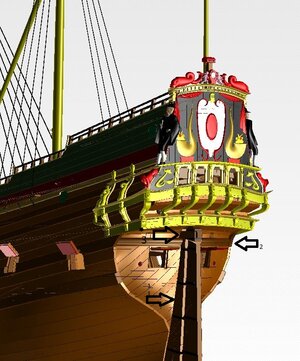
But now you have me thinking. On the drawings it is impossible to tell whether it was supposed to be one or two pieces. On Ab's model (below) where I have indicated the hekbalk with the two yellow arrows, it is also difficult to make a definitive call.
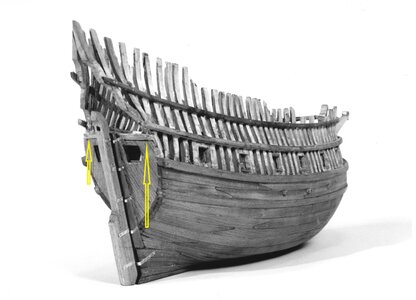
Barents-01.jpgHowever, looking at this picture of the replica, there is no doubt that they have it as one, continuous piece - just like you said.
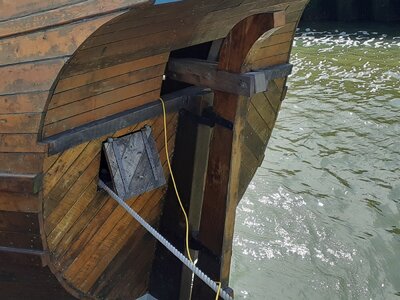
Mees Ippel 10.jpg

So, my friend, I don't know. You can bet your bottom dollar I will find out though! Thank you so much for that observation, Paul! It is great to have my friends think along and your question may well have pointed to something that would otherwise have been incorrect! Thank you for that! Thumbsup Thumbsup Thumbsup Beer

@Kolderstok Hans, did the hekbalk consist of one piece or two? ROTF
 
Hello Everyone

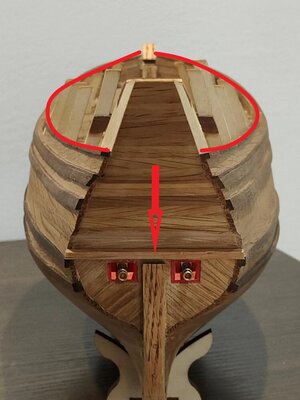
I mentioned to @Peter Voogt Peter, that I had planned on applying CLOU tonight in some parts, but because that also includes part of the stern, I first had to install the two "hekbalken" - directly translated to English it would be "gate beams", but that does not sound right. They are placed at the point where the curved planked part of the stern transitions over to the straight-planked part.

View attachment 323926
If you look at the above picture of WB #1, the hekbalken are marked in green. Now, note their position relative to the adjoining wale. You will see that I placed the hekbalken so that they fall directly over the wale, creating one line. This INCORRECT - doing it, I knew I wasn't doing the historically correct thing, but I suppose I succumbed to Al-Fi in a moment of weakness. :)

So, how should it look like? Well, this is confusing as there is a marked difference between @Ab Hoving Ab's interpreation on the one hand and those of @Kolderstok and Gerald de Weerdt on the other

View attachment 323927
If you look at Ab's plans, you will see that the hekbalken fit just underneath the wale.

View attachment 323933
Ab's model with the hekbalken underneath the wale.

View attachment 323928
If you look at @Kolderstok's plans, you will see the hekbalken are placed just above the wales - in fact, it would be fair to say they almost "rest" on top of the wales.

View attachment 323930
Gerald de Weerdt's drawing, which in turn, is an interpretation of Gerrit De Veer's drawings from his journal, also show the hekbalken above the wales.

Therefore, it comes as no surprise that on the replica, the hekbalken are above the wales.

View attachment 323931

Looking at WB #2, it was clear that placing the helbalken underneath the wales, was no option and thus I followed the examples of @Kolderstok and Gerald de Weerdt.

Hekbalken on WB#2:

View attachment 323932

As soon as the glue has dried - three hours from now - the part of the stern up to and including the hekbalken will be set in CLOU together with the designated portions on the sides and the stem.
Good afternoon Heinrich. Brilliant work everywhere my friend. I love it! I’m with Paul re the Hekblaken. On the drawings and replica you posted it would appear to be one continuous beam ? Hey don’t take my word...what I know about Dutch (or anyone ship) is dangerous. Cheers Grant
 
Heinrich, just for your information: What you call ‘Hekbalken’ (pl) is actually one beam, forming the base of the tuck (on the upper side). The english term is ‘Wing transom’.
When setting up the lines of the ship in the early days of the build the builder can choose how much sheer he wants to give to the lines of the ship. Placing the end of the wale above the wing transom creates more sheer, placing it lower subsequently less. It also has to do with the run of the decks, as in those days the decks were mostly parallel to the wales. It changed later on.
Thank you so much, Ab! You have solved the mystery for me. As I mentioned to @dockattner Paul, I just followed the kit's instructions, but that was clearly done for a practical reason and is not correct.

Wonderful information Ab - I will rectify that immediately! Thumbsup
 
Good afternoon Heinrich. Brilliant work everywhere my friend. I love it! I’m with Paul re the Hekblaken. On the drawings and replica you posted it would appear to be one continuous beam ? Hey don’t take my word...what I know about Dutch (or anyone ship) is dangerous. Cheers Grant
Ahh an expert already answered the question. Fabulous WB Heinrich
 
Good afternoon Heinrich. Brilliant work everywhere my friend. I love it! I’m with Paul re the Hekblaken. On the drawings and replica you posted it would appear to be one continuous beam ? Hey don’t take my word...what I know about Dutch (or anyone ship) is dangerous. Cheers Grant
You and @dockattner Paul were both spot on, my friend! You clearly know more about a hekbalk than I do! ROTF What I just love is how everone pulls together and in two ticks, we have the answer! Thumbsup
 
@dockattner Dear Paul - thank you for saving my butt, my friend! I will forever be thankful. It has immediately been christened as "Paul's Beam!" from now on!

Now I have to boil some water ... and @rtibbs RON!!! ... RON !!! ...
My pleasure Heinrich. I'm a detail guy (not always a good thing or easy to live with ROTF).
 
Heinrich, just for your information: What you call ‘Hekbalken’ (pl) is actually one beam, forming the base of the tuck (on the upper side). The english term is ‘Wing transom’.
When setting up the lines of the ship in the early days of the build the builder can choose how much sheer he wants to give to the lines of the ship. Placing the end of the wale above the wing transom creates more sheer, placing it lower subsequently less. It also has to do with the run of the decks, as in those days the decks were mostly parallel to the wales. It changed later on.
I am just as glad that you explained the function of the hekbalk to me. That explains why on your model it sits below the wales and on Gerald's above the wales - your ship clearly has a much greater sheer. The one thing that has become clear to me, is that a POF build will be the only way to go, if you want to remain true to a particular interpretation - in this case, yours. Thank you, Ab!
 
Interesting, on the Statenjacht there are two layers with the first layer being one piece and the second layer is two pieces butted up to the sternpost
 
Interesting, on the Statenjacht there are two layers with the first layer being one piece and the second layer is two pieces butted up to the sternpost
Ron, as I said I understand why Hans has done it. By installing a single piece now, I will definitely have to take some material away from the rudder when it comes to fitting it. With the beam in two pieces, it negates that fact, and the rudder can be fitted without any alterations. With the rudder installed, it would be very difficult to tell whether the beam is made up of one piece or two. I can, however, not advocate a quest for historical accuracy on the one hand and make compromises on the other. As it stands now, within the limitations that any kit build brings, I have no choice but to place my beam above the wales, while it is now clear to me that it should have been the other way around. At least this choice is more or less "defensible". :)
 
I cannot remember anymore why I made the wing transom in two pieces :-(
Just like Ab Hoving already mentioned it was (and should be) one piece of wood.
I guess that during the process of building, writing the instructions and thinking ahead about the next steps I just went for the easy way instead of the correct one.

Hans
 
@Kolderstok Hello Hans.

Yes, you threw the cat squarely among my pigeons! ROTF However, all is well that ends well - so no problem, my friend.

You may also consider lengthening the sternpost slightly so that the hekbalk can fit directly on top of it without a gap.
 
Hello Everyone

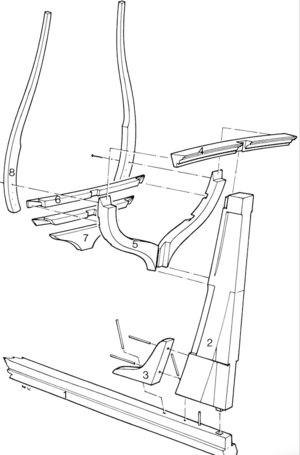
Late last night/ early this morning, @Ab Hoving sent me these pictures and explanation to make sure that I understand Hekbalk/Wing Transom 101!

The hekbalk/wing transom (4) is mounted at the front of the top of the sternpost (2) via a dovetail joint. Rantsoenhouten (5) (two rising support beams) form the outside frame of the transom and embrace the whole structure. Worpen (6) (horizontal beams between the rantsoenhouten connect the whole thing.

Schermafbeelding 2022-08-17 om 19.27.09.png
Knipsel.PNG

Eventually the whipstaff (3) goes over the top of the stern (1) through the (3) hennegat (opening) into the ship.

Knipsel02.JPG
All illustrations courtesy of @Ab Hoving

If you want to know more about this particular aspect, or in fact, anything about Dutch Shipbuilding in the 17th Century, visit the superb 3D Virtual Tour of Witsen's Pinas which Ab was instrumental in creating: https://witsenscheepsbouw.nl
 
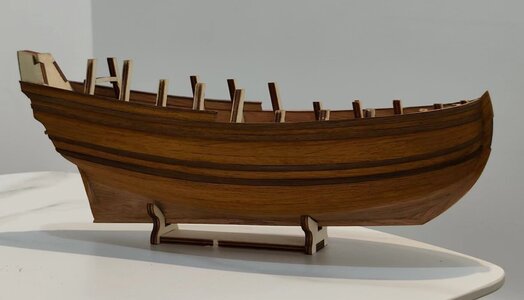
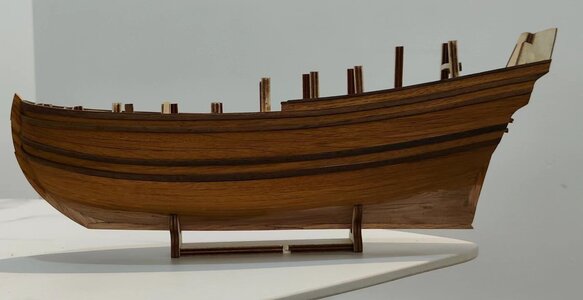
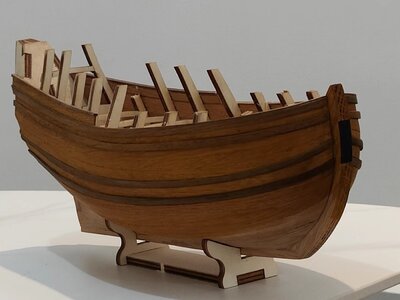
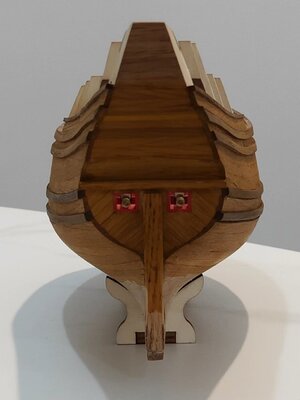
And then of course the big moment for me. This is the first time ever that I have used stain on a ship. This is what she looks like after one layer of CLOU.

微信图片_20220818085312.jpg
微信图片_20220818085346.jpg
微信图片_20220818085337.jpg
微信图片_20220818085304.jpg
微信图片_20220818085328.jpg
Please let me know what you guys think!
 
Well, since you asked I’m not a fan of stains. (Unless the wood is crappy) Your wood is definitely not crappy.
In my woodworking projects with good grained hardwoods I prefer a clear finish as it brings out the gain of the wood and highlights the contrast between the various species of wood.
Not saying yours doesn’t look very good I’m just not a fan of staining.
 
Back
Top