• LUCZORAMA SHIPWRECK SCAVENGER HUNT GIVEAWAY. 4 Weeks of Fun • 1 Legendary Prize ((OcCre’s Fram Ship)) • Global Crew Welcome!
    **VIEW THREAD HERE**

HIGH HOPES, WILD MEN AND THE DEVIL’S JAW - Willem Barentsz Kolderstok 1:50

Hi Heinrich.
Your WB with both closed and open gunport looks very nice. It gives a nice personal touch.
Maybe a small visual cosmetic addition: let the plank seams continue over the shutters? Now they give a break from those nice curved lines.
I took the liberty of adding those lines to a photo of you in Photoshop to show what I mean:
View attachment 328023
I know you are skilled with the sharp blade. With a few minor scratches.... :)
Regards, Peter
That is a very good suggestion, Peter. On WB#1 that was no problem because I could reuse the walnut ports that I had cut out - thus the planking lines formed a continuous effect. On WB#2, the oak did not allow me that luxury, so I had to make new gunport covers. About the sharp blades - I will have to wait until my new knives arrive! ROTF
 
Dear Friends

I said to @GrantTyler Grant earlier that I hope to place an update tonight and here it is.

微信图片_20220911232102.jpg
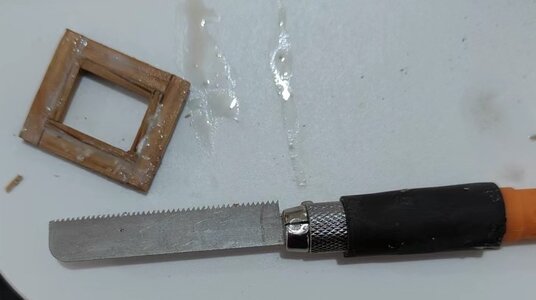
Have saw, will build! ROTF Even though I broke all my knives yesterday, I called my little saw into action. I used a Stanley knife to score the sawing line and the saw did the rest. The unworldly mess in the upper left-hand corner of the picture, is the rear hatch (re-do) under construction. Sometimes, I think that my fellow builders on SOS will cringe if they have to see my methods. ROTF

微信图片_20220912125100.jpg
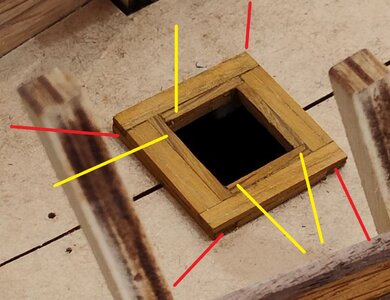
In any case, out of the mess in the first picture came one rear hatch that I am very pleased with. The red lines indicate the position of the half lap-joints while the yellow lines indicate just how careful you have to be with the woodgrain. Those woodgrain lines can really be confusing when filing and cutting the planks straight.

微信图片_20220912143058.jpg
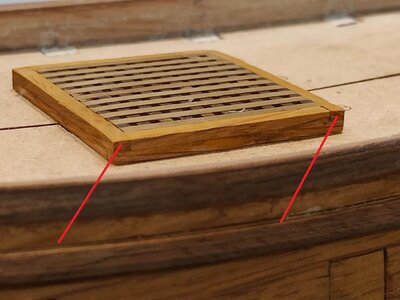
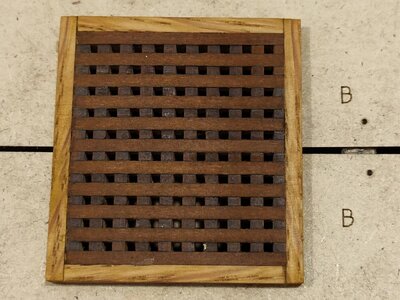
The main grating (ok, the only grating) came out very well. Once again, the red lines indicate the half lap-joints.

微信图片_20220912143135.jpg
View from the bow towards the stern.

微信图片_20220912143151.jpg
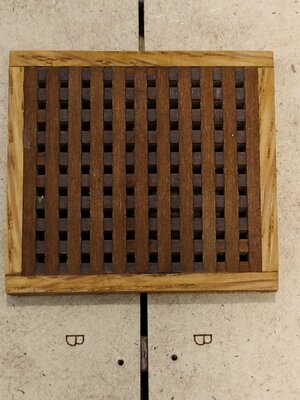
View from the Starboard Side towards the Port Side. These pictures of the rear hatch and the grating are super macro close-ups, and I remain happy. Moreover, they are now done the way they should be - none of these fancy 45-degree mitered joints!

微信图片_20220912205415.jpg
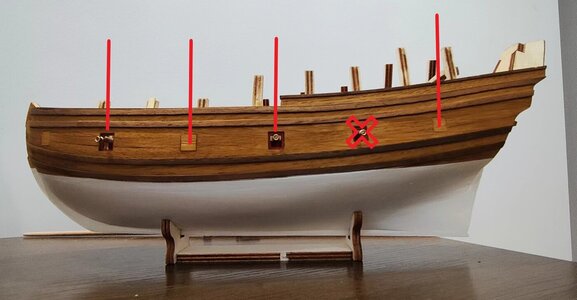
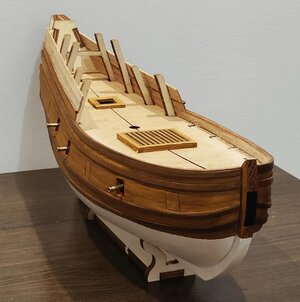
I have also brought the rear bulwarks up to their required height. As you can see, I am still waiting on the glue to dry so no sanding or finishing has taken place. While planking the bulwarks, Frame 8 finally decided to cry enough and inserting the push pin, it broke. Bear in mind though that this was the frame that I had cut in half to accommodate the gunport. Seeing that this is the last plank for which the frames will be used (after this, they all get cut away) it did its job.

@Pathfinder65 Jan, with this in mind, I do have a recommendation for you.

8.jpg
With the advantage of hindsight, I would rather follow this configuration. In this instance, you would have to cut part from Frame 5 away but seeing that all planking for which Frame 5 was required, has already been done, it has served its purpose. Rather keep Frame 8 intact which will be needed for the planking of the upper bulwarks!
 
Great recovery with a few limited tools Heinrich. It just goes to show how quality work is very much attainable with knowledge, experience and a trusty saw. You didn’t let a few broken knives close the shipyard :D.

I’ll have to keep those lap joints in mind when I get to hatch construction.
 
Great recovery with a few limited tools Heinrich. It just goes to show how quality work is very much attainable with knowledge, experience and a trusty saw. You didn’t let a few broken knives close the shipyard :D.

I’ll have to keep those lap joints in mind when I get to hatch construction.
Thank you. Roger. Lately, I have so few days to build, I just couldn't let the opportunity slip! :)
 
Good morning, everyone.

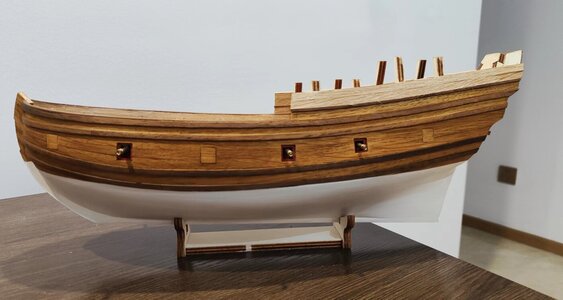
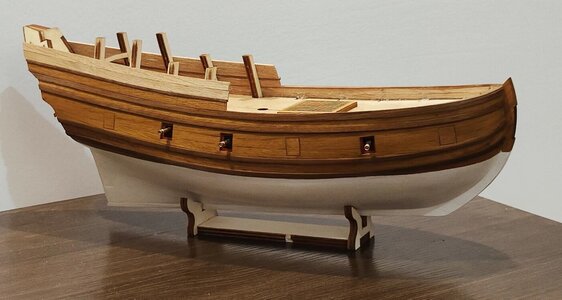
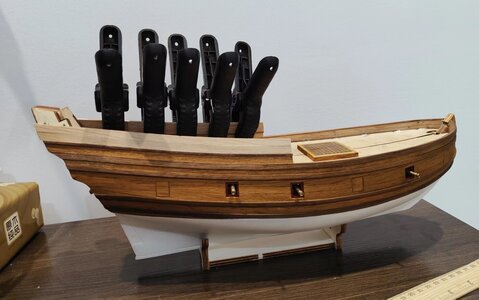
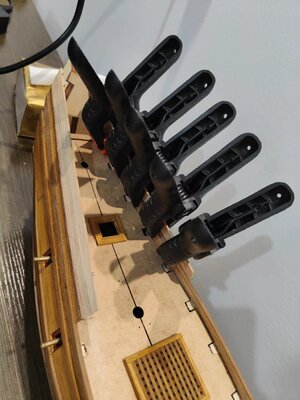
With the bulwarks roughly cut to size and the clamps removed, here is an overview of yesterday's progress.


微信图片_20220913061950.jpg
微信图片_20220913061956.jpg
微信图片_20220913061942.jpg

Time permitting, the bulwarks can now be filed to size at the stern, sanded, stained and the frames removed. Looking at the difference between the unstained and newly added bulwarks and the rest of the ship, the effect of the CLOU is just remarkable.
 
Dear Friends

I said to @GrantTyler Grant earlier that I hope to place an update tonight and here it is.

View attachment 328084
Have saw, will build! ROTF Even though I broke all my knives yesterday, I called my little saw into action. I used a Stanley knife to score the sawing line and the saw did the rest. The unworldly mess in the upper left-hand corner of the picture, is the rear hatch (re-do) under construction. Sometimes, I think that my fellow builders on SOS will cringe if they have to see my methods. ROTF

View attachment 328085
In any case, out of the mess in the first picture came one rear hatch that I am very pleased with. The red lines indicate the position of the half lap-joints while the yellow lines indicate just how careful you have to be with the woodgrain. Those woodgrain lines can really be confusing when filing and cutting the planks straight.

View attachment 328087
The main grating (ok, the only grating) came out very well. Once again, the red lines indicate the half lap-joints.

View attachment 328089
View from the bow towards the stern.

View attachment 328090
View from the Starboard Side towards the Port Side. These pictures of the rear hatch and the grating are super macro close-ups, and I remain happy. Moreover, they are now done the way they should be - none of these fancy 45-degree mitered joints!

View attachment 328091
I have also brought the rear bulwarks up to their required height. As you can see, I am still waiting on the glue to dry so no sanding or finishing has taken place. While planking the bulwarks, Frame 8 finally decided to cry enough and inserting the push pin, it broke. Bear in mind though that this was the frame that I had cut in half to accommodate the gunport. Seeing that this is the last plank for which the frames will be used (after this, they all get cut away) it did its job.

@Pathfinder65 Jan, with this in mind, I do have a recommendation for you.

View attachment 328092
With the advantage of hindsight, I would rather follow this configuration. In this instance, you would have to cut part from Frame 5 away but seeing that all planking for which Frame 5 was required, has already been done, it has served its purpose. Rather keep Frame 8 intact which will be needed for the planking of the upper bulwarks!
Good morning Heinrich. Lap joints with a trusty saw and some sand paper- You certainly pulled off a challenge here. Lap joints are a far away experience for myself for sure -the gratings are fantastic! Cheers Grant
 
Good morning, everyone.

With the bulwarks roughly cut to size and the clamps removed, here is an overview of yesterday's progress.


View attachment 328131
View attachment 328132
View attachment 328133

Time permitting, the bulwarks can now be filed to size at the stern, sanded, stained and the frames removed. Looking at the difference between the unstained and newly added bulwarks and the rest of the ship, the effect of the CLOU is just remarkable.
Lovely Heinrich. You are right . The pre clou wood almost looks like you used different wood type. Cheers Grant
 
Lovely Heinrich. You are right . The pre clou wood almost looks like you used different wood type. Cheers Grant
Thank you, Grant - the half lap joints are not difficult to make per se - if you have the right tools.
 
Nice progress Heinrich, and it is amazing what beautifull things one can make with a verry limited amount of tools, is'nt it
For sure my friend. I can only imagine how the "old model" of the Prins Willem in the Rijksmuseum was built all that time ago.
 
I must say that your Build Log is very educational and full of tutorial-like methods. Anyone following your log will benefit if they build this ship. Very nice techniques. I really like your gratings. Those to me are hard to master.
 
Wow, I’m just catching up on the last three pages. I copied your photo and have it pinned to my plans. Thank you for the change in plan.
It is a pleasure my friend. The call is still yours, but with what I know now, that is the way I would go.
 
I must say that your Build Log is very educational and full of tutorial-like methods. Anyone following your log will benefit if they build this ship. Very nice techniques. I really like your gratings. Those to me are hard to master.
Thank you very much for the kind words, Donnie - it is much appreciated. Sometimes, the techniques are born out of necessity ROTF . As far as the gratings go, @Kolderstok should get all the credit. The gratings go extremely well together, and they are to scale which is a big bonus. The only challenge for me was to create the frame around it.
 
Good evening, Dear Friends

A very small update, but even small progress is progress.

微信图片_20220913224244.jpg
All bulkheads have been removed ...

微信图片_20220913224237.jpg
And inner planking on the Port Side has started. This will be a slow process as two planks an evening will be about the going rate.
 
Back
Top