• LUCZORAMA SHIPWRECK SCAVENGER HUNT GIVEAWAY. 4 Weeks of Fun • 1 Legendary Prize ((OcCre’s Fram Ship)) • Global Crew Welcome!
    **VIEW THREAD HERE**

HIGH HOPES, WILD MEN AND THE DEVIL’S JAW - Willem Barentsz Kolderstok 1:50

Dear Friends

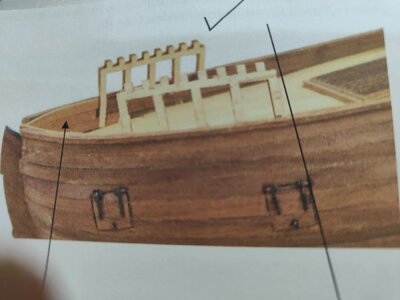
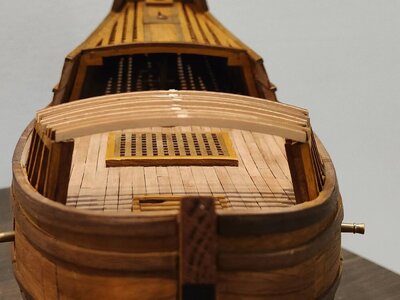
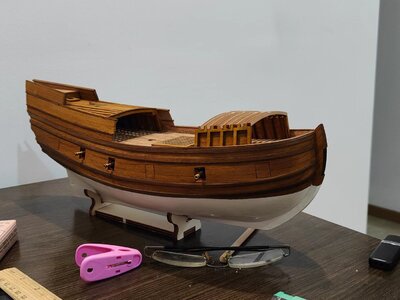
With the inner planking of the front canopy completed and the stanchions placed, the whole assembly was stained with the CLOU. Then it was time for a test-fitting of the frames. I expected to pick up some issues here as I built the ship wider than the Kolderstok version, but a little fiddle here and there and all looks good!
微信图片_20221005144555.jpg

微信图片_20221005160704.jpg
What should be clear from these pictures is that the canopy is much more integrated with the hull and also follows the curvature of the whole ship much better than on WB#1.

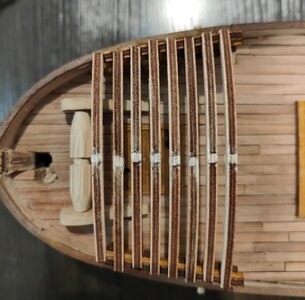
As another indication of how much wider this ship is than the previous one, I test-fitted Hans's scratch-built winch at the front of the canopy! Those of you who follow the build regularly, will know that on WB#1 it was impossible to fit the winch and belaying rack in front of the canopy, but in this case - just look at all the space!
微信图片_20221005165501.jpg

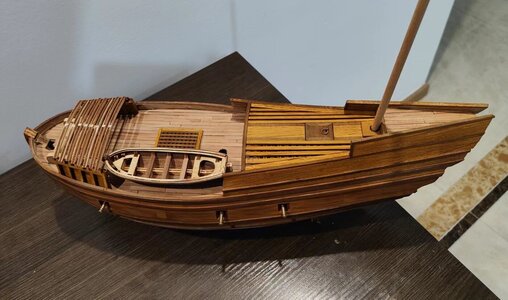
If I move the winch (which incidentally is much bigger than the original Kolderstok version) fractionally back towards the cabin, I can easily fit a belaying rack in front of it. I will in all likelihood stick to my position underneath the canopy, but it is nice to know that I have options.
微信图片_20221005164906.jpg
And by leaving the front canopy open, even the bigger of the two lifeboats has ample space!
 
This is looking great my friend, i think you made the right choice by making the bow of the Willem Barentsz #2 as it is now
She is looking WOW
Thank you very much for the kind words, Peter! As far as the bow was concerned, I just followed Ab's plans, but that was clearly the right thing to do. I can't wait for a top view picture when everything is done and in place. I am really happy with how the center canopy turned out, so the trick is now to repeat that on the front canopy.
 
Honestly, while being tremendously appreciative of your build and I'm sincere about that, I still can't convince myself about the configuration of the sidewalls of the fwd canopy. And that despite your best efforts to explain your rationale behind your canopy design...
My apologies, dear Heinrich.
 
Honestly, while being tremendously appreciative of your build and I'm sincere about that, I still can't convince myself about the configuration of the sidewalls of the fwd canopy. And that despite your best efforts to explain your rationale behind your canopy design...
My apologies, dear Heinrich.
PS: Your slightly different approach, building WB#2, is paying dividends; the bow section looks so much more realistic now. This, IMHO, gives a rather plausible representation of how it could have been. Thumbsup
 
Honestly, while being tremendously appreciative of your build and I'm sincere about that, I still can't convince myself about the configuration of the sidewalls of the fwd canopy. And that despite your best efforts to explain your rationale behind your canopy design...
My apologies, dear Heinrich.
Johan, you do realise that there is still another layer of planking that has to go on the outside. ROTF
 
Yes, Heinrich, I do. That's why I'm awfully cautious with my response... ;)
In other words. If I had followed the instructions, I would have been exactly at this point.

微信图片_20221005184339.jpg
So, in essence the only thing that I have done differently is to add the inner planking and the stanchions. Apart from that, everything is exactly the same.
 
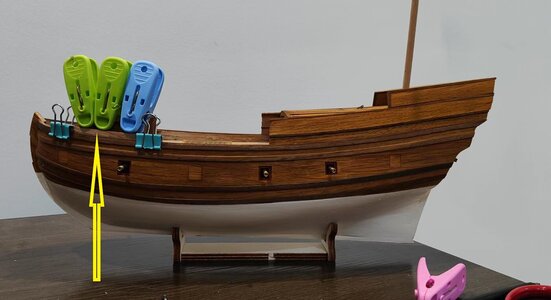
The first exterior plank covering the front canopy has been laid down and it went on beautifully! Excited!

微信图片_20221005210704.jpg

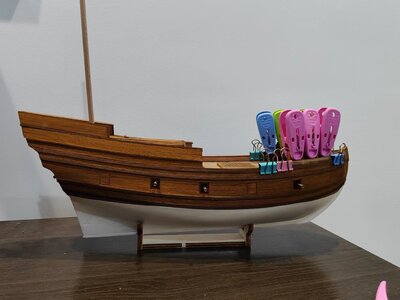
And Ditto on the Starboard Side.

微信图片_20221005212014.jpg
That is how quickly it can go if you can read the hull lines and if the proper preparation was done.
 
The first exterior plank covering the front canopy has been laid down and it went on beautifully! Excited!

View attachment 332332

And Ditto on the Starboard Side.

View attachment 332333
That is how quickly it can go if you can read the hull lines and if the proper preparation was done.
Good morning Heinrich- I am unable to share your excitement yet…to many colourful clips covering your work;). I am waiting for the big reveal with anticipation:D. Going back a few posts it is awesome to see the benefit of the wider bow section and the how the winch, ship boat and belay pin rack(not shown) will all fit perfectly- unlike the challenges on your WB1. A stunning little ship is being built here Heinrich
 
Good morning Heinrich- I am unable to share your excitement yet…to many colourful clips covering your work;). I am waiting for the big reveal with anticipation:D. Going back a few posts it is awesome to see the benefit of the wider bow section and the how the winch, ship boat and belay pin rack(not shown) will all fit perfectly- unlike the challenges on your WB1. A stunning little ship is being built here Heinrich
I agree about it being difficult to share the excitement yet! ROTF And to make it more difficult to see, I am planking this part with 4mm strips - not the 6mm wide ones I used on the rest of the hull - so they are totally obscured by the clamps. But take my word for it - the first two planks on both sides had been laid and I am very happy with them.
 
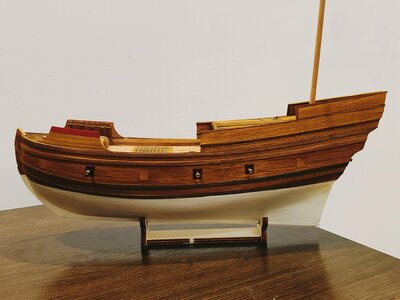
What a beauty Heinrich! Am I seeing a red plank top on the forward canopy (color blind)? If so, then nice touch.
Thank you, Daniel! I put a lot of work into these sidewalls to get them to look right. That is indeed a single red (a dark red which is the same as the gunport linings) plank. I will repeat this accent on the stern as well, but the idea is to do it very subtly.
 
Back
Top