Thank you GilbertWell done Grant
Very nice job
-

Win a Free Custom Engraved Brass Coin!!!
As a way to introduce our brass coins to the community, we will raffle off a free coin during the month of August. Follow link ABOVE for instructions for entering.
-

PRE-ORDER SHIPS IN SCALE TODAY!
The beloved Ships in Scale Magazine is back and charting a new course for 2026!
Discover new skills, new techniques, and new inspirations in every issue.
NOTE THAT OUR FIRST ISSUE WILL BE JAN/FEB 2026
You are using an out of date browser. It may not display this or other websites correctly.
You should upgrade or use an alternative browser.
You should upgrade or use an alternative browser.
HMS Enterprise 1774 POF 1:48.
- Thread starter GrantTyler
- Start date
- Watchers 85
-
- Tags
- caf model enterprise
Thanks Peter. Let’s hope I’m correct in my approach. It certainly is very sturdy and seems to be aligned correctly. Now I mud TV just wait for the parts from Tom. Cheers GrantA nice and solid base and alignment, Grant. It can't be better to start.
Regards, Peter
Good afternoon Paul. Thank you and I really hope it is at least close enough to perfect. Yes - char removal is not my favorite function.Perfect arrangement, Grant. All that's left to do it sand the char off 5000 pieces...you're almost done.
 .I am removing the char where it will affect the look of the model and I still have plenty to do. The remaining char will be slightly sanded to ensure the PVA glue gets into the wood sufficiently for a decent bond. E.g the notches where the frames slot in. Lazy, maybe, however let’s rather go for efficient
  .Cheers Grant
Good morning.
I don’t know if I am being too cautious with this project. I am removing the char “only just” as my logic tells me rather have the inconvenience of hours of sanding VS the “OH cock” I took too much off.
As I make each frame I am dry fitting it on the keel before the jig gets made around it.
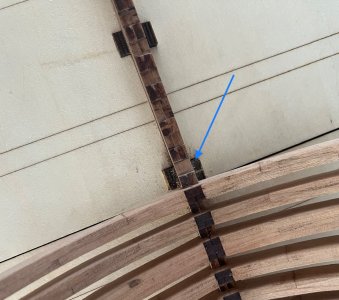
Each notch needs sanding.

Check that the frames all fit nice and snug.
I think (I am certain about nothing with this project) I am going to make all the frames, cant frames, hawes timbers and transom structures and dry fit before I make the jig.
I can see it being awkward to sand certain notches etc once the jig is made around the center timbers. Again I am perhaps being over cautious but why rush it?
OH boy I can see days of sanding ahead…..
 …
…
Cheers Grant
I don’t know if I am being too cautious with this project. I am removing the char “only just” as my logic tells me rather have the inconvenience of hours of sanding VS the “OH cock” I took too much off.

As I make each frame I am dry fitting it on the keel before the jig gets made around it.

Each notch needs sanding.

Check that the frames all fit nice and snug.
I think (I am certain about nothing with this project) I am going to make all the frames, cant frames, hawes timbers and transom structures and dry fit before I make the jig.
I can see it being awkward to sand certain notches etc once the jig is made around the center timbers. Again I am perhaps being over cautious but why rush it?
OH boy I can see days of sanding ahead…..
Cheers Grant
- Joined
- Mar 1, 2022
- Messages
- 694
- Points
- 308

Wise decision. Any gamble could cost an hight price. Nevertheless, a quantum of relief always comes with the comfortably awereness about the possibility of scratching whatever part you should ruine. Perfect job so far, anyway!
Cheers!
Cheers!
- Joined
- Oct 17, 2020
- Messages
- 1,691
- Points
- 488

Hi Grant, have you tried the metal mesh (kitchen) which is very effective to clean?FrankGood afternoon Mike. Thank you kindly. Cheers Grant
- Joined
- Mar 1, 2022
- Messages
- 694
- Points
- 308

Hi. I've tried for myself and I can say it doesn't work at all.Hi Grant, have you tried the metal mesh (kitchen) which is very effective to clean?Frank
- Joined
- Oct 17, 2020
- Messages
- 1,691
- Points
- 488

I simply have it from my own experience.FrankHi. I've tried for myself and I can say it doesn't work at all.
Thats a great Idea, it will pay dividends as you go along. My personal rule of thumb is sand the joint till the piece fits firm not tight.As I make each frame I am dry fitting it on the keel before the jig gets made around it.
Grant,
Great thinking-that's the way to do it; I built the jig before and had problems fitting the frames on the keel.
Alex R
Great thinking-that's the way to do it; I built the jig before and had problems fitting the frames on the keel.
Alex R
Good afternoon Albert. Thank you kindly…I hope it is a perfect job so far as I will only find out when I put it all togetherWise decision. Any gamble could cost an hight price. Nevertheless, a quantum of relief always comes with the comfortably awereness about the possibility of scratching whatever part you should ruine. Perfect job so far, anyway!
Cheers!
Hi Grant, have you tried the metal mesh (kitchen) which is very effective to clean?Frank
Hi. I've tried for myself and I can say it doesn't work at all.
Hi Frank. I will try it as I do find the Cherry a difficult wood to keep clean. ThanksI simply have it from my own experience.Frank
Good afternoon Daniel. It is taking some time and besides frame 8 (which is a bit wobbly) I am getting firm but not tight. Frame 8 was the first do I probably was a tad overzealous. Cheers GrantThats a great Idea, it will pay dividends as you go along. My personal rule of thumb is sand the joint till the piece fits firm not tight.
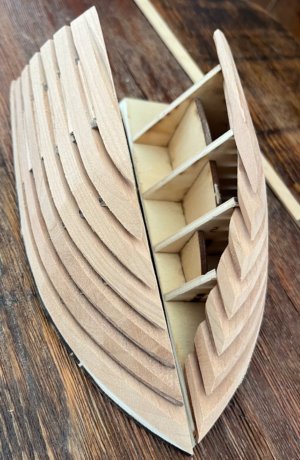
While I am posting I may as well show my progress on the hawse timbers. ( I got bored making frames… ).
).
Note for future CAf builders: always label each part before using them. I had to go back and replace each part back in the frames and label them. .
.
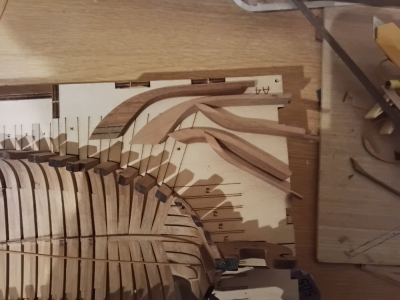
The Hawse timber parts and little jigs ; One can see the bevel lines provided by CAF- very cool.
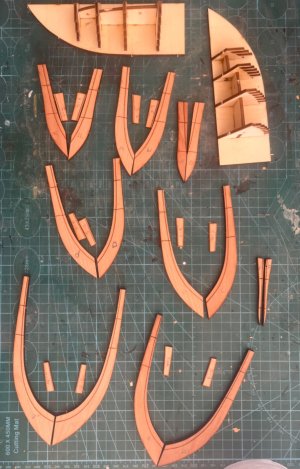
I beveled each part and glued them together in the jig.
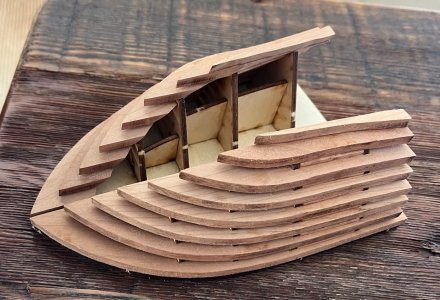
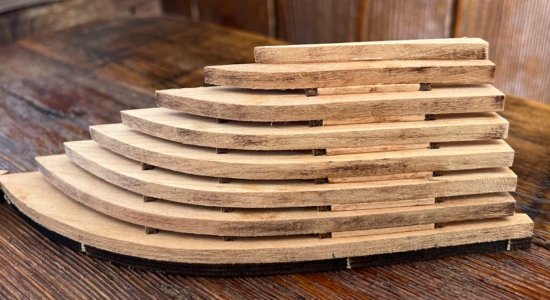

Again taking “just enough” char off.
Preliminary sanding is done while the timbers are still in the jig. Again I have left plenty of sanding to do once the cant frame is made first. This way I can judge more carefully the final sanding requirements so the hawes timbers will fit snugly onto the first cant frame. …….that’s the idea anyway .
.
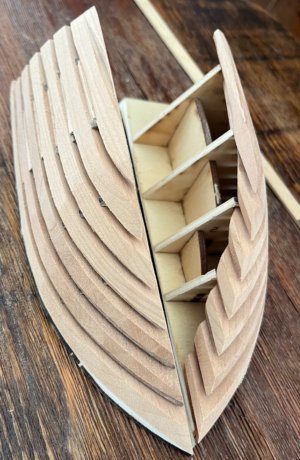
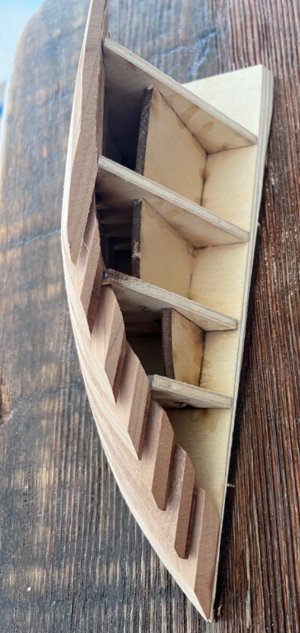
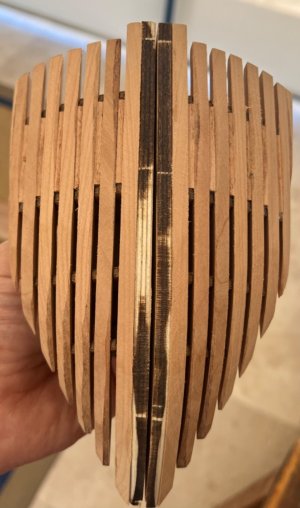
Cheers Grant

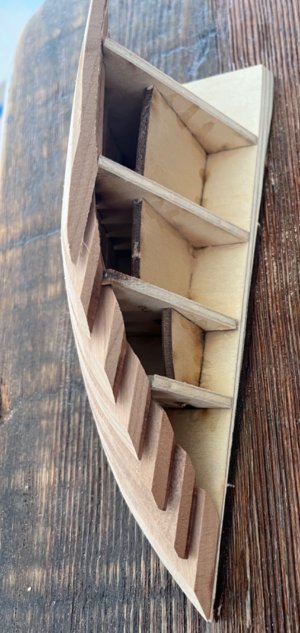
 ).
).Note for future CAf builders: always label each part before using them. I had to go back and replace each part back in the frames and label them.
 .
.The Hawse timber parts and little jigs ; One can see the bevel lines provided by CAF- very cool.

I beveled each part and glued them together in the jig.


Again taking “just enough” char off.
Preliminary sanding is done while the timbers are still in the jig. Again I have left plenty of sanding to do once the cant frame is made first. This way I can judge more carefully the final sanding requirements so the hawes timbers will fit snugly onto the first cant frame. …….that’s the idea anyway
 .
.


Cheers Grant


- Joined
- Oct 17, 2020
- Messages
- 1,691
- Points
- 488

great job GrantWhile I am posting I may as well show my progress on the hawse timbers. ( I got bored making frames…).
Note for future CAf builders: always label each part before using them. I had to go back and replace each part back in the frames and label them..
The Hawse timber parts and little jigs ; One can see the bevel lines provided by CAF- very cool.
View attachment 508204
I beveled each part and glued them together in the jig.
View attachment 508205View attachment 508206View attachment 508207
Again taking “just enough” char off.
Preliminary sanding is done while the timbers are still in the jig. Again I have left plenty of sanding to do once the cant frame is made first. This way I can judge more carefully the final sanding requirements so the hawes timbers will fit snugly onto the first cant frame. …….that’s the idea anyway.
View attachment 508224View attachment 508223View attachment 508222
Cheers Grant
View attachment 508208
View attachment 508209
View attachment 508210
That jig for the hawse timbers is the BOMB! I had already started over three times by the time I got to where you are right now. Cool!While I am posting I may as well show my progress on the hawse timbers. ( I got bored making frames…).
Note for future CAf builders: always label each part before using them. I had to go back and replace each part back in the frames and label them..
The Hawse timber parts and little jigs ; One can see the bevel lines provided by CAF- very cool.
View attachment 508204
I beveled each part and glued them together in the jig.
View attachment 508205View attachment 508206View attachment 508207
Again taking “just enough” char off.
Preliminary sanding is done while the timbers are still in the jig. Again I have left plenty of sanding to do once the cant frame is made first. This way I can judge more carefully the final sanding requirements so the hawes timbers will fit snugly onto the first cant frame. …….that’s the idea anyway.
View attachment 508224View attachment 508223View attachment 508222
Cheers Grant
View attachment 508208
View attachment 508209
View attachment 508210
I took a couple of cups of coffee but I worked my way from the beginning of your log to the present. I'm facinated by what you are doing. I never realized the amount of work required for these type of builds.
Jan
Jan
Very nice Grant. Those bevel lines etched into the frames are a real time saver. My Bluenose had em etched on both sides so one could fair the inside hull as well. However, the Le Requin only has em on the outside only and they tell you draw your own on the inside based on the outer ones!!While I am posting I may as well show my progress on the hawse timbers. ( I got bored making frames…).
Note for future CAf builders: always label each part before using them. I had to go back and replace each part back in the frames and label them..
The Hawse timber parts and little jigs ; One can see the bevel lines provided by CAF- very cool.
View attachment 508204
I beveled each part and glued them together in the jig.
View attachment 508205View attachment 508206View attachment 508207
Again taking “just enough” char off.
Preliminary sanding is done while the timbers are still in the jig. Again I have left plenty of sanding to do once the cant frame is made first. This way I can judge more carefully the final sanding requirements so the hawes timbers will fit snugly onto the first cant frame. …….that’s the idea anyway.
View attachment 508224View attachment 508223View attachment 508222
Cheers Grant
View attachment 508208
View attachment 508209
View attachment 508210
- Joined
- Mar 1, 2022
- Messages
- 694
- Points
- 308

That's true. Now immagine the same operation on bollard timbers e hawse pieces with no jig at all... . I had to cut out even the small notches machined in the plywood in order to get the correct air space between the sternpost and the bollard timbers... . This kit definitely looks far better... or easier under this respect, at least.I took a couple of cups of coffee but I worked my way from the beginning of your log to the present. I'm facinated by what you are doing. I never realized the amount of work required for these type of builds.
Jan
That is looking very nice, Grant. A great view in real 3D.While I am posting I may as well show my progress on the hawse timbers. ( I got bored making frames…).
Note for future CAf builders: always label each part before using them. I had to go back and replace each part back in the frames and label them..
The Hawse timber parts and little jigs ; One can see the bevel lines provided by CAF- very cool.
View attachment 508204
I beveled each part and glued them together in the jig.
View attachment 508205View attachment 508206View attachment 508207
Again taking “just enough” char off.
Preliminary sanding is done while the timbers are still in the jig. Again I have left plenty of sanding to do once the cant frame is made first. This way I can judge more carefully the final sanding requirements so the hawes timbers will fit snugly onto the first cant frame. …….that’s the idea anyway.
View attachment 508224View attachment 508223View attachment 508222
Cheers Grant
View attachment 508208
View attachment 508209
View attachment 508210
Regards, Peter
Last edited:
Thank you Frank. It is much appreciated. Cheers Grantgreat job Grant


