Hohenzollernmodell 1660-1670 Scale 1/75 POF build by Stephan Kertész (Steef66)

Thanks again for all the likes and visit to my post.
I mentioning it in Peter Voogt's log about the curves of the bow. Working with plans could be refreshing, making frames from plans is difficult, but you have a direction how everything goes.
The Bow.

It gives me a headache. Why?
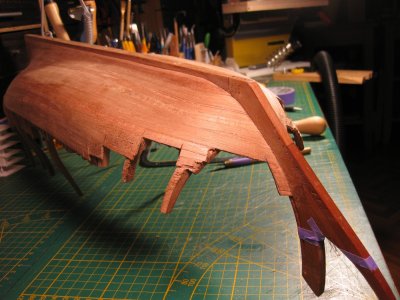
It's not right. There was something bothering me all along about the shape of the boards placed. Especially the last 5 strakes were not right. I could see that the rounding was not right, the typical Dutch bow is hard to make. Especially if you work without padding behind the planks. The wood is going to determine its own shape. The tension in the wood creates straight planks.
I also see this in the keel, it has risen slightly in the middle (1 to 1.5 mm.). Not much but it shouldn't be more. But I have that confidence now because the belly is well filled and I just have to make sure that the remaining parts come on without tension.
But back to the bow, it bothered me that it was a little too tapered. Much better than on my first attempt/redo, then it looked more like a clipper than a Dutchman.
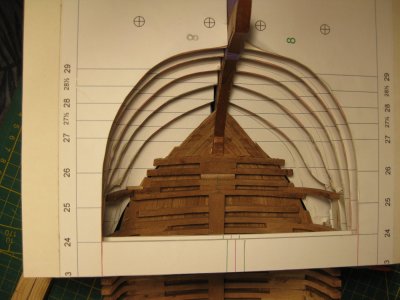
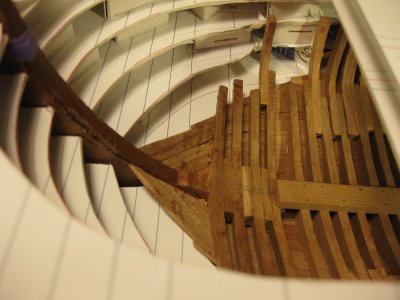
First I made a mould out of cardboard. (Paper/cardboard is actually quite easy to work with, so maybe I should try Ab Hoving's concept).
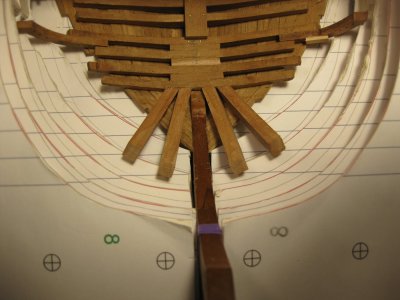
I used the original waterline drawing of the plans to print a part of it on paper and made it into a mold. Not to build 100% right to that, but more as an indication of where things go wrong.
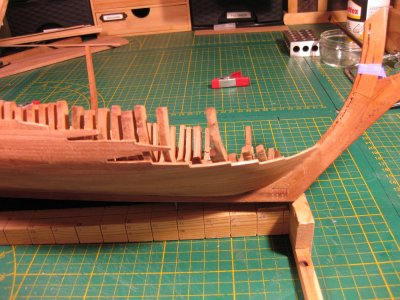
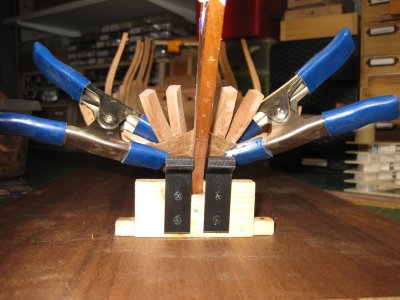
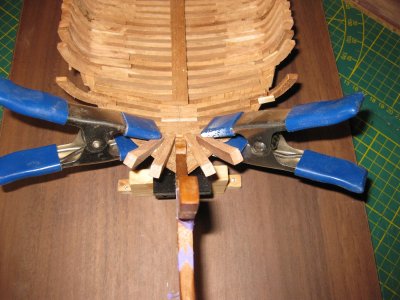
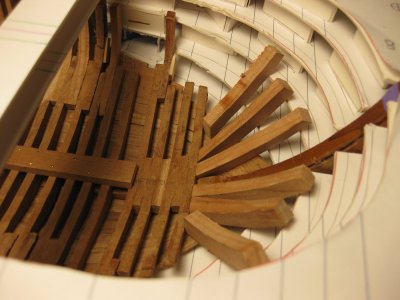
I discovered that indeed my first feeling was right and that the last 5 strakes in the bow section were too straight. You can clearly see this in the photos. The top course that is on it is just 1/2 course below the waterline.

So we are going to demolish a small section to remake this. I will now make some meat on the inside first, though. In other words, first put some parts in the bow that will determine the course of the bow.
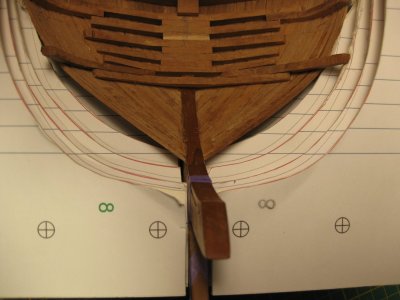

IMG_5103.JPGIMG_5104.JPGIMG_5105.JPGIMG_5106.JPGIMG_5107.JPG
I am not going to follow the drawing exactly, because then I would have to rebuild the ship. I chose shell first and that has consequences. But the difference in the bow is too big and that affects the shape of a Dutch bow. So an indication and a small adjustment to make it rounder.
 
Last edited:
Thanks again for all the likes and visit to my post.
I mentioning it in Peter Voogd's log about the curves of the bow. Working with plans could be refreshing, making frames from plans is difficult, but you have a direction how everything goes.
The Bow.

It gives me a headache. Why?
It's not right. There was something bothering me all along about the shape of the boards placed. Especially the last 5 strakes were not right. I could see that the rounding was not right, the typical Dutch bow is hard to make. Especially if you work without padding behind the planks. The wood is going to determine its own shape. The tension in the wood creates straight planks.
I also see this in the keel, it has risen slightly in the middle (1 to 1.5 mm.). Not much but it shouldn't be more. But I have that confidence now because the belly is well filled and I just have to make sure that the remaining parts come on without tension.
But back to the bow, it bothered me that it was a little too tapered. Much better than on my first attempt/redo, then it looked more like a clipper than a Dutchman.
First I made a mould out of cardboard. (Paper/cardboard is actually quite easy to work with, so maybe I should try Ab Hoving's concept).
I used the original waterline drawing of the plans to print a part of it on paper and made it into a mold. Not to build 100% right to that, but more as an indication of where things go wrong.
I discovered that indeed my first feeling was right and that the last 5 strakes in the bow section were too straight. You can clearly see this in the photos. The top course that is on it is just 1/2 course below the waterline.

So we are going to demolish a small section to remake this. I will now make some meat on the inside first, though. In other words, first put some parts in the bow that will determine the course of the bow.
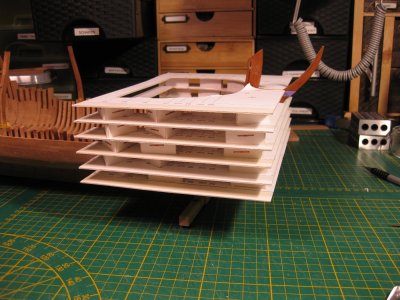

View attachment 506490View attachment 506491View attachment 506492View attachment 506493View attachment 506494
I am not going to follow the drawing exactly, because then I would have to rebuild the ship. I chose shell first and that has consequences. But the difference in the bow is too big and that affects the shape of a Dutch bow. So an indication and a small adjustment to make it rounder.
Good to now you recognized it on time, Stephan. And paper molds are always helpful.
Regards, Peter
 
Building a hull this way is a huge challenge. You are (almost) unique in this and that is not without reason. Maybe you will pave the way for others; enough to learn in your build log. Good luck with rebuilding the bow.
Thanks Herman, bold words that are certainly a support to keep faith in this particular construction. And yes, I have made many mistakes and, more importantly, learnt from them. This will not be the last time I build a ship this way. For damn sure.

Good to now you recognized it on time, Stephan. And paper molds are always helpful.
Regards, Peter
Thanks Peter, the first time I have made something like this using cardboard. And I must say it goes very well and is very solid and firm.
WOW! What a beautiful build Stephen and an accomplished wood carver. Dutch ships do have some of the most beautiful lines about them, I will watch this progress.
Thanks Daniel, for your visit and compliment. I agree with the shape of Dutch 17th century ships. The lines are great to see. When I look to the paintings of v/d Velde and see these ships lying in the water with the stern rising and the bow low. Just beautiful.
 
Thanks again for all the likes and visit to my post.
I mentioning it in Peter Voogt's log about the curves of the bow. Working with plans could be refreshing, making frames from plans is difficult, but you have a direction how everything goes.
The Bow.

It gives me a headache. Why?
It's not right. There was something bothering me all along about the shape of the boards placed. Especially the last 5 strakes were not right. I could see that the rounding was not right, the typical Dutch bow is hard to make. Especially if you work without padding behind the planks. The wood is going to determine its own shape. The tension in the wood creates straight planks.
I also see this in the keel, it has risen slightly in the middle (1 to 1.5 mm.). Not much but it shouldn't be more. But I have that confidence now because the belly is well filled and I just have to make sure that the remaining parts come on without tension.
But back to the bow, it bothered me that it was a little too tapered. Much better than on my first attempt/redo, then it looked more like a clipper than a Dutchman.
First I made a mould out of cardboard. (Paper/cardboard is actually quite easy to work with, so maybe I should try Ab Hoving's concept).
I used the original waterline drawing of the plans to print a part of it on paper and made it into a mold. Not to build 100% right to that, but more as an indication of where things go wrong.
I discovered that indeed my first feeling was right and that the last 5 strakes in the bow section were too straight. You can clearly see this in the photos. The top course that is on it is just 1/2 course below the waterline.

So we are going to demolish a small section to remake this. I will now make some meat on the inside first, though. In other words, first put some parts in the bow that will determine the course of the bow.
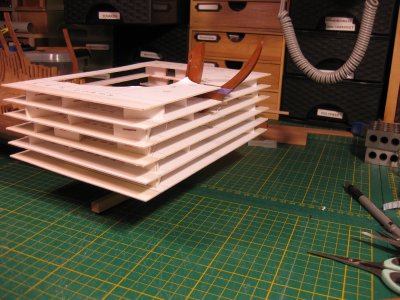

View attachment 506490View attachment 506491View attachment 506492View attachment 506493View attachment 506494
I am not going to follow the drawing exactly, because then I would have to rebuild the ship. I chose shell first and that has consequences. But the difference in the bow is too big and that affects the shape of a Dutch bow. So an indication and a small adjustment to make it rounder.
Good morning Stephan. Wow, this is some serious surgery going to happen……Cheers Grant
 
Good morning Stephan. Wow, this is some serious surgery going to happen……Cheers Grant
Thanks Grant,
First the butcher, the surgery will come later.

Ai ai it was a good part to look at. Only the shape.
First starting to dissolve the glue on these parts that have to come of and cut the planks nice to make sure the new planks will fit well.

IMG_5108.JPGIMG_5109.JPGIMG_5110.JPG
 
The breaking part is done. And I'm ready to start building again.

IMG_5111.JPGIMG_5112.JPGIMG_5114.JPGIMG_5115.JPG

First I want to make a surface gauge, something I need often. I'll make it myself, there are a lot of examples on YouTube.
Then I upgrade the building slip, Make a surface under it to hold the ship in place. Till now I mostly work with the ship free in hand. (Yes that is possible)
And then I will work on the "Draaispanten"

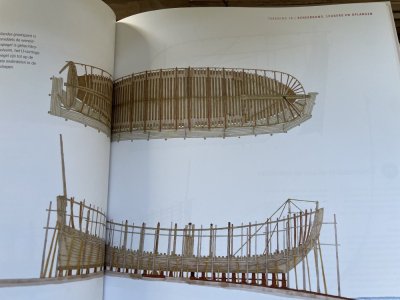
Hans from Kolderstok shared this picture with me, it will be more clear what I suppose to achieve when there is a picture of these timbers.

image.jpg
source: Willem Vos, Build of the Batavia (ISBN 9789462490321)
 
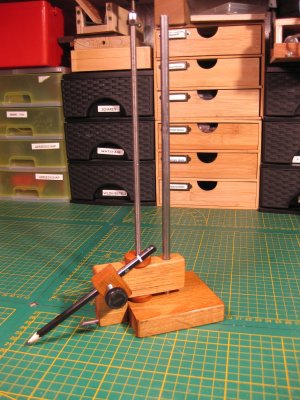
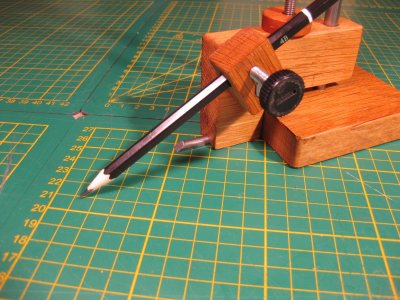
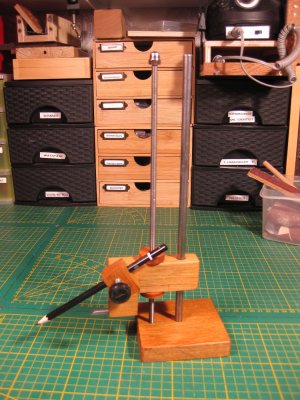
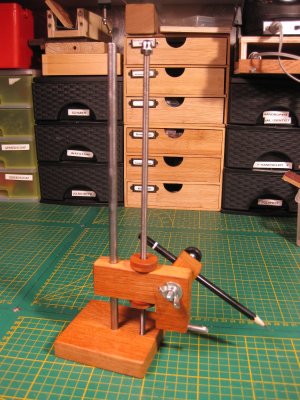
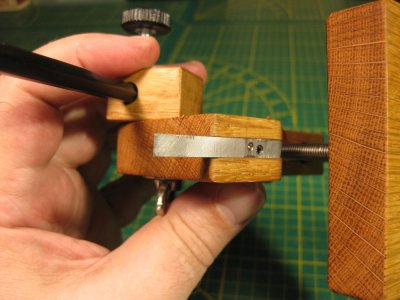
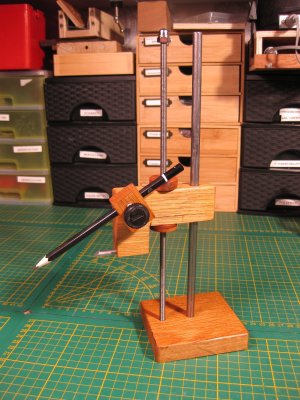
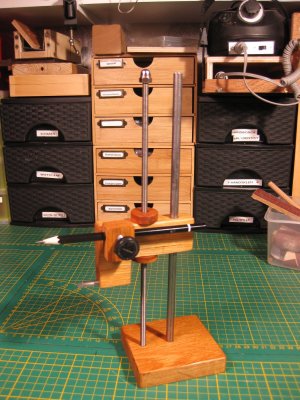
My surface gauge is ready. I can use it to scratch metal or plastics and there is an option for a pencil. I'm happy with it. I was thinking to buy a cheap caliper to attach to the back like I did on my Proxxon MF 70.
It was hard work. The scratch pin is made out of a round piece of RVS and that needed to shaped with a file. Took me 2 hours of my life :(

I took the idea from this artist:


And my version of oak

IMG_5116.JPGIMG_5117.JPGIMG_5118.JPGIMG_5119.JPGIMG_5120.JPGIMG_5121.JPGIMG_5122.JPG

Now I'm gonna work on my building slip.
Thanks for watching.
 
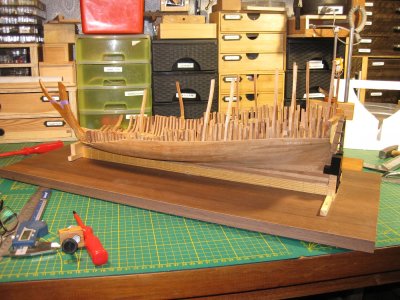
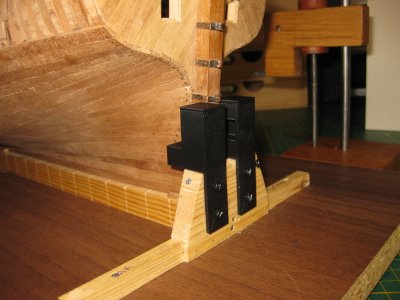
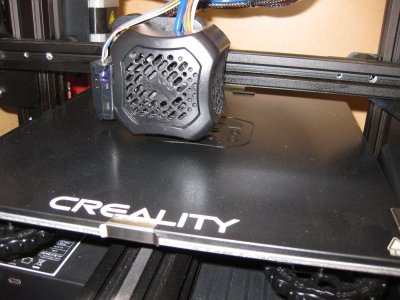
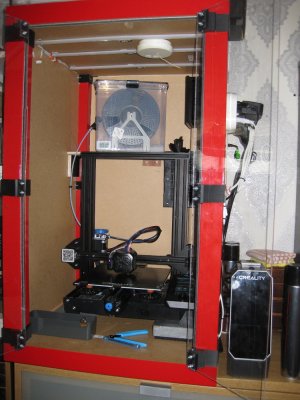
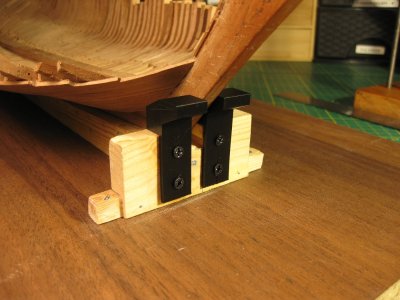
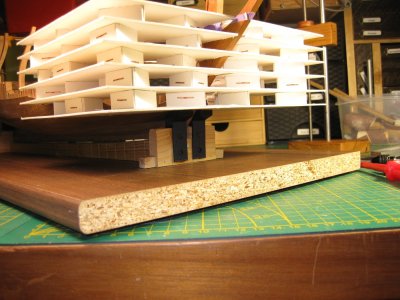
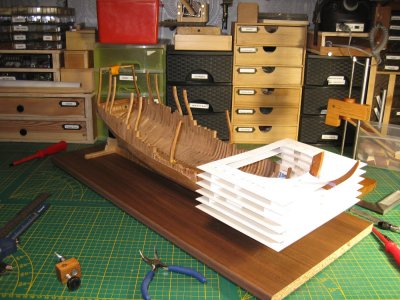
hanks al for the visit and likes. The building slip is a fact. I used my 3D printer to make clamps to hold the ship on the slip. Measuring is now very easy. Had to did the earlier. An extra bonus of my 3D printer in the Ikea hack enclosure.

IMG_5123.JPGIMG_5126.JPGIMG_5127.JPGIMG_5128.JPGIMG_5129.JPGIMG_5130.JPGIMG_5131.JPG

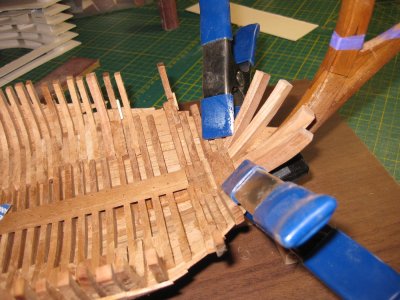
I can start working again at the bow.
The slip is only for measuring and stalling the ship. When I work on it, I like to have it in hand.
 
hanks al for the visit and likes. The building slip is a fact. I used my 3D printer to make clamps to hold the ship on the slip. Measuring is now very easy. Had to did the earlier. An extra bonus of my 3D printer in the Ikea hack enclosure.

View attachment 507828View attachment 507829View attachment 507830View attachment 507831View attachment 507832View attachment 507833View attachment 507834

I can start working again at the bow.
The slip is only for measuring and stalling the ship. When I work on it, I like to have it in hand.
Thats fantastic Stephen, getting a 3D printer is always on my mind.
 
Thats fantastic Stephen, getting a 3D printer is always on my mind.
Think about what use. There is a filament printer (FDM) like mine and there is a liquid 3D printer (SLA). Mine is more for construction parts, and the liquid is for parts for ships, crewmen, etc on a small scale and high in detail.

explanation on Google
When comparing FDM vs SLA 3D printers, If you're looking to create fine feature design prototypes, then SLA 3d printers are the better option. Otherwise, FDM printers will be more versatile for parts across production process, from designing, to manufacturing, to maintenance.
 
Wow! If the "forecast" is ever again 40 days and nights of rain....I'm going to come stay with one of the wonderful ship builders on this site!
 
Back
Top