Hohenzollernmodell 1660-1670 Scale 1/75 POF build by Stephan Kertész (Steef66)

I really like your approach here, Stephan, and I truly admire the ballsy-ness of the surgery. I think this was the right call, and keen of you to see it developing early.
Thanks Marc. When it's wrong build, you have to start over. This build is difficult, but I learn at every move I make.

Wow! If the "forecast" is ever again 40 days and nights of rain....I'm going to come stay with one of the wonderful ship builders on this site!
Thanks for the visit Bowwild.
 
The promised video


I'm not a star in making pictures or video's. When somebody have an idea why the licht is waving in the video is welcome with advice. I self had the idea of under light but why it is waving because of that?
Edit problem solved, a defect led bulb was the cause, changed that and now no more flikkering. You cant see it by eye, but only on camera screen.
Hi Stephan, Just getting caught up on your build. The Amsterdam trip looked like fun. Thanks for sharing. And, thanks for the step-by-step progression of your figurehead, which is looking GREAT!. The video really demonstrates the time and effort that goes into a carving. Wonderful work my friend!
 
Hi Stephan, Just getting caught up on your build. The Amsterdam trip looked like fun. Thanks for sharing. And, thanks for the step-by-step progression of your figurehead, which is looking GREAT!. The video really demonstrates the time and effort that goes into a carving. Wonderful work my friend!
Thanks Ken, great to see you here again.
 
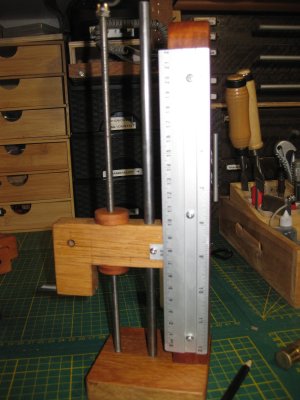
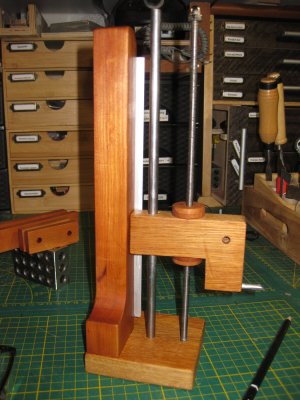
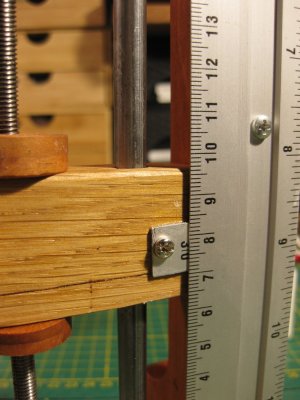
I'm happy with my anti-dust-workbench-leveler. It works great, maybe a little to noisy, just a little.

And I'm happy with the likes, jokes, comments and visit here, some kind of vitamin to go on.

In an early stage I was talking about the manes and that they are not wide enough. So I decided to ad some wood. Yes it is possible to ad wood. And is you do it right even nearly vissible. First I cut out a square part where I can glue a piece of wood in. Sorry I was so enthusiast I forgot to take pictures. But I must ad the crown in the same way and will show you that part. I used my Proxxon MF70 mill for the job. I'd clamped the lion in the vice and used pieces of balsa to keep the lion in the right spot and to keep it safe for markings the vice could make in the lion.
Then with a straight bur cut out a straight piece and later glued in a new piece from the same wood (the same piece I used before).
After that when the glue dried I started to work on the shape. The last picture is still the rough shape but almost there to get a better result on the wider manes.
The second picture shows the beginning of the claws.

View attachment 499632View attachment 499633View attachment 499634View attachment 499635View attachment 499636View attachment 499637View attachment 499638View attachment 499639View attachment 499640"

Thanks for the visit.
Now this gives us all a peek into that creative mind of yours! I like the way you think Stephan.

Now for the "anti-dust-workbench-leveler"..... I think if you put your mind to it, you could give Elon Musk a run for his money on who gets to Mars first!!ROTF
 
ROTF I'm not really political by nature. My comparison was solely from an innovative engineering standpoint and meant to be of the highest praise. Sorry if that was not clear.
 
ROTF I'm not really political by nature. My comparison was solely from an innovative engineering standpoint and meant to be of the highest praise. Sorry if that was not clear.
ROTFROTF I know but he have to wait on me, still working on my nucleair bomb.
 
Hi Stephan,

Wise decision to demolish the bow.
I think the current timbers you place in the bow are a little short. They would run further up towards the scheerstrook. The apostelen placed along the stem have the same shape as the rabbet in the stem and gradually along the profile of the bow outward they change towards the shape of the oplang of the fwd frame, this change in shape is only minor.
 
I think the current timbers you place in the bow are a little short. They would run further up towards the scheerstrook. The apostelen placed along the stem have the same shape as the rabbet in the stem and gradually along the profile of the bow outward they change towards the shape of the oplang of the fwd frame, this change in shape is only minor.
The timbers coming into the bow are kind of confusing to me. I'm kind of following the construction of the Batavia by Willem Vos here. Witsen is not very clear on it and the shipwrecks that have been found give some insight but even those don't tell everything. Herman Ketting talked about the “oplangen” that came on the “stevenwrangen.” And which were connected with "zitters" for reinforcement. If you look at Vos' drawing you can see that too. You recognize there the pieces of wood I have now placed. It looks a bit different all together as in Ab's program Witsenscheepsbouw. Who is right? I'll leave it in the middle. I need to build a model in scale 75.
And that's the difficulty I'm dealing with right now. Also, the ship is not completely shellfirst. The Hohenzollern model does not have a flat bottom and bow like your ship. I have to compromise here with the construction method and the drawing I took as a starting point. My first approximation to lay the floor timbers on the keel failed due to the floor rising too early. Willem Vos' method is the easiest way to apply it to my ship. To get the shape I have to aim for now. So the pieces of wood you see now are not the “oplangen” but the “zitters” or whatever they are called. Connecting pieces to the “apostelen” or “draaispanten” that will come between them later.
My understanding is that the method Willem Vos takes up is also something from the late 17th and 18th centuries for Dutch construction. I could be wrong about that, as so much comes along, but also that a merchant ship was different from a warship and that the later method was also applied to warships earlier. I have read this thesis and I would not remember where. So whether this is correct?

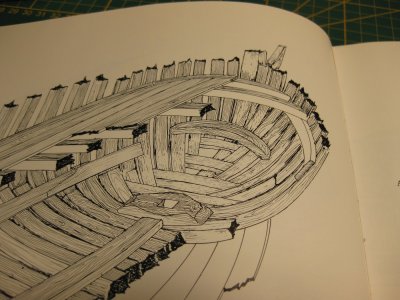
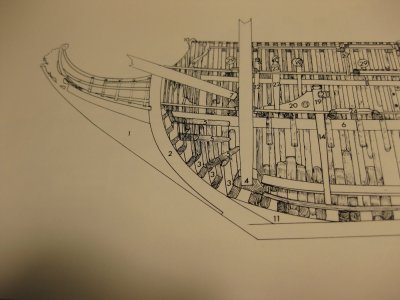
This is the drawing of Vos where you can see these timbers to attached the "draaispanten" to the keel:

image.jpg

These drawings below come out of the book of Herman Ketting. If he was correct in his opinion? I will not arguing that.
but in the second drawing you can see the Connections to (number 3) and also that they don't go all the way up. He also places the floor timbers between them (stevenwrangen) but in my ship the curve is to much to do this. That's Why I choose the method of Vos.

IMG_5138.JPGIMG_5139.JPG

The next project I build will have a correct bottom. Flat and not curvy like the HZ model.
 
A lot of other things came on my road, so not much done the past days. Just a few layers of planks to give me some space to fill in the timbers on the inside. 2 layers on outside hull planks.

IMG_5145.JPG

Taking a lot of time. Wet planks, adjust the to the shape and when dried, glue them.

I did a few updates on my surface gauge in between. I made a scale on it. And a few extra's to make it possible to marking with the pencil on the inside of the hull.

IMG_5140.JPGIMG_5141.JPGIMG_5142.JPGIMG_5143.JPGIMG_5144.JPG

We go one with bending planks and fill in the hull with timbers.
 
Over a week already. @all thanks for the likes and following this build. In the meantime worked on the fuselage but also had a nice conversation with an expert in this field. Thanks Ab for the advice and wake up call.


I had chosen an easy way to make the bow, also more or less that I was presented this way on the Dutch forum. Ofcourse with the message that this might not be correct. Ab asked me why I was making it easy for myself when I had already put a lot of effort into getting this far. And that this method of construction was bound to cause problems later on. I immediately agreed with the later because I more or less saw the problems myself. It would not make placing the apostles any easier.

This method in which I followed Willem Vos is not the way these ships are built. He explained to me that there was no deadwood between the keel and the stemhead. Dutch ships were built differently and the “Wrangen” were mounted directly against the keel. In the way Willem Vos wanted to build this ship, the bow would be too weak. The Batavia was not built that way either seemingly another way was chosen later.
I was somewhat too lazy or too easy to find out exactly how it was and whether that drawing of Willem was okay or whether this was a way that was applied. Ab quickly convinced me not to continue this way, also because I had my own doubts.
It was a lot easier to apply the first row of hull planks with this method.

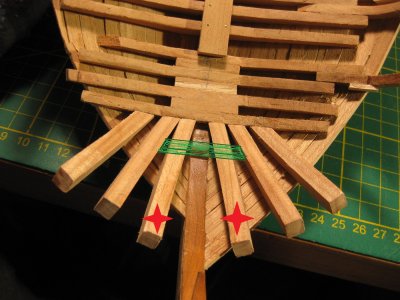
The photo below is the wrong way and I took these beams out, but first I'll use them to easily fit the first few rows of hull planks. See left side of this photo where they are already placed.

IMG_5151.JPG

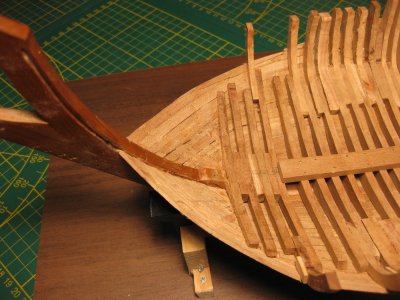
Here is a photo with the lower part of the bow finished and the incorrect beams removed.
IMG_5157.JPG

And here the “Wrangen ”are placed in the right direction.

IMG_5162.JPG

IMG_5163.JPG

The top “Wrang” is also the last one and on it come the 12 apostles. Ab explained to me that the name comes from that fact. On each side of the stem 6 of them.

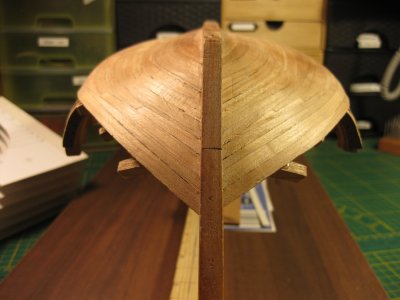
IMG_5156.JPGIMG_5164.JPG

It is almost impossible to see that new boards have been placed in the hull. The many joints are allowed; the Vasa is a fine example.

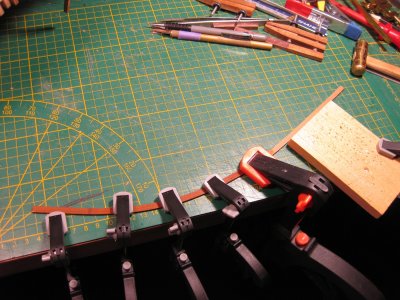
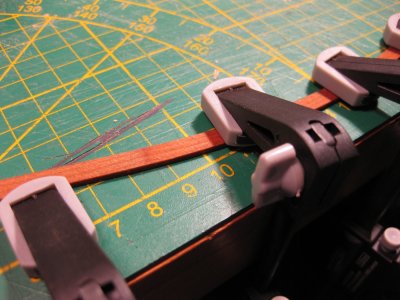
Here are 2 more pictures where I show how I give boards a curve over the flat side. I soak the wood in water overnight and then clamp it into shape flat on the table. Works fine and after it is almost dry I bend them further into shape on the ship and let dry further before gluing.
IMG_5153.JPGIMG_5154.JPG

So much for the construction of a Dutch 2-Decker. I will now move on to another build. I cleared my work area of dust today to continue with the rigging of the Prins Willem again. I was getting more and more in the mood to do that. I also sat back and watched a video on YouTube of Tom Lauria. I saw that video a long time ago somewhere in 2020 and hadn't looked closely at what he was actually doing. Now I was watching some videos I had saved and came across this one again. Also coincidentally, someone here on the forum also commented on this method. After watching the video a few times and asking Tom a few questions about the paint, I want to go ahead with this again. So more on it soon: https://shipsofscale.com/sosforums/threads/voc-ship-the-prins-willem-scale-1-75-year-1651.6761/

Thanks for watching.
 
Last edited:
Back
Top