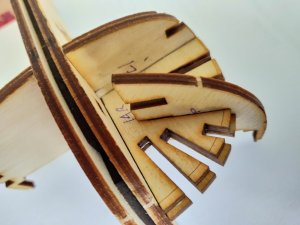
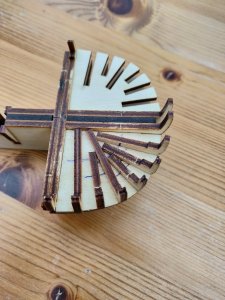
St. Gabriel Master Korabel 1:72 scale

Joined
Aug 25, 2017
Messages
313
Points
193

Location
Moira N.I.
I have already done a review of this kit so I'll not post any pictures of the kit's contents.
St. Gabriel Master Korabel 1:72 Scale Kit Review

StGab1.jpg

Whenever I build a model I like to research it's history. In this case, with some help from Uwe, St Gabriel was built in 1728 by Vitus Bering to be used in the Kamchatka expeditions, to explore the coasts of Siberia and Alaska. It's been interesting to read about these expeditions.
The first step is to fit 2 pieces to the Centre False Keel, these were glued in place and the ends filed to the correct angles.

StGabA1.jpg
StGabA2.jpg
StGabA3.jpg
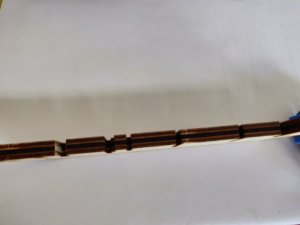
Once this was dry I then fitted the right and left False Keels to the False Centre Keel piece. I had to make sure that all 3 of the False Keels lined up and that no glue blocked any of the holes.

StGabA4.jpg
StGabA5.jpg

There were 4 more parts to fit to the rear of the False Keels, 2 on each side. I fitted the 2 inner pieces first and they needed to be clamped because they are made from thinner wood and they would not sit flat. The 2 outer pieces had to have a bevel filed down to the etched mark first before fitting, again these needed clamping as well.

StGabA6.jpg
StGabA7.jpg

Cheers Andy
 
G'day Andy
I'm very interested in this build and the quality of the parts. If I can understood completely, it a very unique was of joking the false keel together.
Happymodeling
Greg
 
G'day Andy
I'm very interested in this build and the quality of the parts. If I can understood completely, it a very unique was of joking the false keel together.
Happymodeling
Greg
Hi Greg, I am very impressed by the quality of the materials and instuctions in this kit. It may seem strange to have a False Keel made like this but it is very strong and I get the impression that this kit is designed so that it is possible for someone that has never built a wooden ship model to produce a good looking model.
The next stage is to fit the Bulkheads numbered 17,18, 22 and 23. Bulkheads 17 and 18 fit at the front of the False Keel and are marked with etched lines to assist in getting them straight and in the correct position, I also added a few pencil marks to show the bottom of each of the slots. Both Bulkheads needed some adjustment to enable them to fit, in fact the instructions suggest filing a slight angle on all the edges to help them slide into place. Once I was happy with the fit these 2 Bulkheads were glued in place ensuring the etched marks faced forwards. I then repeated the whole thing with Bulkheads 22 and 23, but in this case the ecthed marks faced towards the Stern.

StGabB1.jpg
StGabB2.jpg
StGabB3.jpg
StGabB4.jpg

There are 4 Bow extension plates that need to be fitted to both sides of the Keel. I have removed the right side ones and I am now in the process of dry fitting them.

StGabB5.jpg
StGabB6.jpg

Cheers Andy
 
Watching your build ANDY with great interests, this one will go on my to do list. THANKS FOR THE LOG. Don

Thanks Don, this is certainly a nice well thought out kit.

Very interesting method (bow extensions) they are using here. Nice !

Hi Donnie, once all the Bow and Stern extensions are fitted they will be nigh on solid which will hopefully make the planking a bit easier.

Cheers Andy
 
I have been busy in the evenings looking at new houses so I took the Bow extension pieces with me to work and spent my lunch hour filing the bevels and opening up the slots on each piece. I started fitting the horizontal extensions making sure the side that the laser cut from was facing down as per the instructions. Piece 13 was glued in place followed by piece 14 which is glued underneath piece 13. I used one of the vertical extension pieces dry fitted to keep them both lined up.
StGabB7.jpg

StGabB8.jpg
The other 2 horizontal pieces were then glued in place again using the vertical piece dry fitted.


StGabB9.jpg
The vertical extensions needed the slots opened up a bit so that they would fit to the horizontal extensions. Once the laser char had been removed they fitted nicely, I found that if I put glue on these pieces they became very tight so I dry fitted all the vertical extensions. I had a nearly finished bottle of wood glue so I put a little bit of water into it, gave it a good shaking and then ran the diluted glue into all the joins. This was then left overnight to dry out.

StGabB10.jpg

StGabB11.jpg

I have now removed and fitted the horizontal extension pieces to the left (port) Bow side and will be taking the vertical pieces to work this week to clean up.

StGabB12.jpg
StGabB13.jpg
StGabB14.jpg
StGabB15.jpg
StGabB16.jpg

Cheers Andy
 
Right on! I've been waiting for another post Andy :) The bow pieces look like some very typical Russian tough engineering. It's brilliant and looks like it will not only be strong but perfect in capturing the shape without filler blocks being carved and a pleasure to plank. Can't wait for more!
 
Right on! I've been waiting for another post Andy :) The bow pieces look like some very typical Russian tough engineering. It's brilliant and looks like it will not only be strong but perfect in capturing the shape without filler blocks being carved and a pleasure to plank. Can't wait for more!

Thanks Ron, the Stern will also have several Frames fitted as well, not only will the entire Hull be nearly solid it should hopefully make the planking a bit easier because I do struggle getting the correct shape on curved sections of Hulls. Thanks for following this build,
Cheers Andy
 
On this ship you can see that Peter the Great visited the Netherlands a view years before this ship was build. He was a ship building aprentice in Zaandam where there is still the Peter the Great house. This ship is typical Dutch with it side swords enabling it to navigate shallow waters.
A beautiful little working boat. Looks like a beatiful detailed small size model.

Thanks Maarten, when I saw this boat I thought it looked like a Dutch designed boat with it's rounded Bow and Stern, and it's Lee Boards. It's interesting to know that about Peter the Great, history would be another of my interests. I stayed in Zandaam about 20 years ago in a nice hotel by the Railway Station I don't remember seeing a Peter the Great house, but I did I enjoy a visit to the Scheepvaartmuseum in Amsterdam.

Very nice so far cant wait to see this come to life

Thanks Joe, this is certainly a well designed kit with a lot of thought gone into the building process and instructions,

Cheers Andy
 
This week has again been "bring your model boat to work " week. There are a lot more horizontal Stern extension pieces and this time I decided to do both sides of the Stern at the same time. I spent a couple of lunchbreaks removing the laser char from the slots in the extension pieces which meant I could then make a start fitting them this weekend. Part 41 is glued in place first and then 3 more extensions are glued underneath, followed by a further extension in slots below them. On top of part 41 more extensions are glued but these are only half the size of the lower ones. Whilst I was removing the horizontal extensions one of the bracing strips dettached it's self from the frame so I removed the other one and dry fitted them to the Hull as you can see in the first picture, they will removed whist I fit the remaining Frames.

StGabC1.jpg
StGabC2.jpg
StGabC3.jpg
StGabC4.jpg
StGabC5.jpg
StGabC6.jpg

Cheers Andy
 
This week has again been "bring your model boat to work " week. There are a lot more horizontal Stern extension pieces and this time I decided to do both sides of the Stern at the same time. I spent a couple of lunchbreaks removing the laser char from the slots in the extension pieces which meant I could then make a start fitting them this weekend. Part 41 is glued in place first and then 3 more extensions are glued underneath, followed by a further extension in slots below them. On top of part 41 more extensions are glued but these are only half the size of the lower ones. Whilst I was removing the horizontal extensions one of the bracing strips dettached it's self from the frame so I removed the other one and dry fitted them to the Hull as you can see in the first picture, they will removed whist I fit the remaining Frames.

View attachment 59611
View attachment 59612
View attachment 59613
View attachment 59614
View attachment 59615
View attachment 59616

Cheers Andy
It is already looking like a full body hull....... looking forward how it works
 
Back
Top