Very nice, Keef! Amazing progress in such a short amount of time.
-

Win a Free Custom Engraved Brass Coin!!!
As a way to introduce our brass coins to the community, we will raffle off a free coin during the month of August. Follow link ABOVE for instructions for entering.
-

PRE-ORDER SHIPS IN SCALE TODAY!
The beloved Ships in Scale Magazine is back and charting a new course for 2026!
Discover new skills, new techniques, and new inspirations in every issue.
NOTE THAT OUR FIRST ISSUE WILL BE JAN/FEB 2026
- Home
- Forums
- Ships of Scale Group Builds and Projects
- Modelship Dockyard PoF HMS Enterprize 1774 - 1/48
You are using an out of date browser. It may not display this or other websites correctly.
You should upgrade or use an alternative browser.
You should upgrade or use an alternative browser.
- Joined
- Jan 10, 2022
- Messages
- 860
- Points
- 403

Thank you Paul. Being retired really does have it's advantagesVery nice, Keef! Amazing progress in such a short amount of time.

Your build is looking great ! 
- Joined
- Jan 10, 2022
- Messages
- 860
- Points
- 403

Thank you Jeff. As is yours. Have you decided how you are going to prepare your false keel joints. I'm just making a 45 degree scarf at each joint for ease. After sanding nobody is going to see it. I build for pleasure and not worried about 100% historical accuracy, as long as l think it looks OKYour build is looking great !
Yes, I am planning on the same.Thank you Jeff. As is yours. Have you decided how you are going to prepare your false keel joints. I'm just making a 45 degree scarf at each joint for ease. After sanding nobody is going to see it. I build for pleasure and not worried about 100% historical accuracy, as long as l think it looks OK
Good evening Keith. All coming together very nicely. Cheers Grant
Keef, Looking awesome!! Somehow, I wasn't following this latest build of yours.
I've corrected that and will enjoy my late to the party, back row seating.
Joints are looking clean and tight. Keep up the good work.
I've corrected that and will enjoy my late to the party, back row seating.
Joints are looking clean and tight. Keep up the good work.
- Joined
- Jan 10, 2022
- Messages
- 860
- Points
- 403

Hi Brad. Thanks very much, I'm sure there's plenty of room, pull up a chair, it's good to have youKeef, Looking awesome!! Somehow, I wasn't following this latest build of yours.
I've corrected that and will enjoy my late to the party, back row seating.
Joints are looking clean and tight. Keep up the good work.
- Joined
- Jan 10, 2022
- Messages
- 860
- Points
- 403

Stern deadwood glued and keel pieces dry fitted to see how it all fits together. A little sanding of the bow gripe piece curve will have it fitting perfectly inside the jig. When the glue has dried on the stern deadwood l will begin the first sanding to taper it down to 3 mm at the bottom. Everything seems to fit the drawing nicely 
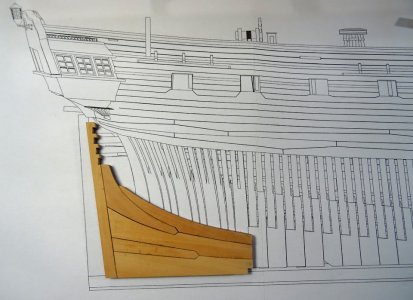
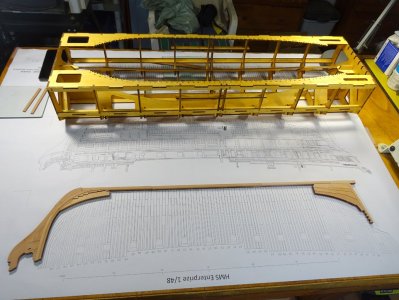
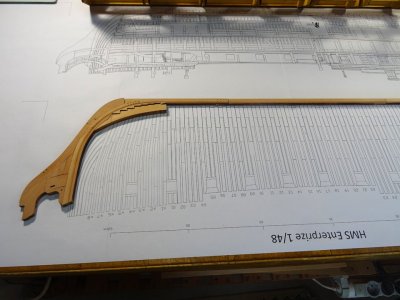
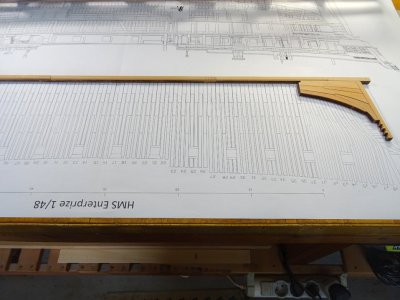
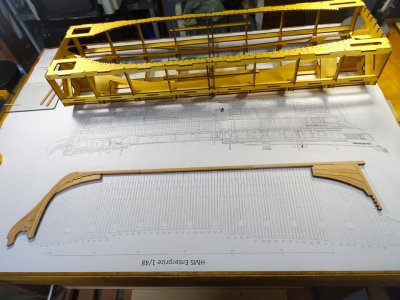


Great start, I wonder what happens next. I watched your construction of Alert and will follow this one.Stern deadwood glued and keel pieces dry fitted to see how it all fits together. A little sanding of the bow gripe piece curve will have it fitting perfectly inside the jig. When the glue has dried on the stern deadwood l will begin the first sanding to taper it down to 3 mm at the bottom. Everything seems to fit the drawing nicely
View attachment 513165
View attachment 513166
View attachment 513167
View attachment 513168
View attachment 513171
She is looking great !Stern deadwood glued and keel pieces dry fitted to see how it all fits together. A little sanding of the bow gripe piece curve will have it fitting perfectly inside the jig. When the glue has dried on the stern deadwood l will begin the first sanding to taper it down to 3 mm at the bottom. Everything seems to fit the drawing nicely
View attachment 513165
View attachment 513166
View attachment 513167
View attachment 513168
View attachment 513171
Great fit and detail Keith! Very nice, Magic Mike
FWIW, I simply glued it all up outside the Jig. Made everything considerably easier and when placed inside, snapped right in.Ahh, Masterful, Keith. Mine doesn't look as good...
A question for Victor and Keith who (I think) have completed the building jig:
I have almost completed the keel (just need to do the rabbet along the keel on one side.). I still have not mated the stern structure to the keel.
Should I attach the stern deadwood and post to the keel now, or should I build the big Jig and then join the structures inside the jig.???
Pictures coming later this PM.
Thanks,
Alex R
Myself, also measured everything up and drilled keel and sternpost assembly to install three bamboo dowel pins for additional strength
Very nice work so far.Thank you Paul. Being retired really does have it's advantages
Might I ask, what methodology to finish up rabit, looks nice and neat.
Tim
- Joined
- Jan 10, 2022
- Messages
- 860
- Points
- 403

Thank you. I cut the rabet into the lower keel piece just by filing at a 45 degree angle to the laser cut guide line and cleaning up by gently side scraping with a sharp craft knife blade. I have been busy, the last few days, fine tuning the keel pieces and tomorrow hope to show some pics of the finished keel in position inside the jigVery nice work so far.
Might I ask, what methodology to finish up rabit, looks nice and neat.
Tim
Thank you. I cut the rabet into the lower keel piece just by filing at a 45 degree angle to the laser cut guide line and cleaning up by gently side scraping with a sharp craft knife blade. I have been busy, the last few days, fine tuning the keel pieces and tomorrow hope to show some pics of the finished keel in position inside the jig

- Joined
- Jan 10, 2022
- Messages
- 860
- Points
- 403

The stern deadwood is now finished and attached to the keel. It all fits the drawing perfectly, which I am taking as a good sign and fits into the jig as well. When the glue is dry, I shall remove the keel from the jig to add the photo etch bracket ties front and back and do a little cleaning up of the top of stern deadwood and where the fore apron is attached. That will be the keel complete and on to the next stage . . . the construction of the ribs
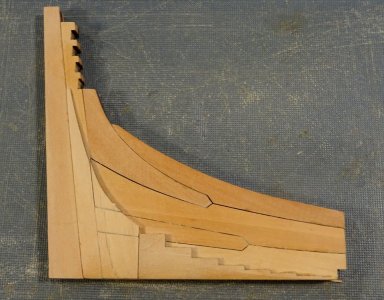
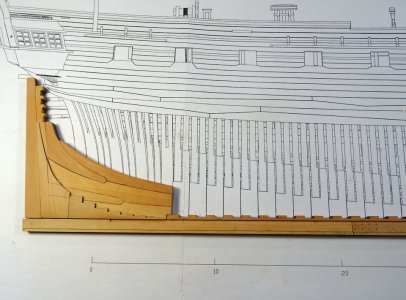
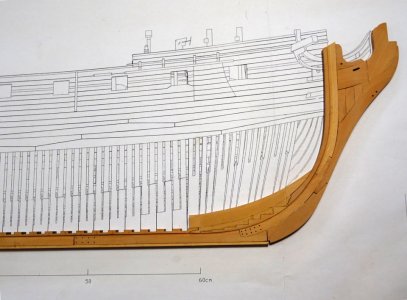
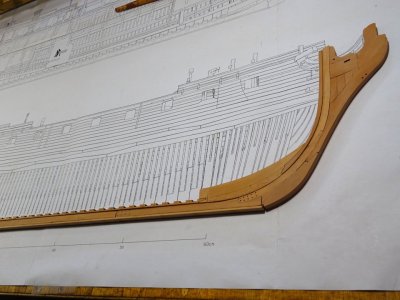
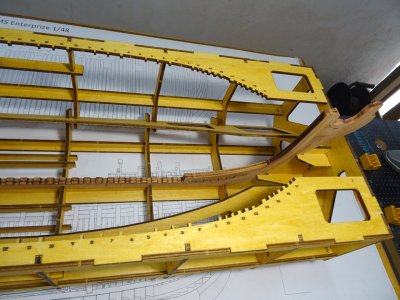
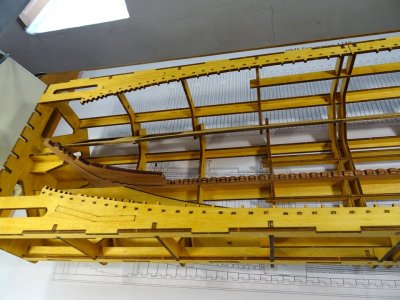
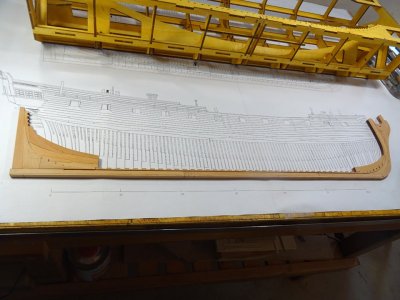


Very nice, Keith!The stern deadwood is now finished and attached to the keel. It all fits the drawing perfectly, which I am taking as a good sign and fits into the jig as well. When the glue is dry, I shall remove the keel from the jig to add the photo etch bracket ties front and back and do a little cleaning up of the top of stern deadwood and where the fore apron is attached. That will be the keel complete and on to the next stage . . . the construction of the ribs
View attachment 514274
View attachment 514275
View attachment 514276
View attachment 514277
View attachment 514278
View attachment 514279
View attachment 514280
Ditto. All looks fantastic Keith. Cheers GrantVery nice, Keith!
- Joined
- Jan 10, 2022
- Messages
- 860
- Points
- 403

Thanks Doctor PaulVery nice, Keith!


