
-

SUBSCRIBE TO SHIPS IN SCALE TODAY!
The beloved Ships in Scale Magazine is back and charting a new course for 2026!
Discover new skills, new techniques, and new inspirations in every issue.
NOTE THAT OUR NEXT ISSUE WILL BE July/August 2026 -

Win a Free Custom Engraved Brass Coin!!!
As a way to introduce our brass coins to the community, we will raffle off a free coin during the month of August. Follow link ABOVE for instructions for entering.
You are using an out of date browser. It may not display this or other websites correctly.
You should upgrade or use an alternative browser.
You should upgrade or use an alternative browser.
Black Swan - Occre by GIG1810
- Thread starter GIG1810
- Start date
- Watchers 27
-
- Tags
- black swan occre
- Joined
- Dec 5, 2022
- Messages
- 1,137
- Points
- 443

Anchors - Model Ship Fittings - Modelers Central
Model Ship Anchors Come in a Range of Sizes and Shapes. Modelers Central Is The Home Of Wooden Model Ship Builders. Order Online For Fast Delivery.www.modelerscentral.com
I'm sure there are others as well if you don't want to make your own...
Hey Paul,Anchors - Model Ship Fittings - Modelers Central
Model Ship Anchors Come in a Range of Sizes and Shapes. Modelers Central Is The Home Of Wooden Model Ship Builders. Order Online For Fast Delivery.
I'm sure there are others as well if you don't want to make your own...
the anchors look really excellent.
Unfortunately they are all too big,
I need the Draggen anchor for my dinghy and that's why it can only be 0.7 cm. big...Tiny. tiny.
It looks like I'll have to build it myself.....
Many thanks for your help and best regards
Günther

- Joined
- Dec 5, 2022
- Messages
- 1,137
- Points
- 443
Hey friends,
another little update from me. I had to make a few changes that I didn't like. Working at this scale is really getting me down. But, it should look nicer than the horrible dinghy of the Black Swan. But what did I do?
I replaced the gratings with maple gratings. These had to be cut to shape, sanded and then rounded off with a 0.3 mm maple strip. Then I turned my attention to the dowels. After all, my rudder straps have to be held and used. To do this, I sanded a lime strip to 2 x 0.5 mm. Then I clamped it in the vice and inserted a curved shaft with the cylindrical sander. Then I took 0.5 mm needles and shortened them to 2 mm. These are supposed to be the real dowels. The wood serves to stabilize the dowels. I glued both together with a lot of effort and holding my breath. It took sooooo long, as many of the cannulas simply slipped away and were lost forever in the nirvana of the carpet table.
As always, here are my pictures.
Best regards
Günther


Oh yes, this is what the little dinghy looks like now. It's not finished yet..... but I think it's already better than that awful dinghy...don't you?


another little update from me. I had to make a few changes that I didn't like. Working at this scale is really getting me down. But, it should look nicer than the horrible dinghy of the Black Swan. But what did I do?
I replaced the gratings with maple gratings. These had to be cut to shape, sanded and then rounded off with a 0.3 mm maple strip. Then I turned my attention to the dowels. After all, my rudder straps have to be held and used. To do this, I sanded a lime strip to 2 x 0.5 mm. Then I clamped it in the vice and inserted a curved shaft with the cylindrical sander. Then I took 0.5 mm needles and shortened them to 2 mm. These are supposed to be the real dowels. The wood serves to stabilize the dowels. I glued both together with a lot of effort and holding my breath. It took sooooo long, as many of the cannulas simply slipped away and were lost forever in the nirvana of the carpet table.
As always, here are my pictures.
Best regards
Günther
Oh yes, this is what the little dinghy looks like now. It's not finished yet..... but I think it's already better than that awful dinghy...don't you?

Good morning Gunther. I totally agree the little ships boat is looking much better. Lovely work. Cheers GrantHey friends,
another little update from me. I had to make a few changes that I didn't like. Working at this scale is really getting me down. But, it should look nicer than the horrible dinghy of the Black Swan. But what did I do?
I replaced the gratings with maple gratings. These had to be cut to shape, sanded and then rounded off with a 0.3 mm maple strip. Then I turned my attention to the dowels. After all, my rudder straps have to be held and used. To do this, I sanded a lime strip to 2 x 0.5 mm. Then I clamped it in the vice and inserted a curved shaft with the cylindrical sander. Then I took 0.5 mm needles and shortened them to 2 mm. These are supposed to be the real dowels. The wood serves to stabilize the dowels. I glued both together with a lot of effort and holding my breath. It took sooooo long, as many of the cannulas simply slipped away and were lost forever in the nirvana of the carpet table.
As always, here are my pictures.
Best regards
Günther
View attachment 525275
View attachment 525276
View attachment 525277
View attachment 525277
View attachment 525278
Oh yes, this is what the little dinghy looks like now. It's not finished yet..... but I think it's already better than that awful dinghy...don't you?
View attachment 525283
View attachment 525279
View attachment 525281
View attachment 525280
- Joined
- Dec 5, 2022
- Messages
- 1,137
- Points
- 443
Good morning Grant,Good morning Gunther. I totally agree the little ships boat is looking much better. Lovely work. Cheers Grant
Thank you very much for your motivating comment. I am very happy about it.


Cheers Günther
- Joined
- Dec 5, 2022
- Messages
- 1,137
- Points
- 443
So this is my first scratch build and I'm only now beginning to understand the process and why it can take so long. I don't have a plan as a basis for the build, just my technical understanding. I also have to say that there is an absolute risk of addiction to getting better and better.
The dinghy is far from finished and there are still a few things missing. I want to build it as detailed as my skills allow me to. Even if it looks so small and simple, it really isn't.
The following work still needs to be done:
-burnished and glued in the cleats
-burnished and glued in the eyelets
-carve and varnish the mast
-Carve and paint the bowsprit
-Cut and attach ropes and cables
-Setting the boarding iron and fastener
-Place and varnish oars
-Carving and varnishing the tiller
-Paint and seal the dinghy
-Build a stand
-Build a stand
So there's still a lot of work to do...Let's tackle it.....
Cheers
Günther
- Joined
- Dec 5, 2022
- Messages
- 1,137
- Points
- 443
Good morning heroes of model building,
I needed another task on the boat, otherwise I wouldn't be so focused. I was a bit sloppy with some of the attachments on the boat and had to remedy the situation.
That's why I thought I'd take care of a gun barrel for once. In other words, I bronzed and adapted it. Then I cut the bolt to size.
I decided to put one of my cannon crests on the cannon.
I hope you can recognize it, it's really tiny. It still has to be bent and burnished. But it's so tiny that if I lift it too hard with the tweezers, it bounces away and gets lost in the nirvana of the ground. The madness. Here are a few more photos for you.....
Greetings
Günther
That’s amazing! Do you solder the crest to the barrel, or use CA?
- Joined
- Dec 5, 2022
- Messages
- 1,137
- Points
- 443
Hey Namabiiru,That’s amazing! Do you solder the crest to the barrel, or use CA?
I can't solder it because it's just too small and I'm not that good at soldering. I use a metal adhesive. Then you won't be able to get it off. The only disadvantage is that it has to be fitted exactly. You can no longer correct it because it immediately welds to the surface.
Günther
I’m not familiar with that kind of adhesive. I would like to learn more. For some thing like that, maybe solder paste would work. I use that very effectively for small parts.
Hi Namabiiru,I’m not familiar with that kind of adhesive. I would like to learn more. For some thing like that, maybe solder paste would work. I use that very effectively for small parts.
Some time ago, I made a review of aftermarket naval guns where I used to soldered the crest to a barrel using soft silver solder. Specifically, section: Working with gun barrels.
Parts review - Aftermarket naval guns parts to upscale, Part 2/3
Greetings all. This is way long past-due log of Part 2 of 3 series: Accesories\Uspscale mini kits of naval guns. To those of you who came directly to this post, please follow the below link to get familiar with our discussion about aftermarket naval gun mini kits...
shipsofscale.com
Please let me know if you have questions.
- Joined
- Dec 5, 2022
- Messages
- 1,137
- Points
- 443
Hey Namabiiru,I’m not familiar with that kind of adhesive. I would like to learn more. For some thing like that, maybe solder paste would work. I use that very effectively for small parts.
look here. This ist the glue!
Superglue metal extra strong 30g - Metal glue waterproof, heat-resistant & with needle lock to prevent drying out - Metal glue for bonding...
It is really bombproof and so it always saves me soldering. Especially with small parts. Like with my mini coat of arms.
Cheers
Günther
- Joined
- Dec 5, 2022
- Messages
- 1,137
- Points
- 443
Hey Namabiiru,
look here. This ist the glue!
Superglue metal extra strong 30g - Metal glue waterproof, heat-resistant & with needle lock to prevent drying out - Metal glue for bonding...
It is really bombproof and so it always saves me soldering. Especially with small parts. Like with my mini coat of arms.
Cheers
Günther


- Joined
- Dec 5, 2022
- Messages
- 1,137
- Points
- 443
Hey Jim,Hi Namabiiru,
Some time ago, I made a review of aftermarket naval guns where I used to soldered the crest to a barrel using soft silver solder. Specifically, section: Working with gun barrels.
Parts review - Aftermarket naval guns parts to upscale, Part 2/3
Greetings all. This is way long past-due log of Part 2 of 3 series: Accesories\Uspscale mini kits of naval guns. To those of you who came directly to this post, please follow the below link to get familiar with our discussion about aftermarket naval gun mini kits...shipsofscale.com
Please let me know if you have questions.
I took a look at the site. That looks wonderful. very nice. my gun and gun carriage should look something like that. Only much much smaller...
Cheers Günther
- Joined
- Dec 5, 2022
- Messages
- 1,137
- Points
- 443
Hi guys,
I'm currently trying my hand at the fastener for the mast attachment. Once again it's all tiny work.
I have taken a photo of a pillar for the seat boards in the dinghy. Here you can see how small it is.
I also wanted to show you a photo of what the dinghy looks like. But it's not finished yet...
Cheers Günther 


I'm currently trying my hand at the fastener for the mast attachment. Once again it's all tiny work.
I have taken a photo of a pillar for the seat boards in the dinghy. Here you can see how small it is.
I also wanted to show you a photo of what the dinghy looks like. But it's not finished yet...
Cheers Günther
- Joined
- Dec 5, 2022
- Messages
- 1,137
- Points
- 443
Hi guys,
I was on holiday with my family for 10 days on the beautiful island of Mallorca near Spain. Now I'm back here again. I couldn't do much to my little dinghy. Here are a few photos of how tiny it is....
Best regards
Günther
There is still some work to do. I hope to finish it this week and then I can show you this little dinghy in its full splendor. Let me surprise you...
Best regards
Günther
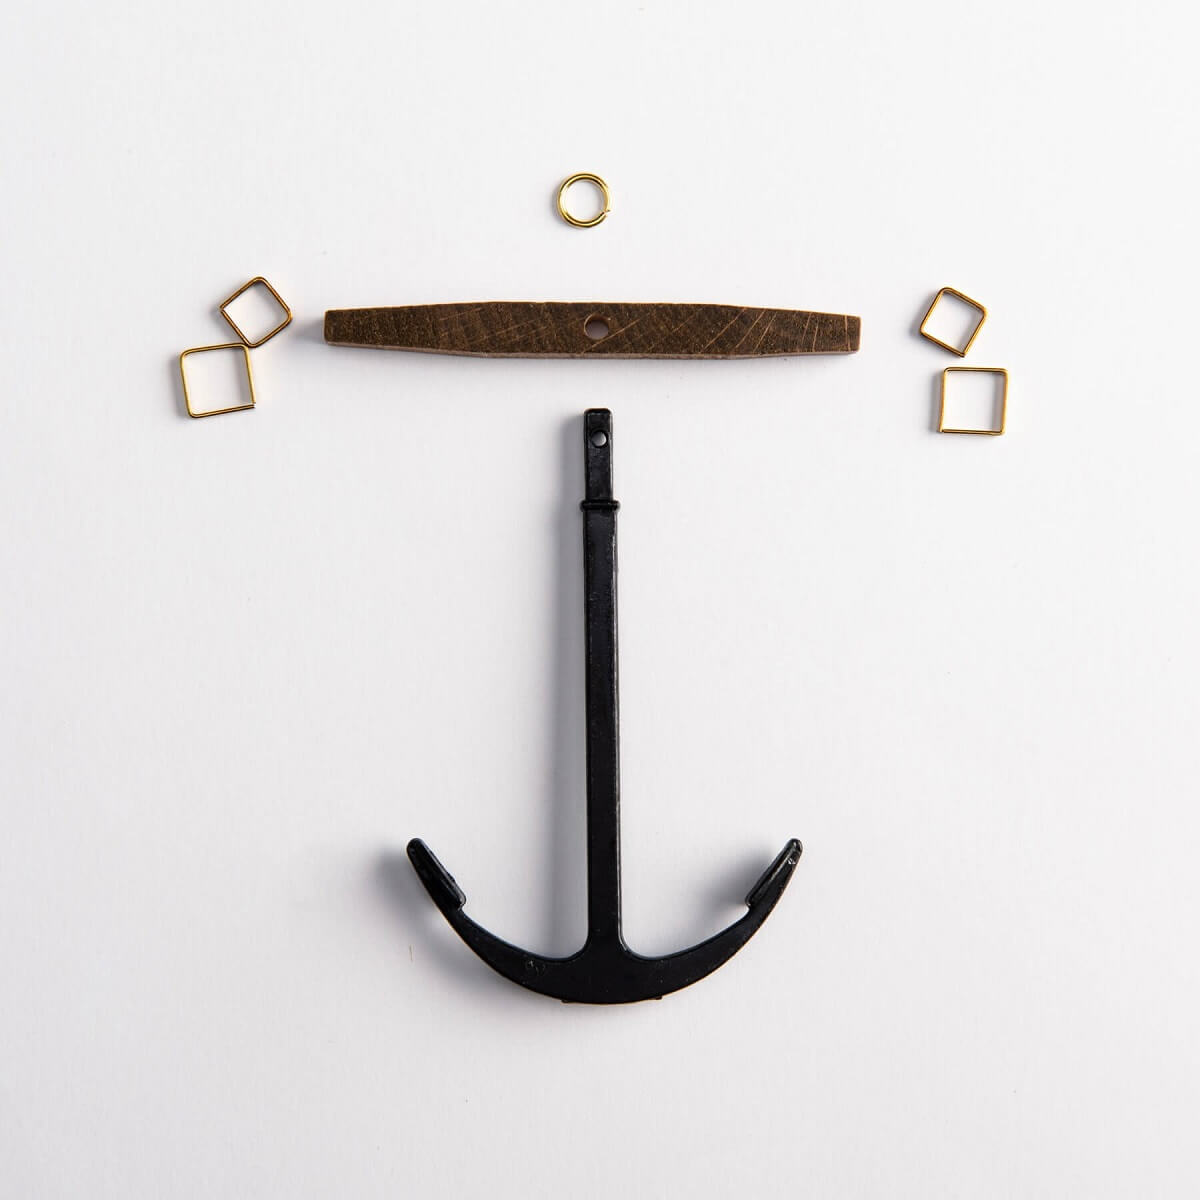
Here are a few burnished mini parts like eyelets and cleats for my dinghy.


I was on holiday with my family for 10 days on the beautiful island of Mallorca near Spain. Now I'm back here again. I couldn't do much to my little dinghy. Here are a few photos of how tiny it is....
Best regards
Günther
There is still some work to do. I hope to finish it this week and then I can show you this little dinghy in its full splendor. Let me surprise you...
Best regards
Günther
Here are a few burnished mini parts like eyelets and cleats for my dinghy.
") The dinghy will go on this little stand until the Athena is ready.
The dinghy will go on this little stand until the Athena is ready.Good job. One piece of advice for the future. Take all the wood you will use and cover it with different types of oil (if you will apply it) and let it lie where the model will stand in the future during the entire construction period. This is necessary in order to see how much and how the color will change. Because the result immediately and after a couple of months varies greatly and, for example, light wood species can turn very yellow from some types of oils, and the samples will show you this so that there are no surprises on the model later.
- Joined
- Dec 5, 2022
- Messages
- 1,137
- Points
- 443
Good job. One piece of advice for the future. Take all the wood you will use and cover it with different types of oil (if you will apply it) and let it lie where the model will stand in the future during the entire construction period. This is necessary in order to see how much and how the color will change. Because the result immediately and after a couple of months varies greatly and, for example, light wood species can turn very yellow from some types of oils, and the samples will show you this so that there are no surprises on the model later.
Hey Sergey,
Thank you very much for the tip and the kind comment. The dinghy isn't finished yet. But I have managed to add some details.
These include:
-4 cleats
-Three eyelets for attaching the ropes and the bowsprit
-Attaching the eyelet for the bowsprit
-Brass fastening (burnished) for the mast bracket.
-Attachment of all dowels for the rudder straps
-Cutting the mast base and painting it red
-Now I still have to do the embellishments, i.e. paint and attach my decorations to the dinghy.
Outstanding work:
- paint
- Attach the moulding
- Fitting the rudder
- Fitting the tiller
- Varnish rudder strap
- attach homemade sail.
I will try to upgrade it, but I can't promise that ...
Otherwise, I think everything will be stowed directly on the dinghy: sail, mast, bowsprit, oars, anchor, etc.
I hope you enjoy dropping by here. If I'm doing something wrong or it's incomprehensible, please leave a comment so I can change it.
Best regards
Günther
P.S. Photos to follow...This increases the excitement....