- Joined
- Sep 3, 2021
- Messages
- 5,190
- Points
- 738

That's terrifying!when they said "prepare for the worst"
 |
As a way to introduce our brass coins to the community, we will raffle off a free coin during the month of August. Follow link ABOVE for instructions for entering. |
 |
 |
The beloved Ships in Scale Magazine is back and charting a new course for 2026! Discover new skills, new techniques, and new inspirations in every issue. NOTE THAT OUR FIRST ISSUE WILL BE JAN/FEB 2026 |
 |

That's terrifying!when they said "prepare for the worst"
Good afternoon Peter. Always good to hear from you and have a look at your cross section. I am so sorry to hear about your wife Peter. Tough times my friend and I wish her all the best and may her recovery be swift. As we say in SA - “wees sterk en vol moed ” Peter. Cheers GrantMy friends,
First of all, my apologies for losing the contacts on this forum, but my admiral was on the mend since her hospitalisation, and slowly, she lost her strength, and i got to do more in the house, at first i have been following some of your building logs, but a while ago everything came to an abrupt halt, because i was to busy in the house.
A couple of weeks ago my admiral got hospitalised again, and after some verry critical days in hospital , she is back home, but but here strength has faded away, so all builkding activities are still on halt, and waiting for better days.
I did manage to do something on the cross-section in the last months, and so i can give you a small update.
First of all, i made a pump, to give you an idea about the sizes, i made a picture beside a ruler, from the handle, and the pumphood.
View attachment 515857
Very tiny, and fragile, i had 3 pumphoods in the kit, and i managed to break them all.
So i had to make one myself from some pearwood, and after mounting the pump together, it loos like this.
View attachment 515859
After this pump, i made the small knight, this was reasonablesimple, and it looks like this
View attachment 515861
And after this, the large knight had to be built, here it is.
View attachment 515860
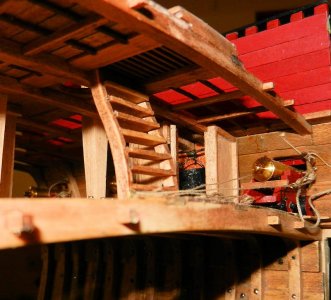
Dry-fitted on the crossection, it looks quite reasonable to me.
View attachment 515858
It looks rather dusty, and the eyebolts that you can see, are removed again, no way that i can attach a block for the canons to the eyebolts when they are already on the ship.
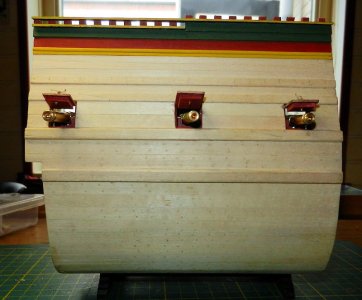
Then i went a few steps ahead of the building instructions, because i wanted to make working hinges for the porthatches, and this is what i could produce.
My nails where very out of proportion, so i glued the nails in the hatch, cut them off, and filed them smooth with the hinges.
Partly ready, it came to a sudden and complete stop overhere.
I have no idea when i can place the next update, or when i can follow your logs again, but one day, i will be back.
Greetings,
Peter
View attachment 515862
Thank you Rob, we are going full speed for the Health and Happines for a long time to come, we are doing the best we can, to achiev that.Wishing your Admiral a healthy recovery, these times put life in perspective for us all. Wishing you all the best and some rest for your modelling, health and happiness to both of you for a long time to come.
Yes, you can say that again, we all know that our time will com one day, but it was not the meaning to do that so soon.That's terrifying!
Thanks Grant, for the wishes, en we will be "wees sterk, en vol goede moed " (be strong, and full of courage )Good afternoon Peter. Always good to hear from you and have a look at your cross section. I am so sorry to hear about your wife Peter. Tough times my friend and I wish her all the best and may her recovery be swift. As we say in SA - “wees sterk en vol moed ” Peter. Cheers Grant
Good to see you back on the shipyard and it's going better with your Admiral, Peter. It's looks very nice.Good afternoon friends,
My admiral is up and about again, and she is doing some smal jobs in the house as well, so i found a couple of hours to spend on the crossection.
She asked me to stop messing around, and to finish it, so the rest of the crossection will be build according to the building instructions.
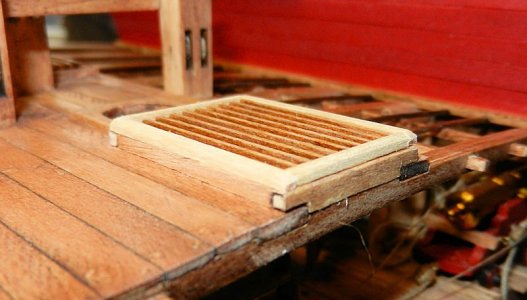
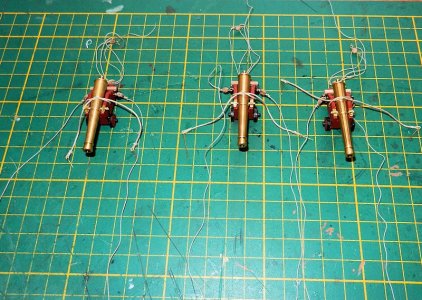
I finished the gunportlids, and after that, my attention went to the canons, on a special request of my admiral there wil be no more blackening of the brass, so the guns have to age on the model.
The building instruction is saying place the canons on the deck, and attach the ropes to them, but i could not achief that, so i took them of again, i took away the already placed eyebolts, and i did it all out of the crossection and on my bench, here is a picture of them.
View attachment 527861
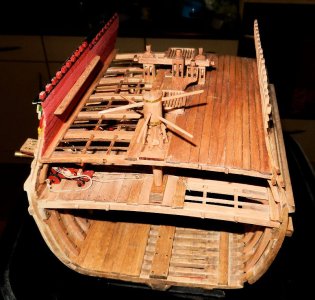
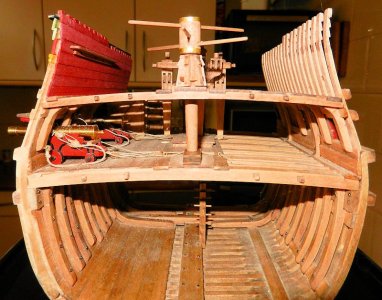
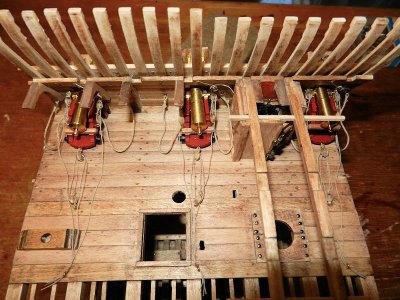
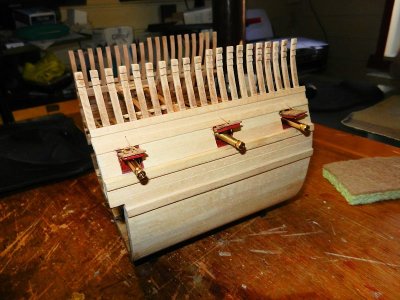
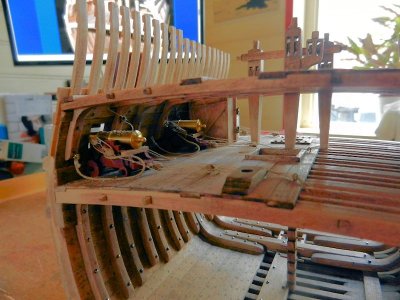
After this i placed them on the deck,
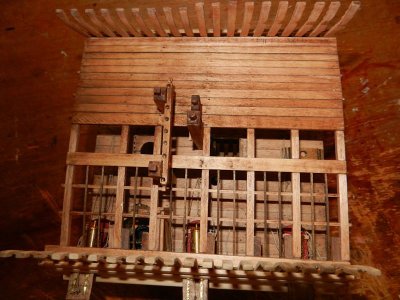
View attachment 527862
View attachment 527863
On the last picture you can also see the finished portlids
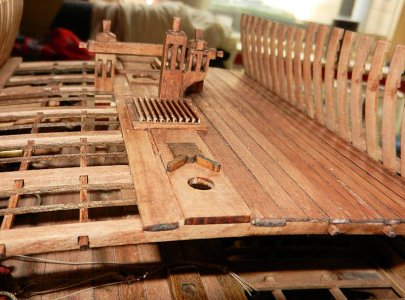
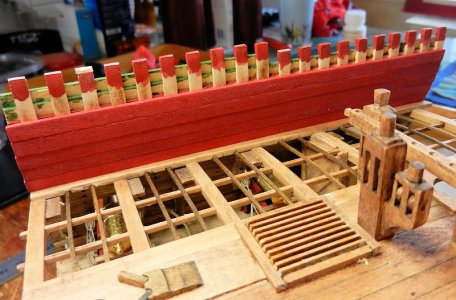
Now it was the time to place the dekbeams, the knights, after which the carlings, and the ledges came on the crossection.
( Off course i forgot to take a picture of this ), and when this was done, i planked the deck of the unplanked side of the model.
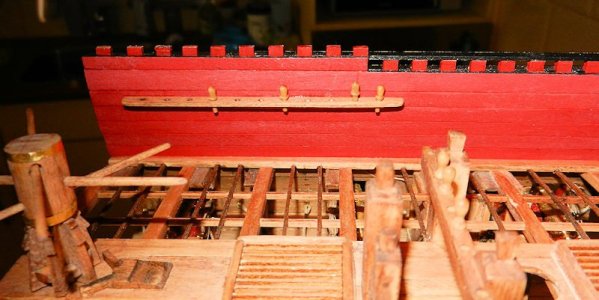
The deck got tree nailed, and i wanted to do this a bit more subtle as the lower parts of the ship, so i tried to make a tip of 0,6 millimeter on my treenails.
My drawplate did not work with that kind of tips, so i took a sheet of brass, drilled a hole of 0,6 millimeter, and i made my treenails that way, and it worked excellent after staining, it looks great to me.
See for yourself here is the picture
View attachment 527864
The drawplate ended in the scrap- iron, i don't want to see that thing again.
To end this update, a picture, just because it is fun to do.
View attachment 527865
I hope to see you soon again,
Greetings Peter

Thank you for the compliment Paul, and you are right about the trunnels, o.6 millimeters are first reasonable difficult to make , and to get them in a hole which is a bit smaller, that is when the fun begins, because 0,6 millimeter of wood can't stand a lot of pressure before it breaksVery nice, Peter! I have also learned that it is best to rig guns off the ship model. And I think your trunnels turned out perfect: 0.6 mm is not so easy to achieve but your self-made draw plate did the trick.
Thank you Peter, the most important thing is the admiral, and that is great news. I am glad you like the modelGood to see you back on the shipyard and it's going better with your Admiral, Peter. It's looks very nice.
Regards, Peter
Ah yes Herman, those see through pictures are always great to see.Hi Peter. Good to hear your admiral is doing better again.
You have made great progress with your build. I especially like the last see through picture. Zooming in on the deck with the canons really brings it to life.
Dear Peter
Good to hear your admiral is doing better again, and Good to see you back on the shipyard, it's looks beautiful
Hi Peter
Great to hear your Admiral is bk on deck again, and your now bk in the Dockyard. Your build is looking brilliant, just wondering if you are going to make anymore enhancements, maybe added deck details etc..
Apologies if your not, it's probably just me jumping the gun when I get to the insides of the Hull or on deck my imagination just runs away with itself regards to adding more detail.
All the best
Rob.
This is wonderful news Peter. Nice work rigging those cannons, it is a fiddly job. Cheers GrantMy admiral is up and about again, and she is doing some smal jobs in the house as well
Yes Grant, wonderful news, and the cannons were a pain in the *ss.This is wonderful news Peter. Nice work rigging those cannons, it is a fiddly job. Cheers Grant
