Cross-section of a 17th-century Pinas by Peter

Joined
Oct 3, 2017
Messages
627
Points
353

Location
The Netherlands
This cross-section is the latest kit in the Kolderstok series, and it was developed and build by Matthias Noback.

It contains a very good building instruction , and there is no plywood used at all, it is build of Basswood except for the masts.

The kit is developed according to the book written in 1671, of Nicolaes Witsen, "Aeloude en Hedendaagse Scheepsbouw en Bestier " ( ancient and current shipbuildig and -management ), which describes the construction of a Pinas, a relatively heavaly armed square-rigged merchantman, also called a "mirror ship "
Witsen's book was the first book published in the then Republic of the United Netherlands on shipbuilding in the 17th century and the centuries before
The book did not have technical constructiondrawings and in-depth calculations,but it did contain an overvieuw of all parts, designations and dimensions and derived dimensions from keel to mast, with guidlines for construction.
In the mid-1990s, Ab Hoving, the then curator of the Rijksmuseum,produced a revised and more readeble version of the rather impenetrable original, " Nicolaes Witsens Scheeps-bouw-konst Open Gestelt " ( Nicolaes Witsen's art of shipbuilding explained ) 1994.
Both books were used as source for the design of this model, a cross-section of a 17th century Pinas with a length of 138 Amsterdam feet ( 39 meter ) and a width of 29 feet (over 8 meters).
Of the original 24 guns present, 3 are shown.
This cross-section highlights the part of the ship around the mainmast, including spindle, knights, pumpgalley and cannons, is open on one side and has skin planking on the other
This part has been taken from the introduction of the building instructions, which is also the work of Matthias Noback.
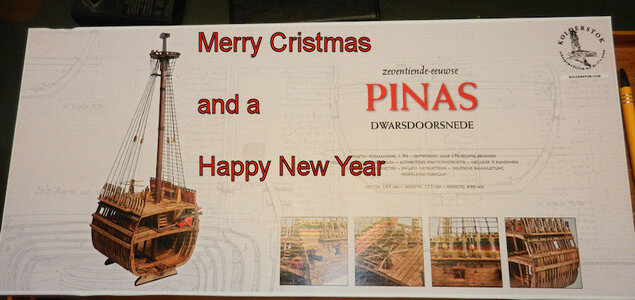
SOS.jpg.JPG
 
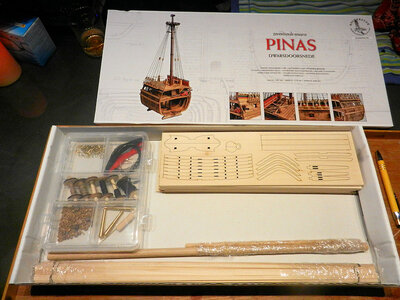
The unboxing of the kit.

DSCN5345.JPG


DSCN5347.jpg.JPG

DSCN5348.jpg.JPG

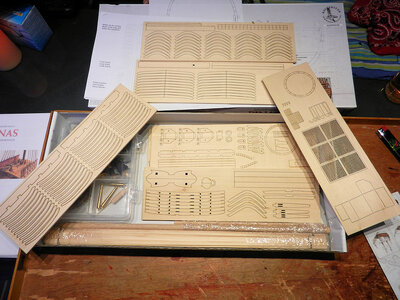
The kit contains a box with small material, such as the canons, the rope (of excellent quality , a present for the buyers of one of the first 20 kits), and the blocks of the authentic sort.
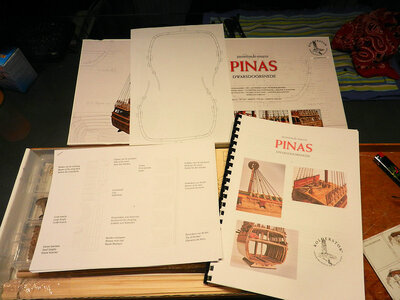
A building instruction with pictures and discriptions on what to do next, in English German, and Dutch.
A drawing of the frame, and a drawing of the parts lasered in the basswood.
It is all looking great .

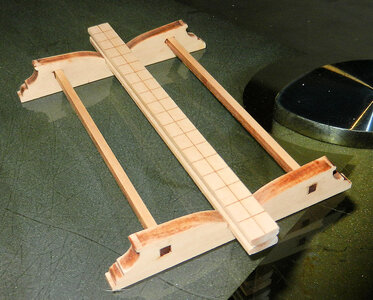
I made a start in the last couple of day's and the stand has been put together.

DSCN5352.jpg.JPG

It has not been cleaned very torough, because there are some anti-slip parts for the bottom, and some felt for the top of the stand.
As you can see the keel got laid as well, including a groove for the Garboard strake.
After this i made the first part of the front and rear frame of this section.
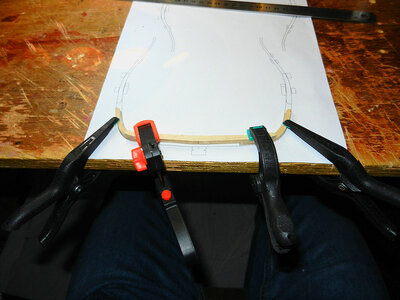
It was the meaning in the instruction that you would lay the drawing of the frame on the table, and on that drawing you lay the floortimber and and two futtocks, anf glue them together, and so i did.
After that is took the measures of the drawing, and of my result, and they did not match eachother, so there was the first re-do.After this attempt is clampt the futtocks in the correct position, and i glued the floortimber to it

DSCN5349.jpg.JPG

And that is the way i got it on the correct size.
That is it for now, next step is to glue the partial frames to the keel, and build further by placing the remaining floortimbers,
but that is for the next update.
 
The unboxing of the kit.

View attachment 415927


View attachment 415928

View attachment 415929

The kit contains a box with small material, such as the canons, the rope (of excellent quality , a present for the buyers of one of the first 20 kits), and the blocks of the authentic sort.
A building instruction with pictures and discriptions on what to do next, in English German, and Dutch.
A drawing of the frame, and a drawing of the parts lasered in the basswood.
It is all looking great .

I made a start in the last couple of day's and the stand has been put together.

View attachment 415941

It has not been cleaned very torough, because there are some anti-slip parts for the bottom, and some felt for the top of the stand.
As you can see the keel got laid as well, including a groove for the Garboard strake.
After this i made the first part of the front and rear frame of this section.
It was the meaning in the instruction that you would lay the drawing of the frame on the table, and on that drawing you lay the floortimber and and two futtocks, anf glue them together, and so i did.
After that is took the measures of the drawing, and of my result, and they did not match eachother, so there was the first re-do.After this attempt is clampt the futtocks in the correct position, and i glued the floortimber to it

View attachment 415951

And that is the way i got it on the correct size.
That is it for now, next step is to glue the partial frames to the keel, and build further by placing the remaining floortimbers,
but that is for the next update.
Nice to see the start of this build, Peter.
Looks promising.
Regards, Peter
 
I am looking forward to follow your log on this section model - very interesting (as mentioned in another topic)
 
I am a bit late with this, but i wish everybody a Happy and Healthy New Year

As for the build, i had all the floortimbers placed on the keel, and here is a picture from the beginning,

DSCN5354.JPG

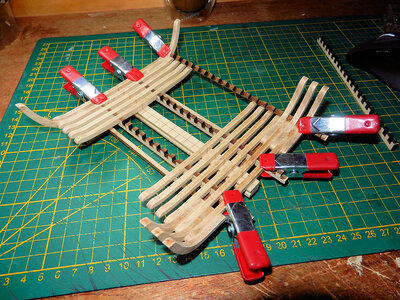
and after all floortimbers were there, i placed the futtocks and i thought i was doing good, but when al were placed, i looked at it, i turned it over, and it looked sloppy, very sloppy.
My keel with floortimbers and futtocks were wobbling al over the place. there was a difference of about 4 millimeters between the corners of the futtocks
I forgot to take a picture, but a rescue attempt is shown here.

DSCN5357.jpg.JPG

but unfortunatly it was not good.
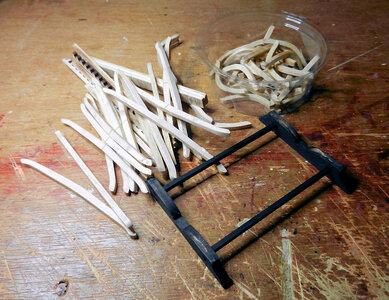
So i took a glas of water and a brush, and this was the result:

DSCN5359.jpg.JPG

All bits and pieces

I have to start al over again, and with much more care this time.
And so i started from the beginning,

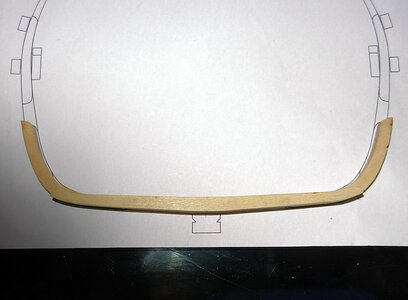
DSCN5366.jpg.JPG

The first frame put together again.
and before the next step, RTFM it was my own fault i did not follow the building instructions ( stupid )


Next time i hope to show you good progress
 
Peter,

Great start - this kit looks to be of very accurate and high quality kit. Will also follow along.
Hmmmm - sure wish that I had known about this one before completing my other, first and last, cross-section from OCcre.

Regards,
 
Peter,

Great start - this kit looks to be of very accurate and high quality kit. Will also follow along.
Hmmmm - sure wish that I had known about this one before completing my other, first and last, cross-section from OCcre.

Regards,
Welkom John, wel if there is one crosssection there can also sit a second one next to it :)
But it is a great kit there you are right.
 
I am a bit late with this, but i wish everybody a Happy and Healthy New Year

As for the build, i had all the floortimbers placed on the keel, and here is a picture from the beginning,

View attachment 419990

and after all floortimbers were there, i placed the futtocks and i thought i was doing good, but when al were placed, i looked at it, i turned it over, and it looked sloppy, very sloppy.
My keel with floortimbers and futtocks were wobbling al over the place. there was a difference of about 4 millimeters between the corners of the futtocks
I forgot to take a picture, but a rescue attempt is shown here.

View attachment 419991

but unfortunatly it was not good.
So i took a glas of water and a brush, and this was the result:

View attachment 419992

All bits and pieces

I have to start al over again, and with much more care this time.
And so i started from the beginning,

View attachment 419993

The first frame put together again.
and before the next step, RTFM it was my own fault i did not follow the building instructions ( stupid )


Next time i hope to show you good progress
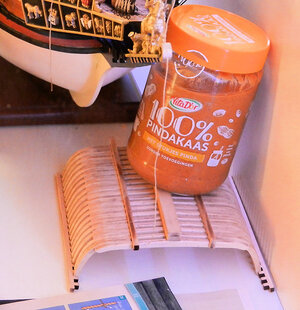
It’s looking good, Peter. And ‘pindakaas’ is almost good for a lot of things.
Unfortunately not in this case.
The re-do looks promising.
Regards, Peter
 
It’s looking good, Peter. And ‘pindakaas’ is almost good for a lot of things.
Unfortunately not in this case.
The re-do looks promising.
Regards, Peter
Hello Peter, yes Peanutbutter is good for many things, especcially to put it on your slice of bread, and in other eatable produkts,
Unfortunatly, not for this, i have to learn to use the building instructions before i do anything.
This was just my own stupidity, de instruction say first a bit of planking, and i did not do thatSickSickSick
 
Back
Top