Cross-section of a 17th-century Pinas by Peter

Good morning Peter. Stunning work. I agree that drawing wood through a draw plate is the way to go with treenails. I wish I had done this. Cheers Grant

Thanx for the compliment Grant, and who knows, in a next build you can always try it, i have to say, it is a lot of work, but the looks is fantastic
 
it has been almost 3 weeks since the last update, so it is about time to show something.

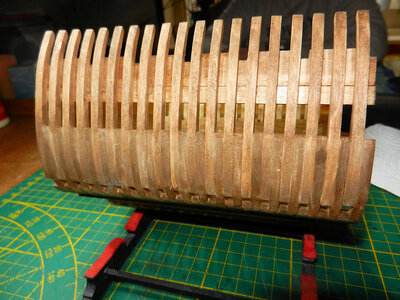
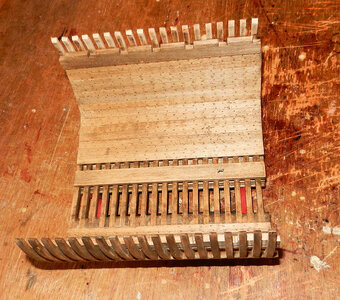
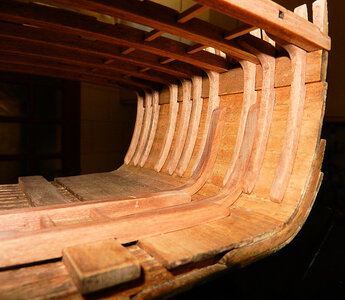
I stained the crossection first, and this was the result

DSCN5455.jpg.JPGDSCN5456.jpg.JPG

I think that the sight of the treenails is quite good, and i like it.
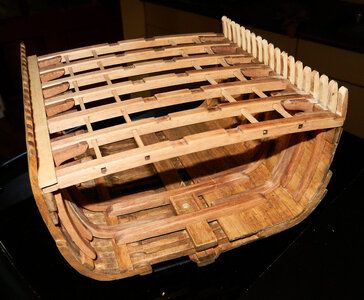
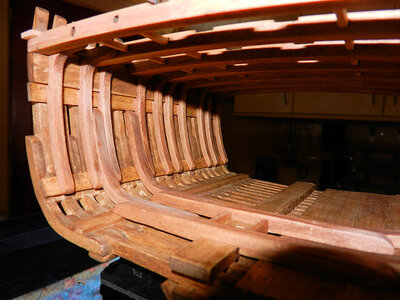
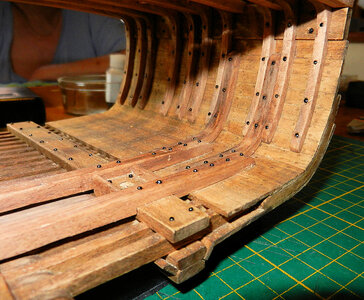
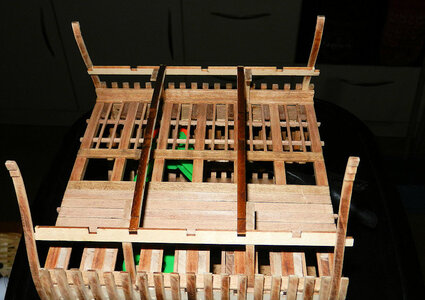
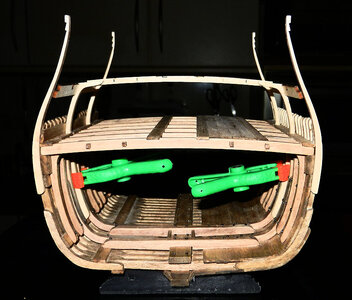
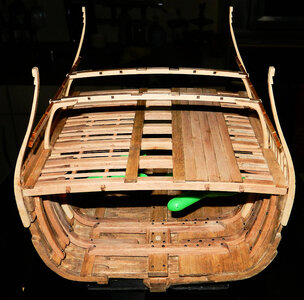
After this, it was time to place the Maststep, the Beams and the Knees, i also placed the Carlings.
Except for the knees and the Maststep, everything is dry-fit, because i also want to place some iron bolts in the knees, the maststep, and the Keelson.
I don't know how i will do this, but i'll try something out on some spare wood, in the next updat i hope to show you some of it.

DSCN5489.jpg.jpg.JPG

DSCN5492.jpg.JPG

DSCN5493.jpg.JPG

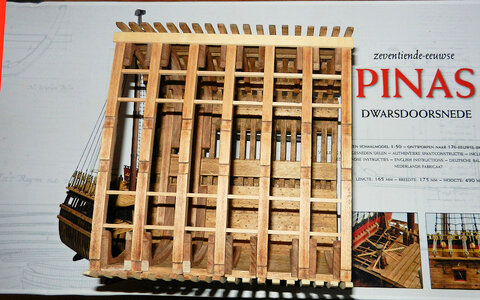
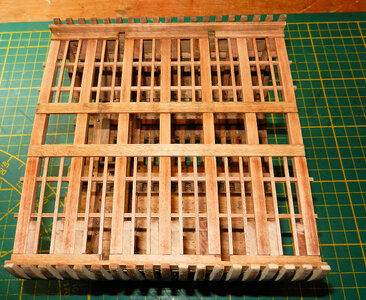
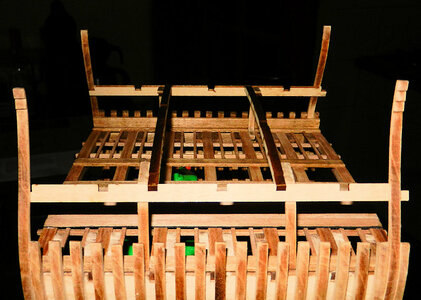
And last, an overvieuw of the Deckbeams and the Carlings

DSCN5495.JPG

I'll see you all next time.
 
it has been almost 3 weeks since the last update, so it is about time to show something.

I stained the crossection first, and this was the result

View attachment 443328View attachment 443329

I think that the sight of the treenails is quite good, and i like it.
After this, it was time to place the Maststep, the Beams and the Knees, i also placed the Carlings.
Except for the knees and the Maststep, everything is dry-fit, because i also want to place some iron bolts in the knees, the maststep, and the Keelson.
I don't know how i will do this, but i'll try something out on some spare wood, in the next updat i hope to show you some of it.

View attachment 443330

View attachment 443331

View attachment 443332

And last, an overvieuw of the Deckbeams and the Carlings

View attachment 443333

I'll see you all next time.
The staining and the outcome of the treenailing looks very nice, Peter.
The deck breams gives her body.
Regards, Peter
 
it has been almost 3 weeks since the last update, so it is about time to show something.

I stained the crossection first, and this was the result

View attachment 443328View attachment 443329

I think that the sight of the treenails is quite good, and i like it.
After this, it was time to place the Maststep, the Beams and the Knees, i also placed the Carlings.
Except for the knees and the Maststep, everything is dry-fit, because i also want to place some iron bolts in the knees, the maststep, and the Keelson.
I don't know how i will do this, but i'll try something out on some spare wood, in the next updat i hope to show you some of it.

View attachment 443330

View attachment 443331

View attachment 443332

And last, an overvieuw of the Deckbeams and the Carlings

View attachment 443333

I'll see you all next time.
Good afternoon Peter. Looking good!!! I also like the way your treenails have come out with the stain. The beams etc all fit really and ready to go. Cheers Grant
 
Good afternoon Peter. Looking good!!! I also like the way your treenails have come out with the stain. The beams etc all fit really and ready to go. Cheers Grant
You completely nailed it Grant, i love the outcome of the treenails as well, and the fitting of the deckbeams and the knees etc, is spoton, just a bit of filddling with some sandpaper, and it is looking good.
 
It is time for an update of the crossection of the Pinas, I first put some bolts in the heavyer parts of the construction, such as the Keelson, Deckbeamshelfs, the Knees, and the Maststep.
At first i have been trying to copy the handforged bolts with the square head, but i could not get them right, there was to much difference in the size of the boltheads. It now looks like this.

DSCN5535.JPG

Then i went on to the deck, the Nibbingstrakes where placed and after that the spirkettings ( one of the Spirkettings was taken away again, because it was not placed correctly ), the Binding Strakes came also in place
The Ledges have been made,

DSCN5527.JPG

and after the placement of the Ledges, the crossection looked like this.
I am quite satisfied in the way it is looking

DSCN5532.JPG

Now was the time to place the first Deck Shelves, and i am sorry to say, i was a bit to fast with the stain, because the treenailing has to be done as well, of course. But there is a solution for everything, so that wil be done a bit later as planned.
And then the time came for the Top Timbers, first i did the Top Timbers at the front of the model, and when the glue had dried the Timbers of the rearend where placed
After this was done, it was time to check if everything could pass the quality control, and unfortunatly this was not the case.
The Top Timbers at the rear stood perfectly upright, but the Timbers at the front stood lousy, the model became to wide for the Deck Beam Shelves of the main deck, so they where removed, for a re-do,
After this correction the model looked like this:

DSCN5555.JPG

As you can see, i could not resist the temporarely placement of the Trusses, and the Deck Beam Shelves of the maindeck, together with a couple of deckbeams, so i could see if i am still on the right track, and it looks like i am.
I am very happy with it. I think it is looking great like this.
A few more pictures of how it is looking at this moment.

DSCN5557.JPG

DSCN5558.JPG

DSCN5559.JPG

That is all for now, see you next time.
 
It is time for an update of the crossection of the Pinas, I first put some bolts in the heavyer parts of the construction, such as the Keelson, Deckbeamshelfs, the Knees, and the Maststep.
At first i have been trying to copy the handforged bolts with the square head, but i could not get them right, there was to much difference in the size of the boltheads. It now looks like this.

View attachment 448600

Then i went on to the deck, the Nibbingstrakes where placed and after that the spirkettings ( one of the Spirkettings was taken away again, because it was not placed correctly ), the Binding Strakes came also in place
The Ledges have been made,

View attachment 448607

and after the placement of the Ledges, the crossection looked like this.
I am quite satisfied in the way it is looking

View attachment 448608

Now was the time to place the first Deck Shelves, and i am sorry to say, i was a bit to fast with the stain, because the treenailing has to be done as well, of course. But there is a solution for everything, so that wil be done a bit later as planned.
And then the time came for the Top Timbers, first i did the Top Timbers at the front of the model, and when the glue had dried the Timbers of the rearend where placed
After this was done, it was time to check if everything could pass the quality control, and unfortunatly this was not the case.
The Top Timbers at the rear stood perfectly upright, but the Timbers at the front stood lousy, the model became to wide for the Deck Beam Shelves of the main deck, so they where removed, for a re-do,
After this correction the model looked like this:

View attachment 448616

As you can see, i could not resist the temporarely placement of the Trusses, and the Deck Beam Shelves of the maindeck, together with a couple of deckbeams, so i could see if i am still on the right track, and it looks like i am.
I am very happy with it. I think it is looking great like this.
A few more pictures of how it is looking at this moment.

View attachment 448617

View attachment 448618

View attachment 448619

That is all for now, see you next time.
Nice progress and nice pictures, Peter.
Regards, Peter
 
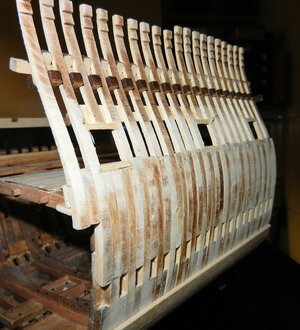
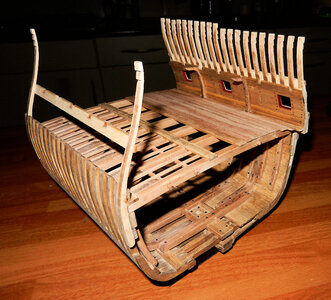
Goodday everybody, i am a bit ashamed that it took 5 weeks before the next update, but now is the time.
I placed the deckbeam shelves for the maindeck, and after this i have placed the Top Timbers, they gave quite some problems, but in the end, they are standing reasonable straight up.
A number of them are so thight between the Futtocks, that there was no time to correct anything, so there are now some slight errors in height of the Top Timbers.
This will be corrected in due time, by means of a sandpaper
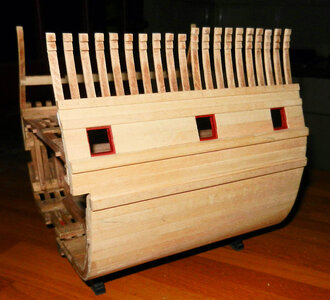
After pacement of the Top Timbers, i started the Gunports, the first 3 have been made, and there i made a mistake i am afraid.
I accidently placed the Port-Sills upside down.
After the placement of the outside hull, and the planking of the inside of the hull you cannot see the mistake, so i will leave it like this.
To place also the breeching line of the first canon, i placed an more Top Timber, and the deck shelves will be jumping in small steps to the new side, which will be shown in one of the next pictures.

DSCN5574.jpg.JPG

The gunports where painted red, and the hull planking has been placed.
Because i cannot make any new wales for the crossection, i took the plate where the wales where coming from, and i took a little piece of it to extend the wales, and it looks like this.

DSCN5593.jpg.JPG

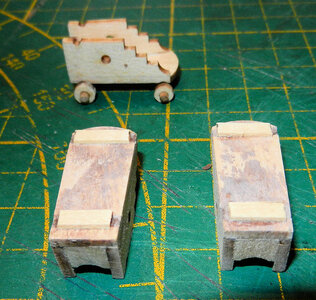
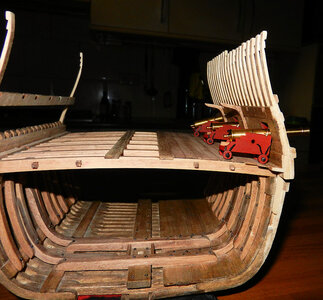
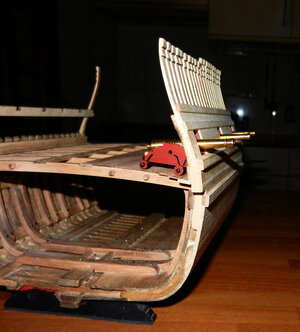
After this, i was very curious how the canons would be positioned in the gun ports, so i made the gun carriages, and i placed them temporarily, and i did not like it.
So i took the wheel axles off, and i first placed some peaces of wood of 1,5 millimeters thick, so the guns would come a bit higher

DSCN5578.jpg.JPG

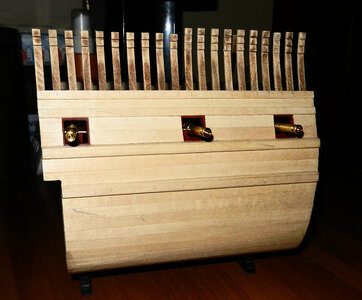
And now, the canons loook like this.

DSCN5603.jpg.JPG

And this is a lot better.
After this side step, i planked the inside of the hull, i placed the Trusses, and the deck shelves got put in.DSCN5594.jpg.JPG

The treenails became a bit to prominently to my likings, but theu are there, and i can't change them anymore, so they are there to stay.
A few more pictures,

DSCN5601.jpg.JPG

DSCN5602.jpg.JPG


That is it for now, see you next time
 
Last edited:
Very nice Peter! Lots of progress to see here!

Have you considered replacing the front wheels of the carriages with larger ones? I believe that was typical to compensate for deck camber and that would place the barrels in the correct position relative to the gun ports - or maybe I don't understand the issue (?).

Again, lovely work!
Paul, you are absolutely right about the larger wheels, and i did not think one moment about that part of the carriage.
I believe that a re-build is in order.
And thanks for the compliment, and your remark about the wheels. :) :)
 
Goodday everybody, i am a bit ashamed that it took 5 weeks before the next update, but now is the time.
I placed the deckbeam shelves for the maindeck, and after this i have placed the Top Timbers, they gave quite some problems, but in the end, they are standing reasonable straight up.
A number of them are so thight between the Futtocks, that there was no time to correct anything, so there are now some slight errors in height of the Top Timbers.
This will be corrected in due time, by means of a sandpaper
After pacement of the Top Timbers, i started the Gunports, the first 3 have been made, and there i made a mistake i am afraid.
I accidently placed the Port-Sills upside down.
After the placement of the outside hull, and the planking of the inside of the hull you cannot see the mistake, so i will leave it like this.
To place also the breeching line of the first canon, i placed an more Top Timber, and the deck shelves will be jumping in small steps to the new side, which will be shown in one of the next pictures.

View attachment 457262

The gunports where painted red, and the hull planking has been placed.
Because i cannot make any new wales for the crossection, i took the plate where the wales where coming from, and i took a little piece of it to extend the wales, and it looks like this.

View attachment 457264

After this, i was very curious how the canons would be positioned in the gun ports, so i made the gun carriages, and i placed them temporarily, and i did not like it.
So i took the wheel axles off, and i first placed some peaces of wood of 1,5 millimeters thick, so the guns would come a bit higher

View attachment 457263

And now, the canons loook like this.

View attachment 457268

And this is a lot better.
After this side step, i planked the inside of the hull, i placed the Trusses, and the deck shelves got put in.View attachment 457265

The treenails became a bit to prominently to my likings, but theu are there, and i can't change them anymore, so they are there to stay.
A few more pictures,

View attachment 457266

View attachment 457267


That is it for now, see you next time
Good morning Peter. Stunning work. Man I had to look really hard to see tiny errors in the Top timbers. I agree with Paul re the cannon height and his solution. Will make a big difference to the appearance. I love the red colour of your cannons. Cheers Grant
 
Goodday everybody, i am a bit ashamed that it took 5 weeks before the next update, but now is the time.
I placed the deckbeam shelves for the maindeck, and after this i have placed the Top Timbers, they gave quite some problems, but in the end, they are standing reasonable straight up.
A number of them are so thight between the Futtocks, that there was no time to correct anything, so there are now some slight errors in height of the Top Timbers.
This will be corrected in due time, by means of a sandpaper
After pacement of the Top Timbers, i started the Gunports, the first 3 have been made, and there i made a mistake i am afraid.
I accidently placed the Port-Sills upside down.
After the placement of the outside hull, and the planking of the inside of the hull you cannot see the mistake, so i will leave it like this.
To place also the breeching line of the first canon, i placed an more Top Timber, and the deck shelves will be jumping in small steps to the new side, which will be shown in one of the next pictures.

View attachment 457262

The gunports where painted red, and the hull planking has been placed.
Because i cannot make any new wales for the crossection, i took the plate where the wales where coming from, and i took a little piece of it to extend the wales, and it looks like this.

View attachment 457264

After this, i was very curious how the canons would be positioned in the gun ports, so i made the gun carriages, and i placed them temporarily, and i did not like it.
So i took the wheel axles off, and i first placed some peaces of wood of 1,5 millimeters thick, so the guns would come a bit higher

View attachment 457263

And now, the canons loook like this.

View attachment 457268

And this is a lot better.
After this side step, i planked the inside of the hull, i placed the Trusses, and the deck shelves got put in.View attachment 457265

The treenails became a bit to prominently to my likings, but theu are there, and i can't change them anymore, so they are there to stay.
A few more pictures,

View attachment 457266

View attachment 457267


That is it for now, see you next time
A nice progress and nice pictures, Peter. And changing the wheels is a piece of cake, just like changing the summer/winter tires of your car. ;)
Regards, Peter
 
Back
Top