• LUCZORAMA SHIPWRECK SCAVENGER HUNT GIVEAWAY. 4 Weeks of Fun • 1 Legendary Prize ((OcCre’s Fram Ship)) • Global Crew Welcome!
    **VIEW THREAD HERE**

Endurance (1912) - Occre, Scale 1:70 - My First Shipbuilding Adventure

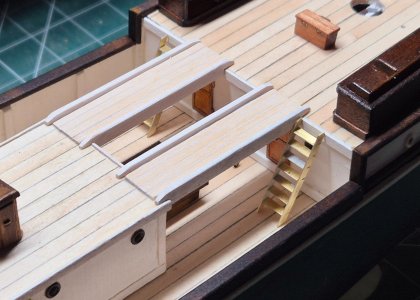
All steps completed and accounted for except the small set that one of the dogs chewed beyond repair.
I did have a word with Macklin, the crew's surgeon, and also given charge of the dogs, and he informed me that it was probably a she-dog as all the dogs were half wolf, bred specific for the expedition, and female wolves will often be found in the wild ripping fallen branches to create a "nest" during winter.
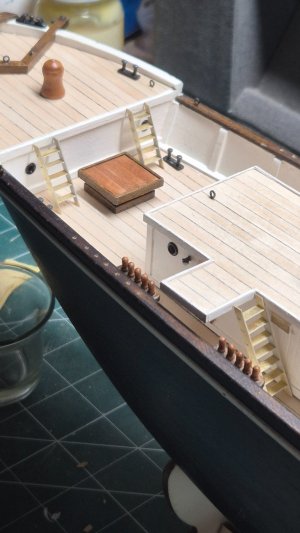
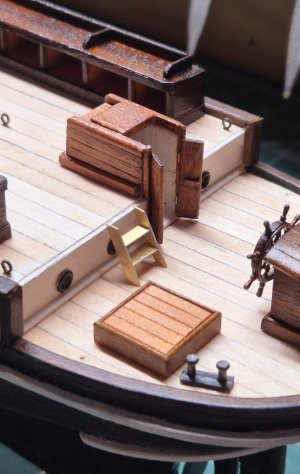
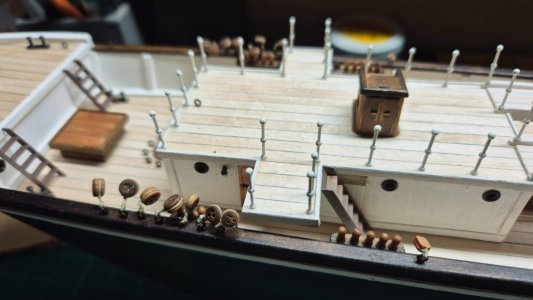
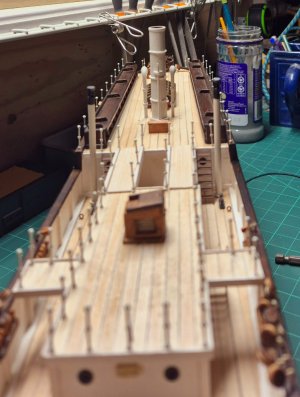
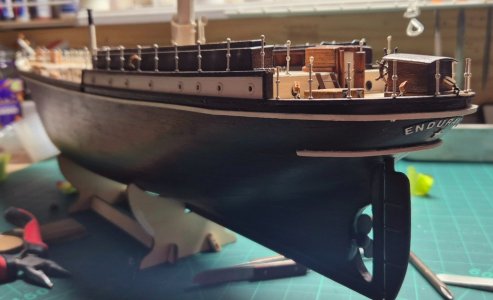
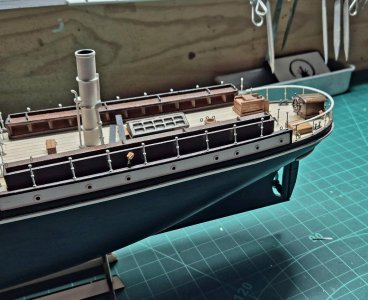
Did a trial fit this afternoon prior to painting (airbrush) and finally fixing into place.
Happy Cat.

19th Jan (6).jpg 19th Jan (3).jpg 19th Jan (5).jpg
 
Sounds right up my alley mate, definitely will have a hunt for that one Hulk Thumbsup


Found it - $750 AUD ?? ......... I might pass :p ROTF

View attachment 493169
Hmm. That must be how Bezos can own a space program. Try Biblio.com.au and Barclaybooks.com.au. Both have it listed secondhand and for a lot less than Amazon. Used Biblio recently for a reference book and they were good.
 
I've been puttin LED on everything... Last one was Queen Mary 2. Yes it is a pain in the a** to do this and the bleeding... But in my oppinion it just gives the model something more, it just looks a bit more interesting maybe? I use micro SMD led for the most part because they ar more "to scale" and easyer to put in places mostly, bum man they ar finicky to work with... Here are some photos of my models that I made with LED. My next ship probably will be with LED also:

View attachment 489596View attachment 489597View attachment 489598View attachment 489599View attachment 489600
Beautiful Phantom! My favorite plane of all time
 
Its been a while :confused:
A lot of life suddenly appeared out of nowhere and so I've been very busy negotiating that for the last 4 months, but hopefully I might be able to get a few more logs in every now and then ;)
To be honest I can't remember where I left off and what I've done since then, not in any order anyway, so I thought I'd simply post a few recent pics and go from there ROTF

23rd May (2).jpg 23rd May (3).jpg
23rd May (4).jpg23rd May (5).jpg
23rd May (6).jpg23rd May (1).jpg

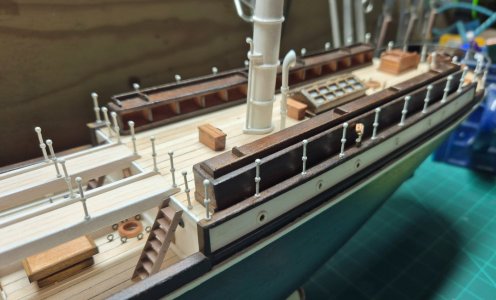
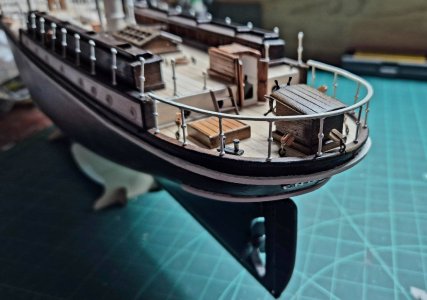
For ages I was trying to figure out how to create that solid handrail on the rear stanchions, it was my brother in the UK that came up with a very simple solution.
"Why not simply use a small piece of steel and make it look like wood"
Genius me thinks.
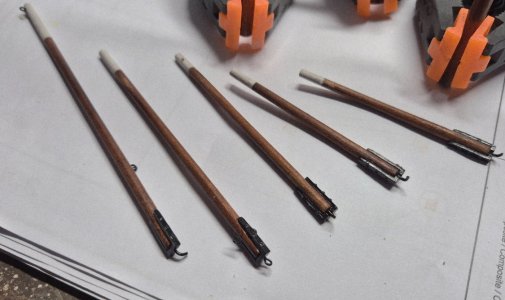
Its actually a length of 2.5mm dia fencing wire that I flattened slightly and curved to suit.
I'm going to use that same principal with 1mm nails and turn them into oars
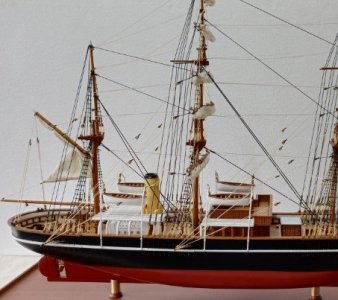
I saw a photo recently of a completed model, and they had painted the chimney and air vents a sort of mustard yellow......tempted.
 
Its been a while :confused:
A lot of life suddenly appeared out of nowhere and so I've been very busy negotiating that for the last 4 months, but hopefully I might be able to get a few more logs in every now and then ;)
To be honest I can't remember where I left off and what I've done since then, not in any order anyway, so I thought I'd simply post a few recent pics and go from there ROTF

View attachment 521363 View attachment 521364
View attachment 521365View attachment 521366
View attachment 521367View attachment 521368

For ages I was trying to figure out how to create that solid handrail on the rear stanchions, it was my brother in the UK that came up with a very simple solution.
"Why not simply use a small piece of steel and make it look like wood"
Genius me thinks.
Its actually a length of 2.5mm dia fencing wire that I flattened slightly and curved to suit.
I'm going to use that same principal with 1mm nails and turn them into oars
I saw a photo recently of a completed model, and they had painted the chimney and air vents a sort of mustard yellow......tempted.
She is looking good Cat. That housing around the steering gear has me pondering. I fitted on mine then removed it. Many photos show it is not there. Have some more pondering to do on that one.
You may be right about the yellow paint. The RRS Discovery which Robert Falcon Scott took to Antarctica is a very similar ship to Endurance and happens to have yellow funnel, vents etch. She is preserved in Dundee Scotland so has a good photographic record.
 
That housing around the steering gear has me pondering. I fitted on mine then removed it.
Thanks Hulk Thumbsup:)

I agree with the housing, I've seen many pics of the ship without it, and and would of really liked to have kept with the accuracy but quite honestly I wouldn't have a clue where or how to start with replicating.
This being my first build I figured I'd stick to the kit ;)

I've made my list of things to complete prior to tackling the masts and rigging (the very thought of which is scaring the hell out of me :oops:;))
and was wondering if you guys had any thoughts on whether I should add the ropes to the stanchions before the rigging or best leave
until afterwards for ease of access to awkward areas ?

I found a pic of The RRS Discovery, I do like the look I'll be honest.
It sort of lets you know - "Hey! Look at me! I'm a sail boat and a steamer Thumbsup:p)

Yellow funnel.jpg
 
Last edited:
Never having negotiated around blocks and "dead-eyes" and tiny ropes before, I was fearing this stage of the build where I just had to roll those glue infested sleeves up and get on with it. ;)
I'm confident others have resolved this problem in a similar fashion, but I thought I'd share anyway.
Trying to thread those ropes through a tiny hole was proving to be frustrating, I did try the CA on the end but my finger-tips can only take so much, and you never know when you're going to have to give finger prints (we all know what Interpol are like eh lads ? :pROTF)
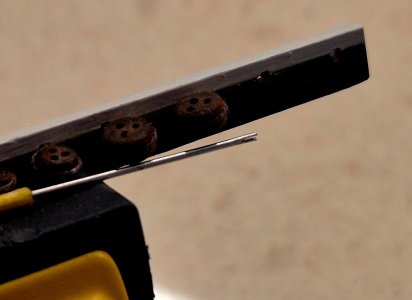
So I made a little "pusher" using a clipped eye of a sewing needle to push the rope through.
Works like a charm !
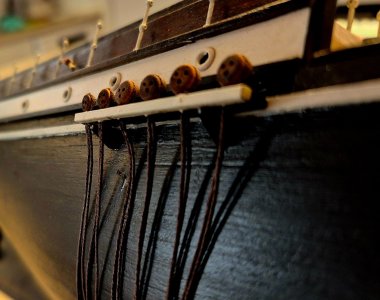
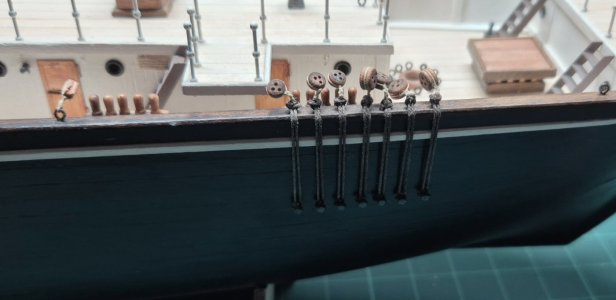
Here is my efforts (yet unfinished) at adding the dead-eyes to the hull.
Occre didn't show supports/gussets for the "planks" but I figured they give it a more hardy look (you can just make them out in this image)

5th June (3).jpg 5th June (1).jpg

Occre instructions were to add brass nails to anchor the ropes to the hull, I actually used pins from a hair brush because they have a double headed end and I felt it looked more authentic (well, I thought it did )
5th June (4).jpg 5th June (2).jpg
 
Trying to thread those ropes through a tiny hole was proving to be frustrating, I did try the CA on the end but my finger-tips can only take so much, and you never know when you're going to have to give finger prints (we all know what Interpol are like eh lads ?
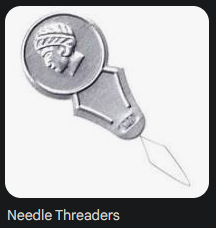
You could try one of these:

1749135165309.png

If you've been good, perhaps the admiral will loan you one. ROTF
 
You could try one of these:

View attachment 523715

If you've been good, perhaps the admiral will loan you one. ROTF
Great tip Russ ! Thumbsup :)
I've been studying the rigging tutorials.......oh my word what have I got myself into ! ROTF
I'm afraid the Admiral and I aren't on speaking terms anymore due to a misunderstanding at mid-ships, but
there's a craft shop in our little township, I'm sure they'd have one of those doo-hickies you showed Thumbsup:p
 
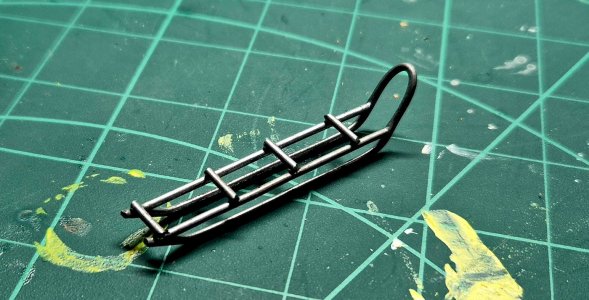
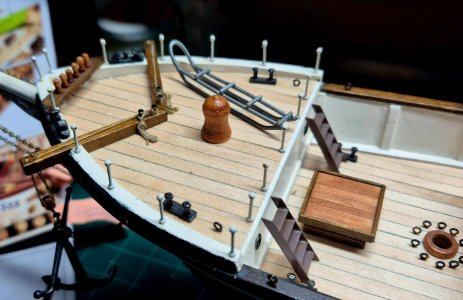
I thought I'd make a start on a simple project, so I figured the sledges sounded like a good idea.
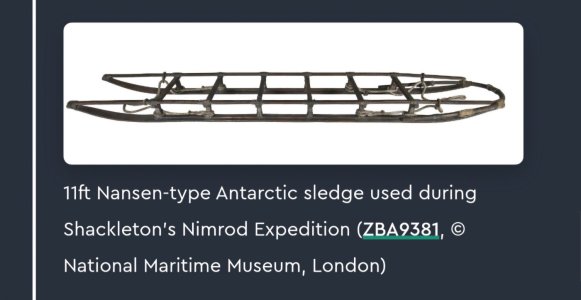
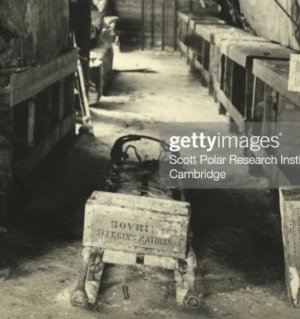
I've been thinking about these for a while, I've seen some very impressive samples and varied ideas here in SOS, so I knew I wanted to embellish the rather simple example offered by Occre but wasn't sure how, and so I decided to take a look on line at some old sledges from early 1900's.
Woah! Not what I was expecting at all ROTF

8th June.jpg 8th June (2).jpg

This is a snapshot taken from the deck of the Endurance.
8th June (3).jpg

Anyhow, I figured why not.
Here's my first attempt at a prototype, happy with it, not overly complicated, painted brown (ish) with a few boxes, tarps and ropes I
reckon I might get away with it Thumbsup:)

7th June (3).jpg 7th June (4).jpg
 
Last edited:
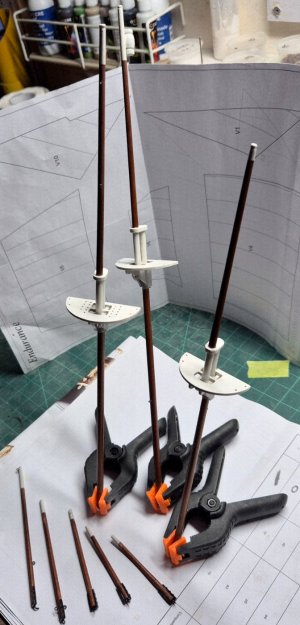
Being a first time builder, the next step always fills me with apprehension and I spend many hours "rehearsing" over and over different
strategies in my head on how I'm going to tackle it.
The masts were definitely in that category.
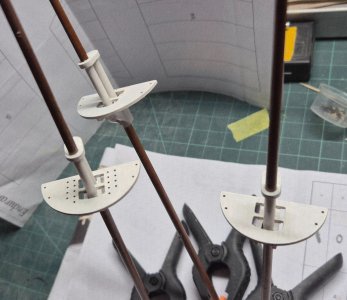
I think the biggest obstacle I feared was the shaping of the supplied dowels. - 6mm dia to 5mm, 5mm Dia to 3mm, 4mm to 2.5mm.
In the end I clamped a piece of sandpaper in a vice, put the dowels (well protected) in a hand drill, and "sandwiched" the dowel between the sandpaper in the vice and a hand held piece.
Probably way more luck than I deserve but it seemed to have worked fine Thumbsup:)
I've decided to upgrade the ropes, so I'm waiting on those to arrive to add the blocks.
Happy thus far Thumbsup:p

17th June (2).jpg 17th June (1).jpg 17th June (3).jpg
 
Being a first time builder, the next step always fills me with apprehension and I spend many hours "rehearsing" over and over different
strategies in my head on how I'm going to tackle it.
Your searches for reference materials and attention to details is fantastic! Are you SURE you are a Plebe? Your work is like that from an upper classman. :) I see you are more as the experienced guy on the right "giving" lessons, not the newbies against the wall.
1751017241157.png
 
Last edited:
I know I'm jumping the gun by a country mile, but while I saw it :p
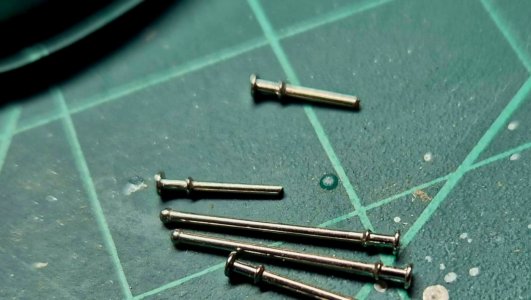
Noticed these handrail posts on a build.
Occre supply the flat ones, and of course I'll have a serious crack at it, but I thought these looked the deal, and I reckon might be far easier to thread the "rope" through ??
Anyone any idea where I might be able to find some ?
Try Cornwall Model Boats (England)
 
Your searches for reference materials and attention to details is fantastic! Are you SURE you are a Plebe? Your work is like that from an upper classman. :) I see you are more as the experienced guy on the right "giving: lessons, not the newbies against the wall.
Thank you Allan, that's very kind mate but I assure you I am 100% legit 1st time builder. Thumbsup :)
I guess I've been an obsessive for detail with whatever project I do ;)
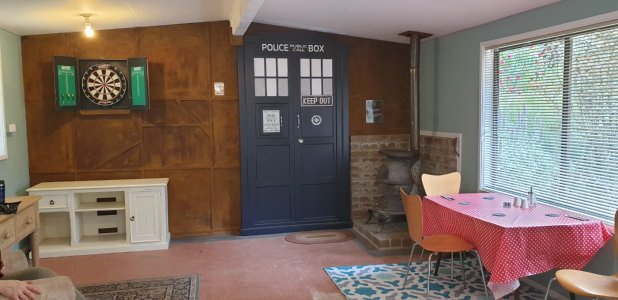
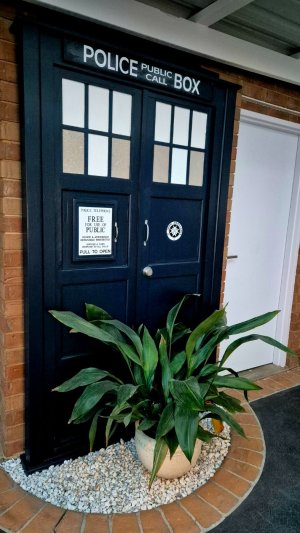
I built a full size Tardis door as a "barn door" once, and everything had to look realistic down to the handles and locks.
I even researched the archives of the BBC in London and found out the paint code for the original Dr. Who series Tardis ROTF
I'll post a pic of said door, we've moved house since and is a feature under our Patio :)
I want to see that!
 
I want to see that!
Cheers Namabiiru ! :D Here's that Tardis door ;)
The first is in its original location.
We had a very large shed on our previous property which had a small room at the end which I chose to do some artwork in, and decided to put a sliding door to the entrance, and my missus suggested the Tardis :p
When we moved to a smaller property the door came with us, and so we turned it into a feature under the patio near the garage entrance Thumbsup:)

Tardis 1.jpg

Tardis 2.jpg
 
Back
Top