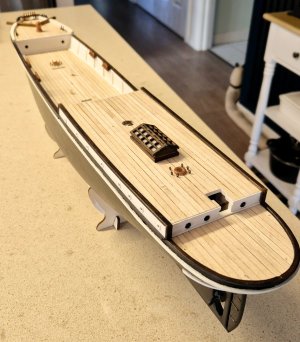
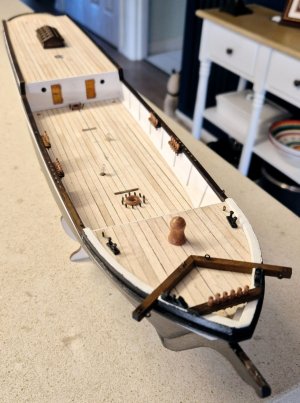
Endurance (1912) - Occre, Scale 1:70 - My First Shipbuilding Adventure

I've been puttin LED on everything... Last one was Queen Mary 2. Yes it is a pain in the a** to do this and the bleeding... But in my oppinion it just gives the model something more, it just looks a bit more interesting maybe? I use micro SMD led for the most part because they ar more "to scale" and easyer to put in places mostly, bum man they ar finicky to work with... Here are some photos of my models that I made with LED. My next ship probably will be with LED also:

View attachment 489596View attachment 489597View attachment 489598View attachment 489599View attachment 489600
Extremely impressive, fantastic work.
The fighter jet looks awesome Thumbsup;)
This is my first ever attempt, even my first attempt at building a model ship, but I felt the want to make her look as though there's interaction, I wanted to make people wonder if someone is eating, or reading a book, what might they be talking about ?
 
Last edited:
Will you be including some fur wrapped figures?
I thought on this a few times Smithy, but then I get to thinking about oddities dotted around in place of actual figures.
Apart from the suggestions from Occre, the sleds of course, coils of rope, but I was thinking of the misplaced pot, a few barrels perhaps, I would love a few coats hanging near a door, a bucket or 2 near the kennels , would LOVE to find tiny mats or something, even thinking what might look like straw in the kennels at 1:70 scale

Harnesses for the dogs. Spare spars lashed to the chains or shrouds. Crates with the tops opened and replaced askew. A rifle. Binoculars. Boots, big hairy mukluks…

And dog sleds! Seal meat hanging in the rigging.
 
Last edited:
Woah ! Has it been THAT long ?? :oops:

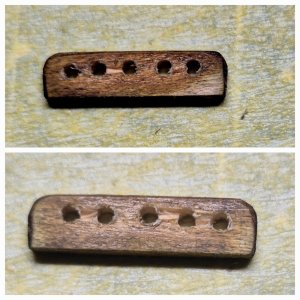
Reaching out to all those shipbuilders out there who have come across a solution to drilling tiny holes in tiny pieces of timber :p
Case in question:
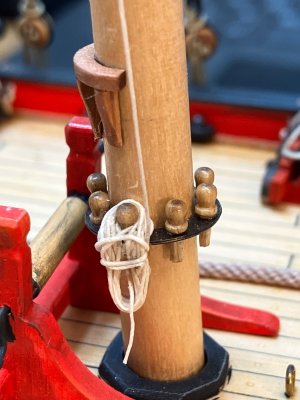
2mm x 5mm x 20mm long to house 5 belaying pins each hole 1.77mm dia, and about 3mm apart-ish.
I have tried everything I can think of, from starting with small (0.8mm) and working up, using hand-drill, lacquering before drilling.
I keep getting huge (to scale) chunks ripping out between the holes and it looks awful.
Any tips would be most appreciated Thumbsup;)

29th Dec.jpg
 
Reaching out to all those shipbuilders out there who have come across a solution to drilling tiny holes in tiny pieces of timber :p

Use a harder wood. Ideally something slow growing that has small growth rings bonded tightly together. There must be something Australian like that in your house. Perhaps a mallet head in hornbeam or an olive wood chopping board? Find something you can’t dent with a thumbnail and saw a bit off. If you can shape it with files, you’ll be able to drill it ok.
 
So the use of twist drills should be avoided Smithy

Soft wood requires very sharp cutting tools if it isn’t to tear out. How old are your drills, maybe they are a bit blunt? The drill bit lifts the waste out of the hole so if it ‘grabs’ the wood splinters upwards as seen in your photos.

Filing soft wood is also not best practice because you’ll still get tear outs but smaller ones hopefully. There’s no ‘lifting’ of the waste so the small tear outs will stay in the hole. In the case of a pin rail a hairy hole isn’t a problem because you will fill it with a pin.

Oh, wait a minute.

IMG_1782.jpeg

You won’t be able to see the tear outs because they will be buried under ropes.

Forget about it!
 
And the Cigar goes to?
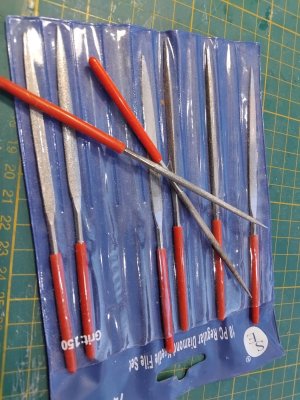
The round needle file!
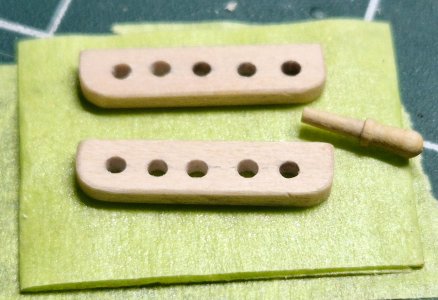
I managed to drill a 1mm dia hole without causing any damage, and then applied the file very gently, half twist clockwise, half twist anticlockwise until I got the desired hole size of about 1.7mm ~ 1.8mm or so.
Many thanks for all your kind support guys, very appreciated.
The file I used did the job but I'm intent on getting a fine set as per your example @Harbour Hulk Thumbsup;)

30th Dec.jpg
 
Following on from a lengthy gap, brought on by;
a) - A mother of all viruses
b) - Family Christmas / New Year celebrations
c) - Lethargy
I have managed to catch the odd hour here and there on the Endurance, added the rub-rails, prop, rudder, and fitted out the Bow deck with most items.
Still reluctant to permanently fix the centre cabin until I'm absolutely positive it's not going to cause issues or be in the way of other stuff.
We watched a new Netflix (2023) doco on Shackleton, and I got a glimpse of the rear companionway and its door posts which has been
bugging me for ages so I'll get to fit that now. Thumbsup
I've set a goal to be starting to prepare the masts by the end of January / mid-Feb.
I think that's a do-able target, only need to fit some tiny wooden blocks, a few hatches, the kennels, stanchions and other
little fancy-schmancies - should be a doddle. ;):p
I'll add a few comments towards the end of the month and with a bit of luck should be void of self-inflicted expletives ROTF

3rd Jan (2).jpg 3rd Jan (1).jpg
 
If you haven't got it all ready get a copy of "South With Endurance-the photography of Frank Hurley." A huge amount of details in those photos. I got my copy from the shop at the National Library in Canberra but is probably available through any good bookshop.
 
Back
Top