• Win a Free Custom Engraved Brass Coin!!!
    As a way to introduce our brass coins to the community, we will raffle off a free coin during the month of August. Follow link ABOVE for instructions for entering.

Silent Mary by Mellpapa

SilentMary-44-36.jpg
This image shows the Reef points attached to each sail, with the sail being attached to the main lower yard.
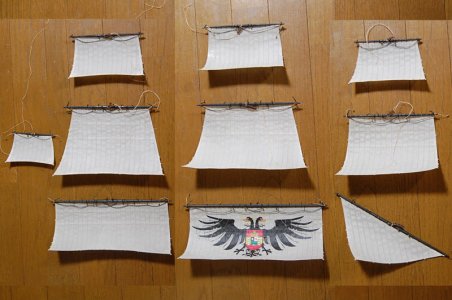
SilentMary-44-37.jpg
Sails have been attached to all yards.
This was meticulous work, so it took time.
Starting tomorrow, we will prepare to attach the yards to each mast. This preparation is also detailed work, so it will likely take time.

SilentMary-44-38.jpg
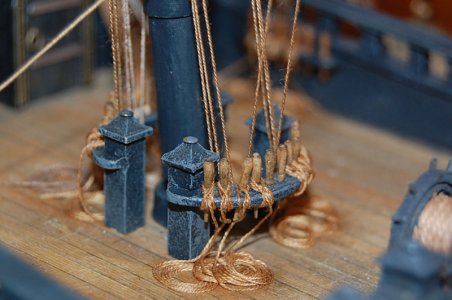
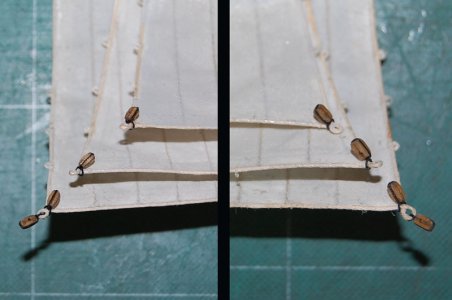
Attach pulleys to each end of the sails.
This is another fiddly and tedious job, but these pulleys are essential for the running rigging.
Let's just buckle down and get them attached!!
Some sails don't need pulleys attached.
I think the name was... a split topsail, maybe!?
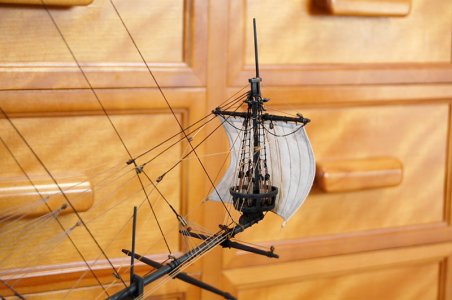
SilentMary-44-39.jpg
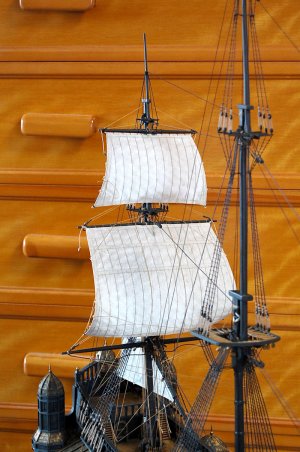
I installed the split topsail and yard set.
The rigging is incredibly complicated to handle.
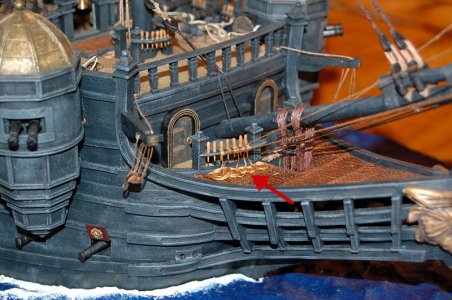
SilentMary-44-40.jpg
The split top-sail and yard rigging terminate at the red arrow point.
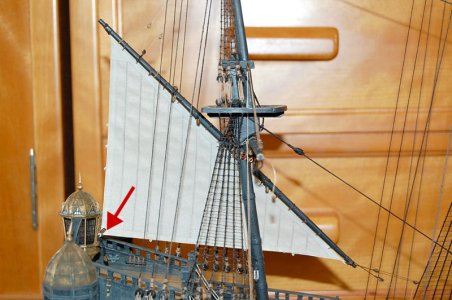
SilentMary-44-41.jpg
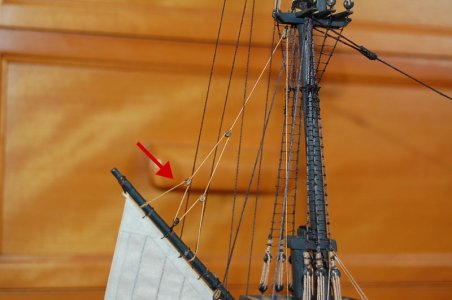
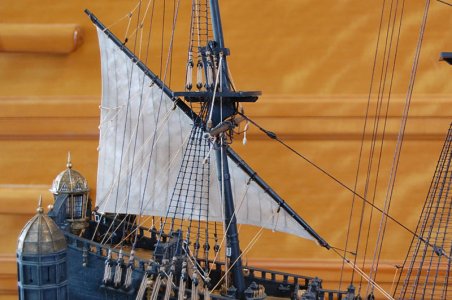
I also installed the lateen sail.
I made the rigging here the same as the Black Pearl (since the Silent Mary's rigging in this area wasn't clearly shown in the movie...). Speechless
The red arrow section hasn't been processed yet, but this will also be made into the same rigging as the Black Pearl.
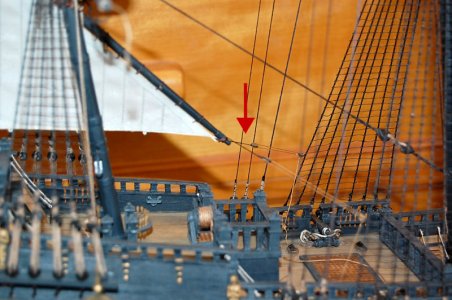
SilentMary-44-42.jpg
The rigging arrangement at the red arrow section is the same as that of the Black Pearl.:D

SilentMary-44-43.jpg
The rigging arrangement at the red arrow section here is the same as on the Black Pearl.
-------------------------------------------------------------------------------------------------------
Sorry if my explanation or the spelling of words is wrong.
That's all for today. :)
 
Last edited:
Mellpapa,
I always enjoy your updates, and am amazed at the detailed work you have created with only a movie for a resource. Stunning work!
Namabiiru, hello
Thank you for always encouraging me.
My Silent Mary has quite a few mistakes, but I'm just going to keep working on it without worrying about them.
Sometimes I've had to imagine parts I didn't understand, and then later figured things out.
As long as I enjoy it, that's good enough, right?!
I'll keep working hard to make it a piece I can be satisfied with. ;)
 
View attachment 547720
This image shows the reef points attached to each sail, with the sail being attached to the main lower yard.

View attachment 547721
Sails have been attached to all yards.
This was meticulous work, so it took time.
Starting tomorrow, we will prepare to attach the yards to each mast. This preparation is also detailed work, so it will likely take time.


View attachment 547722
Attach pulleys to each end of the sails.
This is another fiddly and tedious job, but these pulleys are essential for the running rigging.
Let's just buckle down and get them attached!!
Some sails don't need pulleys attached.
I think the name was... a split topsail, maybe!?

View attachment 547726
I installed the split topsail and yard set.
The rigging is incredibly complicated to handle.

View attachment 547727
The split top-sail and yard rigging terminate at the red arrow point.

View attachment 547728
I also installed the lateen sail.
I made the rigging here the same as the Black Pearl (since the Silent Mary's rigging in this area wasn't clearly shown in the movie...). Speechless
The red arrow section hasn't been processed yet, but this will also be made into the same rigging as the Black Pearl.

View attachment 547729
The rigging arrangement at the red arrow section is the same as that of the Black Pearl.:D

View attachment 547730
The rigging arrangement at the red arrow section here is the same as on the Black Pearl.
-------------------------------------------------------------------------------------------------------
Sorry if my explanation or the spelling of words is wrong.
That's all for today. :)
Hi Mellpapa, great work, congratulations. Frank
 
Melpappa, your sail work is fantastic. All your earrings, cringles and clews are perfect! Really well done.

I think the name was... a split topsail, maybe!?

I believe it was "Sprit topsail" since it was bent to the sprit topmast on the bowsprit.
 
Melpappa, your sail work is fantastic. All your earrings, cringles and clews are perfect! Really well done.


I believe it was "Sprit topsail" since it was bent to the sprit topmast on the bowsprit.
RussF, hello
My knowledge of sailing ship models comes solely from reading Japanese books that explain them.
Even if those books contain errors in their explanations, I wouldn't know.Speechless
So I only know the names of each part of a sailing ship as they're explained in those books.
For example, they refer to the spar rib as a “bib.”:eek:
Seeing other people's work on S.O.S. is truly educational.
Thank you! :D
 
You certainly wouldn't know that to look at your work. Very detailed and life-like. Oh, and sorry about misspelling your screen name. :oops:
Hey, RussF-san
My screen name gets misspelled a lot. ;)
Examples of how it gets messed up in Japan:
malpapa・meiipapa・mellpepa・molpapa and so on.:eek:
Probably just typos, so I don't mind at all.:D
 
SilentMary-44-44.jpg
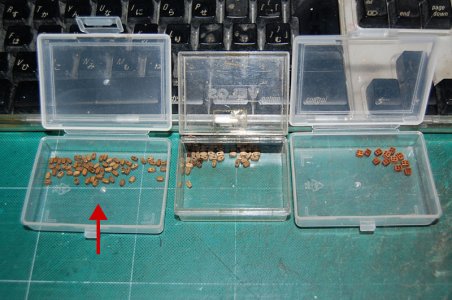
I ran out of single pulleys, so I made about 60 more. (Red arrow) Took half a day.
They disappear fast when you attach them to yards and sails.

I made about 88 before, but after assigning them to where they're needed, I still didn't have enough.
If these aren't enough, I'll just make more!

---------------------------------------------------------------------------------------------------------------------------

SilentMary-44-46.jpg
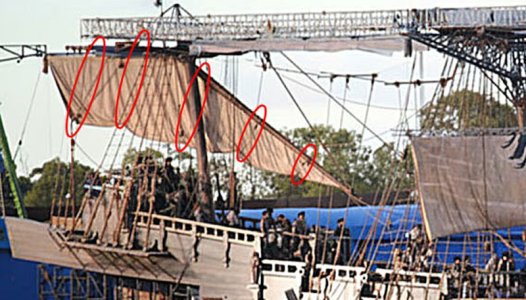
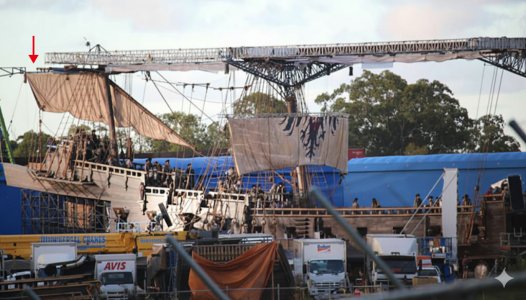
The red oval section of the Latin sail on the filming set... so that's how it's constructed.
It's probably rigging needed for folding the sail, but it's unclear which belay pin it connects to.

SilentMary-44-45.jpg
Since I didn't know which belay pin it was connected to, I just hooked it up to a random one on either side.
It's not like it has any historical value or anything.
Feel free to copy me, but do so at your own risk.
 
SilentMary-44-47.jpg
I rigged the topsail and topgallant sail on the Mizzen Mast, but it's complicated and giving me a headache...
The positions for the topsail and topgallant sail braces still aren't decided.
The bowlines for the topgallant sail also still haven't been positioned.
This is troubling... I'll look at the reference materials and think it over.Speechless

SilentMary-44-48.jpg
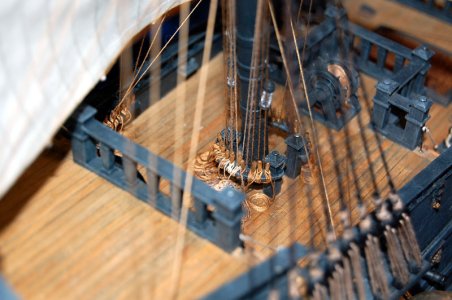
The pin rail behind the mizzenmast is tangled with ropes. :eek:

SilentMary-44-49.jpg
The front pin rail for the Mizunmast—it's a tangled mess of ropes here too, but you can still tie off two belay pins.

SilentMary-44-50.jpg
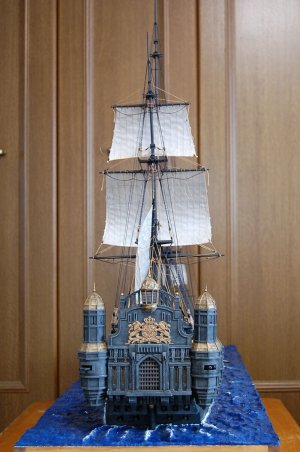
I took a shot of the stern view after rigging the topsail and topgallant sail on the mizzen mast.
Feeling pretty pleased with myself—it looks good.:D
Having rigged this far, I started wondering if it might be better to attach the sails to each mast first.
Attaching the mainmast sails after finishing the mizzen mast rigging gets quite tricky.:oops:
Next time, I'll attach the mainmast and foremast sails first.
Seems like that would be easier.;)
That's all for today.
 
Hello Mellpapa,

you are a real pervert! :D Your Silent Mary looks simply beautiful. You can clearly see how much love you put into the detail. I am always amazed at how skilfully you do this. I'm a big fan of yours!ThumbsupExclamation-Mark

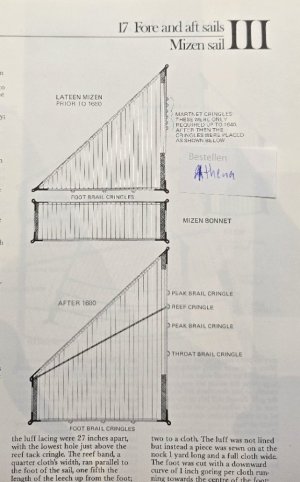
You did a great job with the mizzen sail. I have attached a picture that corresponds to the era of your Silent Mary. I will also use this mizzen sail for the Athena. I see that you have already placed the ropes. You've done a really nice job with them. How did you do that?

Keep up the good work, I always look forward to your new progress and can learn a lot from you ...

It is from the book "The Masting and Rigging English Ships of War 1625-1860" by James Lees.
Mizzen Sail.jpg
 
Hello Mellpapa,

you are a real pervert! :D Your Silent Mary looks simply beautiful. You can clearly see how much love you put into the detail. I am always amazed at how skilfully you do this. I'm a big fan of yours!ThumbsupExclamation-Mark

You did a great job with the mizzen sail. I have attached a picture that corresponds to the era of your Silent Mary. I will also use this mizzen sail for the Athena. I see that you have already placed the ropes. You've done a really nice job with them. How did you do that?

Keep up the good work, I always look forward to your new progress and can learn a lot from you ...

It is from the book "The Masting and Rigging English Ships of War 1625-1860" by James Lees.
View attachment 548828
GIG1810, hello
Thanks for the pervert stuff.
Rigging isn't really my strong suit. :eek:
That image shows me struggling with rigging I'm not good at, just to satisfy myself.Speechless
I wish I could do it better.;)
Thanks for the mizzen sail image.Thumbsup
I copied it.
Looks like Silent Mary's lateen sail doesn't have a bonnet. (See image)
Seems the same as the Athena.Ship-1

unnamed001.jpg
 
SilentMary-45-01.jpg
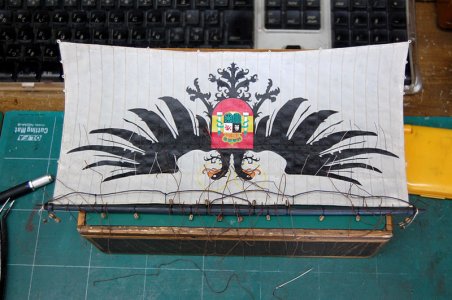
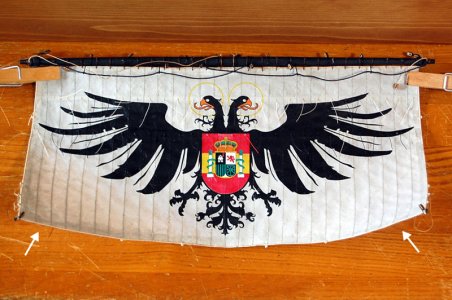
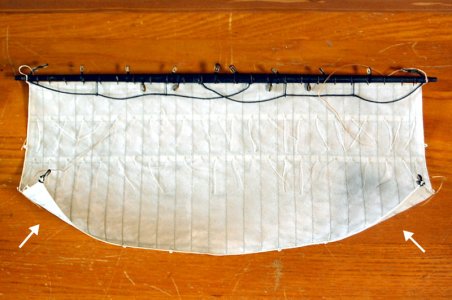
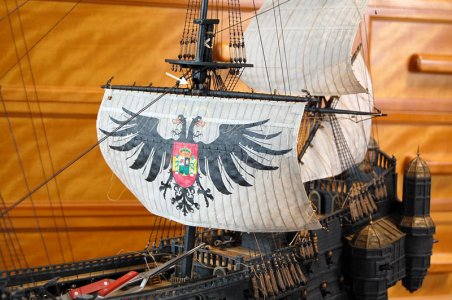
The main sail was finished by applying clear lacquer spray to set the decals, spraying clear lacquer spray again to protect the decals, and finally applying clear flat lacquer spray.
I observed it for about a month, and the decals showed no cracks or peeling.
Even when rolled up, the decals didn't peel off, so it seems fine.
Therefore, to make the lower edges of the main sail appear as if they're catching the wind, I added a curl to them.

・Focus on Reef points:
The Reef points on the main sail are located on the illustration of the double-headed eagle.
Black areas use black thread, red areas use red thread, and whitish areas use white thread.
Reef points are not applied to the eagle's face.
It's not ideal for Reef points to stand out prominently on the face area.

SilentMary-45-02.jpg
To make the lower edge of the foresail appear as if both ends are catching the wind, I rolled it to set the crease.

SilentMary-45-03.jpg
I installed the main sail.
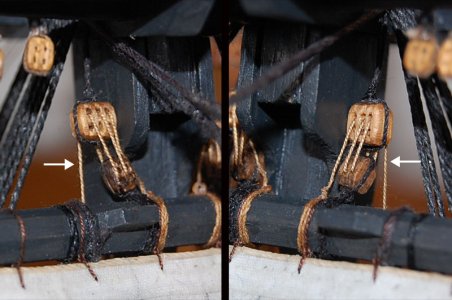
The image below is an enlarged view of the white arrow.

SilentMary-45-06.jpg SilentMary-45-05.jpg
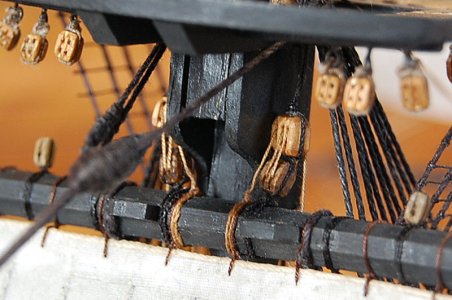
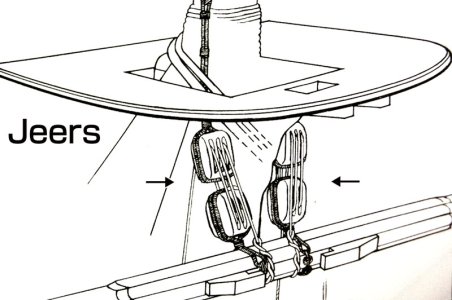
The enlarged image above is intended to recreate Jeers.
The image below shows the enlarged left and right Jeers sections.
SilentMary-45-04.jpg

Finally, I've become a Jeers, so I'm feeling pretty pleased with myself.ROTF

That's all for today. :D
 
Last edited:
View attachment 549019
The main sail was finished by applying clear lacquer spray to set the decals, spraying clear lacquer spray again to protect the decals, and finally applying clear flat lacquer spray.
I observed it for about a month, and the decals showed no cracks or peeling.
Even when rolled up, the decals didn't peel off, so it seems fine.
Therefore, to make the lower edges of the main sail appear as if they're catching the wind, I added a curl to them.

・Focus on Leef Point:
The Leef Point on the main sail are located on the illustration of the double-headed eagle.
Black areas use black thread, red areas use red thread, and whitish areas use white thread.
Leef Point are not applied to the eagle's face.
It's not ideal for Leef Point to stand out prominently on the face area.

View attachment 549020
To make the lower edge of the foresail appear as if both ends are catching the wind, I rolled it to set the crease.

View attachment 549021
I installed the main sail.
The image below is an enlarged view of the white arrow.

View attachment 549022 View attachment 549023
The enlarged image above is intended to recreate Jeers.
The image below shows the enlarged left and right Jeers sections.
View attachment 549024

Finally, I've become a Jeers, so I'm feeling pretty pleased with myself.ROTF

That's all for today. :D
Mellpapa, that is wonderful! Your sail and jeers are so impressive! Also your homemade blocks. Where did you get the rope from?
 
Mellpapa, that is wonderful! Your sail and jeers are so impressive! Also your homemade blocks. Where did you get the rope from?
Hello, Namabiiru
Since all the pulleys are handmade, some might be a bit uneven. :eek:
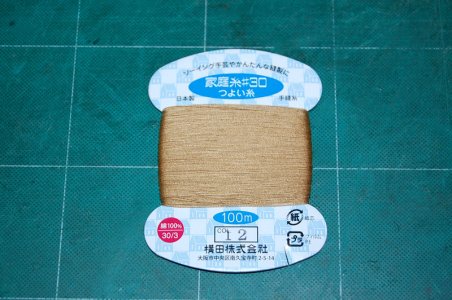
The rope... I found and bought the thread at the thread section in the craft supplies aisle at Home Center.
You should be able to find it at a craft store.:)
I'll post a photo.
By the way, COL12 is the thread color number.Thumbsup

DSC_1258-01.jpg
 
Back
Top