• Win a Free Custom Engraved Brass Coin!!!
    As a way to introduce our brass coins to the community, we will raffle off a free coin during the month of August. Follow link ABOVE for instructions for entering.

HMS Enterprize 1774 Scale Scale 1/160 Midships Cross Section

Good morning Gunther. Coming along nicely. Have you tried using a scraper rather than sanding all the way? I find the scraper brings out the wood colour and grain (if any) much nicer. This looks like a really cool build. Cheers Grant
Hello Grant,

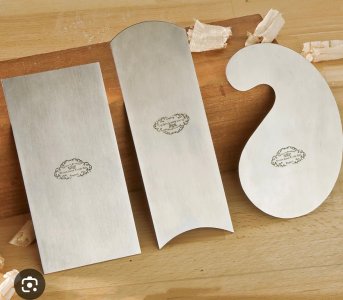
Thank you for the tip about the scraper. But what exactly is it and what does it look like? If you have a picture of it, I would be very pleased ...
 
Thanks for showing all the in between steps of the placement off the spacers, Günther. It looking nice.
Regards, Peter
Hey Peter,

You're very welcome. I'll try to include more pictures so that you can understand what I'm writing. I hope that's okay. This model in 1/160 is really something special. It has a lot of little pitfalls. Most of them are really tiny and you really have to be as careful as with a virgin ... In other words, you really have to dose the forces ... Unfortunately, I don't always succeed and when it doesn't work out, it's really annoying. The instructions are really questionable in some places, especially when parts are described incorrectly. This happened to me with the keel support for the cutter. So always be careful.

But: I'm pretty sure that when the HMS Enterprise is finished, it will be really beautiful ... :)
 
Hey folks,

here's a comparison of the dinghies: the one from the Athena in 1/75th scale and the small Athena dinghy in 1/160th scale. what a difference! My dinghy, the Athena, looks really huge. I thought it was small. But look at the frame of the dinghy in 1 : 160, it's amazing! And now you can understand me when I go slightly mad ...

1761220482576.png


1761220548754.png


1761220590691.png
Indeed …….. that is small ……Redface. I wish you all the best with the build of that very small boat, Günther.
Regards, Peter
 
Working at this scale has to be interesting/frustrating/gratifying depending on the day. :) Assuming (I know, a bad idea) the notches in the frames are for the port sills, were the notches precut in the frames in the kit? They vary in height, thus my question. Many folks find it is usually easier to assemble the frames, then cut them for both ends of the sills. Only one notch for each sill is cut which seems odd if they were pre-cut. Thanks.
Allan
Enterprise framing 2.jpg
 
Hi Gunther,

I hate to bring this up, but I think you have some of the frames backwards (that is, the face of the frame that should face the front of the ship is facing the back of the ship). The notches for the gunports should face each other at each respective gun port...

I'm guessing it's the ones that are bending to get into the jig...

I rarely point out stuff like this because I'm usually wrong, so I hope that is true this time as well...


1761423244563.png
 
Hello Günther,

I don't know if it is a problem with the perspective but in the first picture it looks like that the keel is later not straight.
This model will be really small, much to small for my thick fingers.:rolleyes:
Hello Christian,

Nice of you to drop by. It does look a bit crooked from this perspective. But the keel is straight. Thank goodness .. :eek: . I looked straight away when I read your tip ...
 
Hi Gunther,

I hate to bring this up, but I think you have some of the frames backwards (that is, the face of the frame that should face the front of the ship is facing the back of the ship). The notches for the gunports should face each other at each respective gun port...

I'm guessing it's the ones that are bending to get into the jig...

I rarely point out stuff like this because I'm usually wrong, so I hope that is true this time as well...


View attachment 552791

Unfortunately Paul, I believe you are correct.

1761485104888.png

With some judicial measurement and some patience, I think that new notches can be put in the correct places. Since the outside of the hull is planked in this area, it won't show and one would be hard pressed to see the wayward notches on the inside.
 
Congratulations Günther
your new project looks promising
good luck to you and have a great time!
Hey Shota,

Thank you for stopping by. I'll try to keep doing my best. It really is a beautiful build, but so incredibly fragile. Thick fingers have to touch really delicate wood. Unfortunately, not always without causing damage ...
 
Hi Gunther,

I hate to bring this up, but I think you have some of the frames backwards (that is, the face of the frame that should face the front of the ship is facing the back of the ship). The notches for the gunports should face each other at each respective gun port...

I'm guessing it's the ones that are bending to get into the jig...

I rarely point out stuff like this because I'm usually wrong, so I hope that is true this time as well...


View attachment 552791
Hello Paul,

Unfortunately you're right. I accidentally swapped the formers. This happened to me because I misinterpreted the instructions in English and Chinese. I had read that all the frames should have the notches facing outwards. Unfortunately, I understood this to mean that they should all point in one direction. I realised far too late and had already glued them together. It was no longer possible to remove it. Richard had also pointed this out to me. Unfortunately too late. Thank goodness it's not that bad and I can hide the assembly error with the planks later. However, I can still change the carving of the trempel frames by hand. Nevertheless, it annoys me to no end how stupid people can sometimes be.
 
Unfortunately Paul, I believe you are correct.

View attachment 552906

With some judicial measurement and some patience, I think that new notches can be put in the correct places. Since the outside of the hull is planked in this area, it won't show and one would be hard pressed to see the wayward notches on the inside.
Hey Rufus,

yes, thank you very much and you are right! Unfortunately! That's why I have to make improvements ... Thumbsup
 
Working at this scale has to be interesting/frustrating/gratifying depending on the day. :) Assuming (I know, a bad idea) the notches in the frames are for the port sills, were the notches precut in the frames in the kit? They vary in height, thus my question. Many folks find it is usually easier to assemble the frames, then cut them for both ends of the sills. Only one notch for each sill is cut which seems odd if they were pre-cut. Thanks.
Allan
View attachment 552630
Hey Allan69,

Nice of you to drop by. The notches were already pre-cut like this and vary in height. I think they should reflect the shape of the deck. Unfortunately, I installed a few frames incorrectly. That's why I have to cut the other missing notches myself. Once the notches have been cut, small sill frames are inserted at the top and bottom.
 
I had never built a ship with a platform before. I'm curious to see how I get on with it.
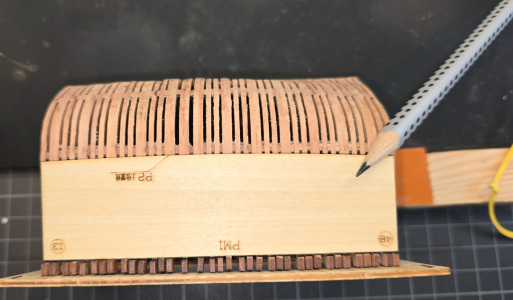
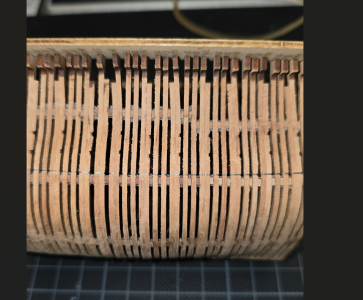
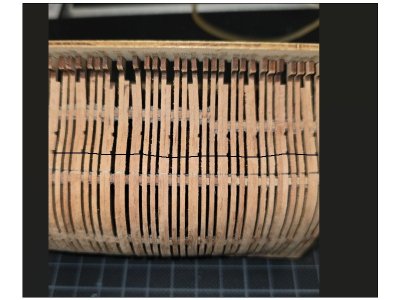
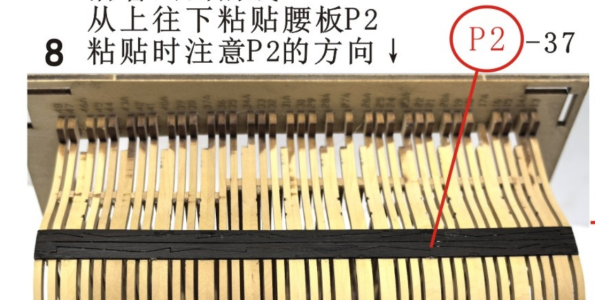
Now let's take a look at the frames.

Removing them is a bit tricky and I don't really dare to use the scalpel firmly. I hope nothing breaks.

View attachment 551299

View attachment 551301

View attachment 551304


View attachment 551305

I have now removed the frames. Unfortunately, two of them broke because I pressed too hard. Stupid. I'll just have to glue them with superglue. I hope they hold.

:mad:
I think it's near that the frames have their number attached.
 
Hello Grant,

Thank you for the tip about the scraper. But what exactly is it and what does it look like? If you have a picture of it, I would be very pleased ...
Good evening Gunther. Some guys buy these
IMG_6849.jpeg
You scrap these along the wood and it almost shaves the wood. I cannot get these in SA and find the post and duties here in SA just silly so I make my own from a Stanley blade. I sometimes just use my chisel blade.
Cheers Grant
 
Good evening Gunther. Some guys buy these
View attachment 552921
You scrap these along the wood and it almost shaves the wood. I cannot get these in SA and find the post and duties here in SA just silly so I make my own from a Stanley blade. I sometimes just use my chisel blade.
Cheers Grant

Grant, I'm really surprised that you cannot get those in SA. Are there not woodworkers there? A card scraper produces the best finish you can get on a piece of wood. I love mine. Of course, in the scales we work in, it can be difficult to get inside a hull, but scraping the outside should be a piece of cake. You absolutely can make a card scraper from a utility knife blade, but for it to work properly, a little effort is required to form the edge. You CANNOT just use the edge of the blade - that's not how card scrapers work. You must form the microscopic hook on the edge. I'll link a video below showing how they work and how to sharpen and use them. He uses an actual burnisher, but the round shaft of a quality screwdriver will work in a pinch.

 
Back
Top