HMS Victory cross section (De'Agostini)

G'day Tony
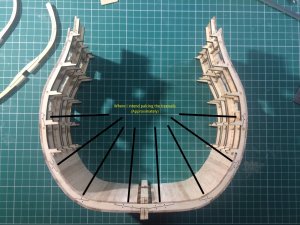
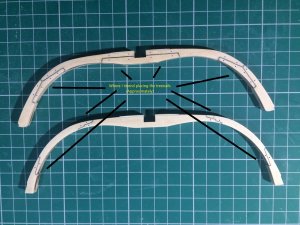
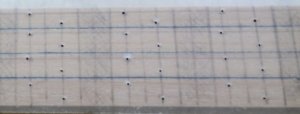
I don't think that you have the full concept of where you place treenails. I went to another member's log who is a pure genius modelshipright to copy this photo. His name is @Péji, and I hope he don't mind.
20190102_112844.jpg
The shaded areas are the spaces between the frames. Please note that the treenails goes one up and one down 1/4 of the width of each plank in the middle of each half frame.
Looking at your model there are 5 full frames, so therefore there are 10 half frames.
Each plank will have10 treenails per plank, so you are looking at doing quite a few hundreds of treenails.

Hope this helps mate and if you got any more questions, please ask
 
G'day Tony
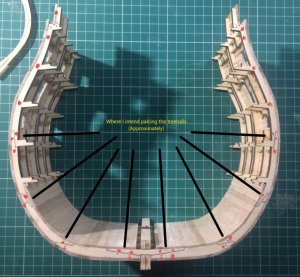
Wooden treenails are not used in the frames. On the side of the two outer faces of the frames you should put brass 'bolts' blackened in the position below.
20190102_125041.jpg
The red dots are the place for the blackened bolts.
It appears that you have put putty in these areas already.
Goodluckmemattie
 
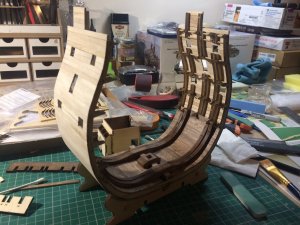
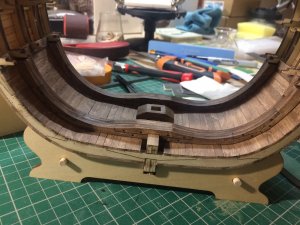
A couple more pics to show current state of build.
Decided not to remove the planks and couldn't find anything suitable at my local model shop to place on top of the existing planking, so opted for stealing a bit of 1x3mm timber from a future part of the project and built up the undersides of the beams. Can't even be seen. (I hope - You eagle eyed ones out there, lose your glasses)
Here is the result.
The first picture shows the one side of the cross section having been sanded and the lower deck floor with the beams in place, dyed and one coat of matt varnish applied.
The second picture shows my first attempt at doing bolts.
IMG_5559.JPG

IMG_5560.JPG

I made the bolts by first staining and then applying a coat of matt varnish and then used a sharpie to dot on the bolts.
I tested the process on some scraps of planking.
Tried without stain and varnish and the sharpie bled into the wood.
Tried with only stain, same result.
It took the varnish to solve the problem.
This may not be to the liking of the purists, but the other methods were a little out of my reach with just a desk in the sitting room and my current level of expertise.
Apologies guys.
 
Last edited:
but the other methods were a little out of my reach with just a desk in the sitting room and my current level of expertise.
Apologies guys.

Firstly you are doing 'a bang up job'. That's a English saying, I believe. In Ozzie, it would be, you're doing a ripper of a job mate'.
In what ever sayings, For your first attempt your skills level is astonishing high and you SHOULD BE VERY PROUD OF YOURSELF MATE.
The skills that I shared with you, I'm sure you will be able to do them very soon.
And please NEVER apologize for doing your best memattie.
Glad that you got the stand built, it looks great.
 
but with some rigging.
Would like to give it a try.
Probably a bit ahead of myself here.
That's the sound of a true shipwright! Always pushing himself or herself to higher plains. That is how you learn new skills.
Glad t I at you are having fun doing this build.....that's what this hobby is all about.
By the way my first build, it was an eyesore. I eventually gave the ship to my boys so they can have a spud gun target. I didn't do any treenails in that model either. I'm so glad the ship, I think it was The Bounty, came in some use when the boys demolished it.
 
While my oak stain dries, I really like the look of ZHL Misticque.
http://www.woodmodelboatbuilder.com/index.php?main_page=product_info&cPath=1&products_id=50
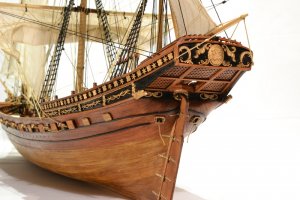
Bit unsure what the two ropes hanging out the back are meant to do though.

View attachment 70346
I think this was a mistake by the modeler and he did not finished this part, when the photos were made.
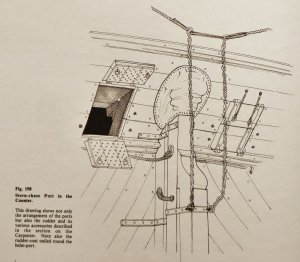
usually you have one chains or rope, on each side of the rudder, which make the rudder movement possible, when there is a problem with the normal stearing

Here you can find a principle sketch from the 74-Gun Ship from Boudriot
IMG_170612.jpg
 
Back
Top